The Dreamsite build

ActualGenuine

Junior Member
Messages
33
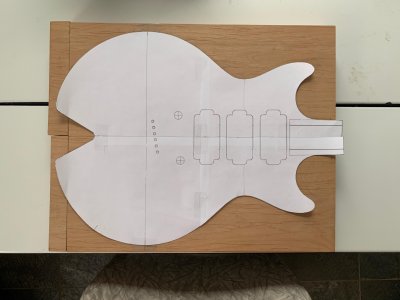
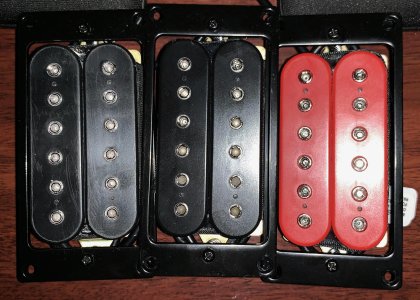
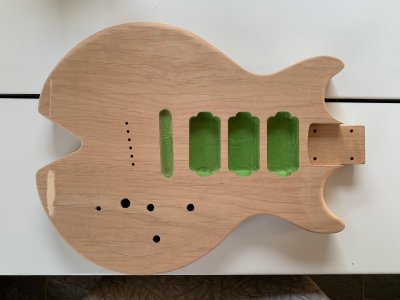
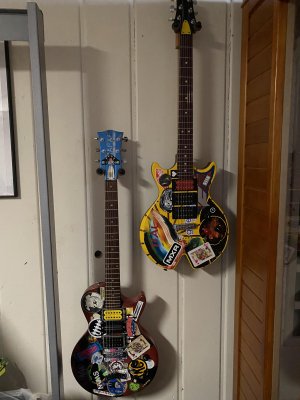
No turning back now, I guess! This is a re-imagined build of my old guitar, The Dumpsite (pic in my profile). It's named so since it's gone through many, many changes, with me just dumping whatever stuff I had laying around into it, over the years. It's had about 5 different bridges / tailpieces, for example, but I'm really happy with the current setup. Ditto the pickups and wiring.

So the Dreamsite is the same guitar, but with a double cutaway, and updated components / design / etc. Essentially, trying to get it right the first time. If you read my Out of the Box post, you'll know I've already blown that. I ordered a blank that won't fit my design!

Instead of compromising on a Tele shape I didn't want, and since this is the last guitar in the budget for a while, I made a different compromise. (Prepare your gasping-in-horror muscles).

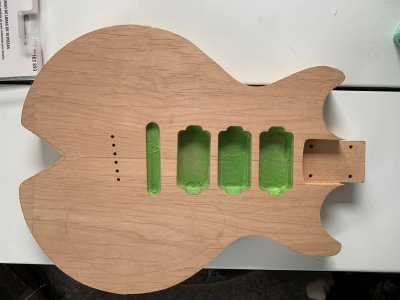
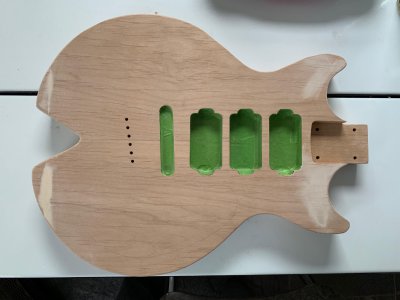
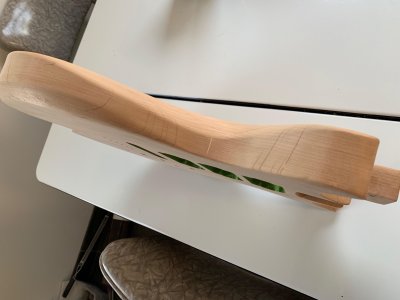
I cut off the upper horn extension I didn't need, split it in half, and cut slots in the end grain sides. Then a matching slot in the heel of the body, and I found/made some jointer wood to fab up a wide tenon joint, and glued it all up. (Pic below).

I'll need some filler and such to make a smooth surface for the finish, but after some scaling, sketches, and much paper template printing and trashing, my original body shape now fits, and I couldn't be more pleased with how well it all worked out. The old lower cutaway met the neck pocket right between the 18th and 19th frets, and this one hits it just behind the 18th, so pretty much spot on. Due to differences in the scale and etc., this guitar's neck will sit deeper in the body outline than the old one, and the bridge / tail ferrules closer to the heel of the body, but the overall length from headstock tip to body heel is shorter by a scant .75" overall.

Pretty close, and it's actually nice that it'll be a little more compact, and a touch narrower across the wide part of the body (just less than 1/2" total).
 

Attachments

  • IMG_0344.jpg
    IMG_0344.jpg
    674.4 KB · Views: 27
Very interesting. I'm usually sort of a traditionalist when it comes to guitar design, but I must say I'm liking what I see here. Keep us posted on your progress, and don't forget the pix!
 
Pics! Lots of pics. This thing is cool and needs to be documented (read: our pic addiction needs to be fed). :icon_biggrin:
 
Pickups are now all here. The bridge (left) and neck (right, red) are DiMarzio D-Activators. Bridge was tested in the Dumpsite, naturally. The middle pickup is a DiMarzio Super 2.


Attachments

  • IMG_0347.jpg
    IMG_0347.jpg
    1 MB · Views: 6
Progress made today, after a couple hours in the shop.

Here's the cut out body, both right off the saws, and after preliminary filing, filling, and sanding. Much more sanding to come...
 

Attachments

  • IMG_0350.jpg
    IMG_0350.jpg
    837.4 KB · Views: 17
  • IMG_0351.jpg
    IMG_0351.jpg
    967.3 KB · Views: 18
More sanding done, control holes marked and drilled, and some relief contouring done.
 

Attachments

  • IMG_0352.jpg
    IMG_0352.jpg
    969.3 KB · Views: 22
  • IMG_0353.jpg
    IMG_0353.jpg
    751.9 KB · Views: 22
Well it sure has been a while. Long story short, some life happened, and the guitar got to when it got got to, and I don't have all the pictures I once took to document the build. But, there are a few that survived. =)

As noted previously the color scheme is a reverse of the guitar that inspired this one (pic in profile) so it was to have a yellow base color with a red pickup in the neck position.

Here's the base coat laid down on the (finally) sanded and contoured body. The tear-out around the control holes bugs me when I look at this picture, but you can't really see it with the controls in, and it would probably be appropriate even if you could, given the overall design.


Attachments

  • IMG_0364.jpg
    IMG_0364.jpg
    1.1 MB · Views: 16
Next, I sent the body to a friend who paints, with the rather vague instruction to "take inspiration from the colors and shapes on the original" and just let her do her thing.

And this was the result.
 

Attachments

  • IMG_0003.jpg
    IMG_0003.jpg
    650.4 KB · Views: 13
While she was working on that, I was working on the neck and headstock. The neck itself got 6 light coats of tung oil with light sanding between the first few and sanding/burnishing between the last few. The headstock got Tru-Oil over a coat of carbon black, which was then sanded with 800 and then 1000 grit wet paper for a satin look.

The truss rod cover I hit with the same yellow as the body, and it's hard to see here but the edges were covered with copper foil tape to match the body (see next post).

If the tuner posts here seem long, it's because they are. I'm not sure what I ordered but it was the wrong thing, and they've since been replaced (still Grover locking mini-Rotomatics, but with sane post heights).

Wow does photography show off dust. =) As I mentioned I lost a lot of photos to an incident and this is the best one I have of the headstock pre-assembly. I also left the nick in the paint on the truss rod cover, since the whole guitar was going to be distressed anyway, to better fit the rather dramatic aging the red one shows today.
 

Attachments

  • IMG_0388.jpg
    IMG_0388.jpg
    739.9 KB · Views: 8
So the top of the guitar is painted yellow, but that color wraps over the edges to meet up with the black on the back. I applied copper foil tape as a "binding" to cover the seam, and it integrates with the sunburst lines on the front, also in copper foil, cut into the existing paint.

Again, this is a reference to the original guitar, which had a black sunburst pattern over the red (but under all the stickers and other nonsense).

A couple shots here showing the copper tape after application, along with the addition of some stickers and other nonsense, but now updated to include or at least reference how my interests and hobbies have changed since the 1980's.

Copper foil shielding also in the pickup cavities. I did take care that it didn't touch the tape on the front, not being sure what would happen if I introduced another possible ground path. It was all going to be covered with poly anyway, but I'm not an electricalist, so I didn't want to take chances.
 

Attachments

  • IMG_0396.jpg
    IMG_0396.jpg
    1.3 MB · Views: 9
  • IMG_0397.jpg
    IMG_0397.jpg
    975.4 KB · Views: 6
And lastly, here it is after the paint and appliqué were distressed, and two coats of polyurethane were applied too quickly, so that the paint underneath would crack. (Also, it's obviously been assembled and wired up).

I didn't get the full "trashed" effect I was looking for, but it's enough, and the overall look of it matches what I was going for. This was never intended to be a pretty guitar, and I'm sure it'll go through changes over time just like its brother has, until it has taken on a unique character all its own.

It sounds pretty different from the guitar that inspired it, which is mostly down to the pickups and the body wood. One of the first things that might happen to it, in fact, is I might steal the bridge pickup from the old one to install in it. It's just so much lighter than its predecessor, and I'm so much older, but I love the sound of that Maricella Juarez wound Duncan Distortion.

On second thought, I'll probably leave well enough alone.


Attachments

  • IMG_0399.jpg
    IMG_0399.jpg
    1.2 MB · Views: 12
Somewhere Alvin Lee is smiling. I'd say you achieved what you wanted, good work. Be happy and enjoy the fruits of your labors. :headbang:
 
Back
Top