Z Body Dream Build

kevin_guitars

Junior Member
Messages
62
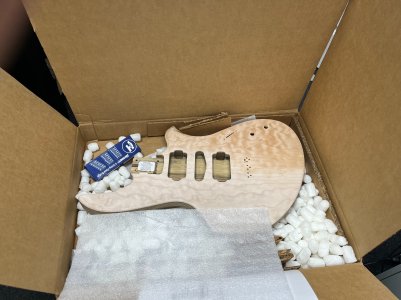
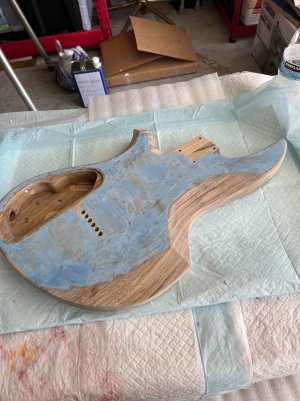
I'm pretty excited to do my second (and third) Warmoth build. My first was a Tele that I did back in 2016. I ended up ordering an in stock "screaming deal" strat body and neck that I will be working on at the same time as this Z body, stay tuned for a separate post.
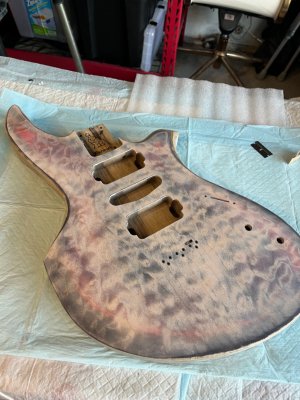
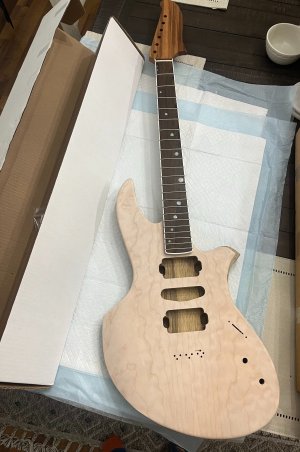
Z Body
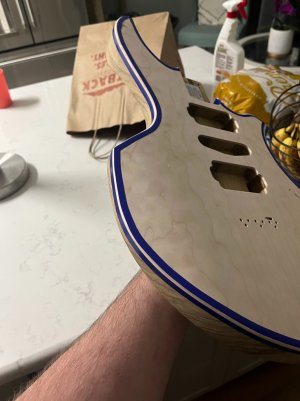
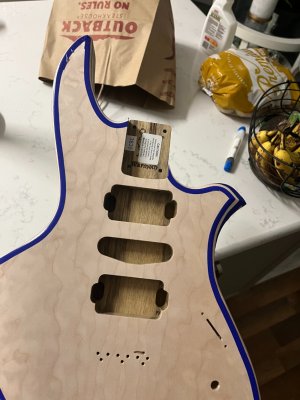
Body - Limba w/ quilted maple top *unfinished*
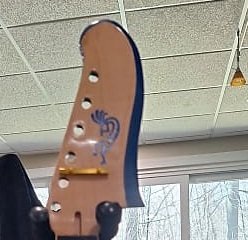
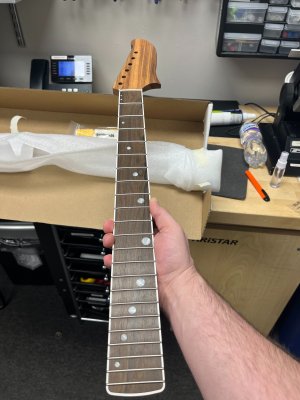
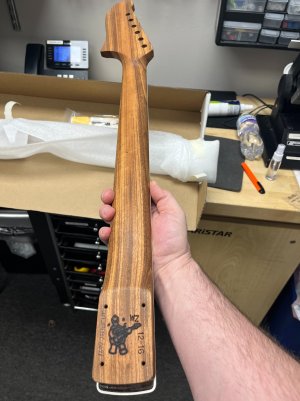
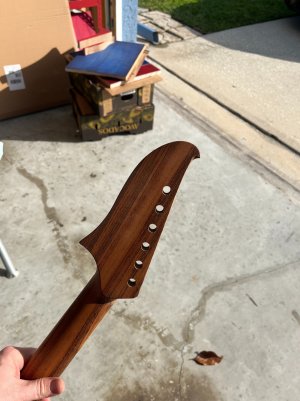
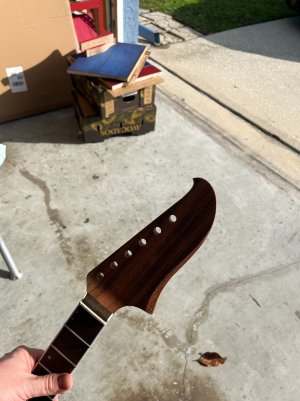
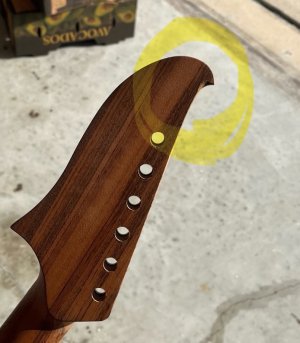
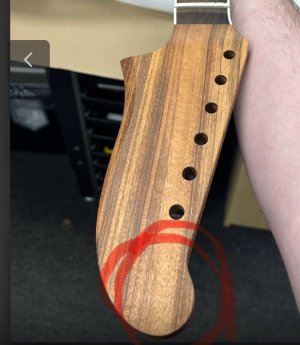
Neck - Goncalo Alves w/ bound Zircote Fingerboard
12"-16" compound radius Wizard profile
6105 Stainless frets and Nightswan inlay
 

Attachments

  • IMG_7735.jpg
    IMG_7735.jpg
    667.1 KB · Views: 45
  • IMG_7736.jpg
    IMG_7736.jpg
    673.8 KB · Views: 39
  • IMG_7737.jpg
    IMG_7737.jpg
    671.1 KB · Views: 34
  • IMG_7741.jpg
    IMG_7741.jpg
    745.9 KB · Views: 40
  • IMG_7742.jpg
    IMG_7742.jpg
    725.7 KB · Views: 39
I will be following this, I'm intrigued by the Z body. More pics!
 
So the first agenda was to modify the Mooncaster headstock shape. Spent an hour with my dremel and some sandpaper and I think the new shape fits the aesthetic of the body and inlays much better. I also put 2 coats of grainfiller on the back and sides, the second coat I tinted blue on the flat back surface.
 

Attachments

  • IMG_7767.jpg
    IMG_7767.jpg
    844.7 KB · Views: 33
  • IMG_7768.jpg
    IMG_7768.jpg
    813.4 KB · Views: 26
  • IMG_7778.jpg
    IMG_7778.jpg
    837.2 KB · Views: 26
  • IMG_7779.jpg
    IMG_7779.jpg
    852.2 KB · Views: 31
Following this, never seen a Z build. Looks like it probably balances perfectly.
 
Good idea for the headstock mod, and I would suggest thinning down the bulbous lower part to complement more the angularity and curves of the body.
 
Gosh I hadn't thought of tweaking the headstock shape anymore but that's not a bad idea. My plan thus far was to paint or finish the right beveled edge of the headstock a similar finish I'm planning for the body. See attached pic (though is is NOT at all what I want mine to look like). It would give the perceived effect I think you are envisioning; making the profile a bit thinner. I'll play around with some mockups on my computer to see what your suggestion looks like :)
 

Attachments

  • eqqjdtjrskt6m4mvmc7q.jpg
    eqqjdtjrskt6m4mvmc7q.jpg
    26.8 KB · Views: 23
Vinyl taped off the body for 5 coats of sealer to scrape later for a faux binding. Holy crap this was tedious. I brushed it on with a small artist brush over the course of a day.

Next I laid down a 1st coat of black and red to sand back, then a 2nd coat of blue that I sanded back to 320 leaving nice deep layers of color in the grain that almost looks purple.

This is the base for what I intend to be a nice deep blue burst dye job. Hopefully I can get that done in the next day or so. Hopefully it turns out the way I want it to. The end goal hear is to be a rich and vibrant Blue/aqua burst. I did lots of testing using red laid down and sanded back and it made for wonderful purple accents deep in the grain. We'll see how it turns out on the real thing. I must say it is scary putting all that red and black down on a guitar that I want to be blue :rolleyes:

Combination of Keda powder and liquid dye, Trans tint, Rit dye. I used water as the solvent for the outer edge near the binding and denatured alcohol for the rest.
 

Attachments

  • IMG_7762.jpg
    IMG_7762.jpg
    922.9 KB · Views: 12
  • IMG_7764.jpg
    IMG_7764.jpg
    925.7 KB · Views: 18
  • IMG_7781.jpg
    IMG_7781.jpg
    953.7 KB · Views: 19
  • IMG_7782.jpg
    IMG_7782.jpg
    949 KB · Views: 19
  • IMG_7783.jpg
    IMG_7783.jpg
    946.1 KB · Views: 20
I don't know if it is what you want, but I think it looks great, similar to the faded purple guitar I seen in another link
 
All done with the dye job I’m quite pleased with how it came out i’m kind of a novice with this. I did spend a good bit of time on practice scrap Maple. The red and black undercoat was to try and get the quilt to pop as much as possible. Up Next is to scrape the binding.
IMG_7803.jpeg
 
Last edited:
All done with the dye job I’m quite pleased with how it came out i’m kind of a novice with this. I did spend a good bit of time on practice scrap Maple. The red and black undercoat was to try and get the quilt to pop as much as possible. Up Next is to scrape the binding.
View attachment 61565
Buddy if you think you’re a novice come look at my builds, that is a beauty
 
All done with the dye job I’m quite pleased with how it came out i’m kind of a novice with this. I did spend a good bit of time on practice scrap Maple. The red and black undercoat was to try and get the quilt to pop as much as possible. Up Next is to scrape the binding.
View attachment 61565
Just out of curiosity have you rubbed the body on your face yet? This very well could be the difference between glory and shame my friend! Please!
 
Buddy if you think you’re a novice come look at my builds, that is a beauty
Thank you I appreciate it I’m proud of how it looks thus far. I for sure am a novice though I’ve only ever done 1 other build. There will be issues that come up I’m sure. And I’ll be asking questions and opinions here along the way.
 
So I’ve been meticulously scraping away the dye off the thin bead of sealer I put on to make what I hope is a nice faux binding. This is beyond tedious but I’m determined to be patient with every part of this build. I’m aiming for quality. I’m at a good stopping point for the night. This pic shows a good before and after the scraping. There are are a few tiny spots where the dye seeped into the end grain if anyone has any tips to address these I would love it.
IMG_7805.jpeg
 
So I’ve been meticulously scraping away the dye off the thin bead of sealer I put on to make what I hope is a nice faux binding. This is beyond tedious but I’m determined to be patient with every part of this build. I’m aiming for quality. I’m at a good stopping point for the night. This pic shows a good before and after the scraping. There are are a few tiny spots where the dye seeped into the end grain if anyone has any tips to address these I would love it.
View attachment 61567
 
Back
Top