Jazzmaster Build with a Home Finish

Strap pins installed.  Note the felt washers.
 

Attachments

  • JM dunlop strap pins.jpg
    JM dunlop strap pins.jpg
    361.4 KB · Views: 15
  • jm dunlop strap pin horn.jpg
    jm dunlop strap pin horn.jpg
    274 KB · Views: 12
  • JM dunlop strap pin butt.jpg
    JM dunlop strap pin butt.jpg
    251.6 KB · Views: 18
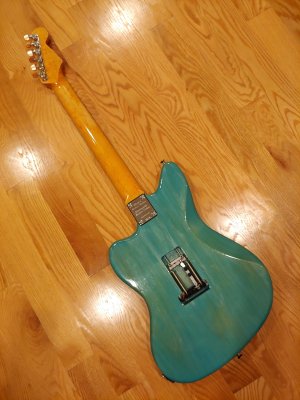
I’ve never really given the blue shell any consideration at all, but seeing that sample it actually looks really cool. I look forward to seeing it in context!
 
Input Jack installed.  Note the felt and the sparkle highlights.  Next will be the bridge!
 

Attachments

  • JM Input Jack.jpg
    JM Input Jack.jpg
    285.3 KB · Views: 26
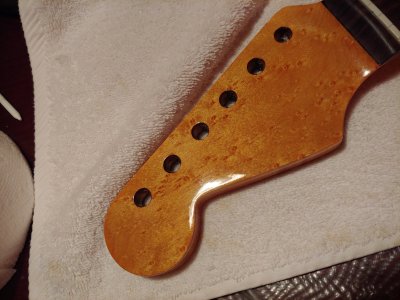
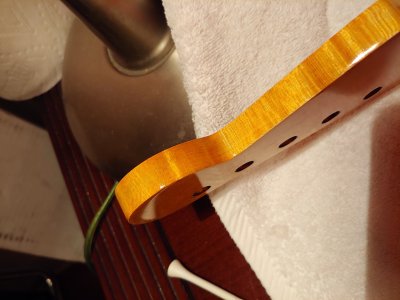
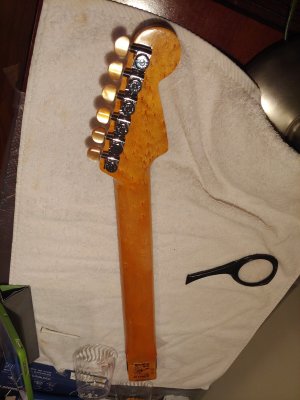
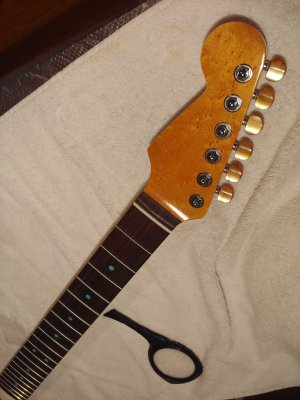
Buffed the neck.  Brought out the chatoyance. Just need to install hardware.
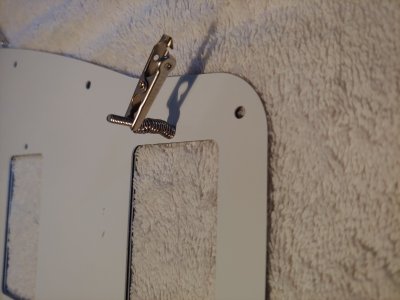
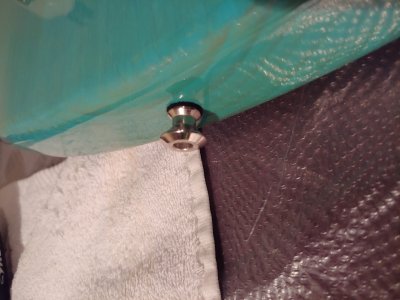
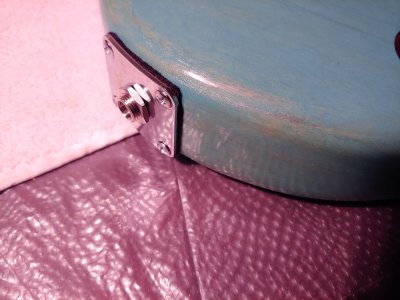
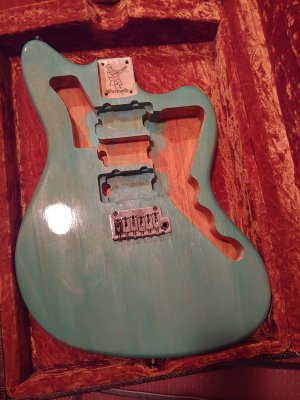
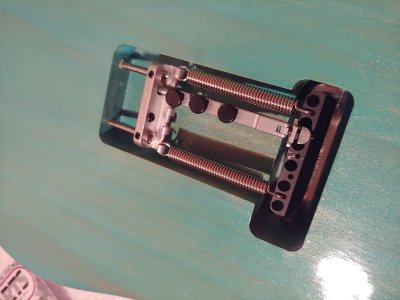
Put on the bridge and tremel no.

Note that this is the narrow spaced Gotoh bridge recommended by Logrinn.  It fits the normal Gotoh 510 rout perfectly.  Warmoth should offer it as an option.
 

Attachments

  • JM Headstock Buffed final.jpg
    JM Headstock Buffed final.jpg
    346.4 KB · Views: 12
  • JM Neck back final buffed.jpg
    JM Neck back final buffed.jpg
    421.2 KB · Views: 16
  • JM side headstock flaming buffed final.jpg
    JM side headstock flaming buffed final.jpg
    230 KB · Views: 9
  • JM Body in case.jpg
    JM Body in case.jpg
    429.7 KB · Views: 9
  • JM Bridge Install.jpg
    JM Bridge Install.jpg
    373.3 KB · Views: 13
  • JM Tremel no install.jpg
    JM Tremel no install.jpg
    291.1 KB · Views: 9
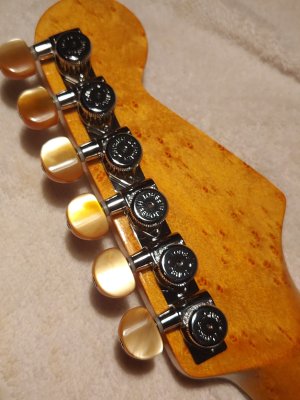
Installed the staggered hipshot tuners.  I spent about 45 minutes of quality time with a piece of sandpaper and a pencil getting the tru-oil scratch x goop out of the tuning holes.  The rest of the install process was so easy.  I can't recommend the hipshot tuners enough. 

The Amber buttons match the amber of the neck. 

Tonight, if I have the time the big moment will arrive ... mating the neck to body.  :hello2:  :eek:ccasion14:
 

Attachments

  • jm hipshot tuner install back of neck.jpg
    jm hipshot tuner install back of neck.jpg
    326 KB · Views: 6
  • jm hipshot headstock front tuner install.jpg
    jm hipshot headstock front tuner install.jpg
    327.9 KB · Views: 7
  • jm hipshots installed back headstock.jpg
    jm hipshots installed back headstock.jpg
    290.2 KB · Views: 8
  • jm hipshot front neck tuner installed.jpg
    jm hipshot front neck tuner installed.jpg
    333.1 KB · Views: 7
yep, they are made by hipshot; cost for 6 buttons is $11 if I recall correctly.  Got them from sporthitech.  The plastic buttons are way lighter in weight than the metal; if that's a concern.  With light shining on them they are very reflective.  Normal lighting they have a rich look that matches the dye as in the third pic.
 
Also, in the bridge, installed string saver classic saddles that I had in my parts drawer.  They have the teflon (or whatever it is) insert to make the strings slide easier.
 

Attachments

  • JM Bridge Install.jpg
    JM Bridge Install.jpg
    373.3 KB · Views: 8
Thanks, I thought so. Those should look good with that body. I tried to find cream colored buttons for my current build but they're not available and the cream ones that are, aren't a fit for the Hipshot tuners.
 
These are ivroid, a little expensive but in terms of color they'd by in the ball park.

http://www.sporthitech.com/tone-ninja-elephant-ivoryoid-tuner-buttons-6-fits-grover-hipshot-btne11/
 
Neck attached.  Pickguard to arrive tomorrow.  Less than two weeks from order, not bad.
 

Attachments

  • jm neck attached back.jpg
    jm neck attached back.jpg
    326.8 KB · Views: 20
  • JM neck attached front.jpg
    JM neck attached front.jpg
    490.8 KB · Views: 42
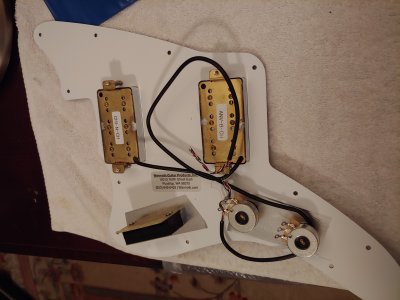
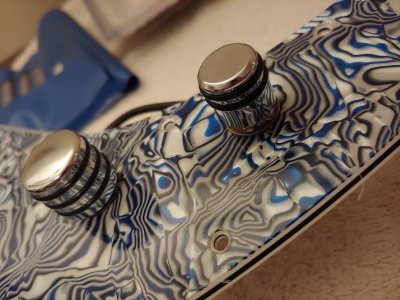
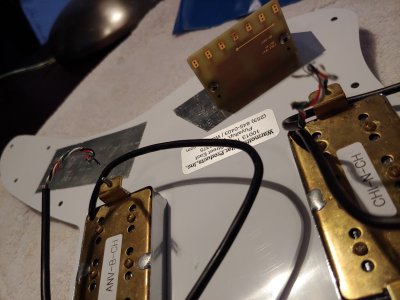
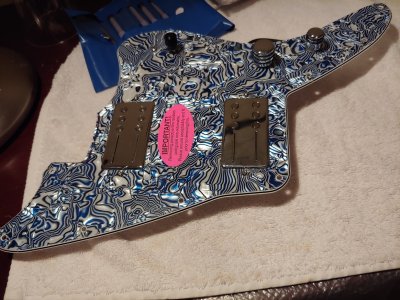
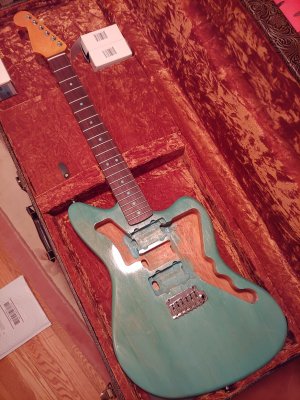
Getting stuff put on the blue shell pickguard, railhammer anvil and chisel humbucker install note the alligator clip, hipshot knobs, freeway switch.  The pickguard is real silvery.
 

Attachments

  • JM pickguard back.jpg
    JM pickguard back.jpg
    3.9 MB · Views: 9
  • JM installed hipshot knobs chrome.jpg
    JM installed hipshot knobs chrome.jpg
    342 KB · Views: 180
  • JM freeway switch install.jpg
    JM freeway switch install.jpg
    264.6 KB · Views: 9
  • JM humbucker install screwdriver.jpg
    JM humbucker install screwdriver.jpg
    235.7 KB · Views: 11
  • JM Humbucker install alligator clip.jpg
    JM Humbucker install alligator clip.jpg
    199.1 KB · Views: 7
  • JM pick guard top before install.jpg
    JM pick guard top before install.jpg
    426.3 KB · Views: 16
Looking good. Looking forward to seeing that on the guitar.

I have to try one of those freeway blade switches one of these days. What a great way to get more options.
 
Back
Top