

mayfly
Epic Member
- Messages
- 9,224
stubhead said:My question was sort of - what glue under nitro? - if tolex glue "stays soft" it sounds like it might be releasing gases undeneath the nitro for some time, not a real swell scenario.
It might swell under the nitro in just the way I don't want it :doh:
stubhead said:Do the dyes on the paper not run under nitro? "Somewhere" - Vintage Guitar Magazine, maybe - I read that Bill Crook had some problems with the paper he was using for Brad Paisley's guitars, in that way.
Yep, I've got that article. The dyes in the paper don't run with deft. Hell, they don't run with pure acetone. They did run a bit when I was experimenting with different greens from rattle cans.
I'm not worried.
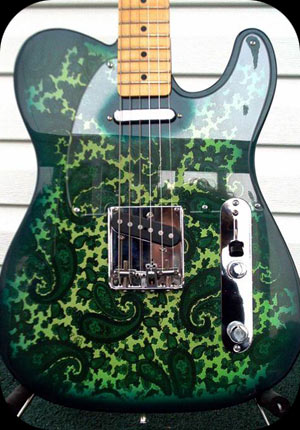
") . It looks to me like Crook has designed a "big" paisley pattern to still stand out on stage... Personally, I don't care, I want a guitar to look good curled up with me at 3 a.m. in my rocking chair. Of all these, I (perversely) like the tangerine the best, but it might be scary at 3 a.m.
. It looks to me like Crook has designed a "big" paisley pattern to still stand out on stage... Personally, I don't care, I want a guitar to look good curled up with me at 3 a.m. in my rocking chair. Of all these, I (perversely) like the tangerine the best, but it might be scary at 3 a.m. 


 :icon_biggrin:


