aguyinaustintx
Junior Member
- Messages
- 88
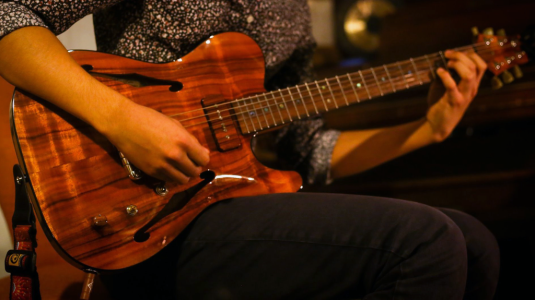
Photographs of the finished guitar appear at the end of this post. Here's an audio clip featuring the guitar, from the piece "Irreplaceable You" by The Brian Bhalla Trio:
Audio clip
Version 2 of this design has been completed, and can be seen at https://www.unofficialwarmoth.com/index.php?topic=31025
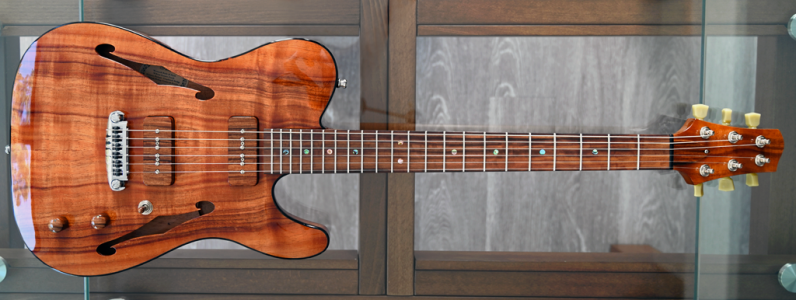
My design philosophy is that guitars are fundamentally wooden instruments. I use clear finishes and try to avoid the use of plastic parts. The pickup covers on this guitar, for instance, were replaced with wooden ones. The knobs and truss rod cover were made from wood as well. I can see why this isn't done on commercial guitars, as it adds a considerable amount of labor. A detailed description of the build follows.
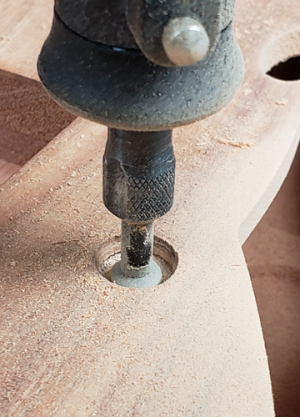
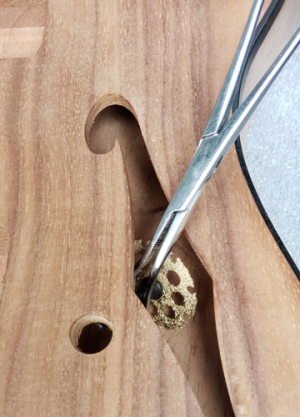
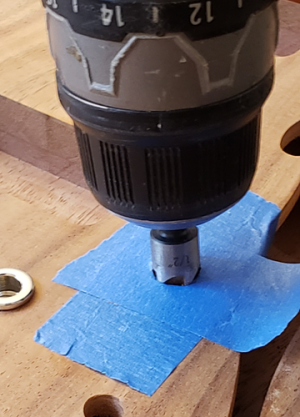
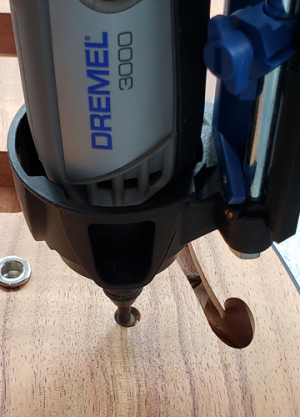
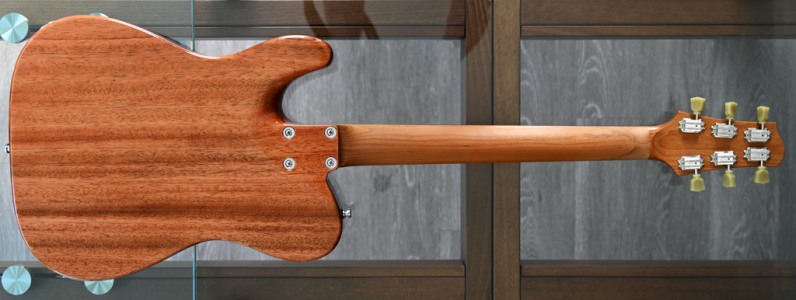
Having a closed back complicated the build. Warmoth warned that it would not be easy. Semi-hollow Warmoth bodies do not seem to be designed with this in mind. Holes for the pots and switch had to be thinned from the inside for the controls to fit after the body was built -- Warmoth said they could not do this.
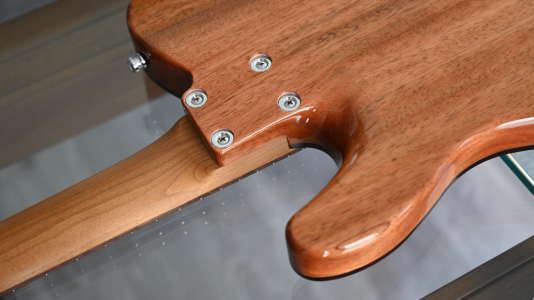
Warmoth does not offer necks with only the headstock finished, so the finish had to be done elsewhere. Wilkins Guitars applied an amazing finish, the term "perfection" comes to mind. Wilkins also converted the neck joint to use ferrules and machine screws, which I really liked. Warmoth's approach is to use different sized wood screws and a neckplate. The screws go in at an angle on the contour heel, and wind up looking misaligned.
David King (dknob.com) made the pickup covers, knobs, and TRC. He normally runs the grain of the covers 90 degrees to the neck for added strength, but he accommodated my request to run them with the neck grain. He matched the pau ferro board for this project. I thought about leaving them unfinished, but decided to finish them myself with spray can poly over a shellac seal coat. It took me several tries to get it right. Warming the poly by immersing the can in warm water did the trick, completely eliminating orange peel.
Sealed Bourns pots were used for the controls, as conventional pots could accumulate dust from the open f-holes. Because of the polymer casing, soldering components to the case was not an option. The tone and treble bleed components were left “floating” between the pots, sealed in a blob of 2-part polymer (pictured on page 2).
Archival non-acid paper was used to create a label, mounted inside the body. It was printed on a consumer ink-jet printer. Wood glue was used to affix the label, spread evenly and completely to avoid bubbles. The top f-hole was masked with blue tape before inserting the label. South Austin Music leveled and polished the frets and setup the guitar.
A Hiscox guitar case was purchased for the guitar. The case was a bit too long for the guitar, so a custom insert was built to fit snuggly between the end of the headstock and the edge of the case. The insert was made by wrapping self-adhesive velvet flocking liner around custom-cut Kaizen foam (pictured on page 3).
I like the way the guitar sounds unplugged as well as amplified. It sounds more like a solid body guitar than a Gibson ES 335, but not exactly like a solid body. I suspect that's because the 335's laminate top is more resonant than Warmoth's carved top, and because the 335 has more internal volume. Unplugged, it's loud enough for unaccompanied practice. Amplified, it can be made to sound twangy on low-gain settings, and has a nice growl on distortion settings. The 0.015mF tone capacitor has a varied sweep to it, from a neutral sound to a midrange hump to a high-cutoff effect. The volume control has an advanced treble bleed circuit, similar to the one used on Fender American Telecasters. There is no treble roll-off as the volume is turned down. The schematic is shown on page 2.
I am very happy with the end result, the effort seemed well worth it.
Audio clip
Version 2 of this design has been completed, and can be seen at https://www.unofficialwarmoth.com/index.php?topic=31025
My design philosophy is that guitars are fundamentally wooden instruments. I use clear finishes and try to avoid the use of plastic parts. The pickup covers on this guitar, for instance, were replaced with wooden ones. The knobs and truss rod cover were made from wood as well. I can see why this isn't done on commercial guitars, as it adds a considerable amount of labor. A detailed description of the build follows.
Having a closed back complicated the build. Warmoth warned that it would not be easy. Semi-hollow Warmoth bodies do not seem to be designed with this in mind. Holes for the pots and switch had to be thinned from the inside for the controls to fit after the body was built -- Warmoth said they could not do this.
Warmoth does not offer necks with only the headstock finished, so the finish had to be done elsewhere. Wilkins Guitars applied an amazing finish, the term "perfection" comes to mind. Wilkins also converted the neck joint to use ferrules and machine screws, which I really liked. Warmoth's approach is to use different sized wood screws and a neckplate. The screws go in at an angle on the contour heel, and wind up looking misaligned.
David King (dknob.com) made the pickup covers, knobs, and TRC. He normally runs the grain of the covers 90 degrees to the neck for added strength, but he accommodated my request to run them with the neck grain. He matched the pau ferro board for this project. I thought about leaving them unfinished, but decided to finish them myself with spray can poly over a shellac seal coat. It took me several tries to get it right. Warming the poly by immersing the can in warm water did the trick, completely eliminating orange peel.
Sealed Bourns pots were used for the controls, as conventional pots could accumulate dust from the open f-holes. Because of the polymer casing, soldering components to the case was not an option. The tone and treble bleed components were left “floating” between the pots, sealed in a blob of 2-part polymer (pictured on page 2).
Archival non-acid paper was used to create a label, mounted inside the body. It was printed on a consumer ink-jet printer. Wood glue was used to affix the label, spread evenly and completely to avoid bubbles. The top f-hole was masked with blue tape before inserting the label. South Austin Music leveled and polished the frets and setup the guitar.
A Hiscox guitar case was purchased for the guitar. The case was a bit too long for the guitar, so a custom insert was built to fit snuggly between the end of the headstock and the edge of the case. The insert was made by wrapping self-adhesive velvet flocking liner around custom-cut Kaizen foam (pictured on page 3).
I like the way the guitar sounds unplugged as well as amplified. It sounds more like a solid body guitar than a Gibson ES 335, but not exactly like a solid body. I suspect that's because the 335's laminate top is more resonant than Warmoth's carved top, and because the 335 has more internal volume. Unplugged, it's loud enough for unaccompanied practice. Amplified, it can be made to sound twangy on low-gain settings, and has a nice growl on distortion settings. The 0.015mF tone capacitor has a varied sweep to it, from a neutral sound to a midrange hump to a high-cutoff effect. The volume control has an advanced treble bleed circuit, similar to the one used on Fender American Telecasters. There is no treble roll-off as the volume is turned down. The schematic is shown on page 2.
I am very happy with the end result, the effort seemed well worth it.


") I have a plan. Any guesses?
I have a plan. Any guesses?