

You are using an out of date browser. It may not display this or other websites correctly.
You should upgrade or use an alternative browser.
You should upgrade or use an alternative browser.
Jazzmaster Build with a Home Finish
- Thread starter Rick
- Start date

Rick
Epic Member
- Messages
- 7,195
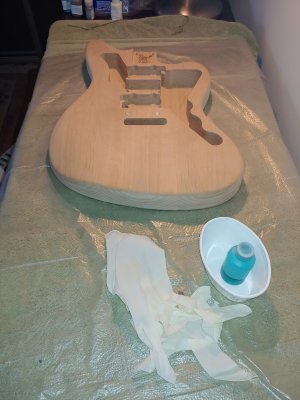
I rethought theWudtone finish, and I'm doing an 80/20 mix of dye and white, followed by flakes, followed by a top coat. I want it to be just transparent, so that that the mineral lines will be just visible.
I'll give it 48 hours between coats. It cost just under $65 not including shipping but including extra bottle of dye / pigment.
The regular kit comes with:
1 30ml bottle of dye / pigment
1 30ml bottle of white pigment
1 30 ml bottle of clear top coat
1 10 ml bottle of sparkle
plus I got the extra bottle of dye / pigment
Attachments
Rick
Epic Member
- Messages
- 7,195
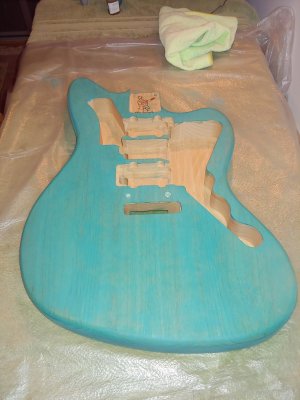
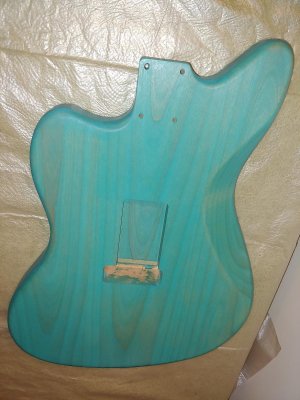
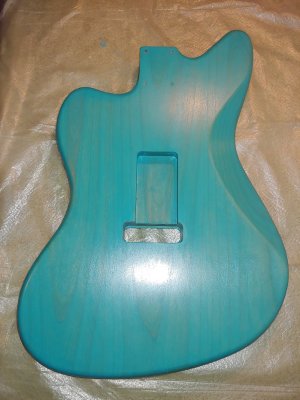
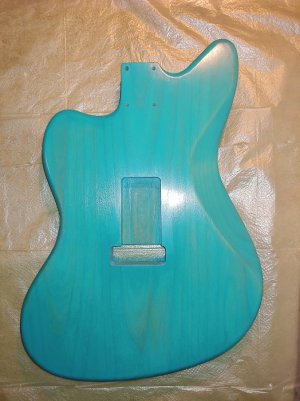
I mixed 20ml of dye pigment and 5ml of white. The gloves were lousy, so I used my wife's food prep gloves. She got them at Costco and are a lot better. Had about 5ml left over. I'll use that for the next time. So far it's seems easy. The yellow in the alder is making the blue greener. Interesting. I'll note there are some places that just sucked in the dye pigment, and others not so much.
Attachments
Rick
Epic Member
- Messages
- 7,195
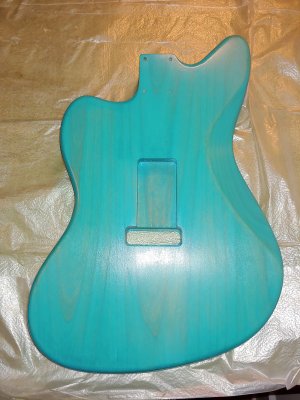
2nd Coat
I mixed 10ml of dye / pigment and 5ml of white with the 5ml left over from the first coat. Again I had 5ml left over after application. So the first coat took 20ml of dye/pigment, the second coat took, 10ml of dye/pigment. This means I've used up one entire bottle of the dye pigment. Fortunately, because I'm going for an 80/20 mix, I ordered a second bottle of dye pigment . That's a $15 upcharge. I could've mixed it with other colors (I did an internet search and a guy in Australia mixed t-bird with surf girl (surf green) and it looked nice), but I wanted to keep it this milky turqoise blue. I'll probably wind up using 10ml of the mix on the third coat, and then 5ml on the fourth, and even less on subsequent coats. I'm going to be using less and less of the white coat so I've got plenty of that. By the 6th or 7th coat it'll probably not be absorbing. We'll see.
Also, in between coats I've been doing a light scuffing with 0000 steel wool, followed by a wipe with a paper towel not very damped with naptha; paper is almost dry, and it's got all the dust. No issues and it's smooth as a baby's butt.
The application is still dead simple and very easy. It's darkening up nicely, less yellow showing thru.
Should be intereting ... transparent taos turquoise sparkle; that's combining a solid color with transparant with flake. Cool
As I understand it, this finish is a mixture of dye and pigment. Something to think about if I'm going to replicate it in the future with transtints. But I'm happy to have Wudtone put together the finishing package it really is a big time saver, and since I'm not making lots of guitars makes economic sense.
The instructions say wait 24-48 hours between coats, but it's tempting to try to accellerate the process. Must resist.
Attachments
Rick
Epic Member
- Messages
- 7,195
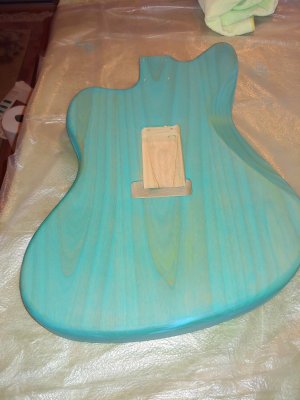
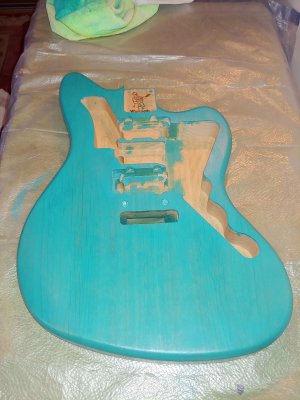
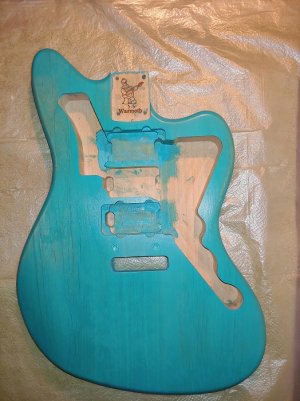
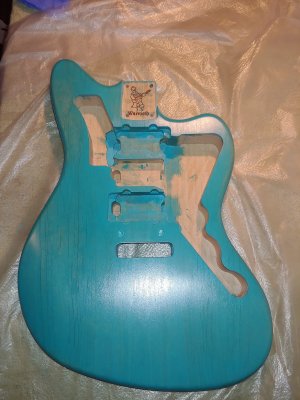
Third Coat
Hit the body with a gentle rub of 0000 steel wool. Gentle wipe with a paper towel dampened with naptha to get the dust. Used about 7ml of the dye/pigment white mix. Trying to maintain 80/20 proportion. The yellow / green is disappearing and the blue dominating. Still translucent. Now to wait 48 hours for the fourth coat to dry. I hate waiting. I think three more coats. :cool01:
Hit the body with a gentle rub of 0000 steel wool. Gentle wipe with a paper towel dampened with naptha to get the dust. Used about 7ml of the dye/pigment white mix. Trying to maintain 80/20 proportion. The yellow / green is disappearing and the blue dominating. Still translucent. Now to wait 48 hours for the fourth coat to dry. I hate waiting. I think three more coats. :cool01:
Attachments

Rick
Epic Member
- Messages
- 7,195
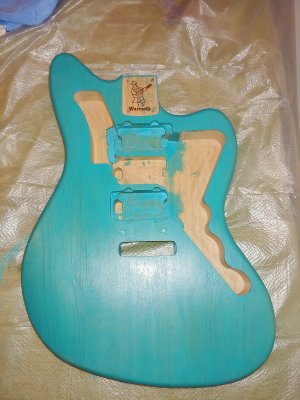
Fourth Coat
I have 20 mls of the dye mixed with the white left. (I have excess white and no more unmixed dye) I used 5mls on this coat. This means I have enough for 4 more coats. As such, my plan is 3 more coats, and having a little left over for an emergency. That'll be a total of 7 coats. For a home brew finish it's coming out pretty good.
The absorption rate seems to be so far by coat:
20ml
10ml
7ml
5ml
Attachments
Rick
Epic Member
- Messages
- 7,195
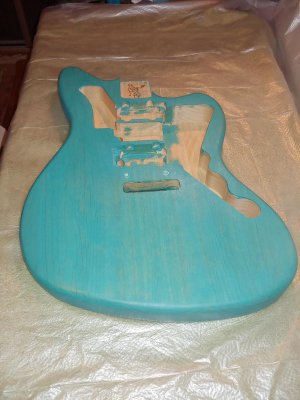
Fifth Coat
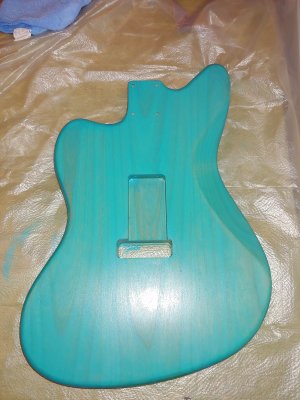
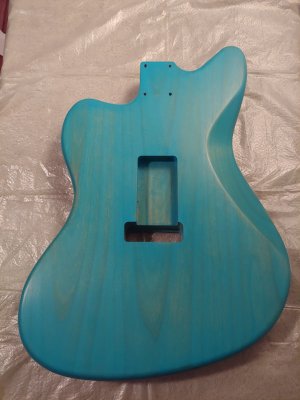
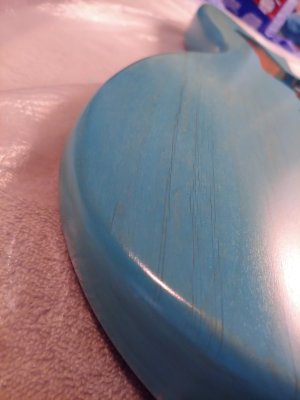
I have 11 mls of the dye mixed with the white left. I used 9 mls on this coat. This means I have enough for 1, maybe 2, more coats at this rate. I believe the reason the absorbtion rate went up is the finish on the upper left front had developed some steaks so I steel wooled alot off. It's now smooth but it increased the amount of dye sucked in. Because the back and sides are looking about perfect, the next coat will just be the front: I'll see if I can build up the finish a little bit. It's supposed to be translucent so it'll be OK. The color is really lovely. In some lights it's an intense blue, in other's it's green.
I have 11 mls of the dye mixed with the white left. I used 9 mls on this coat. This means I have enough for 1, maybe 2, more coats at this rate. I believe the reason the absorbtion rate went up is the finish on the upper left front had developed some steaks so I steel wooled alot off. It's now smooth but it increased the amount of dye sucked in. Because the back and sides are looking about perfect, the next coat will just be the front: I'll see if I can build up the finish a little bit. It's supposed to be translucent so it'll be OK. The color is really lovely. In some lights it's an intense blue, in other's it's green.
Attachments
Rick
Epic Member
- Messages
- 7,195
6th Coat. Did back and front. Now I have to decide, do I press on with one more. I have 6ml left. Because the back looks as good as it's going to get, I might do one more coat on the front, and then be done. Then it's onto the sparkle!
Attachments
Rick
Epic Member
- Messages
- 7,195
Confessions of a Guitar Finisher ... (with an apology to Thomas DeQuincey)
Tonight I used 4 ml of the mix ... 8th Coat ... Put it on back and front ... 3ml remaining. Looking good... feeling good. The guitar seems immense and time expands ... Every 48 hours ... the question remains, when it's done, will I go into withdrawals? Is 3ml enough for another dose, I mean coat on the front ... I wonder??????
I'm calling this finish Transparent Ocean Turquoise. The question is how will it look with the sparkle?
Attachments
Rick
Epic Member
- Messages
- 7,195
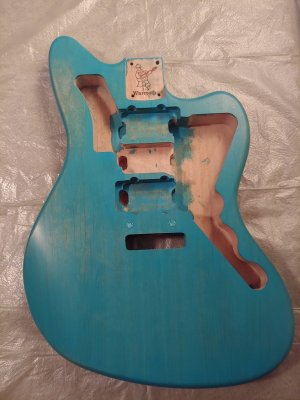
This is the 8th Coat.
The 3ml left in the bottle had turned into a gel, so I added some Naptha, and it came back to life, but it had concentrated itself down to 2ml. Just enough for 1 more coat of the top, which I applied. I'm glad this stage is almost over. Not that I didn't enjoy the Zen monotony of rubbing dye on wood, but I want to move onto to the next step .... SPARKLE!!!!!
I reckon, with the wudtone finish, once you open the bottle, you gotta use it. If you let it sit, it'll dry out, even with the cap on. Something to remember for anyone else interested in this kind of finish.
I was looking at pictures of cars, and so I'm going to call it transparent thunderbird blue.
Attachments
Rick
Epic Member
- Messages
- 7,195
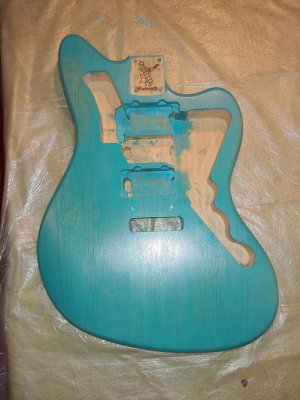
9th Coat and looking good! No more dye mix! :bananaguitar:
Pictures next time of the sparkle. I used the whole 10 ml jar of highlights. I went to pour 5 ml into my "paint jar" and apparantly there was a thick skin on the top of the sparkle. So I squeezed the bottle and like a zit the damn thing exploded. Fortunately it all exploded into the paint jar and no where else. Phew. So used all 10 ml of the sparkle (except for the solidified skin). Hopefully I won't need anymore. Rather than looking like flake, it looks more like metalic. I'm happy with it. I got to listen to the Esher demo while I did this. Maybe some of that mojo will rub off onto the guitar.
Pictures next time of the sparkle. I used the whole 10 ml jar of highlights. I went to pour 5 ml into my "paint jar" and apparantly there was a thick skin on the top of the sparkle. So I squeezed the bottle and like a zit the damn thing exploded. Fortunately it all exploded into the paint jar and no where else. Phew. So used all 10 ml of the sparkle (except for the solidified skin). Hopefully I won't need anymore. Rather than looking like flake, it looks more like metalic. I'm happy with it. I got to listen to the Esher demo while I did this. Maybe some of that mojo will rub off onto the guitar.
Attachments
Similar threads
- Replies
- 27
- Views
- 3K
- Replies
- 89
- Views
- 8K
- Replies
- 3
- Views
- 932