

You are using an out of date browser. It may not display this or other websites correctly.
You should upgrade or use an alternative browser.
You should upgrade or use an alternative browser.
A Jazzmaster inspired by the ULTRA Series
- Thread starter Verne Bunsen
- Start date
Hendrix
Hero Member
- Messages
- 710
Rgand said:I wonder if you could get some white screws for that pickguard? I did a quick search but didn't find any but I was only looking for pickguard screws.
I always just sand the screw head and spray print the colour I want , it not solid , but can re spray it if got off .
stratamania
Mythical Status
- Messages
- 12,437
Looks very good. I personally would go back to the chrome screws. Even the Mastery bridge has chrome screws.
Just as a question as I am not so into offset guitars (though I have one in mind) it seems often that parts don't seem to fit easily. Is this due to using different parts to what Warmoth sells or is it just that things are less standard than you might find on a Tele or a Strat?
Just as a question as I am not so into offset guitars (though I have one in mind) it seems often that parts don't seem to fit easily. Is this due to using different parts to what Warmoth sells or is it just that things are less standard than you might find on a Tele or a Strat?
BigSteve22
Hero Member
- Messages
- 2,798
Just IMHO, but to me, the black screws command too much attention. Chrome screws would do more to bring the eye to the center line where you follow the the dark tone of the neck, through the pups, bridge, and trem. I just think it would be more dramatic. Then all the chrome parts would sort of blend into the pearl guard, accentuating the blacks.stratamania said:...I personally would go back to the chrome screws....
Of course, the only person that has to be happy, is you...... :dontknow:
Verne Bunsen
Hero Member
- Messages
- 2,551
Thanks guys! Everyone I have shown this guitar to is knocked out by the finish. I know you're probably tired of hearing (seeing?) me say it by now, but man Candy Turquoise is really unbelievable....
The main reason I do that is because the textured surface of the tape makes it much easier to position and mark the holes. The awl tends to want to "skate" on the finished surface otherwise. The fact that I get the shakes (no, not DT's!) doesn't help. Also, while I'm sure the merits are debatable, I believe it helps prevent finish chipping/splintering while drilling.
I concur, and for the same reasons. The black screws are a distraction. And the chrome tends to disappear into the pick guard at arms length. I'll be going back to the chrome. In fact... (sounds of black screws being extracted and replaced with chrome...)
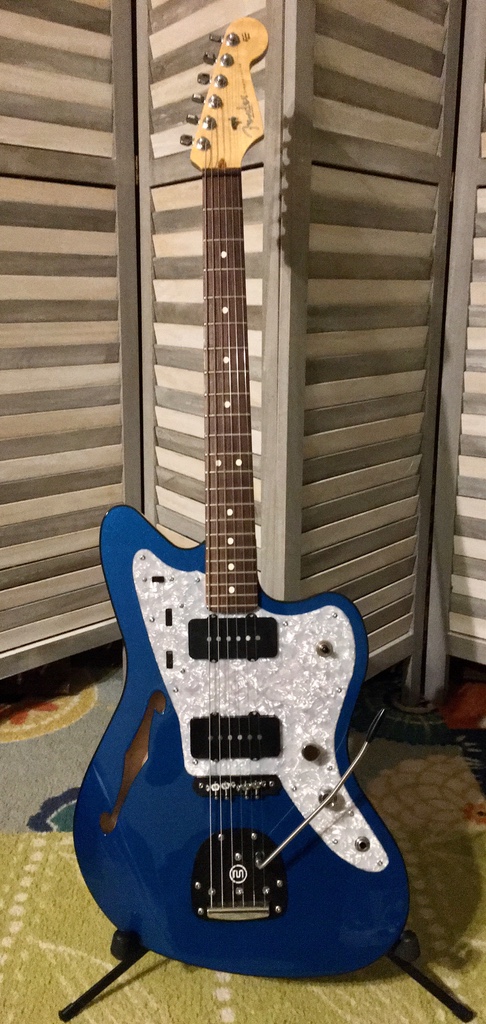
Much better! (Still the donor neck. My pa has a Strat neck with a maple board laying around, I may see about borrowing that and putting it on in the near future just to preview the aesthetic)
As for the fitment issues, I'm not sure what that is about. I've built four Warmoth offsets: 1 Mustang and now 3 Jazzmasters. All of them have used Warmoth pick guards (or at least pick guards cut to Warmoth spec by a reputable vendor) and on all of them I've had to do work on the routes for standard equipment to fit. It is not a problem, part of the fun, it is just noteworthy because the Strats and Teles I've built have had no such complications.
:dontknow:
I had the opportunity to spend some time playing this bad machine today and have drawn some conclusions:
BroccoliRob said:hey, lookin killer and on fleek, etc., but what does the tape do when you put it over the holes you're drilling?
The main reason I do that is because the textured surface of the tape makes it much easier to position and mark the holes. The awl tends to want to "skate" on the finished surface otherwise. The fact that I get the shakes (no, not DT's!) doesn't help. Also, while I'm sure the merits are debatable, I believe it helps prevent finish chipping/splintering while drilling.
BigSteve22 said:Just IMHO, but to me, the black screws command too much attention. Chrome screws would do more to bring the eye to the center line where you follow the the dark tone of the neck, through the pups, bridge, and trem. I just think it would be more dramatic. Then all the chrome parts would sort of blend into the pearl guard, accentuating the blacks.
stratamania said:Looks very good. I personally would go back to the chrome screws. Even the Mastery bridge has chrome screws.
Just as a question as I am not so into offset guitars (though I have one in mind) it seems often that parts don't seem to fit easily. Is this due to using different parts to what Warmoth sells or is it just that things are less standard than you might find on a Tele or a Strat?
I concur, and for the same reasons. The black screws are a distraction. And the chrome tends to disappear into the pick guard at arms length. I'll be going back to the chrome. In fact... (sounds of black screws being extracted and replaced with chrome...)
Much better! (Still the donor neck. My pa has a Strat neck with a maple board laying around, I may see about borrowing that and putting it on in the near future just to preview the aesthetic)
As for the fitment issues, I'm not sure what that is about. I've built four Warmoth offsets: 1 Mustang and now 3 Jazzmasters. All of them have used Warmoth pick guards (or at least pick guards cut to Warmoth spec by a reputable vendor) and on all of them I've had to do work on the routes for standard equipment to fit. It is not a problem, part of the fun, it is just noteworthy because the Strats and Teles I've built have had no such complications.
:dontknow:
I had the opportunity to spend some time playing this bad machine today and have drawn some conclusions:
- 250k pots with Jazzmaster pickups and round wound strings are a phenomenal match! I had concerns about the 250k's being too dark because my other Jazzmaster sounds right at home with the 1Megs, but my other Jazzmaster also sports flatwounds which are warmer by nature. In this context, I think the 250k's are grand!
- Jazzmaster pickups in series sound bodacious. Anticipating that this would be a recipe for mud, I maintained the 1Meg volume pot in the upper circuit, which is active when the series option is activated with the S-1 Switch. Paired with the 250k upper tone, the series option howls and growls without getting stuck in the muck. In fact I found myself rolling the tone off a bit. It is good! Cleans up really nice too.
- I find myself wishing that the series/parallel and in-phase/out-of-phase switches were swapped. Currently the upper slider switch controls phase while the S-1 switch puts both pickups in series and swaps to the upper controls. Having spent time with it, I would prefer to activate the series option and upper controls with the slider (more akin to traditional Jazzmaster upper circuit functionality) and let the S-1 Switch handle phase. It will mean a 4PDT slider switch which may or may not fit without modification, and it will mean a lot more wires running through that upper cavity. Sounds like fun!
Verne Bunsen
Hero Member
- Messages
- 2,551
molul said:Love that color! It made me want to see a transparent turquoise satin finish even more (I almost ordered my latest guitar body with that finish, but ended up with transparent red ^_^U maybe next time).
Transparent Red is good too! I may be biased, my other Jazzmaster is Black Korina finished in Transparent Red...
If you do a Transparent Turquoise build, I’ll look forward to seeing it!
Verne Bunsen
Hero Member
- Messages
- 2,551
I believe I have tracked down the switch I’ll need for modifying the controls, Switchcraft 4PDT slider 50212LX:
https://www.mouser.com/ProductDetail/Switchcraft/50212LX?qs=%2Fha2pyFadug9oBF2SPrVjvYruAfpdHgCSd%252B0yW8aR58%3D
Next will be seeing if it fits without modifying the route. My heart is saying “Yes”, but my eyeballs are saying “Maybe”.... I don’t want to have to disassemble what I’ve already got to try this out, so I went ahead and ordered another pickguard. I’m flying out of town tonight for a week, hopefully they’ll be waiting for me when I get home. I will also need to re-kajigger the wiring diagram for the new layout... :sad1:
stratamania
Mythical Status
- Messages
- 12,437
It's looking really good now with the chrome screws.  ccasion14:
Fun times ahead with the re-kajiggering.
ccasion14:Fun times ahead with the re-kajiggering.
Verne Bunsen
Hero Member
- Messages
- 2,551
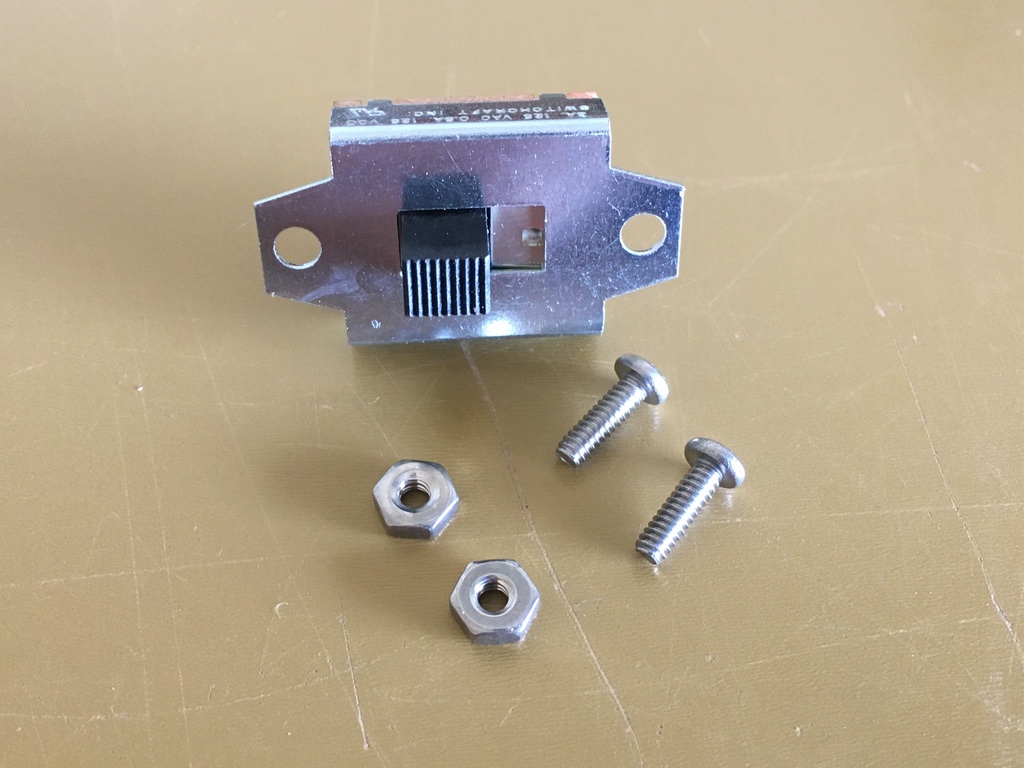
Here is the 4PDT Switchcraft slider next to its smaller 2PDT cousin:
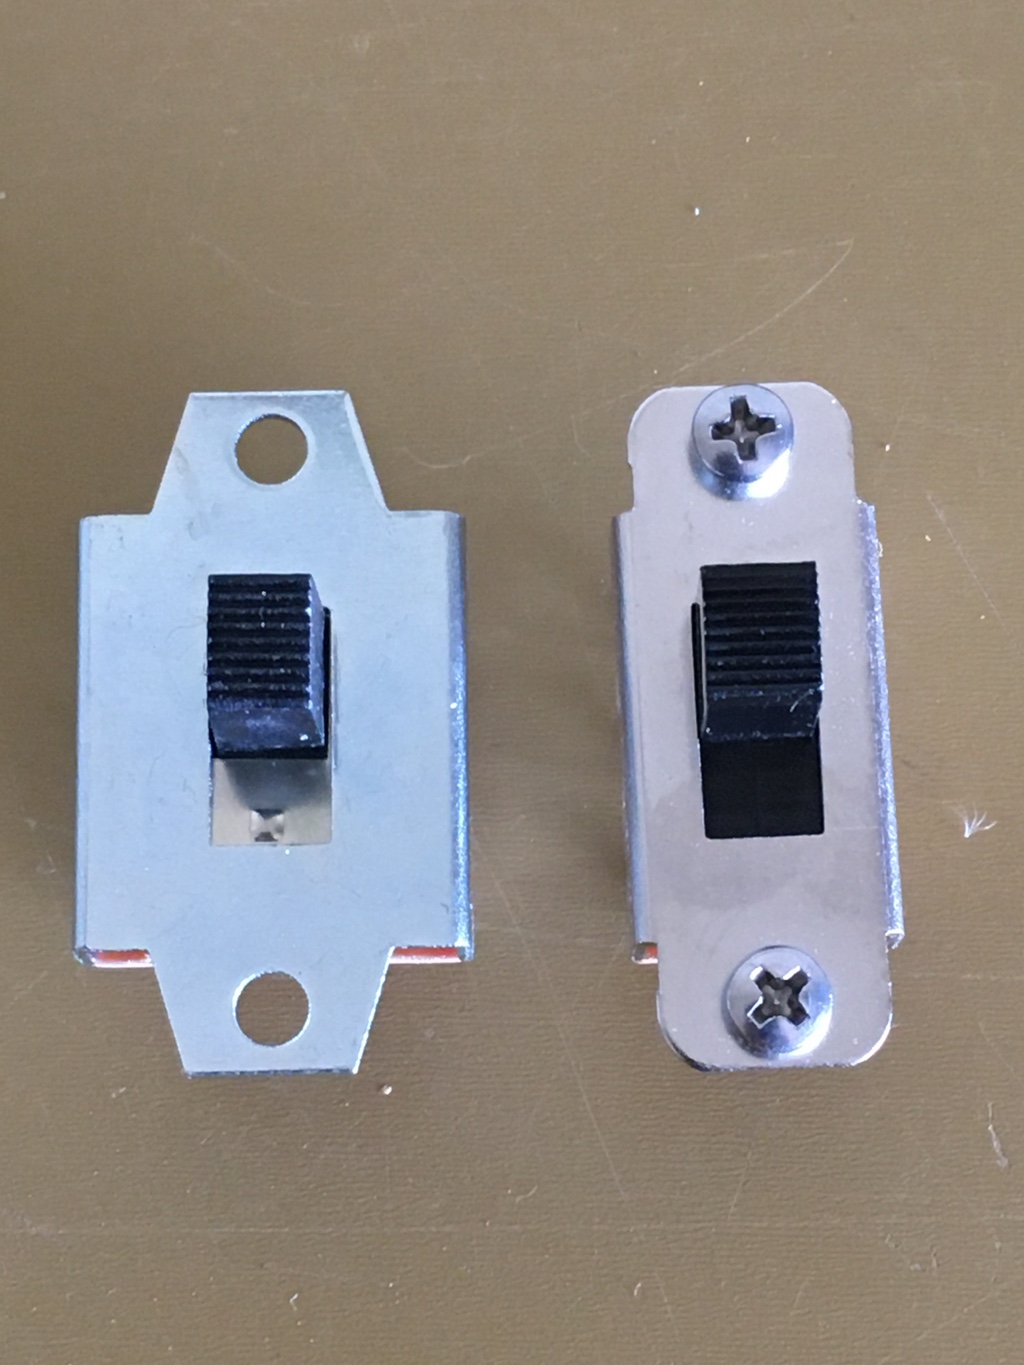

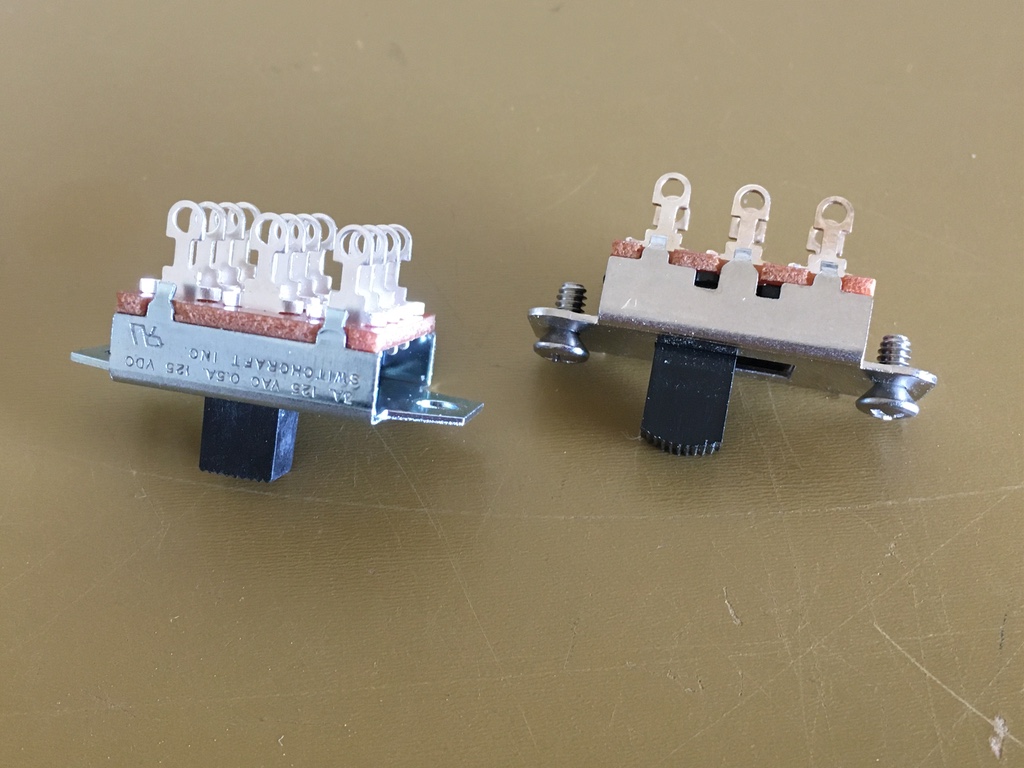
There are a couple of distinguishing physical features other than the size. The 2PDT uses a one piece plastic slider with hidden detents while the 4PDT is plastic with a metal follower and the detents are visible on said follower. The 2PDT switch has a rounded top while the 4PDT is flat.
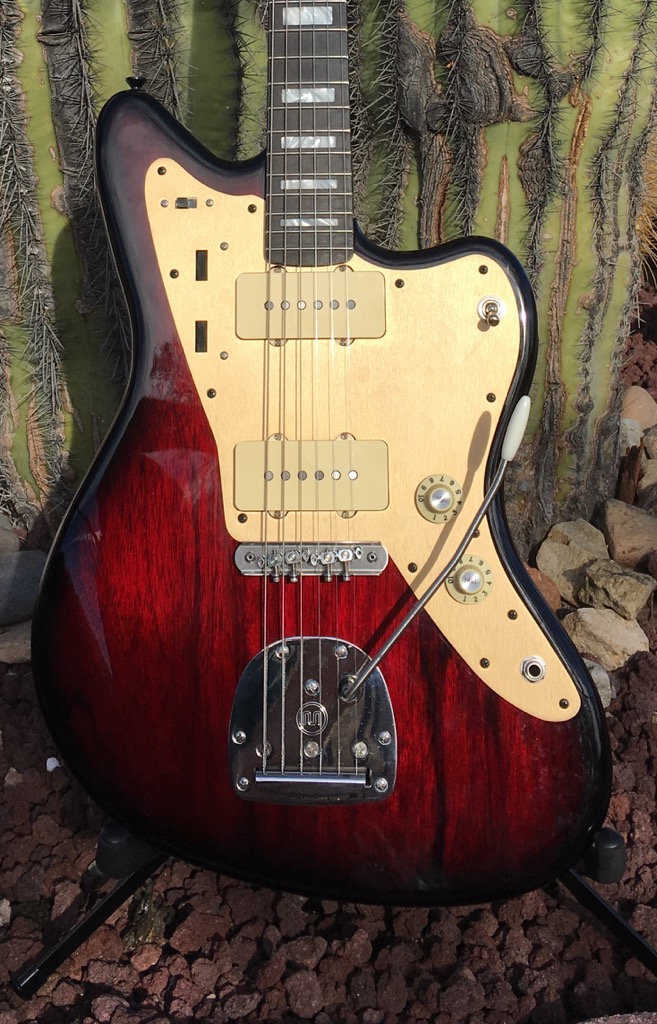
A close up of the switch on the Ultra Series Jazzmaster tells me this is the switch they are using:
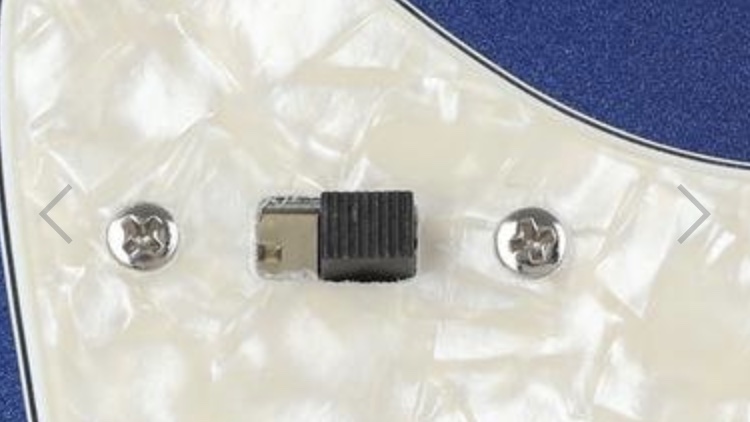
The standard 2PDT measures 0.530" wide, and the 4PDT 0.785". That makes the size difference about 1/4" total, or about 1/8" on each side. For a visual reference, the 4 banks of lugs on the 4PDT are almost exactly the same width as the whole 2PDT switch.
The standard 2PDT has tapped holes and comes with screws, the 4PDT is not tapped and comes with no hardware. A #6 fits, but the corresponding nut is too big. I got #4 hardware and it works great.
One still has to be careful with the nut, as it will interfere with the travel of the switch if a flat is not aligned parallel to the carriage.
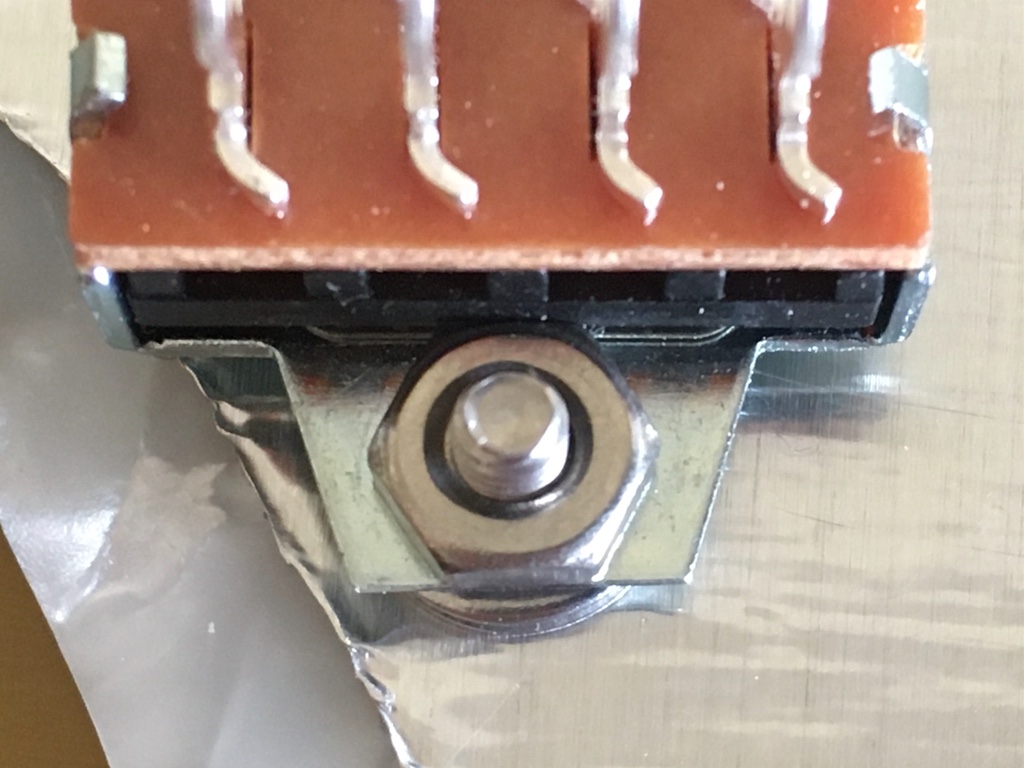
Here it is installed on the pick guard, showing its size and position relative to the pick guard mounting screw holes. I'll have to tear the guitar down to determine if it fits without modification. Which means I'll have to stop playing it for a while. All in due time...

There are a couple of distinguishing physical features other than the size. The 2PDT uses a one piece plastic slider with hidden detents while the 4PDT is plastic with a metal follower and the detents are visible on said follower. The 2PDT switch has a rounded top while the 4PDT is flat.
A close up of the switch on the Ultra Series Jazzmaster tells me this is the switch they are using:
The standard 2PDT measures 0.530" wide, and the 4PDT 0.785". That makes the size difference about 1/4" total, or about 1/8" on each side. For a visual reference, the 4 banks of lugs on the 4PDT are almost exactly the same width as the whole 2PDT switch.
The standard 2PDT has tapped holes and comes with screws, the 4PDT is not tapped and comes with no hardware. A #6 fits, but the corresponding nut is too big. I got #4 hardware and it works great.
One still has to be careful with the nut, as it will interfere with the travel of the switch if a flat is not aligned parallel to the carriage.
Here it is installed on the pick guard, showing its size and position relative to the pick guard mounting screw holes. I'll have to tear the guitar down to determine if it fits without modification. Which means I'll have to stop playing it for a while. All in due time...
Verne Bunsen
Hero Member
- Messages
- 2,551
Rgand said:That's a pretty cool switch. I can see some uses for one like that. Can you bond those nuts on with JB Weld or maybe use brass nuts and solder them on? That way you would not have to fiddle with it when you install it.
I'm sure that could be done, but it really wasn't bad. Even with the two washers stacked between the switch frame and the pick guard to "lower" it. Shorty 1/4" wrench on one side, screwdriver on the other. Now if it comes loose later and I have to pull the neck and pick guard off to snug it back up, then I may find myself cursing it....
rgand
Epic Member
- Messages
- 5,934
Yeah, you're right. It's not something you pull off and re-install periodically. :doh:-VB- said:Rgand said:That's a pretty cool switch. I can see some uses for one like that. Can you bond those nuts on with JB Weld or maybe use brass nuts and solder them on? That way you would not have to fiddle with it when you install it.
I'm sure that could be done, but it really wasn't bad. Even with the two washers stacked between the switch frame and the pick guard to "lower" it. Shorty 1/4" wrench on one side, screwdriver on the other. Now if it comes loose later and I have to pull the neck and pick guard off to snug it back up, then I may find myself cursing it....
stratamania
Mythical Status
- Messages
- 12,437
You could always put some kind of thread lock such as loctite or similar on it.
Verne Bunsen
Hero Member
- Messages
- 2,551
stratamania said:You could always put some kind of thread lock such as loctite or similar on it.
That is an excellent idea
ccasion14:Verne Bunsen
Hero Member
- Messages
- 2,551
I had the guitar on the operating table, ready to tear her apart to check the fit of the switch, when it occurred to me that... well, I didn't really want to. Then I remembered a lesson from Tommy Boy, where he said, "You can get a good look at a steak by sticking your head up a cow's [butt]..." There was more, but that is the important part. So I just took a look at the steak.
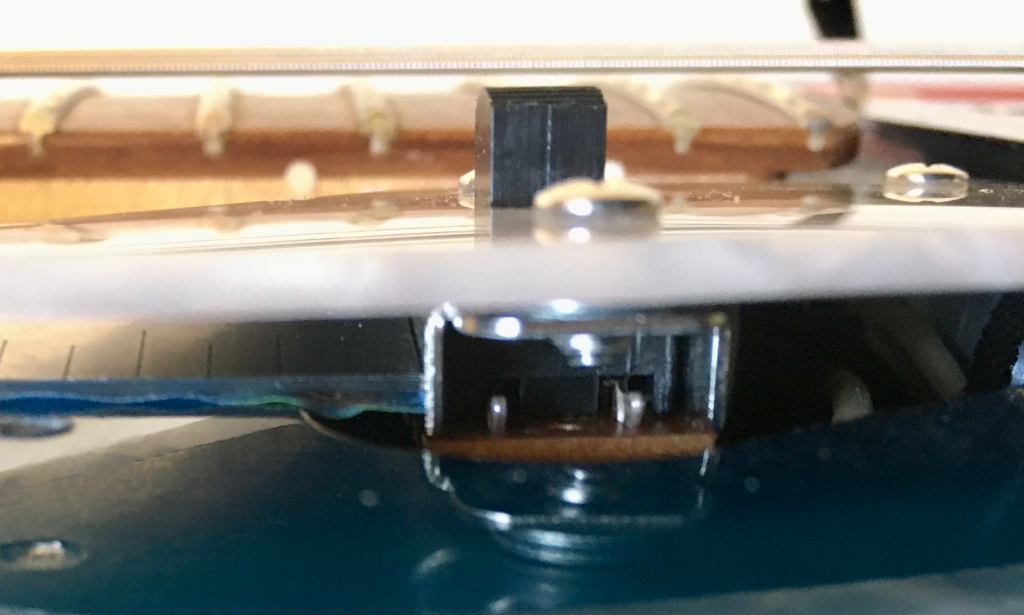
Difficult picture to take, so I apologize, but if you can figure out what you are looking at you can see the frame of the standard 2PDT slider, edge of the route, and a machinists rule. It looks like there is just shy of 1/4" between the switch frame and the wall of the route, which tells me that there should not be any trouble with the extra 1/8" the 4PDT will have going that direction. So that is awesome.
I did go ahead and pull the neck off; we are going to visit my folks tonight and I plan to snag the maple/maple Strat neck my dad has on the shelf. And I will also probably go ahead and string her up with the Thomastik-Infeld Jazz BeBops that I plan on using. I hate to use a set of those for what will probably be a relatively short period, but it will be most excellent to get a closer representation of what the final version will sound like...
Verne Bunsen
Hero Member
- Messages
- 2,551
So, I put the maple neck on tonight, and the TI strings. Looked plenty sharp:
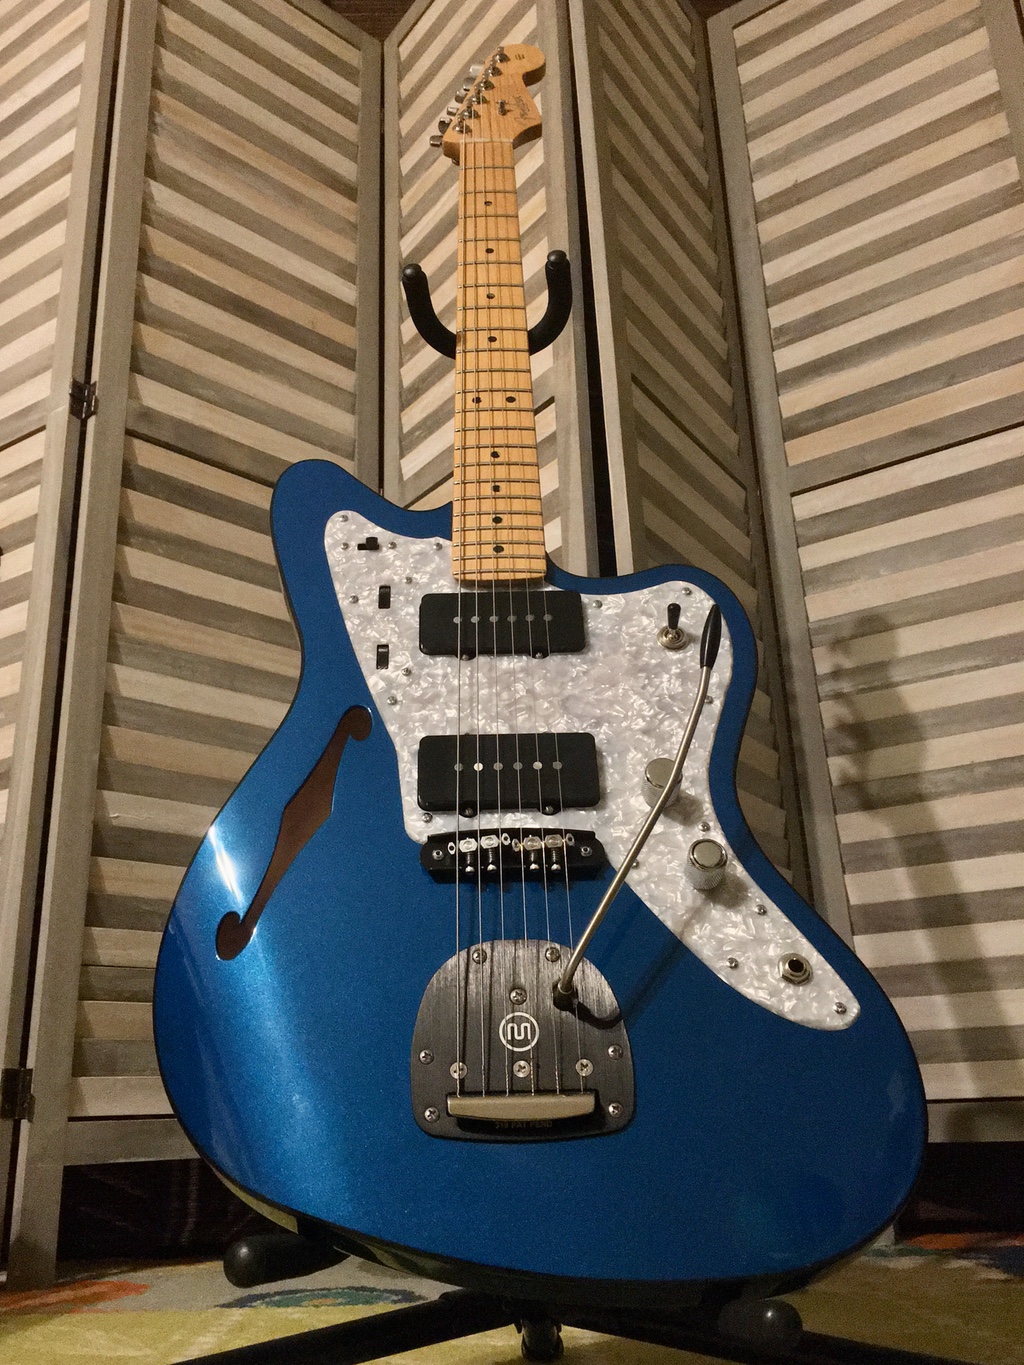
But unfortunately I hated the combination, haha! I couldn't get that neck off of there fast enough. It was plinky and lifeless, the unwound strings were atonal and completely lacked sustain when fretted above the 12th fret. The neck fit funky to begin with, odd gaps in the corners of the pocket. Suffice to say, the magic was not there. I will swap the necks back out the next time I visit pa.
For the record, I don't think this is says a maple neck won't sound good on this guitar. I think it just says THIS maple neck doesn't sound good on this guitar.....
stratamania
Mythical Status
- Messages
- 12,437
It looks very good with that maple neck in any case :icon_thumright:
Similar threads
- Replies
- 16
- Views
- 783