A Jazzmaster inspired by the ULTRA Series

Thanks! I am tickled that it sold so quickly, and for the asking price at that. I believe it was an excellent price, and the proceeds will cover this build, so I'm inclined to say we both won.  No regrets or heartburn over parting with the Gibby, but the empty hook in my guitar cabinet has me all kinds of excited!
 
For anyone who is interested, here is a map I made of the Fender S1 switch. This is my first time using one, so I had to get familiar with it's workings. It isn't as complex as I'd initially believed, it is just 4 independent dual throw switches, basically like having two push/pulls. A ton of functionality in a little package; simple in concept and elegant in execution. We'll see how much fun it is to actually work on it.

S1.jpg


I got the pickguard loaded up today. Well, mostly. I started by bonding the different component areas using shielding tape. This works very well for providing a continuous conductive mounting surface for all of the components.

Photo%20Dec%2028%2C%2010%2019%2051%20PM.jpeg


I discovered a few things right off the bat:

  • My very carefully spec'd 250k mini pot for the upper circuit doesn't come close to fitting any of the critical dimensional parameters for this application, it is too big in every way. Back to Mouser I go....
  • The operator for the 2-Way slider was  way too proud of the front of the pickguard. I don't remember having to deal with that on my other Jazzmaster, but it had the thicker anodized aluminum pickguard. I stacked two M4 flat washers under each screw and it sits much better now.

    Before:
    Photo%20Dec%2029%2C%208%2038%2013%20PM.jpeg


    After:
    Photo%20Dec%2029%2C%208%2040%2040%20PM.jpeg


  • Nothing lined up on the mini pot bracket. The pot sat too high for the knob to line up with the window and even when lowered the roller knob was jammed tight against the pickguard and could not rotate. An M6 washer under the pot to lower it a bit and an M4 washer under each bracket screw to back the assembly off and give the knob some clearance, and everything is groovy.

    Photo%20Dec%2029%2C%208%2037%2013%20PM.jpeg


    The washers are stainless and everything rings out properly on the meter, all the component chassis talk to all the other ones, so I'm happy.

Photo%20Dec%2029%2C%208%2044%2021%20PM.jpeg


Photo%20Dec%2029%2C%208%2043%2036%20PM.jpeg


That's where things will sit for now. I won't start wiring anything up until I get the upper circuit tone pot figured out. Meanwhile, I'm also still waiting on the S1 knob with the push-button to show up. Pickups should be arriving soon. With luck a Warmoth order will be going in soon. I have consulted Neck Wizard Cagey and he has agreed to perform his magic on the neck. Wheels are in motion!
 
Nice progress already. I'm interested to find out how you like the S1 switch.
 
Good progress so far.

But I think you need to review your S1 map as to what is down and what is up. On poles 1 and 3 it looks to me like you have down and up transposed.

There are some diagrams I did at the link below which might help visualise it. (If you add the numbers to your map also it may help)

https://stratamania.wordpress.com/2014/12/03/4pdt-blower-switch-for-guitar/

Also, it is worth checking with a multimeter or similar to be totally certain.
 
stratamania said:
Good progress so far.

But I think you need to review your S1 map as to what is down and what is up. On poles 1 and 3 it looks to me like you have down and up transposed.

There are some diagrams I did at the link below which might help visualise it. (If you add the numbers to your map also it may help)

https://stratamania.wordpress.com/2014/12/03/4pdt-blower-switch-for-guitar/

Also, it is worth checking with a multimeter or similar to be totally certain.

I used a meter to ring the switch out initially, when I made the diagram, and I’ve just re-verified it. It checks out, the diagram is correct. You gave me a good scare though, the thought of having to re-doing the guitar wiring diagram (again!) made me a bit queasy, haha!
 
-VB- said:
stratamania said:
Good progress so far.

But I think you need to review your S1 map as to what is down and what is up. On poles 1 and 3 it looks to me like you have down and up transposed.

There are some diagrams I did at the link below which might help visualise it. (If you add the numbers to your map also it may help)

https://stratamania.wordpress.com/2014/12/03/4pdt-blower-switch-for-guitar/

Also, it is worth checking with a multimeter or similar to be totally certain.

I used a meter to ring the switch out initially, when I made the diagram, and I’ve just re-verified it. It checks out, the diagram is correct. You gave me a good scare though, the thought of having to re-doing the guitar wiring diagram (again!) made me a bit queasy, haha!

I wonder if the internals has changed on different batches. I was hoping you saw it prior to you soldering a bunch of stuff.

Sorry to scare you and it is not even Halloween  :eek:ccasion14:
 
stratamania said:
-VB- said:
stratamania said:
Good progress so far.

But I think you need to review your S1 map as to what is down and what is up. On poles 1 and 3 it looks to me like you have down and up transposed.

There are some diagrams I did at the link below which might help visualise it. (If you add the numbers to your map also it may help)

https://stratamania.wordpress.com/2014/12/03/4pdt-blower-switch-for-guitar/

Also, it is worth checking with a multimeter or similar to be totally certain.

I used a meter to ring the switch out initially, when I made the diagram, and I’ve just re-verified it. It checks out, the diagram is correct. You gave me a good scare though, the thought of having to re-doing the guitar wiring diagram (again!) made me a bit queasy, haha!

I wonder if the internals has changed on different batches. I was hoping you saw it prior to you soldering a bunch of stuff.

Sorry to scare you and it is not even Halloween  :eek:ccasion14:

Now THAT is a scary thought...

Actually, looking closer at your diagram, I don't think there is a disagreement at all. If you orient your diagram so that the solder lugs face left instead of up, then the switching seems to line up after all...
 
-VB- said:
stratamania said:
-VB- said:
stratamania said:
Good progress so far.

But I think you need to review your S1 map as to what is down and what is up. On poles 1 and 3 it looks to me like you have down and up transposed.

There are some diagrams I did at the link below which might help visualise it. (If you add the numbers to your map also it may help)

https://stratamania.wordpress.com/2014/12/03/4pdt-blower-switch-for-guitar/

Also, it is worth checking with a multimeter or similar to be totally certain.

I used a meter to ring the switch out initially, when I made the diagram, and I’ve just re-verified it. It checks out, the diagram is correct. You gave me a good scare though, the thought of having to re-doing the guitar wiring diagram (again!) made me a bit queasy, haha!

I wonder if the internals has changed on different batches. I was hoping you saw it prior to you soldering a bunch of stuff.

Sorry to scare you and it is not even Halloween  :eek:ccasion14:

Now THAT is a scary thought...

Actually, looking closer at your diagram, I don't think there is a disagreement at all. If you orient your diagram so that the solder lugs face left instead of up, then the switching seems to line up after all...

Good spot when rotated they are in accordance with each other. I was beginning to wonder whether there was something odd happening.
 
Yo I jus wanted to #say that upside down jack plate idea from page 1 is Supafly and I'm gonna steal it and use it sometime
 
BroccoliRob said:
Yo I jus wanted to #say that upside down jack plate idea from page 1 is Supafly and I'm gonna steal it and use it sometime
A lot of the plates aren't polished chrome on the underside. You might want to check for one at a brick and mortar store so you can see the back. I ordered a couple that weren't polished before I found one that was. I think the one I used was a Proline one.
 
Well, a week has passed since the ES-137 was delivered to its new owner and I have heard nary a word from him. So, I am feeling pretty justified in calling a close to the evaluation period and spending those funds! The orders are in! Body will be coming to me, neck heading to Cagey for his magic.

In the meantime, these have arrived:

Photo%20Jan%2010%2C%204%2012%2057%20AM.jpeg

Photo%20Jan%2010%2C%204%2015%2021%20AM.jpeg


Vintage spec Jazmaster pickups from Revel. Can't wait to hear them!

In other news I believe I have the alt-spec-mini-tone-pot-and-roller-knob conundrum licked. More on that once I actually have it successfully fitted up....
 
I'm getting more impressed with Revel pickups as time passes. I just don't have enough stuff planned to try them all. :icon_biggrin:
 
Rgand said:
I'm getting more impressed with Revel pickups as time passes. I just don't have enough stuff planned to try them all. :icon_biggrin:

Indeed! This will be my third guitar with his pickups. Not only does he make a great product, but he’s a great guy to do business with. I’ve been recommending him quite a bit.
 
-VB- said:
Rgand said:
I'm getting more impressed with Revel pickups as time passes. I just don't have enough stuff planned to try them all. :icon_biggrin:

Indeed! This will be my third guitar with his pickups. Not only does he make a great product, but he’s a great guy to do business with. I’ve been recommending him quite a bit.
You know, to try all the pickups I would like to would mean another 10 guitars. Hmmm, that isn't a bad idea...
 
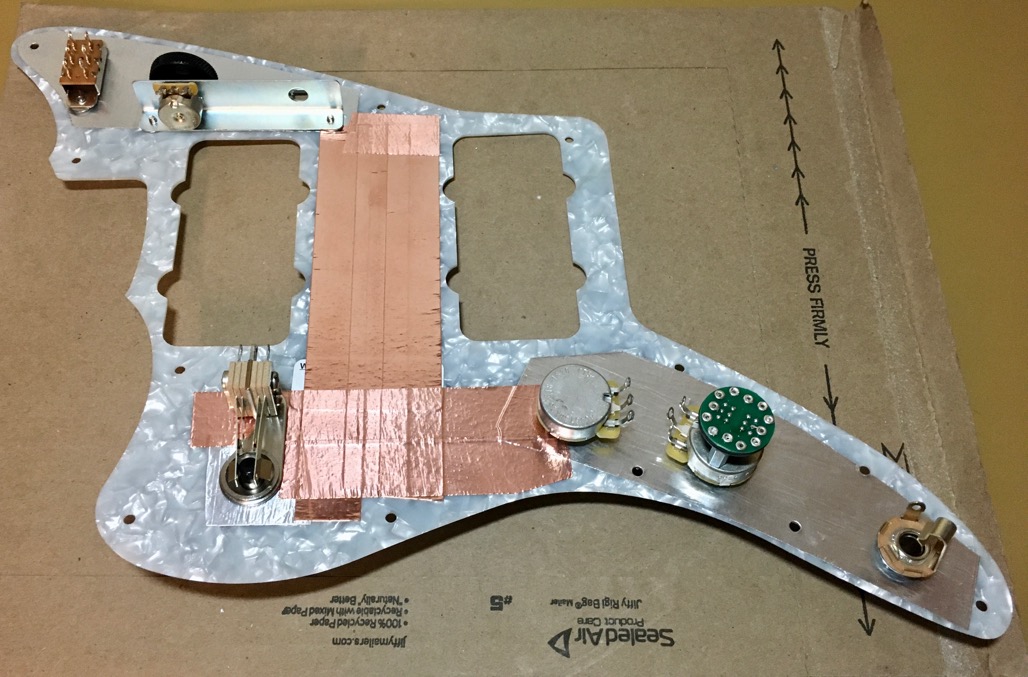
Ok. Mini pots and roller knobs.

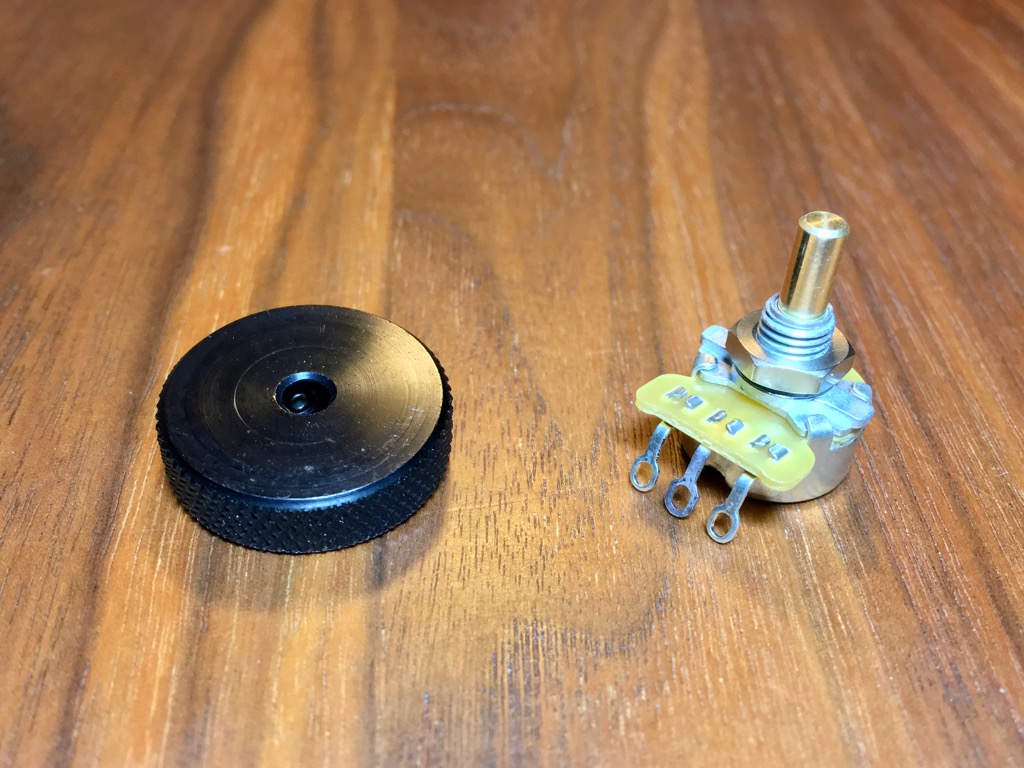
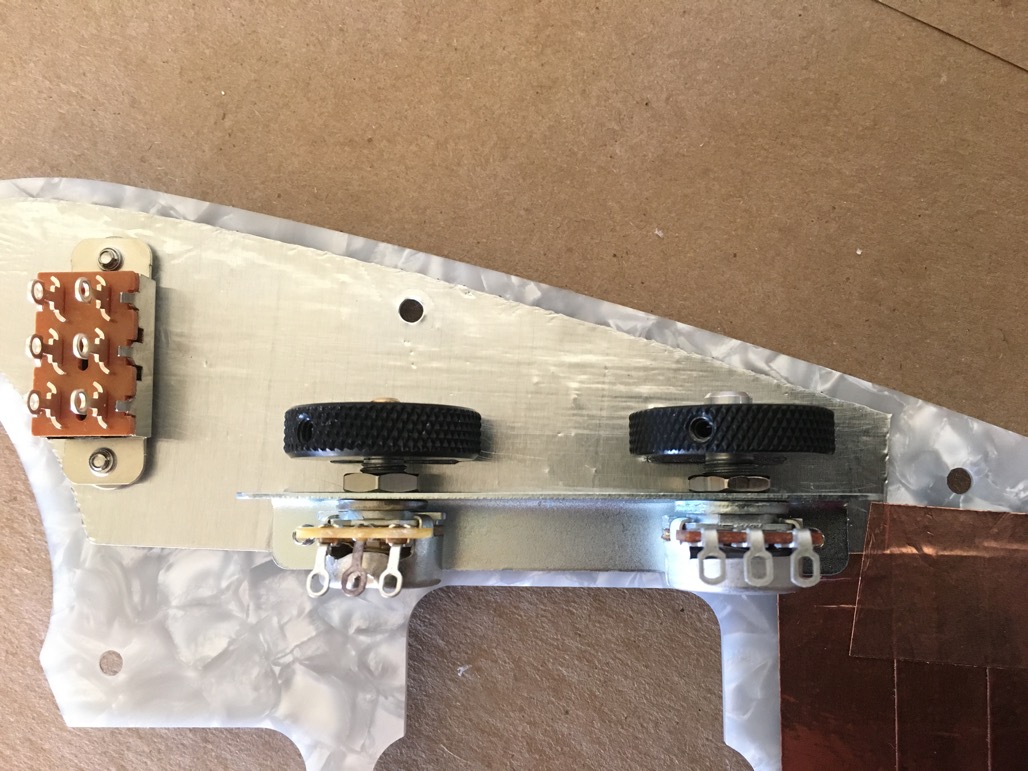
This is the standard USA spec Jazzmaster hardware:

Photo%20Jan%2010%2C%204%2044%2007%20AM.jpeg


The pot shaft is 4mm, which is pretty darn tiny. Trying to find 4mm shaft pots in values other than 1Meg linear and 50k linear (the standard rhythm circuit compliment) is futile. I tried. Like the ROUS's, I don't believe they exist.

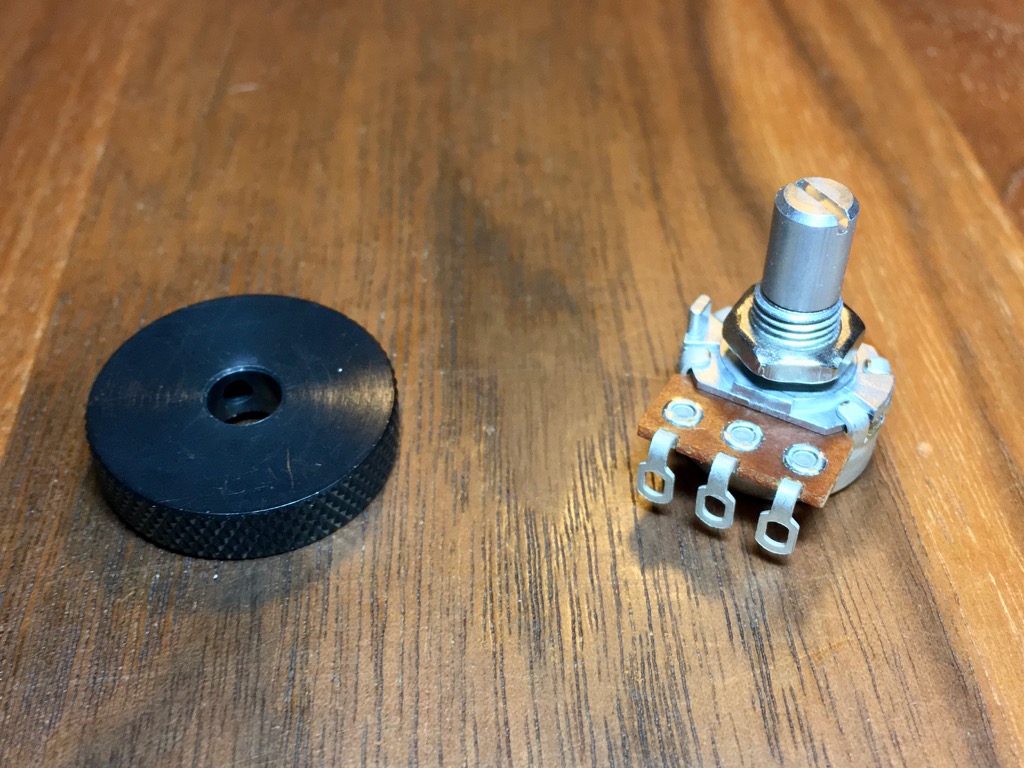
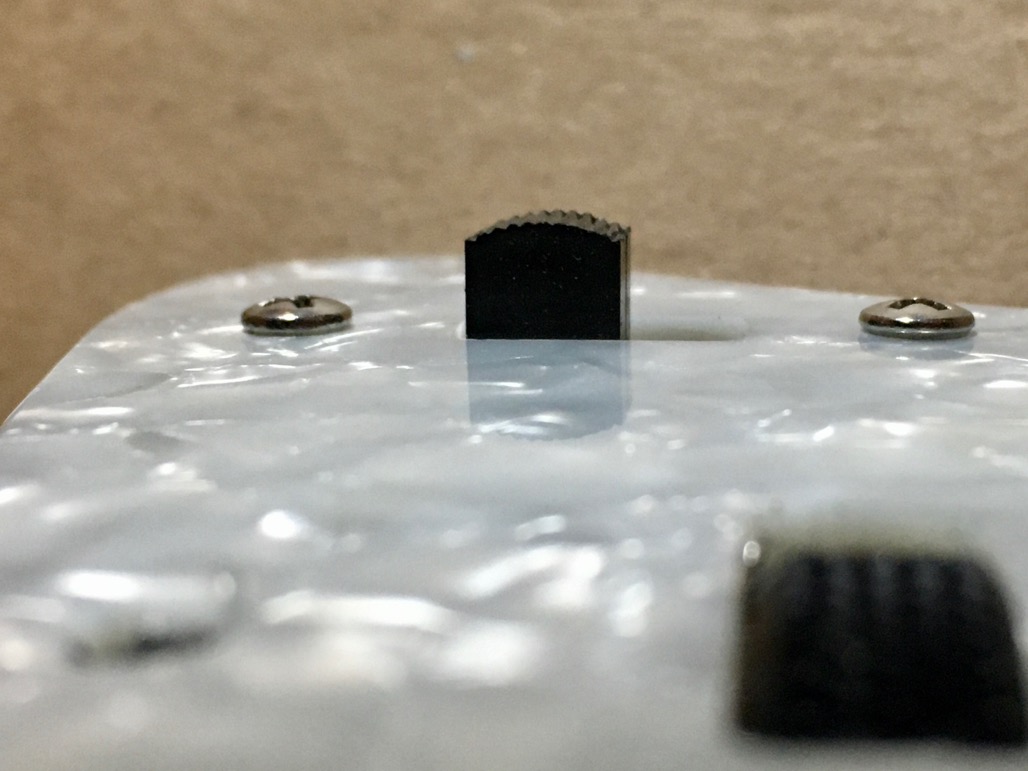
However Japanese Jazzmasters use a pot with a larger 6mm shaft. So the Japanese spec roller knobs open up a lot more possibilities. It still took some pretty heavy digging through the Mouser inventory to find something that would also fit in the Jazzmaster control route, and I ordered more than one that was a failure, but I eventually had success!

Photo%20Jan%2010%2C%204%2047%2034%20AM.jpeg


Japanese Spec Roller Knob, Fender P/N 0264227000
(I ordered them from Darren Riley, but they no longer show in his inventory.....?)

<Note to readers from The Future: the pots linked below ended up being wrong after all. See update on 5/25/2020 for info and links to the actual correct pots......>

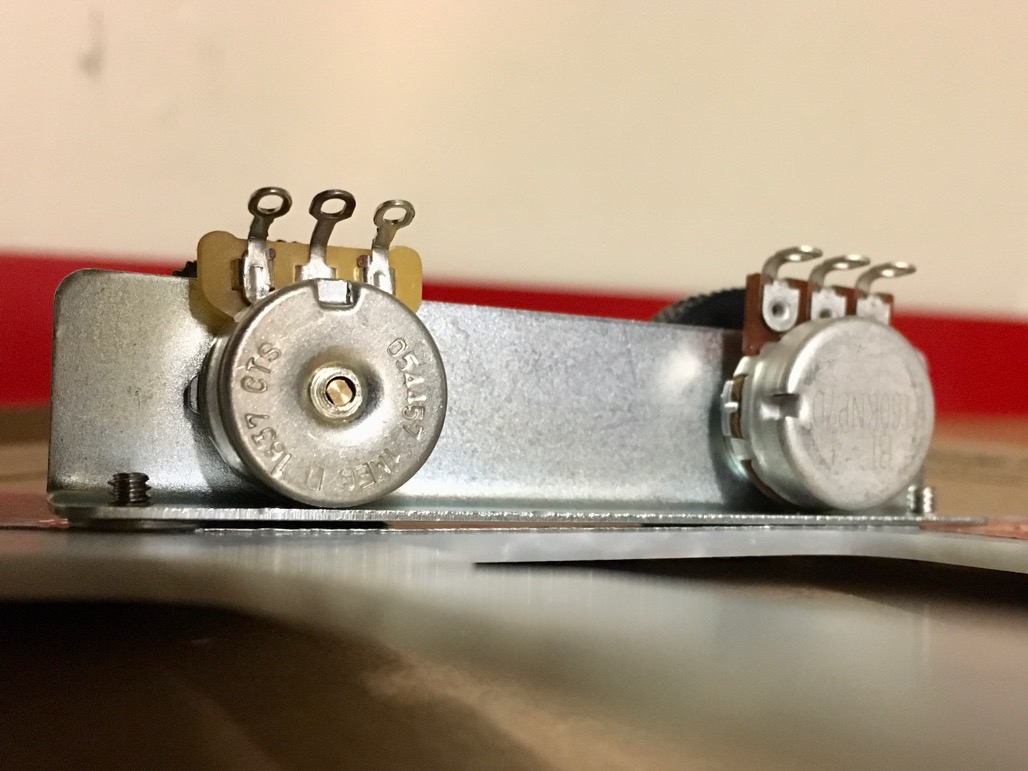
Compatible 250k audio taper pot, Mouser P/N 858-P160KNP0EC15A250
https://www.mouser.com/ProductDetail/tt-electronics/p160knp-0ec15a250k/?qs=56eeD6vBg8hhR%252bJRCDE9aA%3D%3D&countrycode=US&currencycode=USD

Compatible 500k audio taper pot (this is the one I am using), Mouser P/N 858-P160KNPC15A500K
https://www.mouser.com/ProductDetail/tt-electronics/p160knp-0ec15a500k/?qs=mJjUQczmFniyDjTw9iQXgA%3D%3D&countrycode=US&currencycode=USD

And I am using this bracket from All Parts:
https://www.allparts.com/products/ap-0652-pot-bracket-for-jazzmaster-pickguards

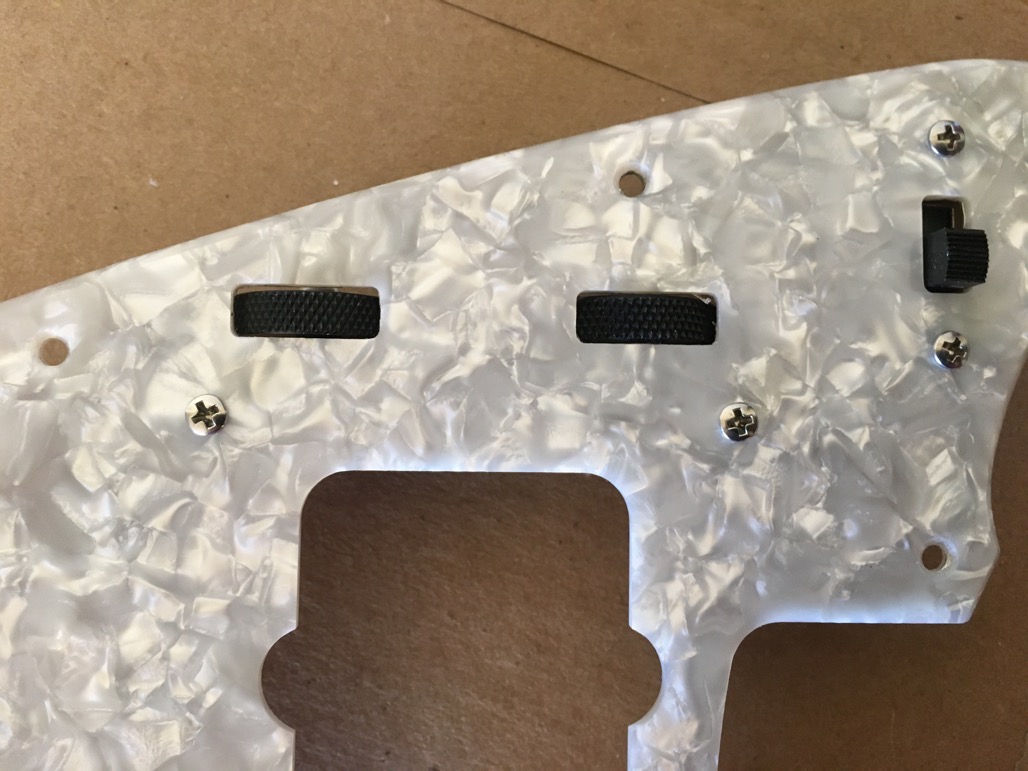
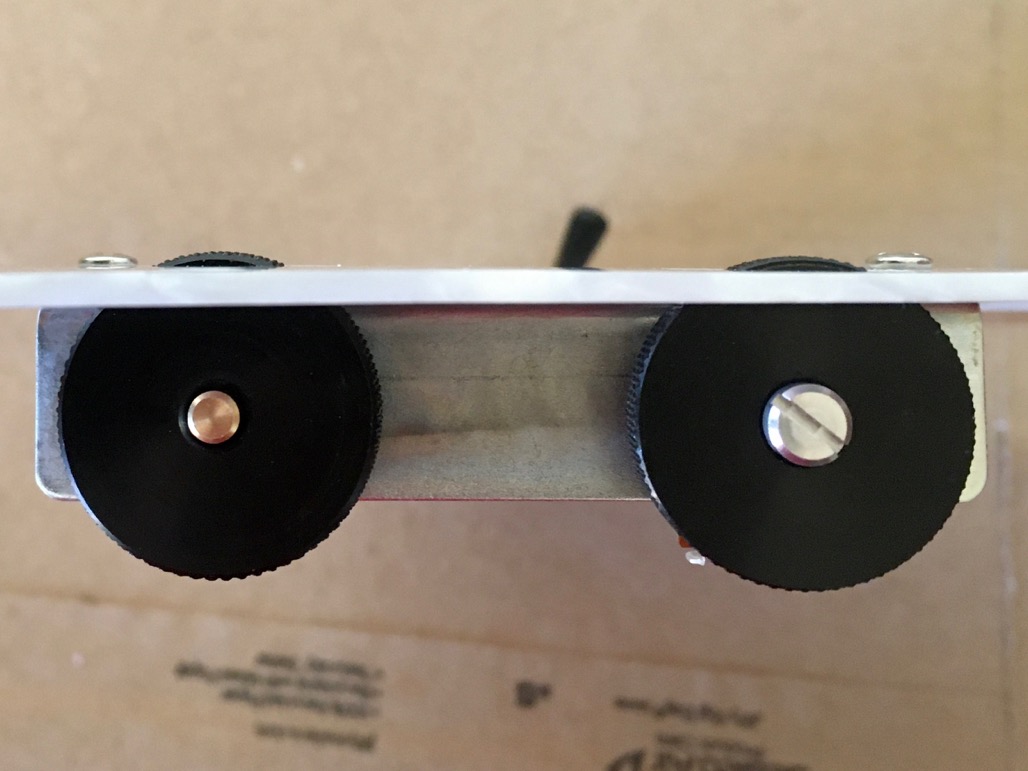
It fits in the bracket with no modification, and a single M7 washer got it sitting properly. The shaft still sets a little higher than the standard pot; hopefully that will not cause any conflict with the route. A can use another washer to drop it further, but that puts the bottom of the pot right on the edge of the pickup cavity. We will see what happens when the body arrives.

Photo%20Jan%2010%2C%204%2027%2037%20PM.jpeg


The dimensions of the Japanese knob are ever so slightly different from the USA spec knob. The diameter is slightly smaller and it is also a bit thinner. Centering it in the window makes the thickness difference pretty un-noticeable. Slipping a #4 washer on the bracket mounting screw on the volume pot side, but NO washer on the tone pot side, compensates for the diameter difference and puts both knobs protruding equally through the pickguard.

Photo%20Jan%2010%2C%204%2028%2009%20PM.jpeg


Photo%20Jan%2011%2C%203%2004%2050%20PM.jpeg


Photo%20Jan%2010%2C%204%2029%2036%20PM.jpeg


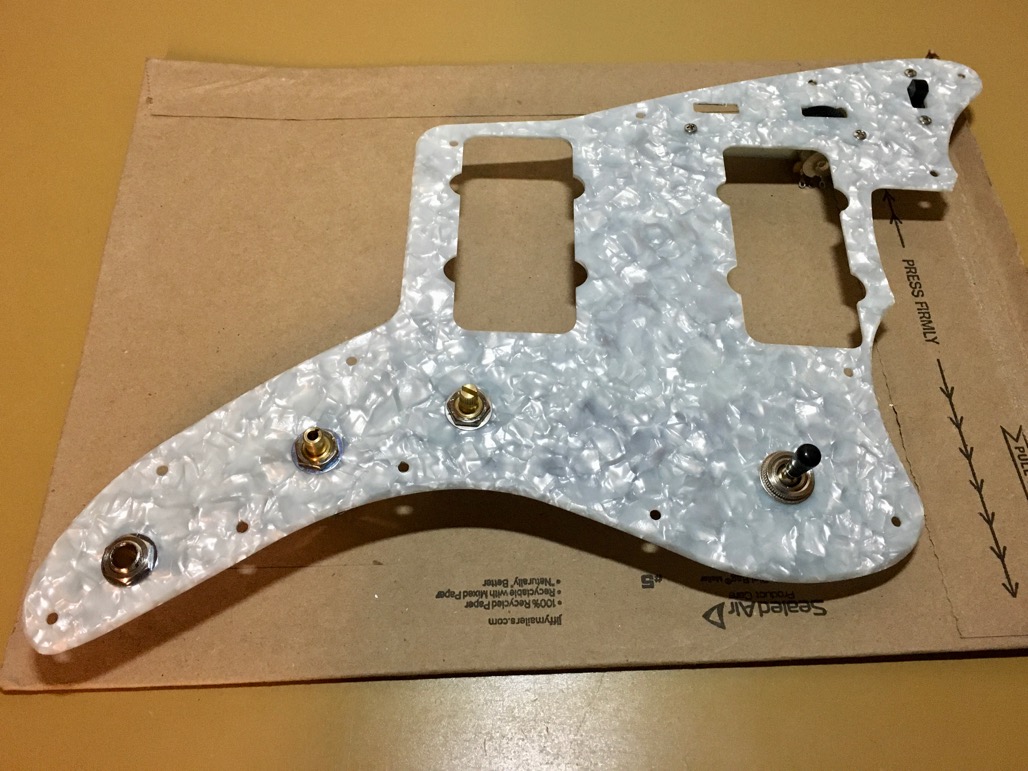
So, there's one hurdle jumped  :headbang1:
 
The last time I built something using those pots (on a Jaguar) I had similar problems sourcing replacements. The reason I needed them was they were incredibly easy to break, so naturally I did. If I had it to do over, I'd be sure to use some Loctite on the pot's mounting bushings the first time I installed them, so I'd be less tempted to reef on them to make sure they'd stay tight over time.  That bushing is just a die-cast part that's fairly thin, so twisting it right off the pot body is surprisingly easy.
 
Back
Top