Leaderboard

Ugly Duckling build thread (roasted swamp ash Jaguar)

Logrinn said:
Very kind of you to offer, Robert.  :occasion14:
But I think you should keep those for a future build.
I have given some thought to a push-pull pot together with a 3-way blade as an alternative to the 4-way blade. And I have such a pot that also happen to fit the Danelectro knobs. So I’ll find a solution one way or another.
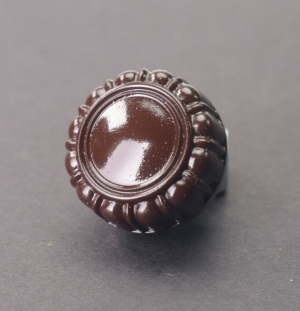
Okey-doke. I do like those Danelectro knobs so I hope you can use them. They're cool like old Philco radio knobs.
 

Attachments

  • Bakelite Philco Radio Knob.png
    Bakelite Philco Radio Knob.png
    357.8 KB · Views: 3
The tuners are in place.
Here’s some pictures.

155937175685746600_resized.jpg


http://iloapp.logrinn.se/data/_gallery/public/0/155937176006277500_resized.jpg?[/

[img]http://iloapp.logrinn.se/data/_gallery/public/0/155937174746712300_resized.jpg?

155937175463587400_resized.jpg


155937175848753400_resized.jpg


155937176171824900_resized.jpg


155937176491550100_resized.jpg


155937176329267700_resized.jpg
 
Very good progress being made, here. I like this project a lot.  :icon_thumright:
 
So I did some work on the upper control plate this afternoon.

The original one has a lot of holes for switches that I won’t be using

155949817859537000_resized.jpg


I’ve been looking for a small steel plate without much luck, but today I found something at a garden shop

155949825171451700_resized.jpg


155949818771274900_resized.jpg


It’s thicker than the original plate, which is good because it’ll match the pickguard better. But it’s also much heavier. Which is less good ..,

155949818306160500_resized.jpg


After a lot of work ...

155949818533007800_resized.jpg


After even more work I shaved of some weight ...

155949819230096700_resized.jpg


About four hours later and even some metal removed from the back ...

155949822023287600_resized.jpg


155949823372738200_resized.jpg


There’s still a lot to do to make it fit, but this is the result of my work today

155949826234191700_resized.jpg


And this is what’s left of the original plate

155949819905336500_resized.jpg


That’s all for today, gentlemen.
 
Good work on that plate. Are you going with a brushed finish or will you polish it?

Also, what will you put in it?
 
Thanks.
I’m thinking I’ll polish it to as shiny as I can get it.
I’m not planning on putting anything in it, but on it. An engraving. That I haven’t designed yet. But my wife gave me some ideas today. We’ll see if I can come up with something cool.
:glasses9:
 
That sounds good. I look forward to what you do with that. If it ends up being a floral design, put a flower center in the most likely place for a switch. You never know when you might want one.
 
Better watch out - if it's steel it will rust without some kind of finish on it.  Just shoot some clear lacquer?
 
That's some nice work on the plate! If you decide to get it engraved, I highly recommend our own Doug, (DangerousR6), for excellent work at a fair price. He's executed every design I've sent him with aplomb, and his attention to detail is second to none. He's not happy, until you're happy. Just saying....  :icon_thumright:
 
Thanks Steve.
Yes, I know of Doug’s work (who here doesn’t - it’s brilliant) and I’ll keep that in mind.
I first need to come up with a design and then I’ll decide if I want to try it myself or leave it to a pro.

Good advice on the center hole thing Robert. Thanks.

Yes, some laquer might be a good idea. Thanks Trevor.
 
Logrinn said:
I first need to come up with a design and then I’ll decide if I want to try it myself or leave it to a pro.
You're a brave man! Not owning the proper equipment, I couldn't even consider doing my own engraving. Can't wait to see what you come up with!
 
Logrinn said:
The first thing I did yesterday was the bridge.
This Jaguar will be getting a Gotoh Tune-o-matic bridge:


So how do one go about to fasten such a bridge in the holes routed for Jaguar/Jazzmaster bridge thimbles?
Easy! With the help of these "excenter" bushings I fond on Rockinger's website.

Here's a better picture from Rockinger's website:
Observe the offset holes that allows for adjustment of TOM bridges with different post spacing


To be continued ...

I love this option.  I may have considered it for my build, I just cannot live with the vintage bridge.  Looks fantastic
 
Got some more work done.

As you might now, the neck pocket on the Jaguar is slightly angled:

156014611331671700_resized.jpg


But the bridge - since it’s a non standard bridge - still sits as low as it can get, with no room to adjust it lower.

156014611179791400_resized.jpg


That means that with the pickguard in place some adjustments will be necessary.

156014765632545700_resized.jpg


But first some holes need to be drilled for the pickguard screws. Here’s my new small hand drill that’s very handy (  :icon_jokercolor: ) for this:

156014765799885800_resized.jpg


Neat holes drilled:

156014766438682600_resized.jpg


The thumb screw holes needed to be enlarged:

156014767530001200_resized.jpg


But even with the holes enlarged and the thumb screws (shouldn’t that be nuts by the way?) screwed all the way down, the bridge now sits higher than before because it now rests on the pickguard instead:

156014767380691400_resized.jpg


The solution? Bring out the file and have at it:

156014767688822400_resized.jpg


156014768106347100_resized.jpg


156014768874618400_resized.jpg


Next, the pickup selector plate went in place. You might notice that the plate is thinner than the pickguard. We can’t have that:

156014766903843000_resized.jpg


Some washers underneath the plate fixed that:

156014767059229500_resized.jpg


And the end result looks much better:

156014768486070800_resized.jpg


With the pickguard in place I was able to do another test fit of parts. This is what I’ve got so far:

156014768332411200_resized.jpg


There’s still more to do, but that’s it for today.

 
Looking good so far, interesting work arounds, very nice job! (Although, I think I might have just used a .5° shim in the neck pocket to give me a slightly greater break angle. But that's just me....  :toothy10:)
 
BigSteve22 said:
Looking good so far, interesting work arounds, very nice job! (Although, I think I might have just used a .5° shim in the neck pocket to give me a slightly greater break angle. But that's just me....  :toothy10:)

I hear you and I’ve thought about it. The problem is shipping and custom fees when getting something like that from StewMac.
And as far as I’ve seen no one in Europe or Sweden carries those shims.
 
Back
Top