Binding an L5S

Jim_H said:
YMMV, but having bound a dozen or so acoustics, I find it easier to laminate them as I install them.  Once they get thick, especially bound, getting them to fit tightly around curves is a serious pain in the neck.
I was thinking that you'd put on one strip at a time, which is the way that I've seen it done in other places so was a little surprised that you'd put them all together before applying to the body. Still, it'll be a great looking binding when finished either way it's done.

What do you have planned for the color on the body? I think I saw Bagman suggest a trans green in another thread (which I can't seem to find at the moment). I really think that the black/cream binding with trans green and chrome hardware would be a total win.
 
I think I'm drawn more to the infrared end of the spectrum, so I was considering something along these lines...

SemiL5SMockup.jpg

Of course, that's not an L5S, nor is that the headstock I'd use (I'd use a Warmoth 3x3), and all that white-looking stuff is supposed to be cream. Thing is, I've already got that red VIP in the pipe, and I already have a TOM/STP combo in chrome, so I don't know. Lotta stuff still up in the air.
 
Always good to see a project where the builder is breaking new (personal) ground. What's better than a learning experience with a guitar at the far end?
 
If nothing else, it teaches you to appreciate what others do for you and what kind of value to attach to it.
 
The saga continues...

I had a bizarre dream a couple days ago. I was in the bathroom (?) routing the channel in the body for the binding, and for some reason I was on the phone at the same time, which meant I could only hold the router with one hand. As a result, I was both out of control and not paying attention so I somehow managed to route the whole lower horn off the body. I kept looking at it, cursing my stupidity, without even wondering how that could be possible with a short flush cutter bit or how I did it single-handed. All I knew was that I was screwed, as there was no repairing that sort of damage. I woke up from this and said to myself "Self, you really need to replace those awful images in your head!"

Where do our brains come up with this stuff?

As luck would have it, today we had unseasonably warm outdoor temperatures and my other obligations could be moved to evening hours without compromise, so it was a good time to blow off work and play in the garage. Not enough time to work on any painting project, considering the weather was certainly very temporary, but I was sure I could make a pretty impressive mess with the router in the time allotted. Routers are hard to beat that way.

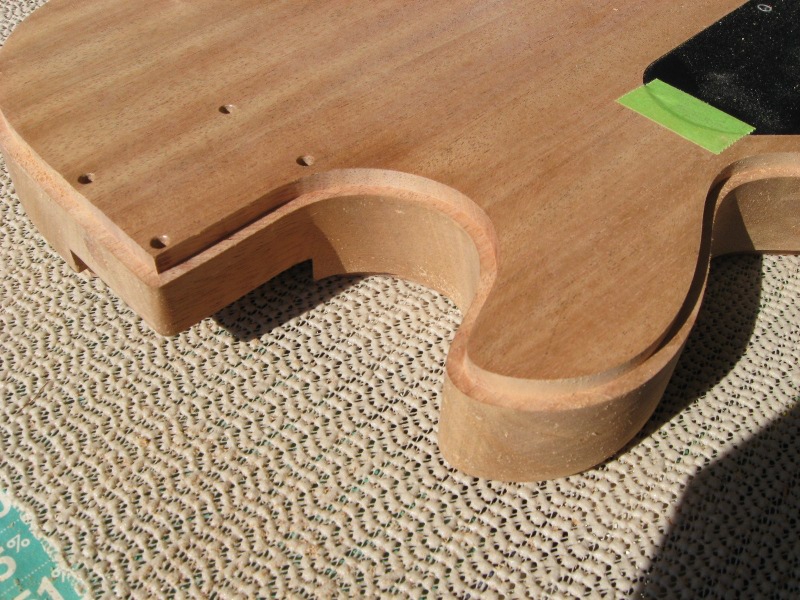
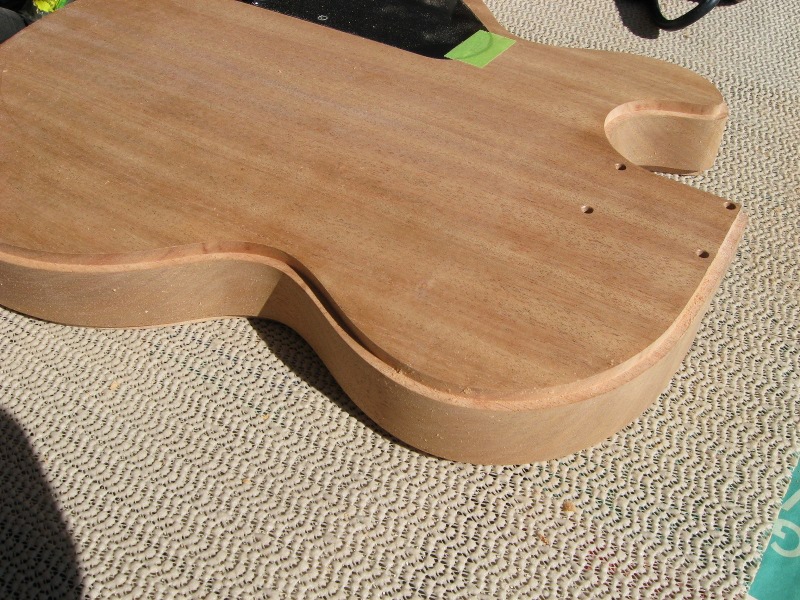
First, we have to do a little bit of prep work. It's important when routing curves to do them in the right order so as to reduce the risk of tear-out. StewMac has an article that describes the process pretty well, but essentially what you have to do is a series of "climb" cuts, then come back around in the opposite direction to finish it off.

08_climbcuts_sm.gif

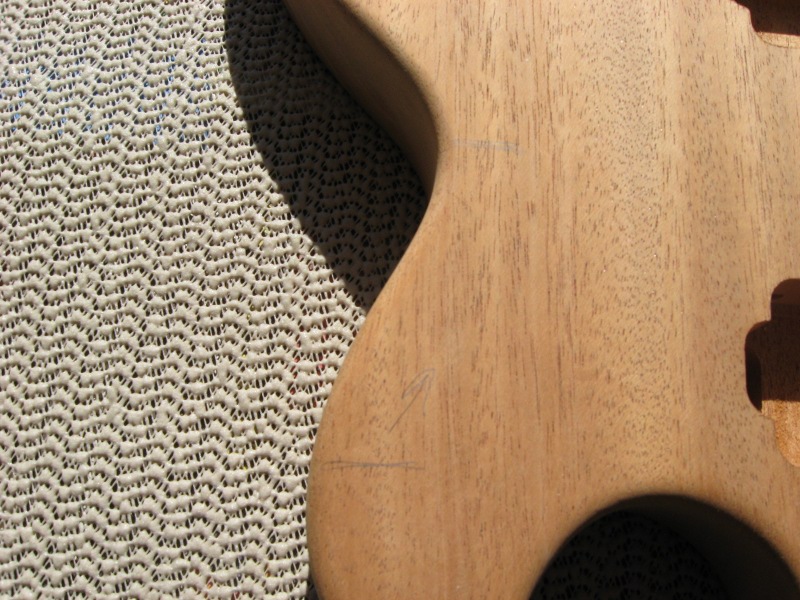
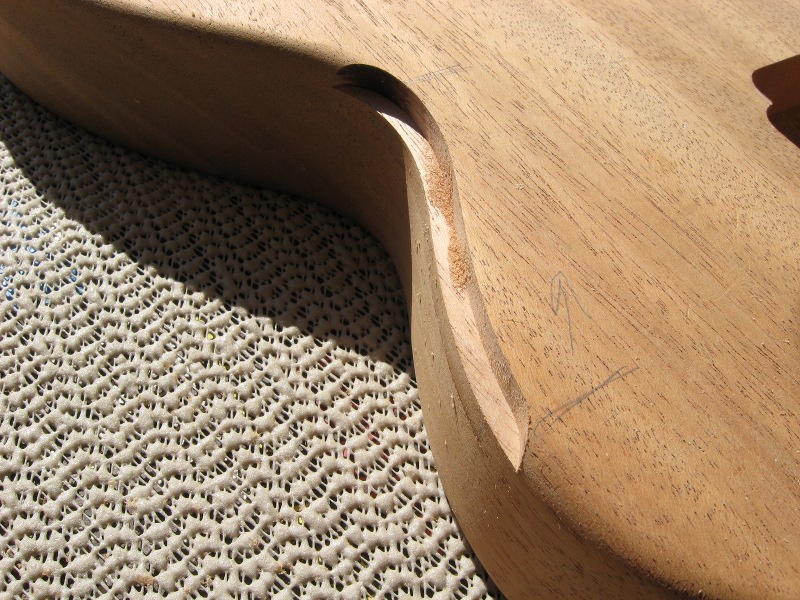
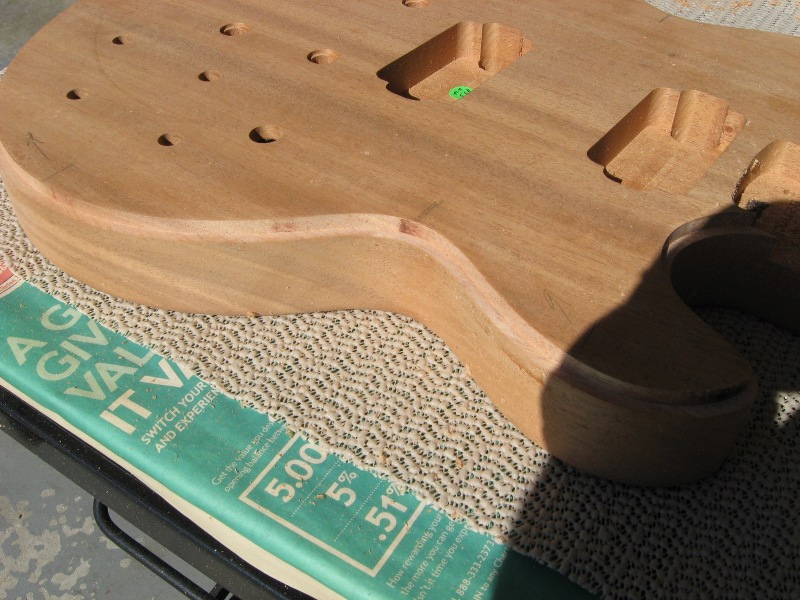
I thought it would be a good idea to mark the start/stop points so I wouldn't have think about them while fiddling with a running router. Hate to chew that lower horn off in a fit of stupid. A quick set of pencil marks and arrows in a few strategic places, and we're there.

IMG_2151_Sm.JPG

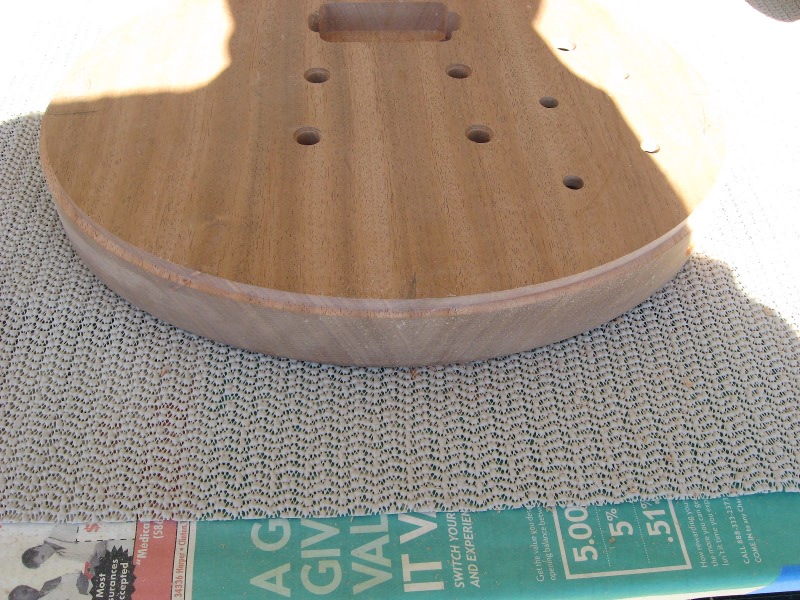
Also, notice that padding the body is sitting on? That's rubber drawer liner. You can buy what they call "router mats", but rubber drawer liner is sometimes easier to find and you get a lot more liner in a roll. It's also thinner, which seems better to me, but that's just me. Either way, you gotta have it for holding parts in place against the force of the router bit's aggressions. It's a non-marring non-skid surface. Highly recommended for hand-held router work.

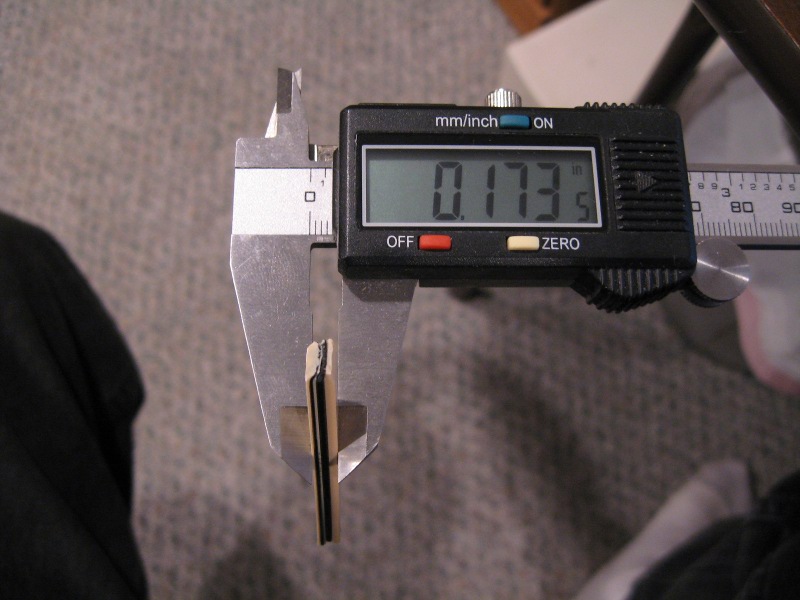
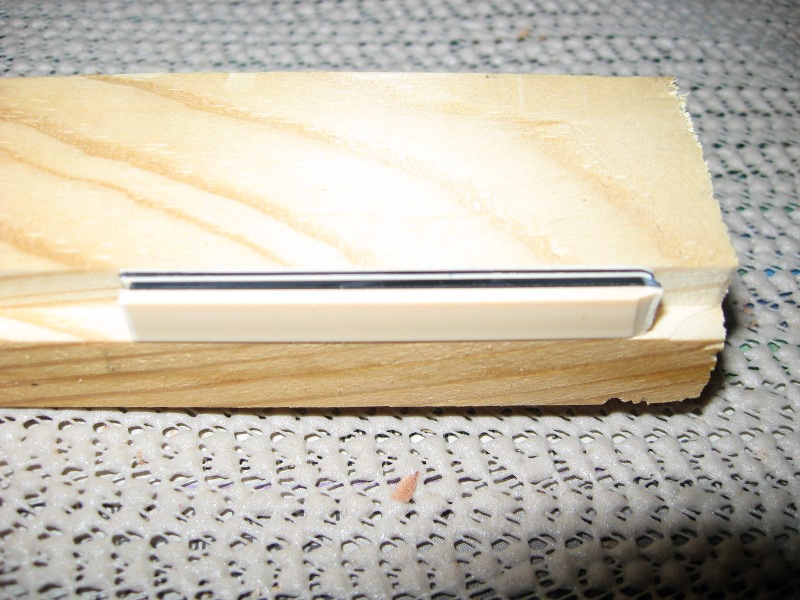
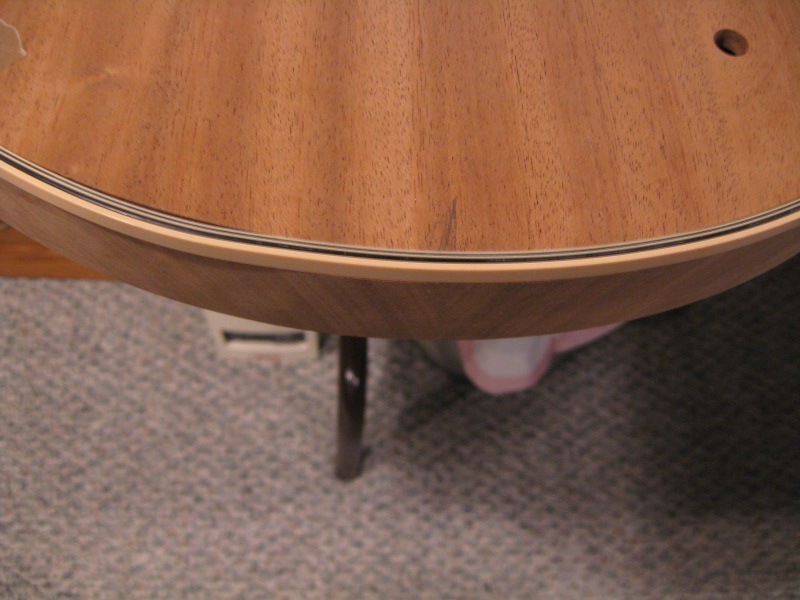
Next, we need to know how much of a ledge we need to cut. According to the supplier, built-up binding expands. They don't say why, and I don't suppose it matters as long as you know it does so you can adjust. In any event, the individual pieces I used should have added up to .160", but a quick peek with Mr. Caliper says...

IMG_2169_Sm.JPG


Holy growth spurt, Batman! We got an extra 13+ thousandths to compensate for!

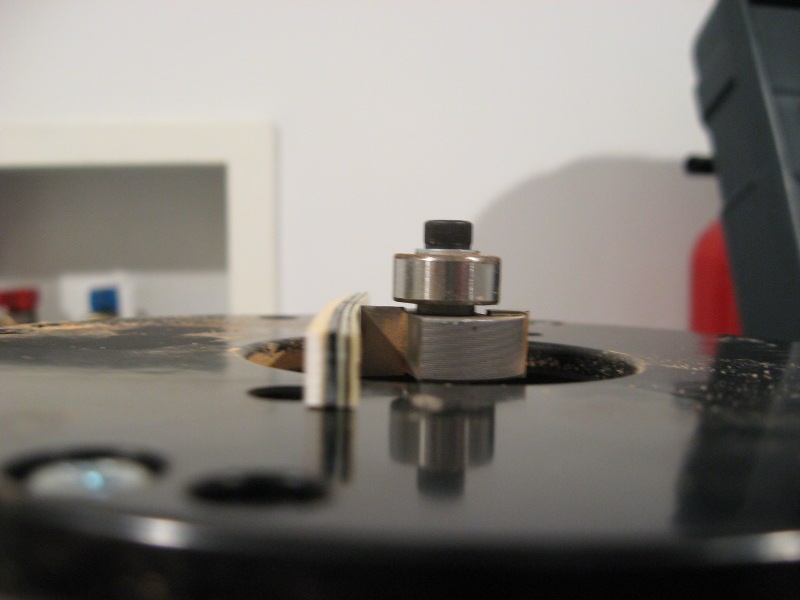
Remember earlier in the thread when I said "buy the whole set of offset bearings because you know you want to?" Yeah. Here's where it pays off. If I'd have bought just the .160" bearing, I'd be all sorts of pissed off having to order another $5-$6 bearing and pay $9 shipping on it. Then I'd be down ~$30 for two bearings when I could have the whole bloody set for $99 and never have to worry again regardless of the binding job. Let's face it: if you're going to spend the time/money to do this, you know you're going to do it again. Otherwise, you may as well just pay somebody to do it the first time.

As for depth, we'll sorta wing it. Lay a piece of binding next to the bit, and adjust the depth until it looks close...

IMG_2183_Sm.JPG

Then, find a piece of scrap something-or-other to make some test cuts on. I happened to have some lengths of 1x2 fuel... adjust the depth a little at time and keep cutting until the little piece of binding fits nice...

IMG_2176_Sm.JPG

It'll never be perfect, and actually, I'm thinking you don't want it to be. Seems as though you'd want the cutout to be a couple/few thousandths shallow so you're able to shave a couple/few thousandths off the binding once installed in order to level it with the body and get rid of any inconsistencies in the binding material. I may get schooled later, but that's the way I'm going now.

Ok. We know where to cut and when, how much, and we're all adjusted up and held in place. I think we're ready to teach that body a lesson.

IMG_2155_Sm.JPG

IMG_2156_Sm.JPG

 
And so on. Then, we reverse the cutting direction to finish it off...

IMG_2157_Sm.JPG

IMG_2158_Sm.JPG

IMG_2159_Sm.JPG

Then, flip the little rascal over and do it from behind...

IMG_2162_Sm.JPG

IMG_2163_Sm.JPG

And this is sorta how the binding fits into that channel...

IMG_2172_Sm.JPG

Stay tuned! For our next trick, we'll actually install some binding.​
 
Cagey, if I haven't said it before, permit me to make up for a horrible omission:


You're my hero.


Bagman
 
Awww... you're turnin' my head! <grin>

And as long as we're on southern euphemisms, this project is getting to be like a big ol' plate o' spaghetti! Seems like the more I eat, the bigger it gets!

But, it keeps me off the streets.
 
Balls of steal    :icon_biggrin:

Great work Cagey  :icon_thumright:  and thanks for the pic's too.

 
Two wildly different suggestions for the bridge since the TOM/Stop holes are already there:

1)  12-string

2) Bigsby

I'm sure the Bigsby probably falls in to your "bad trem designs" category, but I think it could look really nice on that body. 

The 12 is even a little further out there, but its something different that wouldn't require any additional labor.
 
I'm going to do an opaque finish, so I'm debating filling in those TOM/STP holes and re-drilling for another bridge, perhaps another Scartozi, but I haven't committed to anything yet. I'm just not a big fan of the TOM/STP solution. Same with that swarm of control holes. Too many of them, and in the wrong places (at least, for me). In any event, I think if I got the urge for a 12-string, I'd want an acoustic.

I've always loved the look of the Bigsby design, but you're right - it's a non-starter for me. Too inconsistent and not enough range. Although, to be fair, for as much as I bitch about vibrato bridge design, I really don't use them a great deal. I could put a Bigsby on there for appearance's sake, and just ignore it. It would look cool. I'll have to think about it.
 
Even if you accidentally put gold hardware on it, I'm willing to bet it'll still look pretty good.
Don't forget to consider the neck pocket angle since it's got those TOM holes.
 
AutoBat said:
Even if you accidentally put gold hardware on it, I'm willing to bet it'll still look pretty good.
Don't forget to consider the neck pocket angle since it's got those TOM holes.

I'm still not committed on the hardware yet. I hadn't considered the Bigsby at all until Pelagard mentioned it, but the more I think about it, the cooler-looking it gets in my head. I hate to encourage them to make more, though...

Also, while I was looking around, I was reminded of those Schaller Hannes bridges...

48055.jpg

What would be wrong with one of those? Except, you reminded me of the dreaded angled neck pocket possibility, so I checked it. Sure enough, the pocket falls away ~.050" toward the headstock, so there's some built-in tilt to compensate for that tall TOM bridge. Grrrr!

Oh, well. Won't be the first time this body has felt the hot breath and sharp teeth of the routerbeast. I'll just end up with a 680 mod instead of a 720 mod.
 
Back
Top