Leaderboard

Trans Red/RSA JM

I agree, rounded corners are the way to go.

I took a sanding block to my Strat neck, rounding off the corners, as soon as I was sure it would mount properly. Can't say I was worried about voiding the warranty, or that I was even aware that it would void the warranty. Just didn't like the square corners........

If and when you're comfortable doing it, do it!

:icon_thumright:
 
I'll probably wait until the whole thing is finished and the setup is done so I'll know that the neck doesn't have any problems before doing that. I temporarily mounted it but no setup has been done yet. It's roasted maple so I'm not too worried about stability.
 
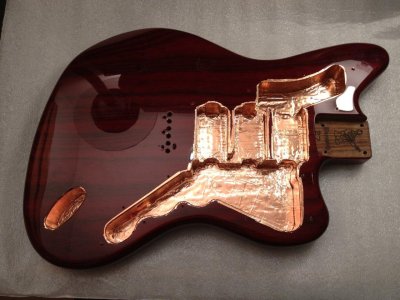
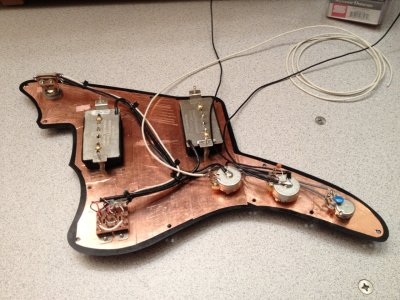
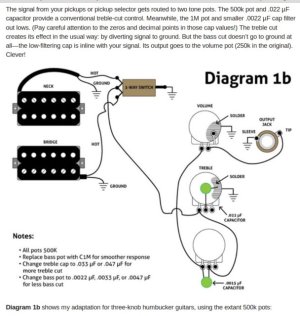
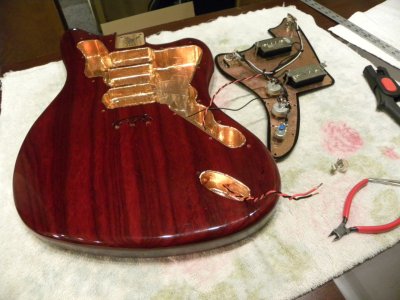
The other day(s), I shielded the cavities with copper tape and covered the inside of the pickguard with it. Today I wired the pickups, controls and switches. As a reminder, I'll put the wiring diagram in here with the photos. The white and two black wires coming off the p/g are for the jack and the bridge ground wire. On the treble bleed, I used a .047 cap and on the bass bleed I put a .0022 cap. The mini pot is the bass bleed. All pots are 500K linear. Between the main cavity and the jack route, I may run a separate ground wire to connect the copper all together rather than just depend on the grounding of the jack plate to do the trick. Next time at it, I'll double check everything and test to make sure it's all done correctly.

edit: The wiring diagram I used was marginal. That has been replaced with one that shows the correct way to wire a bass bleed. I found this in an article written by Joe Gore.
 

Attachments

  • IMG_1167.JPG
    IMG_1167.JPG
    183.5 KB · Views: 29
  • IMG_1168.JPG
    IMG_1168.JPG
    281.8 KB · Views: 24
  • Joe Gore Bass Bleed 640x609.jpg
    Joe Gore Bass Bleed 640x609.jpg
    71.8 KB · Views: 9
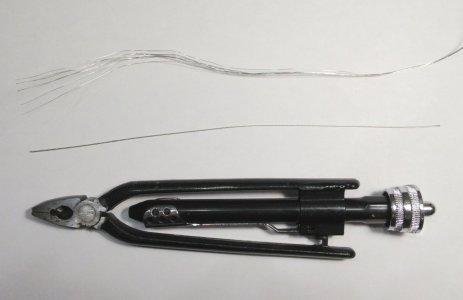
I took some ground wire stripped from a shielded cable and wound the strands tightly with a pair of safety wire pliers. The photo shows the ground wires before and after winding. Then I ran it through the hole between the cavities and fixed it to the wall of each with a piece of copper tape. Simple and effective.
 

Attachments

  • IMG_1176.JPG
    IMG_1176.JPG
    88.1 KB · Views: 19
BigSteve22 said:
Nice, neat wiring! A man after my own heart......

Looking good Bro!

:icon_thumright:
Thanks. I must confess you inspired me. I was going to do the copper tape in the cavities but hadn't thought of doing the whole pickguard back as opposed to just under the controls. That was a good idea. It encapsulates everything except for the pickups.

The next step is to get the string ferrules installed. That requires I change out the greasy table on my drill press for something clean and flat. Since the holes were drilled before finishing, would it be a good idea to gently turn a T-handled tapered reamer in the hole to clean out the finish so it doesn't chip out when I press them in?
 
Oh, yeah. I tested everything earlier by clipping the jack leads to a guitar cable and touching the pickup magnets with a small screwdriver. I was even able to test the tone controls that way.
 
Rgand said:
...would it be a good idea to gently turn a T-handled tapered reamer in the hole to clean out the finish so it doesn't chip out when I press them in?
I've never installed string ferrules, but I have used a tapered reamer on the neck bolt holes of finished bodies, and headstock tuner reams, with good results. Careful and gentle would be the words of the day for that job, just go slow because the reamer cuts a lot faster than it looks like it would.

On holes that don't go all the way through, a countersink works well. A nice new, sharp countersink from the local home or hardware store is all you need, and costs less than $10. (A small price to pay when you consider what the project's total cost is.)

As for the greasy drill press table, I use a piece of maple plywood and a terry cloth towel to protect and cushion the work.
 
Rgand said:
I was going to do the copper tape in the cavities but hadn't thought of doing the whole pickguard back as opposed to just under the controls. That was a good idea. It encapsulates everything except for the pickups.

Unfortunately, it's the pickups that pick up 99% of the noise.

When it comes to noise suppression in the guitar itself, the best you can do is to use shielded cable wherever practical.

Anything past that is just added cost, wishful thinking and a lotta work. The only exception is around the control area of the pickguard. Some foil there will eliminated that crackly noise you sometimes hear on some guitars when touching the pickguard, which is static generated by friction with the plastic. The foil will bleed away the charge to ground.

Of course, it doesn't hurt anything to do it. It's just pointless.
 
Rgand said:
Since the holes were drilled before finishing, would it be a good idea to gently turn a T-handled tapered reamer in the hole to clean out the finish so it doesn't chip out when I press them in?

I use a Dremel tapered grinding stone, spun by hand, to remove the finish from around most drilled holes.

Dremel_Grinding_Stone_EZ68601_952_(EN)(4).jpg


Bigger holes (bridge studs) get sandpaper wrapped around a dowel.
 
BigSteve22 said:
As for the greasy drill press table, I use a piece of maple plywood and a terry cloth towel to protect and cushion the work.
Yeah, I had something like that in mind. After I remove the machine vise and articulating table. Terrycloth towels are plentiful here. We put them inside the doors for the dogs to step on when they come in.
 
Verne Bunsen said:
Rgand said:
Since the holes were drilled before finishing, would it be a good idea to gently turn a T-handled tapered reamer in the hole to clean out the finish so it doesn't chip out when I press them in?

I use a Dremel tapered grinding stone, spun by hand, to remove the finish from around most drilled holes.

Dremel_Grinding_Stone_EZ68601_952_(EN)(4).jpg


Bigger holes (bridge studs) get sandpaper wrapped around a dowel.
Good idea. I have several of those. Thanks.
 
Rgand said:
Verne Bunsen said:
Rgand said:
Since the holes were drilled before finishing, would it be a good idea to gently turn a T-handled tapered reamer in the hole to clean out the finish so it doesn't chip out when I press them in?

I use a Dremel tapered grinding stone, spun by hand, to remove the finish from around most drilled holes.

Dremel_Grinding_Stone_EZ68601_952_(EN)(4).jpg


Bigger holes (bridge studs) get sandpaper wrapped around a dowel.
Good idea. I have several of those. Thanks.
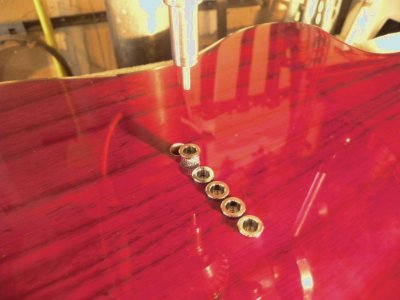
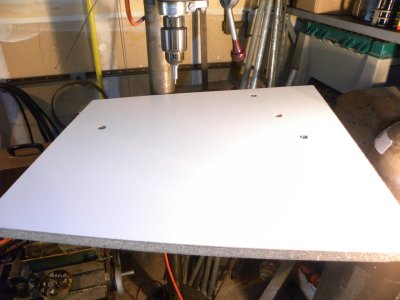
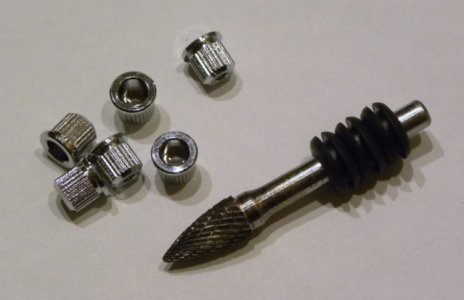
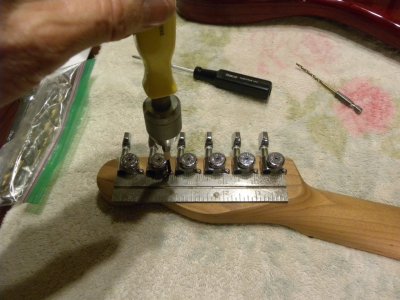
OK, I thought I had several of those. What I did have, though, is a carbide burr with a 1/4" shaft I used. For better hand control, I slid three rubber grommets on the shaft. It worked great. I then pressed the ferrules in with my Stewart-MacDonald installation tool on the makeshift table I temporarily put on the drill press. If the table looks out of square, that's because it isn't rectangular. It's just a lopsided scrap I had lying around.
 

Attachments

  • DSCN6502.JPG
    DSCN6502.JPG
    90.5 KB · Views: 13
  • DSCN6498.JPG
    DSCN6498.JPG
    153.4 KB · Views: 8
  • DSCN6493.JPG
    DSCN6493.JPG
    38.4 KB · Views: 10
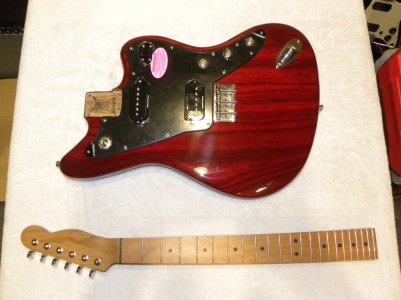
I With the ferrules in, I wired the output jack and installed the bridge and pickguard with all the goodies on it. Then I installed the Hipshot staggered, locking tuners on the neck. Next step will be to put the neck on and install the Bigsby. Then all that's left is to adjust and get the action set up.

While I was at it, I also put the Schaller strap locks on.
 

Attachments

  • DSCN6504.JPG
    DSCN6504.JPG
    217.1 KB · Views: 27
  • DSCN6513.JPG
    DSCN6513.JPG
    216.6 KB · Views: 24
  • DSCN6523.JPG
    DSCN6523.JPG
    183 KB · Views: 41
BigSteve22 said:
Look'n good there Brother. Can't wait to see it all strung up!

:icon_thumright:
That makes two of us.  :icon_biggrin:

Cagey said:
Won't be long and you'll be wankin' and crankin'  :laughing7:
:turtle:

I ordered this case today. I inquired about several from different sources but this is the only one that the seller says will fit a Jazzmaster with a Bigsby on it. The price is fair and if it doesn't fit, I have 30 days to return it if it doesn't. The photos show it brown but it's actually black, not that it matters any. The only SKB (my first choice) that would work was a rifle case that was a foot too long and quite expensive. Somewhere between the two in cost was Fender's tweed case they sell for the Limited Edition American Special Jazzmaster with the Bigsby. That will be my second choice if this one doesn't pan out.
 
Every time I look at this thread I'm knocked out by just how pretty that body is. It's coming together very nicely and I can't wait to see it complete!
 
Verne Bunsen said:
Every time I look at this thread I'm knocked out by just how pretty that body is. It's coming together very nicely and I can't wait to see it complete!
Thanks, I'm really pleased with it. It'll be nice when I can finally pull the protective sheet off the pickguard.
 
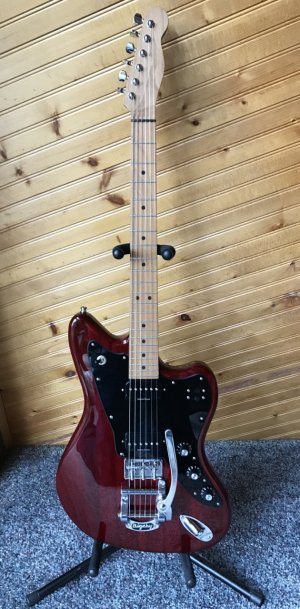
The day is here. It's finished. I'm really pleased. I haven't had much chance to try it out but I did get a photo of it.
 

Attachments

  • JM Finished 1Sm.JPG
    JM Finished 1Sm.JPG
    209.5 KB · Views: 65
Back
Top