

Prometheus
Junior Member
- Messages
- 135
All my guitars have names. And for this one, I arrived at.... “Seraphina“. The name is the feminine form of the Latin name Seraphinus. The biblical word seraphim means "fiery ones", and the seraphim were an order of angels, described as having six wings, and continuously singing.
I have big plans for this build, but it's going to take a while. For now, I've below listed the part specs and my outline. As I progress through the steps of the build (or run into difficulties), I'll post updates and pictures. Believe it or not (because I've had a year to mull over my plans), I have a lot of the steps detailed already, so I'll post those with each step.
Comments and suggestions are always welcome. In fact, it's only due to the input of the contributors in this forum that I've been able to get straightened out for this project. So my thanks go out to you all already, for the invaluable assistance you've already provided.
Body
I established a large number of design goals for this guitar. I wasn't even sure whether I‘d be able to incorporate them all.
Base Design – ("Look and Feel" / Theme / Aesthetic)
Body
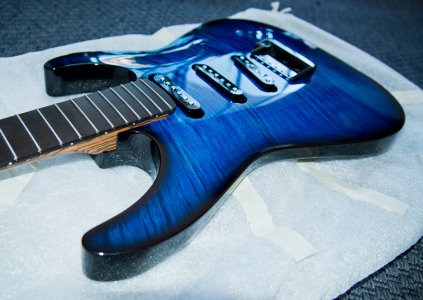
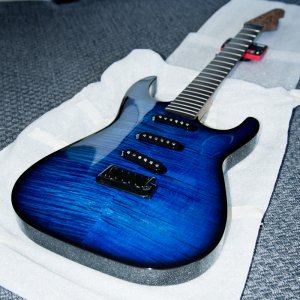
I chose the Soloist over the Strat body because I liked the better access to the high frets, and the silhouette is just a shade more elegant. But still "a Strat". I wanted it pretty, thus the flame maple laminate, which was a Warmoth "Unique Choice". The raw piece had wiggles in it, which I chose on purpose because they looked like frozen vibrations. But they pretty much disappeared in the dyeing. Oh well.
The body I ordered as a one-piece, to avoid a seam down the middle with potentially different densities on either side of the bridge. But a mistake was made in production and I got a bookmatched two-piece instead. But that also avoids the unbalanced density issue, so that's fine. I chose alder for its nice weight and classic tone. And all that fuss just for whatever miniscule amount the body wood contributes to tone. But hey, alder (or ash) is "vintage" (and cheap).
A very nice surprise when it arrived was how light it is. They must have found a really nice piece of stock for the body blank.
Neck
The neck I wanted to be a little less "sharp" than the classic maple-on-maple, especially as my pickups will be plenty bright. This machine will be crankin' out a lot of blues in the years to come, so a "middier" tone was welcome. And I wanted the shaft raw, to avoid the finish issues. So after much research and mental struggle, I settled on Bocote, purported to be a little less bright than maple, but its high hardness and density should retain a stratty tone. Originally, I had a Unique Chice Ziricote fingerboard, but it failed during manufacture. Too bad – it wuz reel purty - looked like a landscape picture of hills or mountains disappearing to the horizon. Failing finding an adequate Ziricote replacement, I opted for Black Ebony instead. And in counterpoint to the warmth of the Bocote shaft, its brightness might help preserve a little of the edge.
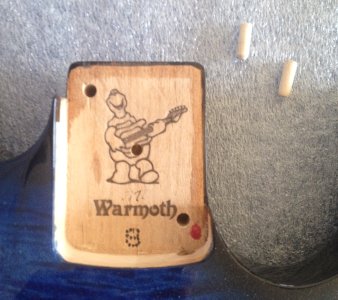
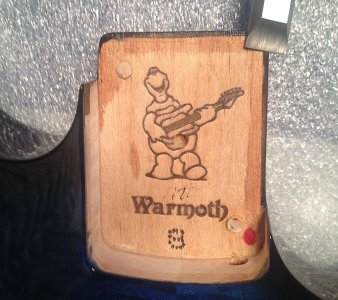
No face dots, because the whole guitar will have a very "clean" look. I chose the Warhead headstock because I think it's more elegant than the Strat one. Originally I wanted it slanted, but Warmoth couldn't do that in a Vintage Modern style, so straight it is. And they couldn't do the body-matched headstock veneer either, so although it's a lot of work, I plan to do the job myself. There will be no logo on the peghead face, but I may put a "maker's mark" on the back of it.
The frets are stainless (Oooo!), SS6150. I didn't want skinny low vintage ones, or big tall railroad ties, but did want them wide enough to make sliding easier, and tall enough to be able to get a good bite for bending. I'll be rolling the edges a tad above the 12th, and dressing all the fret ends. But I'll otherwise leave them alone for at least a few months, until the neck settles in, and only then worry about perfect flatness and address any necessary redressing.
I entertained the idea of a roller nut, but decided I'd try a TUSQ first, and see if I find any issues while tuning, string bending and tremming. On top of which, a solution with no moving parts is more easily replaced, and much less prone to wear and failure than one many little moving bits.
Pickups
I wanted a classic, "vintage"-ey sort of Strat, and that meant S-S-S. That narrowed down the pickup choices to about a million. And I decided to go noiseless... sure, hum is "vintage", but really, who wants it? Some recent models sound very good, to the point of being practically indistinguishable from single coils. This narrowed it down a whole bunch.
I looked at all the makers, and finally settled on a set of the Kinman Impersonator 54s. Nobody I knew was using them, and there are few reviews and soundclips available, but all I could find were glowing, so I went for it. Info (from their website and Wikipedia, links below):
When ordering, I specified my bridge string spacing and neck radius, and they shipped pickups to match. They each have different pole spacing and overall polepiece height curvature so that they match this guitar's strings in all three locations. And they're mildly staggered (fixed) for vintage Strat string-to-string volume balance, with consideration for an unwound G.
The differential polepiece spacing may not make an appreciable tonal improvement, but it certainly can't hurt. As for the stagger, I prefer an adjustable or "tuned" stagger to a fixed flat pickup, because I can't stand string-to-string imbalance, and prefer "vintage" to "modern".
Wikipedia http://en.wikipedia.org/wiki/Kinman_Guitar_Electrix Kinman website http://kinman.com/index.php Kinman Impersonator 54 http://www.kinman.com/guitar-pickups/stratocaster/impersonator54/index.php
Color
The back I decided to leave plain because, well, it's just the back! It's gloss black, which goes with my rather simple color scheme. Namely, every bit of hardware is jet black – knobs, bridge, trem arm... even the nut is black TUSQ. The flame maple top is dyed blue with a black burst. The only shiny-bright metal bits will be the frets, the strings, and the polepieces.
The tuners are black Shaller M6 minis, locking. They're top-lockers, which I thought was very cool, and I'd never actually seen any in person, or heard of anybody using 'em. And they're 25% lighter than the rear-lockers. So I had to have them, but boy, were they tough to get. Unfortunately, they don't come staggered. But naturally, that will become available as soon as I install these.
Tremolo Bridge
The bridge is by Babicz, and it looks very well-engineered. It came anodized black, but with a big logo on it, so I painted the whole thing with black engine enamel and baked it. No logo now! And my finish is probably more durable too.
I like the design of the saddles. They have big bottoms, and rest flat on the base plate. And the cam-style height adjustment system is brilliant. I also like how they all clamp together. All these features together should make for one solid transmissive unit. It has "import" string spacing. I had to ship the bridge to Warmoth so that they could get all the dimensions right.
The bottom was not perfectly flat, so I lapped it with wet-dry sandpaper on a glass slab. It's flat now! And it mates perfectly with the milled-steel Callaham block. In case I want to deck it someday, I very slightly rounded the sharp angle that breaks the plane of the baseplate down (up?) towards the front edge. It should now move more easily when in body contact, and dig a little less into the finish of my pretty carved laminate top.
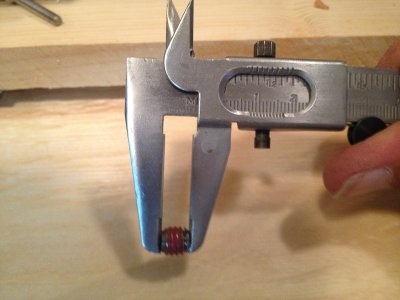
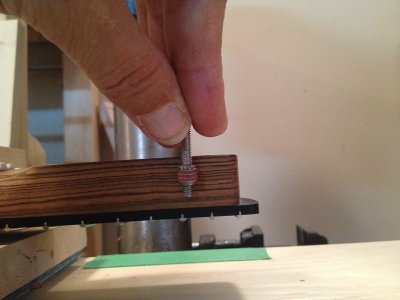
I'll be using 6 Callaham hardened-steel mounting screws, which I've polished for the smoothest possible travel. This should allow the bridge to slide with the minimum frictional impediment, but I have a second set of screws that I plan on putting a groove into, to negate the sliding altogether by creating a fixed pivot axis, and this will (hopefully) optimize a full-floating setup for minimal wobblitudiness.
OK, that's plenty for now. Many more long-winded posts to come. Thanks for tuning in.
I have big plans for this build, but it's going to take a while. For now, I've below listed the part specs and my outline. As I progress through the steps of the build (or run into difficulties), I'll post updates and pictures. Believe it or not (because I've had a year to mull over my plans), I have a lot of the steps detailed already, so I'll post those with each step.
Comments and suggestions are always welcome. In fact, it's only due to the input of the contributors in this forum that I've been able to get straightened out for this project. So my thanks go out to you all already, for the invaluable assistance you've already provided.
Body
- Warmoth Soloist.
- Carved-top. Laminate of flame maple (UC). Finished in blue dye with black burst.
- Two-piece bookmatched alder body. Back finished solid gloss black.
- 3 EMG pickup routes. Tummy cut. Contoured heel.
- Rear-routed control cavity. Solid black cavity covers. Double battery route.
- No top or side holes pre-drilled (except for trem route and bridge mounting screw holes).
- Warmoth Vintage Modern - single truss rod, top-adjust, 25.5" scale, 10"-16" compound radius.
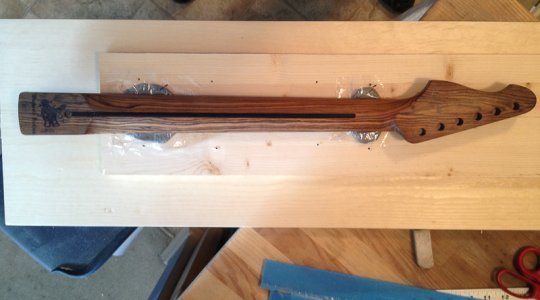
- Warhead pegboard profile.
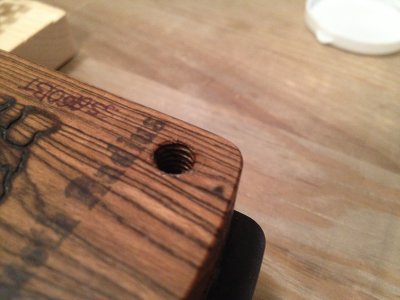
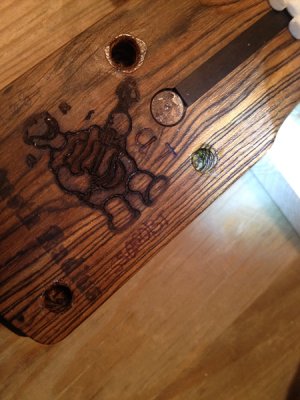
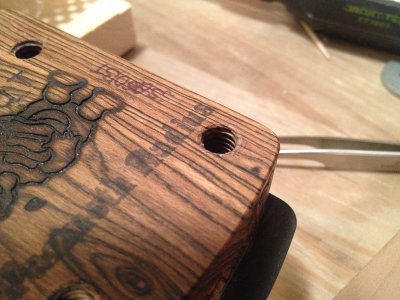
- Bocote shaft. Raw.
- Ebony skunk stripe.
- 22 stainless steel frets (6150).
- Ebony fingerboard, MOP side dots. No face dots.
- TUSQ XL black nut, 2 11/16" width.
- No pre-drilled mounting holes.
- Kinman Impersonator 54 set (noiseless). Narrow baseplates. Matched pole staggers. Black covers.
- Schaller Megaswitch (8P5T), provides B / BM / M / MN / N, plus additional switching.
- Traditional "top hat" style, black.
- Babicz bridge, "import spacing", black. May be full-floated, spring-decked, or blocked.
- Callaham machined steel block.
- Callaham hardened steel bridge mounting screws.
- Schaller M6 mini locking tuners, top-loading, black.
- Schaller, black.
I established a large number of design goals for this guitar. I wasn't even sure whether I‘d be able to incorporate them all.
Base Design – ("Look and Feel" / Theme / Aesthetic)
- The core design is an S-S-S Strat-style electric. The overall approach will be to lean heavily toward the traditional design, in order to be able to produce “vintage“ tone.
It should be a “showpiece“ instrument: eye-catching but not gaudy. The body will be flame maple, blue-dyed with black burst. All hardware will be black.
It will incorporate only the highest-quality components. Non-standard components and materials will be applied whenever possible, if they can have a positive effect on tone or function. Or whenever they may have a positive effect on functionality or durability, but again so long as impact on tone is positive or neutral.
- It will incorporate modern construction techniques. Such deviations from traditional methods are intended to enhance the overall aesthetic without upsetting it, and will be used wherever they can improve build quality, durability and serviceability. Or whenever they could have a positive effect on tone production or quality.
- It will offer “superstrat“ functionality, which I define as features that provide additional tonal versatility and/or control.
Such functionality must be “simple and stealthy“, in that any additional visible components should minimally impact the overall aesthetic, and must in no way detract from the base “vintage“ tone.
Body
I chose the Soloist over the Strat body because I liked the better access to the high frets, and the silhouette is just a shade more elegant. But still "a Strat". I wanted it pretty, thus the flame maple laminate, which was a Warmoth "Unique Choice". The raw piece had wiggles in it, which I chose on purpose because they looked like frozen vibrations. But they pretty much disappeared in the dyeing. Oh well.
The body I ordered as a one-piece, to avoid a seam down the middle with potentially different densities on either side of the bridge. But a mistake was made in production and I got a bookmatched two-piece instead. But that also avoids the unbalanced density issue, so that's fine. I chose alder for its nice weight and classic tone. And all that fuss just for whatever miniscule amount the body wood contributes to tone. But hey, alder (or ash) is "vintage" (and cheap).
A very nice surprise when it arrived was how light it is. They must have found a really nice piece of stock for the body blank.
| I'm using the word "vintage" a few times here. Because I've heard a lot of differing opinions on what "vintage" really is, I thought I'd better state my definition, of which tone is the central element, with aesthetics having a slightly lesser emphasis. To me, for a strat, it starts with S-S-S pickups. Not high-output or "hot" – in fact, the opposite. It also means a trem bridge based on the original Fender design – so no Floyds, and not a hard-tail. I feel both 6-screw and 2-post pivots qualify, including several popular third-party bridges. Scale length of 25.5". That pretty much takes care of the essentials – it should be able to produce tones fundamentally similar to those of Marvin, Gilmour, Knopfler, Clapton, Beck, Johnson, Gallagher, Vaughan, Guy. For the look, a Stratocaster-ish body silhouette, and Stratocaster-ish peghead. Changes to other elements, so long as minor or unobtrusive, are fine with me. |
Neck
The neck I wanted to be a little less "sharp" than the classic maple-on-maple, especially as my pickups will be plenty bright. This machine will be crankin' out a lot of blues in the years to come, so a "middier" tone was welcome. And I wanted the shaft raw, to avoid the finish issues. So after much research and mental struggle, I settled on Bocote, purported to be a little less bright than maple, but its high hardness and density should retain a stratty tone. Originally, I had a Unique Chice Ziricote fingerboard, but it failed during manufacture. Too bad – it wuz reel purty - looked like a landscape picture of hills or mountains disappearing to the horizon. Failing finding an adequate Ziricote replacement, I opted for Black Ebony instead. And in counterpoint to the warmth of the Bocote shaft, its brightness might help preserve a little of the edge.
No face dots, because the whole guitar will have a very "clean" look. I chose the Warhead headstock because I think it's more elegant than the Strat one. Originally I wanted it slanted, but Warmoth couldn't do that in a Vintage Modern style, so straight it is. And they couldn't do the body-matched headstock veneer either, so although it's a lot of work, I plan to do the job myself. There will be no logo on the peghead face, but I may put a "maker's mark" on the back of it.
The frets are stainless (Oooo!), SS6150. I didn't want skinny low vintage ones, or big tall railroad ties, but did want them wide enough to make sliding easier, and tall enough to be able to get a good bite for bending. I'll be rolling the edges a tad above the 12th, and dressing all the fret ends. But I'll otherwise leave them alone for at least a few months, until the neck settles in, and only then worry about perfect flatness and address any necessary redressing.
I entertained the idea of a roller nut, but decided I'd try a TUSQ first, and see if I find any issues while tuning, string bending and tremming. On top of which, a solution with no moving parts is more easily replaced, and much less prone to wear and failure than one many little moving bits.
Pickups
I wanted a classic, "vintage"-ey sort of Strat, and that meant S-S-S. That narrowed down the pickup choices to about a million. And I decided to go noiseless... sure, hum is "vintage", but really, who wants it? Some recent models sound very good, to the point of being practically indistinguishable from single coils. This narrowed it down a whole bunch.
I looked at all the makers, and finally settled on a set of the Kinman Impersonator 54s. Nobody I knew was using them, and there are few reviews and soundclips available, but all I could find were glowing, so I went for it. Info (from their website and Wikipedia, links below):
- Magnets – Alnico. Makes for low string pull, longer sustain and less Strat-itis. Can be played hard with no compression and without distorting (my amp can do that for me).
- Construction – Noiseless, using a laminated H bobbin serving as a low-resistance noise sensor coil. Total part count per pickup = 169 (Yikes!!! God forbid I should ever open one up and have it all fall apart in my lap).
- Tone - "Non-aged", said to sound like new pickups did in '54. Good tracking, sensitive, slightly scooped mids, brilliant highs. Design derived from a custom set made for Hank Marvin.
- Brand users – incl. Crosby, Govan, Marvin, Gilmour, Paisley. At this point I didn't bother reading the rest.
When ordering, I specified my bridge string spacing and neck radius, and they shipped pickups to match. They each have different pole spacing and overall polepiece height curvature so that they match this guitar's strings in all three locations. And they're mildly staggered (fixed) for vintage Strat string-to-string volume balance, with consideration for an unwound G.
The differential polepiece spacing may not make an appreciable tonal improvement, but it certainly can't hurt. As for the stagger, I prefer an adjustable or "tuned" stagger to a fixed flat pickup, because I can't stand string-to-string imbalance, and prefer "vintage" to "modern".
Wikipedia http://en.wikipedia.org/wiki/Kinman_Guitar_Electrix Kinman website http://kinman.com/index.php Kinman Impersonator 54 http://www.kinman.com/guitar-pickups/stratocaster/impersonator54/index.php
Color
The back I decided to leave plain because, well, it's just the back! It's gloss black, which goes with my rather simple color scheme. Namely, every bit of hardware is jet black – knobs, bridge, trem arm... even the nut is black TUSQ. The flame maple top is dyed blue with a black burst. The only shiny-bright metal bits will be the frets, the strings, and the polepieces.
The tuners are black Shaller M6 minis, locking. They're top-lockers, which I thought was very cool, and I'd never actually seen any in person, or heard of anybody using 'em. And they're 25% lighter than the rear-lockers. So I had to have them, but boy, were they tough to get. Unfortunately, they don't come staggered. But naturally, that will become available as soon as I install these.
Tremolo Bridge
The bridge is by Babicz, and it looks very well-engineered. It came anodized black, but with a big logo on it, so I painted the whole thing with black engine enamel and baked it. No logo now! And my finish is probably more durable too.
I like the design of the saddles. They have big bottoms, and rest flat on the base plate. And the cam-style height adjustment system is brilliant. I also like how they all clamp together. All these features together should make for one solid transmissive unit. It has "import" string spacing. I had to ship the bridge to Warmoth so that they could get all the dimensions right.
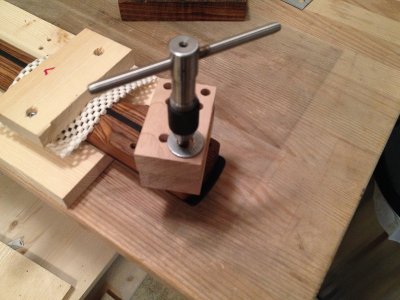
The bottom was not perfectly flat, so I lapped it with wet-dry sandpaper on a glass slab. It's flat now! And it mates perfectly with the milled-steel Callaham block. In case I want to deck it someday, I very slightly rounded the sharp angle that breaks the plane of the baseplate down (up?) towards the front edge. It should now move more easily when in body contact, and dig a little less into the finish of my pretty carved laminate top.
I'll be using 6 Callaham hardened-steel mounting screws, which I've polished for the smoothest possible travel. This should allow the bridge to slide with the minimum frictional impediment, but I have a second set of screws that I plan on putting a groove into, to negate the sliding altogether by creating a fixed pivot axis, and this will (hopefully) optimize a full-floating setup for minimal wobblitudiness.
OK, that's plenty for now. Many more long-winded posts to come. Thanks for tuning in.


")