Hey fellas,
So I haven't updated in a while, definitely not because I haven't been working on this thing, more that I've been doing things, changing my mind, trying new things etc. and tbh I just wanted to go on a journey of discovery and sus things out on my own.
While there's a little bit online bout the use of tru-oil, I've actually found that the techniques that I've learned through experimentation are probably more useful than the guidance.
For sealer and filler there's almost nothing online, so that is a blank canvas. And experiment I certainly have!
So let's take a step back, after the previous updates I was happy to move forward. I started applying thin tru-oil coats with a view of it being the final finish. I used coffee filter paper and it was going on beautifully. The plan was to build up the coats and use the slurry method to fill pores and grain. I was so psyched at the colour, the chatoyance, the overall effect is / was breathtaking. But it wasn't filling thgaps as I'd hoped, I knew it was going to take 4-5 coats, sand back, and again and again. I could see this taking a hundred coats due to the depth of the pores and pocks I'd made. Still I was committed, so glad I did this....but you know what...I can still see clusters of white dots....
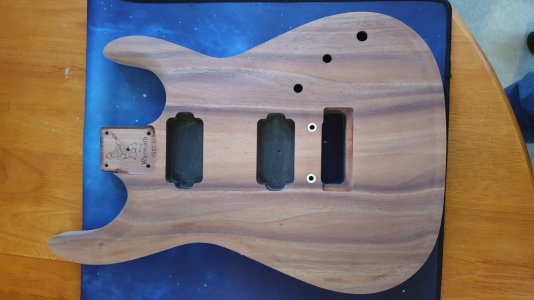
So after 5-6 layers, sand back, more layers, sand back, I slept on it, and I decided in for a penny, in for a pound. Time to get the acetone and sandpaper out. Back to square one.
I took off what I could with acetone and sanded back to 220 with the paper. For some reason I wanted one last crack at sanding these out. Maybe they were filler. An hour later. Nope, the white specks are natural for sure, because now there are more as I open up more grain. Oh FFS!!!
Why is drunk Darren such a hindrance to logical and sensible Darren, now he'll have to sort this out.
So armed with now a range of different craft knives I went to work. This time not just looking for the larger white, but all the white.
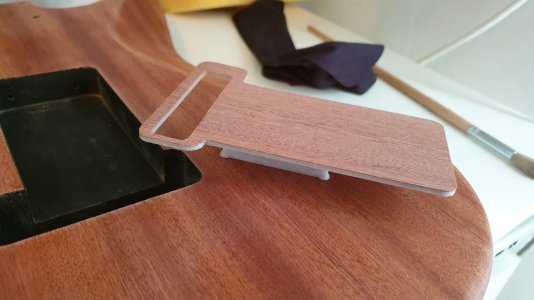
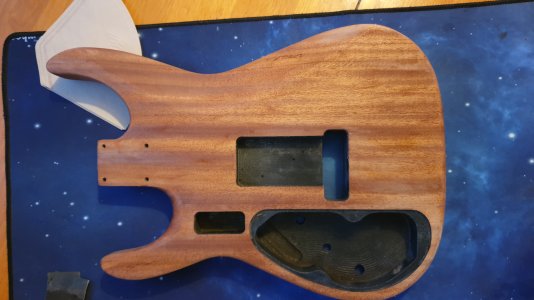
The body after I was finished was full of holes, but there was no obvious white specks now. I was somewhat content, if not a bit horrified at how much work I had left to do. I guess time to give the Birchwood Casey Filler and Sealer a chance to do what it claims.
Now this stuff doesn't really have a lot of usage guidance or anecdotal tutorials online so I went a bit OTT with my record keeping and documentation. So if you don't like detail, probably best to move to another thread, but for posterity and for the future reference of "filling grain and pores in a guitar with Birchwood Caset Filler and Sealer" (that's for the Google SEO) here is a decent workthrough including mistakes and techniques qhich I actually think worked well.
So the bottle looks like Tru-Oil and online people refer to this as cut tru-oil, thicker tru-oil or other tru-oil like comparisons. I'm not sure what these people are smoking, or what is up with their noses but the bottle is where the similarities end. This is, if I was a betting man, clear nail varnish. It has the same viscosity, it smells the same, it does the same job and it sands the same. So If you are looking for a cheaper alternative, you may be able to pick nail varnish up cheaper.
The bottle says to use generously, so my first few tries I did exactly that. I poured directly onto the body, and used coffee filter papers to smother over and left to dry. The bottle says takes 1 hour. I found 8-10 was probably more like it.
Coat One
Coat Two
Once dried I'd use 220 to sand back. If properly cured it will sand, if not it will bind and fill the paper. You know very quickly if it's cured, don't bother trying to sand when gummy, it'll pull the fill straight out of the pores.
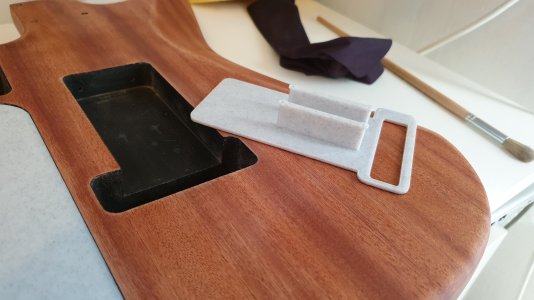
Sand Back
After the first few coats I was kind of amazed, many of the large long 10cm / 1mm valleys of dry wood grain were no longer visible at all. This doesn't just fill the pores. It hides them entirely. Many of the smaller pock marks were filled too.
You can see it at work as when you sand back, the areas filled look like they have small glass dots / marks, the wood obviously looks white and sanded. Between each phase I'd go over with a cloth and a tiny bit of acetone just to see what I was dealing with (and smooth the top layer of sealer) each time.
Coat Three
Coat Four
Sand Back
Thinner Coat Six
Thinner Coat Seven
And Eight
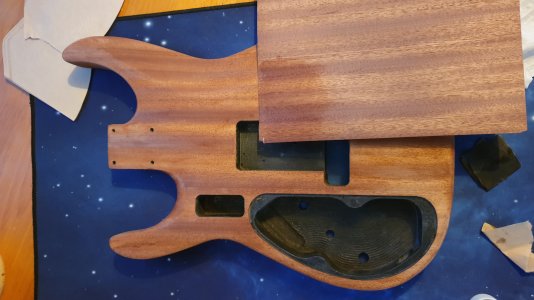
I repeated this over and over, filling and applying thick, but it started feeling like diminishing returns. The shallow pores and grain were now filled, all I was left with were the deep pores. It seemed very wasteful to cover the guitar entirely each time just to build another 30 microns on these areas and so I changed tactics. Not to say I wasn't impressed though, you could clearly see how well filled it was, even on the bottom centre where the most pores / pocks were.
With a cocktail stick I drop filled the filler into the pores I could see. I went OTT, very generously applying and tbh this was a good move. After a few hours you'd see the dot and you'd see the area where the pore was had dropped as it had filled the hole.
I attempted to sand back using a normal technique after 24 hours of drying. This didn't work so well and I was worried about digging in elsewhere.
Then I had a sudden brainwave. All those years of watching Dan on stewmac came to focus and adopted the strip method Dan uses to sand back filled dings. This made light work of the areas by simply putting my thumb over the dollop, and using the strip sanding it down.
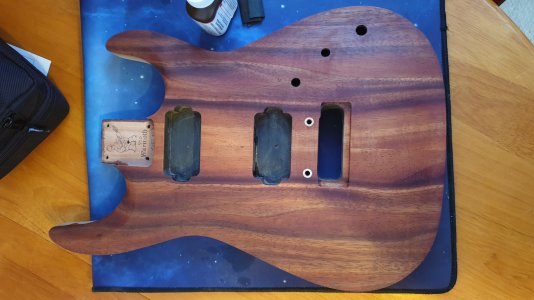
After I was done a quick overall body sand and inspection. Spotted a few more holes, and a few more specks and proceeded to drop fill these areas.
This is where I am right now. The body is 99% flat and clear now, it's amazing. Just sorting out a few tiny additional specks I found. It's like glass and all those pocks and grain lines are almost entirely invisible. Not just filled, but vanished. I did not expect it to work this well but needless to say I have ordered another bottle of this stuff. 2 days with using the sealer / filler properly has saved me I think probably 50 of repetitive Tru-oil slurry sanding / filling.


 ccasion14:
") but seriously, coverage is good and they'll be unnoticeable on them final stages I'm sure, and if not they're a part of a story of this rifle.
but seriously, coverage is good and they'll be unnoticeable on them final stages I'm sure, and if not they're a part of a story of this rifle.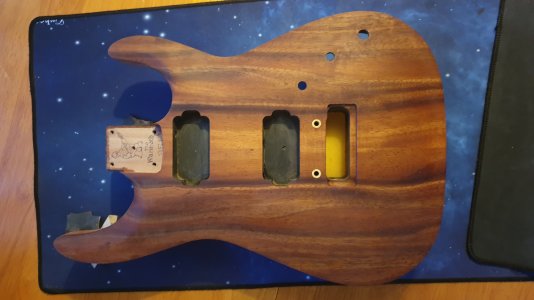


")