I not recommending painting them out. I mean if full it with color , it can become different color under different angles look at it .
the "white" epoxy will become clear coat once transparency coat put on it .
poly type of transparency coat is kind of epoxy can mix with it .
in this video
https://youtu.be/DRvSX7YYXJg
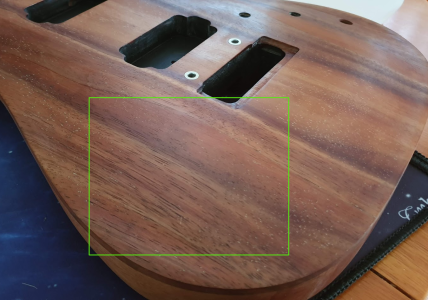
If that wee the case though the tru-oil would have reacted in that way and would have filled those scratches and made it clear, it didn't.
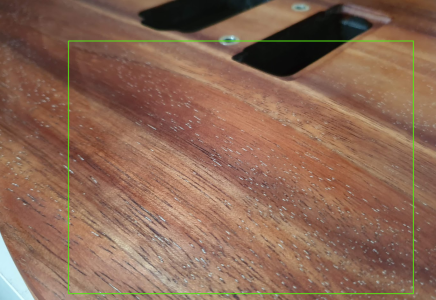
I don't think this is clear, it's uniform in colour top and back. I've worked with quite a bit of epoxy in my time and it would look different to this if it were clear and sanded white. I picked a larger one out and looked at it, it's pretty uniform white.
It could of could be epoxy that's uniformally clouded through the process somewhere, but tbh I think it just looks like white filler. I still think the process is sand to 400, then use some grain filler and see what I'm actually working with. It may be that this is actually enough.
I think this is like some kind of heavy duty putty they use as a deep grain filler before they move onto the darker / thinner top grain. I've just worked away quite a bit of wood so I'm down to that.
Picking them out isn't really an option, there are too many tiny ones and they take too much effort / damage too much wood to remove.
Painting them out could be. I'd need a very steady hand and a lot of time (and my trusty warhammer brush), but it could be done. I think a last resort though after I've entire tested grain filling and sanding. I have a feeling that may be enough to get rid of 99% (as most of it is indeed in the grain which is why is hasn't shifted up to this point.
Through all this planning this assumption is where I come unstuck, I really just thought it was end grain and was gonna just suck up the colour / oil of tru-oil and disappear.
some 3D print transparency resins mix sculpture , I too lazy to polish it to become transparency , it look "white" after sanding , I just put on a clear coat , it become transparency .