bmpietras
Newbie
- Messages
- 9
Hey everyone - joined recently and have been lurking in the DIY Finishing section for a while as I work on this project.
My family has a decent property out in NJ farmland and a nasty beetle infestation has downed a lot of their old growth trees. The first was a maple and i think they’re going to be cutting down some dead ash and walnut trees soon - future builds!
This is my first-ever build, and learned quite a bit along the way. Lots of mistakes…but that’s how you learn! We were able to cut ~3-4” thick blanks out of the center of the tree which was just wide enough for a single-piece body blank.
The maple had been sitting for some time and beetles had done a really good job of chewing small channels throughout (I think of it as weight relief) but the real challenge was planing the wood down to 1.75” by hand - no access to a planet and I was being quoted more than the price of a new body blank from warmoth from local shops. So, said eff it and did it by hand, which took the better part of a day. Ironically, we were gifted a 12” planer after I finished so the next build will be a 2-piece, looking forward to that!
Not much to be said about the shaping and drilling. I’ve never actually held a jazzmaster in person, and NONE of the shops within an hour of me have any in stock (COVID) so i had to guess a great deal based off of photos and CAD files. The one area that I found difficult to get right was the front body contour: some photos seem to imply it’s a level cut but others sit looks like a gentle curve, similar to the Strat I have in hand. I wound up going with the latter. In the process, learned that getting a japanese saw to remove material quickly will be a good investment for the future…
Last but not least, a very light stain with minwax golden mahogany (I wanted to just give a touch of amber without concealing any of the spalting) followed by about 10 coats of tru oil.
TIP: Have all of your metal/plastic pieces on hand to double check measurements…template did NOT match the 62 AVRI tort pick guard. Bridge placement was off by about 1/8” requiring me to redrill the holes (you can see the full evident in the last photo)
THANK YOU to everyone in the forums who has posted extensive guides to finishing with TO - enormously helpful even if i didn’t think to look until halfway through the process. Finish isn’t perfect, but neither is the wood!
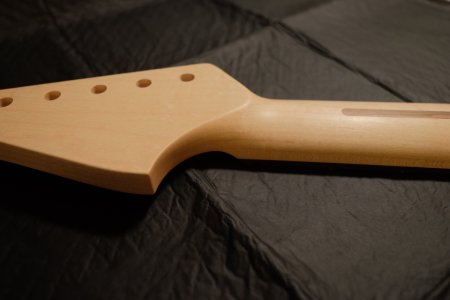
Thanks for looking - following up with some more assembly photos (bridge just came in, electronics next month, neck/finishing end of year). Neck will be maple as well with black gloss headstock/decal, back of headstock gloss and colored to match body with TO for the rest similar to the Music Man necks.
My family has a decent property out in NJ farmland and a nasty beetle infestation has downed a lot of their old growth trees. The first was a maple and i think they’re going to be cutting down some dead ash and walnut trees soon - future builds!
This is my first-ever build, and learned quite a bit along the way. Lots of mistakes…but that’s how you learn! We were able to cut ~3-4” thick blanks out of the center of the tree which was just wide enough for a single-piece body blank.
The maple had been sitting for some time and beetles had done a really good job of chewing small channels throughout (I think of it as weight relief) but the real challenge was planing the wood down to 1.75” by hand - no access to a planet and I was being quoted more than the price of a new body blank from warmoth from local shops. So, said eff it and did it by hand, which took the better part of a day. Ironically, we were gifted a 12” planer after I finished so the next build will be a 2-piece, looking forward to that!
Not much to be said about the shaping and drilling. I’ve never actually held a jazzmaster in person, and NONE of the shops within an hour of me have any in stock (COVID) so i had to guess a great deal based off of photos and CAD files. The one area that I found difficult to get right was the front body contour: some photos seem to imply it’s a level cut but others sit looks like a gentle curve, similar to the Strat I have in hand. I wound up going with the latter. In the process, learned that getting a japanese saw to remove material quickly will be a good investment for the future…
Last but not least, a very light stain with minwax golden mahogany (I wanted to just give a touch of amber without concealing any of the spalting) followed by about 10 coats of tru oil.
TIP: Have all of your metal/plastic pieces on hand to double check measurements…template did NOT match the 62 AVRI tort pick guard. Bridge placement was off by about 1/8” requiring me to redrill the holes (you can see the full evident in the last photo)
THANK YOU to everyone in the forums who has posted extensive guides to finishing with TO - enormously helpful even if i didn’t think to look until halfway through the process. Finish isn’t perfect, but neither is the wood!
Thanks for looking - following up with some more assembly photos (bridge just came in, electronics next month, neck/finishing end of year). Neck will be maple as well with black gloss headstock/decal, back of headstock gloss and colored to match body with TO for the rest similar to the Music Man necks.
Attachments
-
 WARMOTH_004.jpg111.2 KB · Views: 27
 -
 WARMOTH_003.jpg99.7 KB · Views: 70
 -
 WARMOTH_010.jpg59.4 KB · Views: 26
 -
 WARMOTH_009.jpg98.5 KB · Views: 27
 -
 WARMOTH_008.jpg71.9 KB · Views: 27
 -
 WARMOTH_002.jpg118.8 KB · Views: 27
 -
 WARMOTH_007.jpg109.7 KB · Views: 42
 -
 WARMOTH_001.jpg133.7 KB · Views: 29
 -
 WARMOTH_006.jpg85.7 KB · Views: 30
 -
 WARMOTH_005.jpg118.7 KB · Views: 30