Heavy Tele: Swamp Ash / Mahogany + Wenge / Ebony

stratamania said:
It would probably be a good idea to spot repair the areas of sand through.

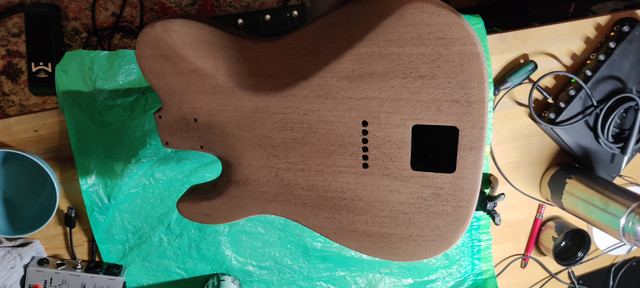
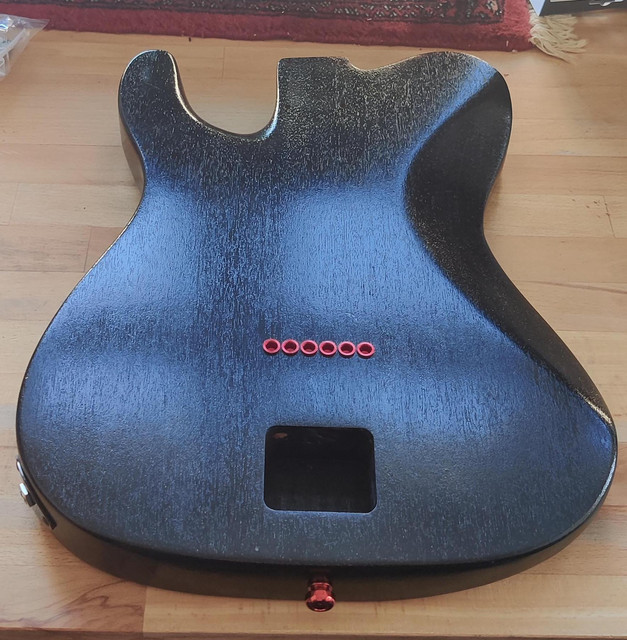
Ah screw it... on my way to work just now I decided that I'm gonna bite the bullet and start from scratch - I just liked it better before and can't help it. It's annoying as hell but well, I guess I'm not the first one to sand down after almost being there...

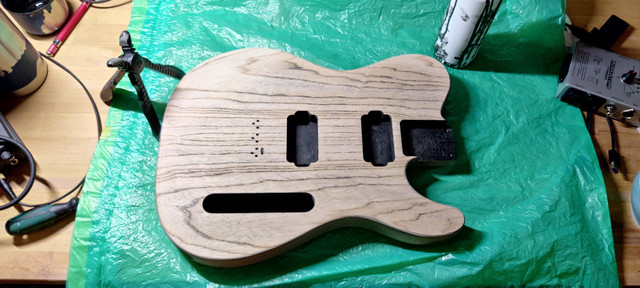
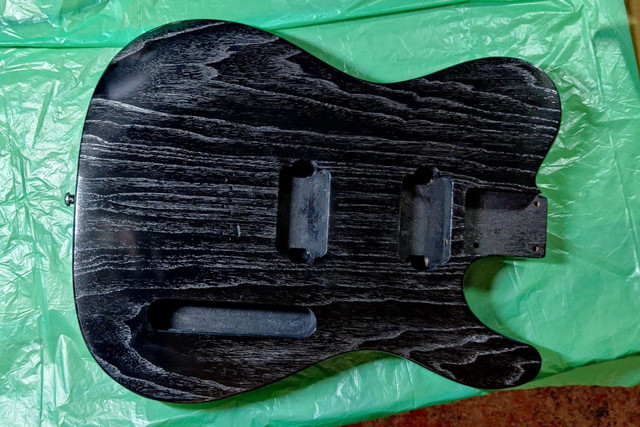
Interestingly, I only sanded once throughout the entire process (after Tru Oil and Sheen). In sum, the problem was that the orange peel (no clue why that happened to that extent anyway) forced me to apply more force in level sanding than I wanted to. This in turn led to sanding through on some spots and toning down the doghair more than I wanted.

The only thing I will change when redoing it is to NOT sand at all and apply the sheen 30 days after Tru-Oil is dried without any level sanding. That means:

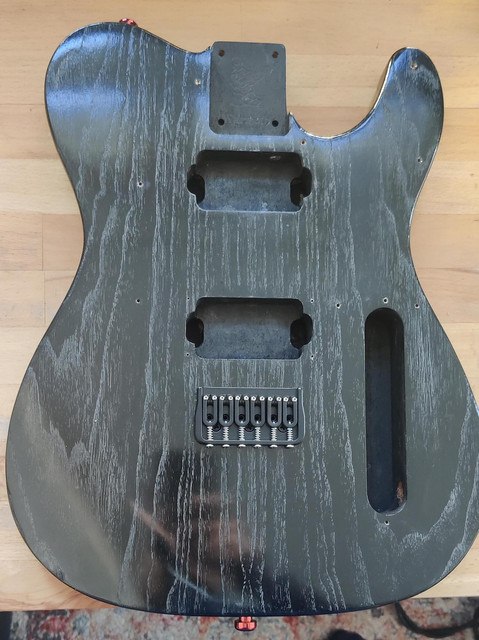
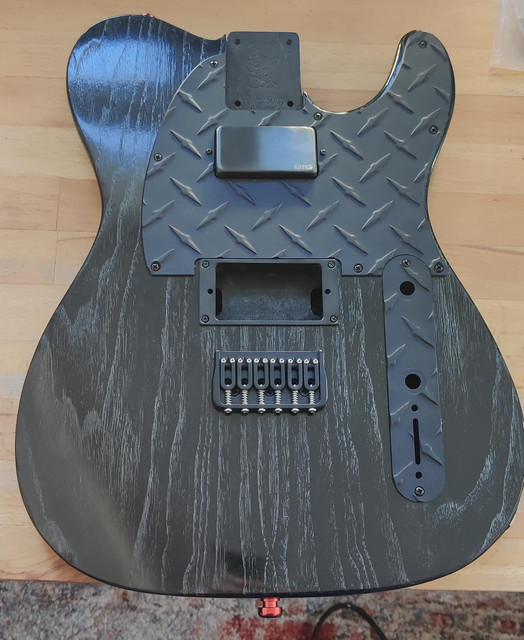
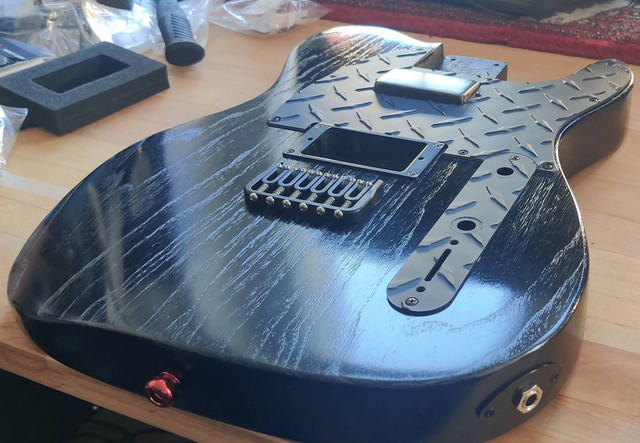
- 4 coats of India ink
- 1 coat of sanding sealer
- rubbing in the silver lacquer
- 10 coats of tru oil
- 2 coats of sheen

...no sanding whatsoever.

@Stratamania may I ask your opinion on the above?
 
It sounds like a reasonable approach. You should have a level surface before getting to the final steps anyway and as you don't want a gloss finish and it is not nitro final sanding would be not needed unless you apply a coat to thick and end up with wrinkles, so thinner coats is the way to go.

And no you are not the first to start again or have to repair (including myself)... all part of building experience.
 
stratamania said:
And no you are not the first to start again or have to repair (including myself)... all part of building experience.

It's part of the learning experience - which I cherish the most about all of this anyway :)

So, reboot. This thread starts at 0 haha
 
...and back to square one (which looks pretty cool). Will update in a few weeks when I'm back at it.

IMG-20220124-222614.jpg

IMG-20220124-222621.jpg

 
I haven't used tru oil, however it seems not much thicker than tung, which has basically no margin for sanding. I also learned this sanding oil > color > wood. It's far less apparent without the color.
 
OK, I've got to where I was (and further). I'm so happy I started over because the second time around I got the doghair just the way I wanted it plus I managed to create no glitches in corners etc.

Here is a pic after 10 coats of tru oil and 5 days of drying:

IMG-20220209-201407.jpg


Now, this might be interesting to some. In the past, I made great experiences with BC Sheen and Conditioner on tru oil over wood. However, it doesn't seem to be nearly as nice on a black dye and tru oil. I isolated a small spot where the pickguard will be anyway and now I am convinced I will not go for sheen but actually keep it shiny (as I noticed it works great with my pickguard). Here's a pic where the contrast between sheen and no sheen is visible:

4935420433b36bb490954af0149f5dd372d398721ccbaa955aada0f81afb0ffa472e37e8.jpg


Advice needed: I am now inclined to let it dry for another 25 days and then simply leave it as is - i.e. no wax, no conditioner, nothing. What do you think about this approach?
 
Looks good. You could leave it as it is as suggested and at most just buff it to taste with a soft lint free cloth.
 
Thanks everyone. I gotta say that I'm enjoying this "go with the flow" style of building a lot. Will now let dry until mid March and then assemble.

Now onto two super basic questions I've been asking myself for months (but been ashamed to ask):

1. Is buffing the same as polishing? I.e. buffing with a cloth means rubbing the surface for sheen, right?
2. What is the actual risk of not letting tru oil dry for a month? I.e. what could happen? Fingerprints?
 
1. Polishing is often achieved with finer and finer abrasives, buffing with cloths (could be cloth wheels) and compounds. Dry buffing would just be with a soft cloth which in this case is what I was suggesting.

Some might use the terms somewhat interchangeably but technically they are different things.

2. If it is not dry enough when you rub or use an abrasive instead of levelling you might just cause the underlying soft finish to shift and it will look not good. Try it on some scrap and you will see the effect.


Alright, drying is over. Brace yourself - this is where some of you will start to love this guitar and some of you will hate it - it's a polarising one I guess :)

Quick update: I used india ink, alcohol-based sanding sealer, chemical laquer and tru oil for a doghair finish which turned out great. Although I wanted satin/matte first, I decided to keep it fairly glossy. Now adding the fun gimmicks - remember it's a metal guitar. Here we go:

First, here's the final finish after drilling and installation of my Hipshot bridge. Note: I did NOT attach a string ground to the bridge as I am using EMGs and I used polishing compound for swirl removal after all:
IMG-20220309-082028.jpg


And here's the backside after adding string ferrules (yup, note the color, also of the string button):

IMG-20220309-080252.jpg


Here's the topside after adding my extravagant scratchplate and the first EMG pickup in brushed black chrome:

IMG-20220309-081133.jpg


And here a side view including the football jack plate:

IMG-20220309-081157.jpg


Next up:
- copper shielding (yes, I have active pickups, but still...)
- removing some minor scratches I created during mounting (ALWAYS happens to me)
- neck stuff: fret leveling (if needed) and tuner installation
- wiring
- fine tuning

PS: yes, it's still TRVE (but not visible in the light) ;-)
 
I love where you took it, completely worth the restart.

Nice commitment to the red buttons and grommets.

Is that steel stair tread stock?
 
I really like the red accents! Personally not a fan of the diamond plate (I think I'd just go with black), but everything else about it is very hot
 
Looks very Bro Country err TRVE or like a Batman tele  :icon_thumright:

Seriously the finish has turned out well.
 
Sadie-f said:
I love where you took it, completely worth the restart.

Nice commitment to the red buttons and grommets.

Is that steel stair tread stock?

Thanks :) It's a diamond scratch plate I got off of eBay. Gives it an almost ridiculous metal look which I like haha
 
Back
Top