ThtOthrPrsn
Junior Member
- Messages
- 131
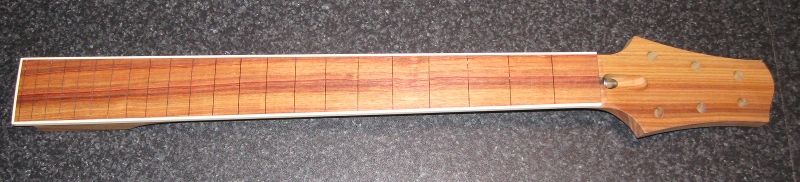
Such clean work! Can't wait to see it all assembled!


Bagman67 said:That's an abidingly bad-ass undertaking you're walking us through, KG. I'm grateful for your explication of the details.
ps. I don't think I was THAT strident about the green, was I?
ThtOthrPrsn said:Such clean work! Can't wait to see it all assembled!
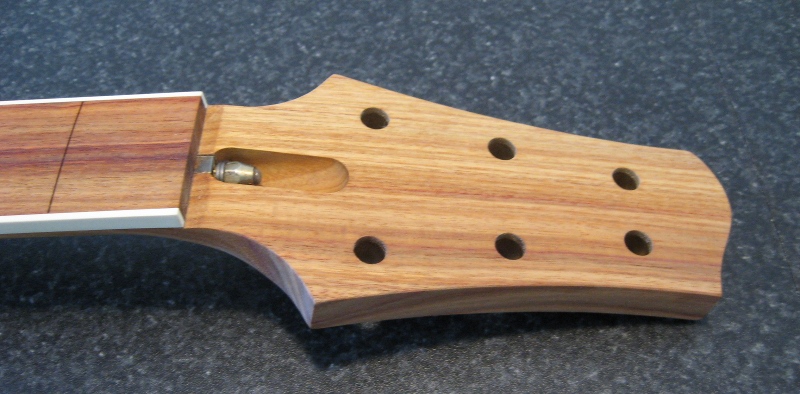
Great Ape said:Incredible work, Kevin!! I am awed, indeed...amazed, too!! Love that ''Cagey Green'', man!

 ccasion14:
Great Ape said:The one Bigsby-equipped guitar I ever owned reduced me to a sniveling puddle of useless protoplasm every time I changed strings...which was maybe twice. Then I gleefully sold the guitar!
Perry Combover said:Cagey, it's posts like this that should boost your business. Outstanding work and thank you for documenting.
... spotted the finished product over in GOTM :headbang1:
Cagey said:Great Ape said:The one Bigsby-equipped guitar I ever owned reduced me to a sniveling puddle of useless protoplasm every time I changed strings...which was maybe twice. Then I gleefully sold the guitar!
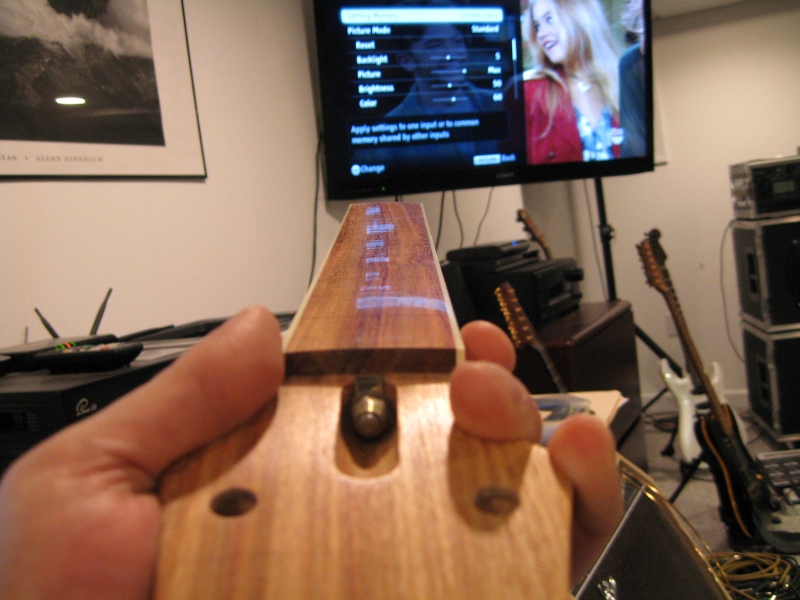
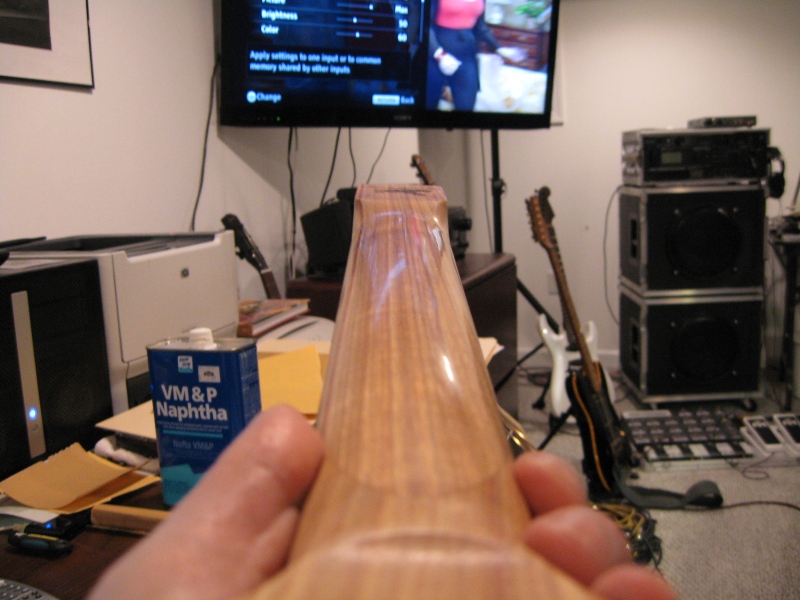
This is somewhat out-of-sequence, but I was reviewing the thread and saw I had to respond to this again. It turns out my memory was wrong and you're right - stringing a Bigsby-equipped fiddle is a major league pain in the ass. You need at least 3 hands and they'd better be coordinated. I don't know what made me think I never had any trouble with it. Must've been wearing rose-colored glasses, since my first exposure to one was on my first "real" guitar back when I was just a grasshopper.
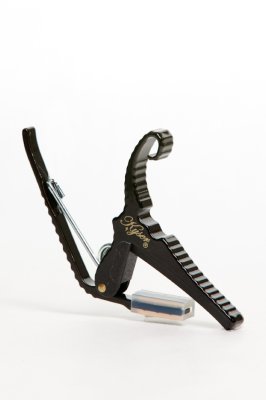
But, necessity being the mother of invention, I've figured out how to do it with only reasonable hardship. For future reference, owning a clamp-on capo is a Good Thing, even if you don't play Peter, Paul and Mary tunes in chick keys. There are a lot of them out there, similar to this...
You thread the string under the bale behind the bridge and forward of the anchor, but don't try to attach it yet. Get it close, and clamp the string to the neck with the capo. Put a kink in the string 1/2" or so up from the ball end of the string, and feed it up under the Bigsby until you can grab it and secure it to the little post retainer. Hold it there with one hand while you pull the string taut under the capo, and the whole thing stays stable. You can actually take both hands off the guitar at that point and the string will stay in place. Play whatever games your tuner demands, and once the string gets some tension on it, you can release the capo. String stays in place, rather than falling off the peg at the bridge end 55,319 times. Or, maybe that was 62,751 times.
I'm not trying to sell you on the idea of using a Bigsby - as pretty as they are, I still think they're a pitiful piece of hardware - this is just for future reference. Never know when you may have to deal with one of the miserable things.
Incidentally, while I never use a capo for what they're designed for, I still have one very similar to what's pictured above. What I got mine for was clamping replacement nuts in place while the glue dries/cures. They're great for that. Now it's become a necessary piece of gear for dealing with this L5S.
sixstringsamurai said:OFR's.....THOSE frustrate the crap out of me......