7/8 S-Style in Black Cherry / Wenge Warhead

Not only do I agree with this, but even the fret-leveling-dude mentioned to the owner of the guitar shop, that he does not have the quality and type of tools to do full fretwork on stainless steel due to the amount of investment needed. But at least he’s willing to level a couple high spots and smooth the fret ends. There’s only a couple local guitar shops, and they both outsource the fret work to the same fret repairman. On the positive side, this fret repairman has a lot of experience and I can personally vouch that he does excellent work.


Yes, and yes! But I don’t want to learn by practicing on this particular neck. I want to get this done now, and I feel more comfortable and confident knowing that this neck will be handled by a pro.


A detail that I left out earlier is that I could not get the neck perfectly straight before installing the strings. Part of the reason is I initially did not fully understand how the Warmoth modern neck works with the dual truss rod and it’s side adjust mechanism. I do know now, though. I also might have been too impatient by not allowing enough time for the neck to settle in between adjustments.
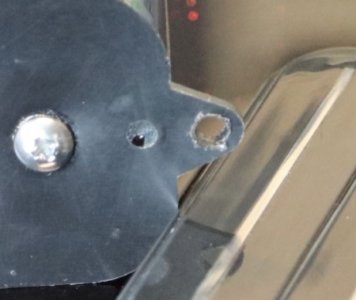
I hear you! I practiced some fret work (and scalloping, too) on a couple of the cheapest MIC necks I could find on Amazon. Made my mistakes, developed some technique, and then I had the confidence to work on a high-quality instrument. Good luck with this project!
 
he does not have the quality and type of tools to do full fretwork on stainless steel due to the amount of investment needed.

I hope these guitar shops are paying him for his work. An investment in his tools that he may need would probably pay him back. If you are cutting stainless steel you might need better cutters, for example, but on a neck where the frets are already installed most good tools ought to be up to the job.
 
So, last week I was out of town camping while the much needed and correct tuner bushing was delivered. WD Music sent me four bushings to pick from, ha ha! First bushing I picked, fit the way I expected it too. Thank you WD Music! Finally installed all tuners, neck, and strings. Spent a couple days dialing in the overall setup and I'm happy to say that this is a fun guitar to express yourself with a variety of useable tones. I know I might be in the Honeymoon phase, but these Wilde (Bill & Becky Lawrence) pickups are impressive.

A couple quick pics with the late afternoon sun:
View attachment 60533


View attachment 60534

More pics to follow in a day or so.
That is one sexy shred stick. Got that custom sports car paint look, nicely done!
 
Those tuner bushings that are dropping all the way in are straight bushings verses tapered bushings. In the comparison picture you can see the taper of the bushing on the left. Lovin' the black cherry metallic!
 
I made one diagram for the super 5 way act the same as the 2502N. Ignore the push/pull tone that is drawn.
In the process of some final touches. But I would like to confirm that when applying the following diagram by Supertruper, the ground to lug #2 of one pole and lug #4 of the other pole must have their own direct connection to ground, correct?
IMG_0899.jpeg
 
But I would like to confirm that when applying the following diagram by Supertruper, the ground to lug #2 of one pole and lug #4 of the other pole must have their own direct connection to ground, correct?
All the symbols to ground need to be grounded to a common ground in the end. In the case of the grounds for lug #2 of one pole and lug #4 of the other pole, you could jump them together. Then take a single lead from one of the poles to a common ground, which would be probably neater and more efficient than separate wires.
 
All the symbols to ground need to be grounded to a common ground in the end. In the case of the grounds for lug #2 of one pole and lug #4 of the other pole, you could jump them together. Then take a single lead from one of the poles to a common ground, which would be probably neater and more efficient than separate wires.
Thanks, Stratamania. I was definitely overthinking on those ground connections. Happy to know that those two lugs can be jumped together.
 
Did you have to widen the screw holes on the pickups to make it so you could direct mount them? Also how’s the intonation with the earvana nut?
 
Kind of looks like they were widened.
 

Attachments

  • 40648462-F46C-4FF3-B012-29325F33768F.jpeg
    40648462-F46C-4FF3-B012-29325F33768F.jpeg
    231.4 KB · Views: 4
A big thanks to @supertruper1988 for his pickup wiring diagram. I like what I’m hearing and I’m sticking with this one.
P1: Bridge (series)
P2: Bridge/Neck (inside coils in parallel)
P3: Bridge/Neck (full/parallel)
P4: Neck (parallel)
P5: Neck (series)

Almost ready for the final pics and conclusion of this build thread!


Did you have to widen the screw holes on the pickups to make it so you could direct mount them? Also how’s the intonation with the earvana nut?
Did not widen the screw holes. I removed the threaded inserts from the holes , and used (black) #4, 1-inch, pan head wood screws. The fit was perfect.

I did have the string height slightly lowered at the nut, but overall intonation is very good.
 
A big thanks to @supertruper1988 for his pickup wiring diagram. I like what I’m hearing and I’m sticking with this one.
P1: Bridge (series)
P2: Bridge/Neck (inside coils in parallel)
P3: Bridge/Neck (full/parallel)
P4: Neck (parallel)
P5: Neck (series)

Almost ready for the final pics and conclusion of this build thread!


Did not widen the screw holes. I removed the threaded inserts from the holes , and used (black) #4, 1-inch, pan head wood screws. The fit was perfect.

I did have the string height slightly lowered at the nut, but overall intonation is very good.
Awesome! Glad it worked out for you.
 
Seymour Duncan. I thought i had mentioned that sorry if I didn’t.
I think you did, but I wanted to be sure. The Wilde Pickup wire colors are different. I had their green and red coil tap wires accidentally reversed in the first try. There was no sound on P2 & P4. Once I connected them correctly… BOOM! All is now well in switching land!

I altered your diagram to match the color scheme of these Wilde L500's:
IMG_0899 - Copy.jpeg
 
Thats awesome. I am glad it worked out for you! I am going to be re-installing that diagram into an HH pickguard for my strats soon. I havent been able to find much time to work on guitars as of late.
 
Back
Top