stratamania
Mythical Status
- Messages
- 12,362
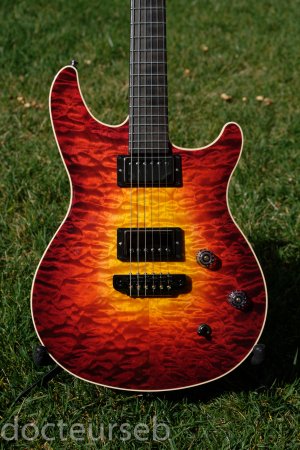
docteurseb said:Cagey said:Rgand said:Thanks for those links, Kevin. I needed both and ordered them.
I think you'll be pleased with the results. Just be sure to turn your Dremel motor's speed down as low as it'll go, or you run the risk of overheating things.
I used the Dremel too (with the mini buffing wheel/disc) and had good results in the past, it's just that this time I may have rushed a little too much when using the fine sandpaper (not going high enough grit maybe) prior to polishing the frets.
I had a similar experience when I did SS for the first time. I had gone to 12000 grit micromesh and polished also with a dremel. It was earlier skipped grits. You can read about it at the link below if you want.
http://www.unofficialwarmoth.com/index.php?topic=22445.msg338072#msg338072