Hello everyone!
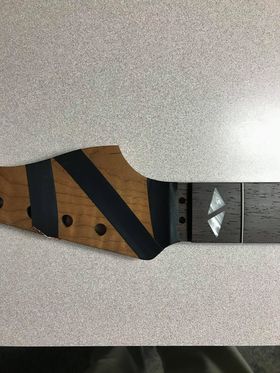
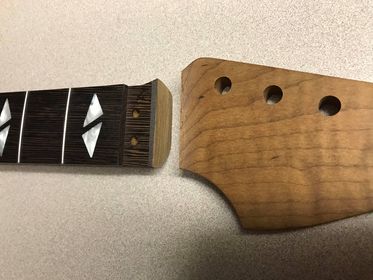
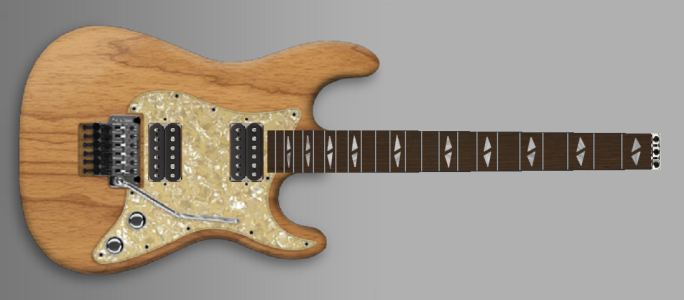
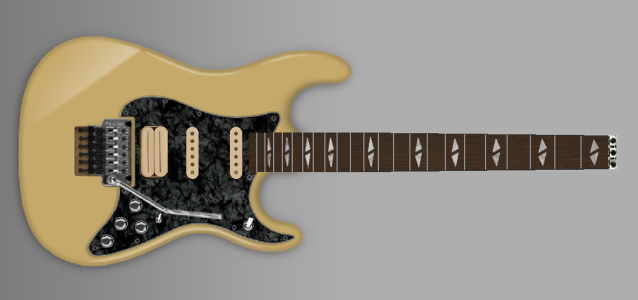
My young nephew and I have decided to build a couple headless guitars based on the 7/8 S-style body and 7/8 Warhead neck. His will be painted alder, mine will be natural (1-piece roasted swamp ash). Both will have roasted flame maple necks with wenge boards and white pearl split diamond inlays.
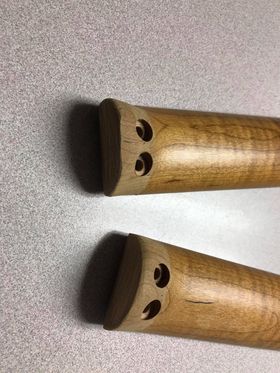
We've decided to use Floyd locking nuts as the string clamps at the headless end along with Hipshot headless tremolos. We're adding piezo saddles to the Hipshot trems and I've ordered those "piezo ready" so they won't have to be modded for the piezo wire slots.
He's going with a cream HSS setup on a black pearl pickguard including a "Bill & Becky" L500L (I think it is) and I'm going with a vintage pearl pickguard and black HH setup with the SD Jazz/JB Trembucker combo. I will be designing/building the preamps myself. I've built many for different guitars with various layouts over the years. For these guitars both the piezo and magnetics will be active. The acoustic side will feature a 3-way mini switch on mine to select from three distinct acoustic tones. He has decided not to use a 3-way mini switch for acoustic tones and will personally select a tone he likes for his. Since I don't normally use a tone control for my magnetic pickups, mine will have just a master volume (for both acoustic and electric) and a pickup blend control along with a 3-way LP-style toggle. He's still deciding on his overall layout but it could potentially have four controls plus a mini-switch along with an LP-style toggle to offer any single pickup or combination along with blending. I understand a lot of people don't like active controls but I've had it on several guitars and like the flexibility. I don't think it hurts the overall tone either. The end circuit will have a great deal of headroom.
We still have to decide on how we'll be routing for the headless tremolo tuner access. I've got a few ideas in mind and will be running a few test routs on a couple old bodies I have. We'll see what happens there but it should help us decide which way to go in the end.
We're both looking forward to it for sure! If these two turn out as I hope they will I will likely be doing another one at some point, though in a different body style. That one, if I ever do it, will be a short-scale headless (without using the 24" scale stuff).
Attached are a couple of pretty horrible mockups. I'm not good with images, but at least they provide some kind of idea what we're shooting for.
Just thought I'd throw this out there. Some might be interested, others not, but WE'RE interested, and that's the main thing!
My young nephew and I have decided to build a couple headless guitars based on the 7/8 S-style body and 7/8 Warhead neck. His will be painted alder, mine will be natural (1-piece roasted swamp ash). Both will have roasted flame maple necks with wenge boards and white pearl split diamond inlays.
We've decided to use Floyd locking nuts as the string clamps at the headless end along with Hipshot headless tremolos. We're adding piezo saddles to the Hipshot trems and I've ordered those "piezo ready" so they won't have to be modded for the piezo wire slots.
He's going with a cream HSS setup on a black pearl pickguard including a "Bill & Becky" L500L (I think it is) and I'm going with a vintage pearl pickguard and black HH setup with the SD Jazz/JB Trembucker combo. I will be designing/building the preamps myself. I've built many for different guitars with various layouts over the years. For these guitars both the piezo and magnetics will be active. The acoustic side will feature a 3-way mini switch on mine to select from three distinct acoustic tones. He has decided not to use a 3-way mini switch for acoustic tones and will personally select a tone he likes for his. Since I don't normally use a tone control for my magnetic pickups, mine will have just a master volume (for both acoustic and electric) and a pickup blend control along with a 3-way LP-style toggle. He's still deciding on his overall layout but it could potentially have four controls plus a mini-switch along with an LP-style toggle to offer any single pickup or combination along with blending. I understand a lot of people don't like active controls but I've had it on several guitars and like the flexibility. I don't think it hurts the overall tone either. The end circuit will have a great deal of headroom.
We still have to decide on how we'll be routing for the headless tremolo tuner access. I've got a few ideas in mind and will be running a few test routs on a couple old bodies I have. We'll see what happens there but it should help us decide which way to go in the end.
We're both looking forward to it for sure! If these two turn out as I hope they will I will likely be doing another one at some point, though in a different body style. That one, if I ever do it, will be a short-scale headless (without using the 24" scale stuff).
Attached are a couple of pretty horrible mockups. I'm not good with images, but at least they provide some kind of idea what we're shooting for.
Just thought I'd throw this out there. Some might be interested, others not, but WE'RE interested, and that's the main thing!

") ) and don't have a cell phone to take photos, but my nephew does and I'll have him take pics as things progress. For now, all the parts are ordered except certain electronic components I'll need for the active circuits. Everything is - bridges, bodies, necks, pickups, hardware, etc.
) and don't have a cell phone to take photos, but my nephew does and I'll have him take pics as things progress. For now, all the parts are ordered except certain electronic components I'll need for the active circuits. Everything is - bridges, bodies, necks, pickups, hardware, etc.")