Leaderboard

Trans Red/RSA JM

rgand

Epic Member
Messages
5,934
There are some parts to acquire before starting in but as things happen, I'll post photos here. I can't really think of this as a Jazzmaster since I don't play Jazz. I do like country and rock'n'roll. Maybe it's a Countryrockmaster?

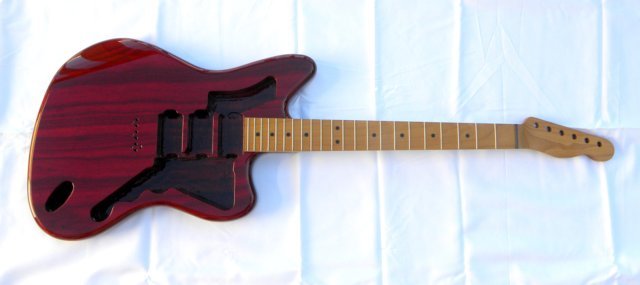
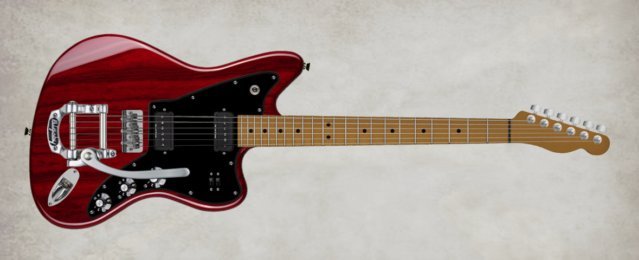
Anyway, I'll start this thread off with the just-out-of-the-box photo and the mockup image to give it direction.
 

Attachments

  • Out of the Box C (copy).JPG
    Out of the Box C (copy).JPG
    28.7 KB · Views: 80
  • Warmoth RSA JM Trans Red Mockup (copy).jpg
    Warmoth RSA JM Trans Red Mockup (copy).jpg
    27.6 KB · Views: 95
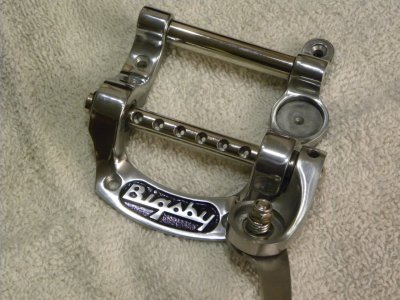
While I was waiting for the body and neck to arrive, I did a little fiddling with my Bigsby B5. I cut the arm bracket down to allow 360 degree rotation of the arm. Then I pulled the roll pins out of the main string shaft and through-drilled the shaft and countersunk for the string balls on the drill press. I don't have a lathe any more so I'll buy the upgraded front roller from Callaham when I order the bridge, later today.
 

Attachments

  • DSCN5450 (copy).JPG
    DSCN5450 (copy).JPG
    223.3 KB · Views: 69
Rgand said:
While I was waiting for the body and neck to arrive, I did a little fiddling with my Bigsby B5. I cut the arm bracket down to allow 360 degree rotation of the arm. Then I pulled the roll pins out of the main string shaft and through-drilled the shaft and countersunk for the string balls on the drill press. I don't have a lathe any more so I'll buy the upgraded front roller from Callaham when I order the bridge, later today.


Freakin' brilliant, man. Stringing up regular Bigsbys is one of the stupidest exercises in the history of ever.
 
Mayfly said:
nice work.  So then you restring by inserting from above?
With the lever down, you run the string through from the front slightly below level. If you're going to replace a full set of strings, you could lift the lever and start all 6 before attaching them to the tuners.

To do this mod, you drill through the original holes and open up the front for the button. Then run a countersink gently into the hole where the string would come out. Of course, deburr everything afterwards. The easy way to accomplish this is to just order one from Callaham and put it in. :icon_biggrin:

double A said:
Rgand said:
While I was waiting for the body and neck to arrive, I did a little fiddling with my Bigsby B5. I cut the arm bracket down to allow 360 degree rotation of the arm. Then I pulled the roll pins out of the main string shaft and through-drilled the shaft and countersunk for the string balls on the drill press. I don't have a lathe any more so I'll buy the upgraded front roller from Callaham when I order the bridge, later today.


Freakin' brilliant, man. Stringing up regular Bigsbys is one of the stupidest exercises in the history of ever.
I can't claim the idea. I just copied what Callaham does with theirs. I didn't even know there was a good solution until I read this thread by Verne Bunsen about the Callaham upgrade parts.
 
After reading Verne's thread back when he posted it, I wanted to get that upgrade kit for my L5S' Bigsby. But, they don't come in gold. Now that you've described how to do it with a drill press, I'm thinking I can just modify the unit I have, which is already gold. Thanks!
 
Cagey said:
After reading Verne's thread back when he posted it, I wanted to get that upgrade kit for my L5S' Bigsby. But, they don't come in gold. Now that you've described how to do it with a drill press, I'm thinking I can just modify the unit I have, which is already gold. Thanks!
It's pretty easy and only takes about an hour if you've never done it before. I haven't tried it yet but it should work. Of course you could wait until you hear how mine does before you commit your gold one. The decision for me was easy. I figured if I screwed it up, Callaham would sell me one.
 
I'm not too worried about it, but I have enough other stuff to do that I can wait  :icon_biggrin:
 
So most of the parts have arrived so I got started.

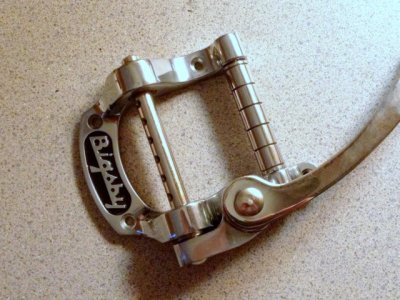
The other day, I replaced the front roller in the B5 with the Callaham one. That's ready to go now.


Attachments

  • IMG_1158.JPG
    IMG_1158.JPG
    87.6 KB · Views: 14
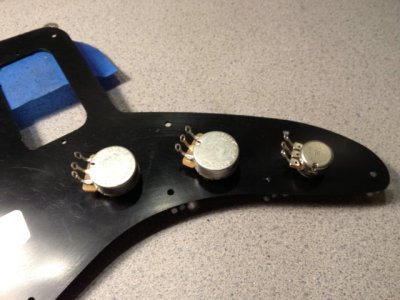
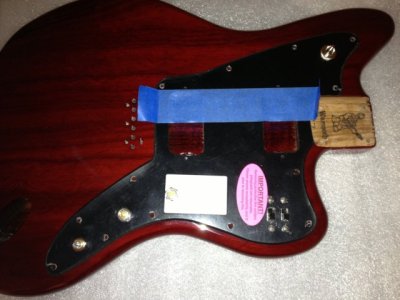
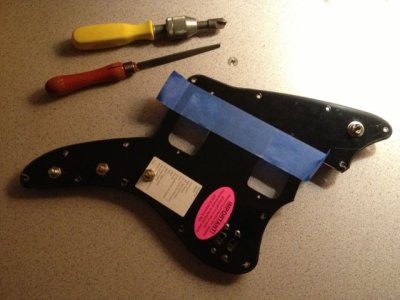
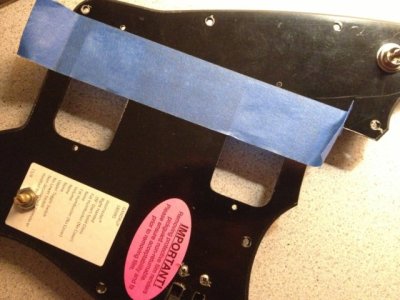
I filed out the corners on the 'fat humbucker' routes in the pickguard to fit the P-rails. I also drilled the tone pot holes and filed out the holes for the slide switches. Filing the holes for the slide switches took a while. I had forgotten how slow the work is when you want to be accurate. Then I carefully set the pickguard with the switches in it in the body to make sure everything fits as planned.

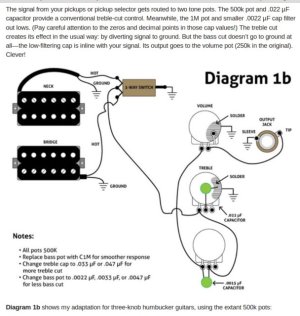
This build will have two tones, one treble bleed and one bass bleed. I had a 1 meg CTS pot for the bass bleed but to get it closer to the other two, I had to use a 500K Bourns mini pot.
 

Attachments

  • IMG_1159.JPG
    IMG_1159.JPG
    59.5 KB · Views: 14
  • IMG_1151.JPG
    IMG_1151.JPG
    56.4 KB · Views: 23
  • IMG_1154.JPG
    IMG_1154.JPG
    55.6 KB · Views: 11
  • IMG_1156.JPG
    IMG_1156.JPG
    65.6 KB · Views: 13
Here's basically what the wiring will be. This is a modified Seymour Duncan schematic. It shows push/pull pots but I will use the two slide switches to control the pickup settings.

edit: deleted the wiring diagram because the bass bleed didn't work when wired that way.

This one works right:
 

Attachments

  • Joe Gore Bass Bleed 640x609.jpg
    Joe Gore Bass Bleed 640x609.jpg
    71.8 KB · Views: 3
Looking good! Every plastic Jazzmaster or Mustang pickguard I've purchased, regardless of the source, has required the slide switch routes to be filed out to allow proper travel. Not sure why that should be when pickup routes, lever switch slots and pot mounting holes are never an issue. Guess it's easier to make the hole bigger than to make it smaller!

Have you tried dry fitting the pickguard to the body with the pickups mounted?

I still drool a little over that mockup picture you did, going to be a beautiful axe!
 
Verne Bunsen said:
Looking good! Every plastic Jazzmaster or Mustang pickguard I've purchased, regardless of the source, has required the slide switch routes to be filed out to allow proper travel. Not sure why that should be when pickup routes, lever switch slots and pot mounting holes are never an issue. Guess it's easier to make the hole bigger than to make it smaller!

Have you tried dry fitting the pickguard to the body with the pickups mounted?

I still drool a little over that mockup picture you did, going to be a beautiful axe!
Thanks, Verne.

I haven't put the pickups in there other than to make the routes fit them. I'll do that before I get into any wiring, of course.

Although Warmoth will route for slide switches, they don't offer routes where I put them. It seems kind of odd since that's where a Jaguar has slides. Of course a Jaguar uses a switch plate there. I had to make the slide switch slots from scratch.
 
Verne Bunsen said:
Rgand said:
I had to make the slide switch slots from scratch.

I hadn't gathered that, fine work! Likewise on doing your own mod on the Bigsby main shaft, well done!
Thanks. Also, I owe the main shaft mod to you for posting the thread that told about the Callaham parts. I can't say I'd have thought of that myself.
 
Really liking this thread, especially the idea of using the slides to control the P/U modes! Very nice looking build, can't wait to see the final product. Please, keep us posted.

:cool01:
 
BigSteve22 said:
Really liking this thread, especially the idea of using the slides to control the P/U modes! Very nice looking build, can't wait to see the final product. Please, keep us posted.

:cool01:
I'll definitely keep this thread up to date.

I intend to flip the jack plate for ease of access. The one I had was dull and grainy so I got to it with the polishing wheel to make it shine and burned through the chrome. The Squier one on my Strat was bright chrome on the back so I'll go see about a Fender one at Guitar Center. At least I can see what they look like before I buy one. Stainless polishes up great but I couldn't find a stainless one.
 
Rgand said:
I intend to flip the jack plate for ease of access.

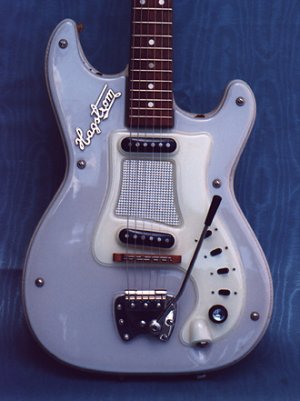
Interesting. Hagstrom did something like that on their Kent series guitars in the '60s.


Attachments

  • Reverse Jack Plate Hagstrom.jpg
    Reverse Jack Plate Hagstrom.jpg
    66.7 KB · Views: 22
That Hagstrom really does look 60's. It's a cool looking guitar. I wonder how the more rearward angle of the jack works. It would probably be really good if you like to run the cable behind the shoulder strap.
 
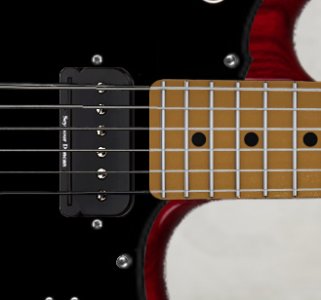
I didn't have much time this weekend to work on things but I did mount the pickguard so the pickups are centered with the neck and bridge. The only square corners on the whole guitar are on the heel of the neck. Looks out of place but Brian assured me that to round them to look right would void the warranty. I may have to wait two years to finally do that. OR just do it and hope the neck stays straight. Plenty of time to decide that. Too bad it isn't a standard offering. Here's how it would look with rounded corners:
 

Attachments

  • NeckHeel.jpg
    NeckHeel.jpg
    38.1 KB · Views: 24
Back
Top