Leaderboard

Roasted Swamp Ash body blank project

H108P

Junior Member
Messages
28
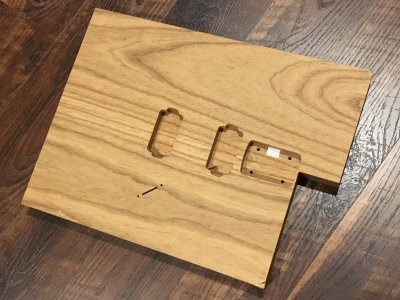
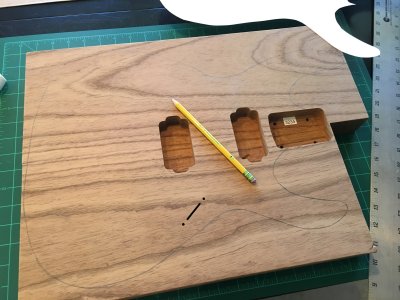
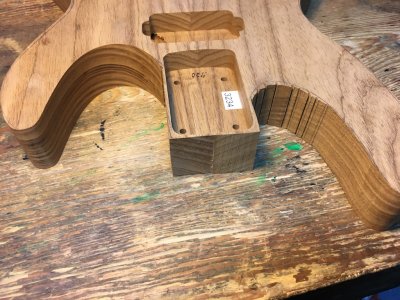
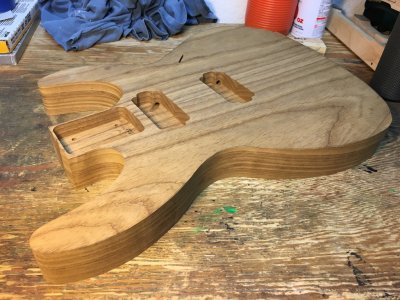
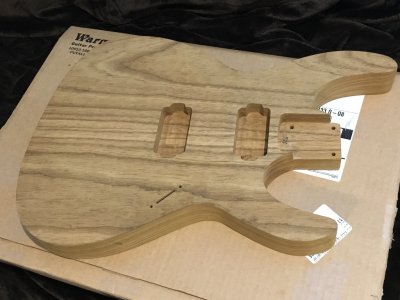
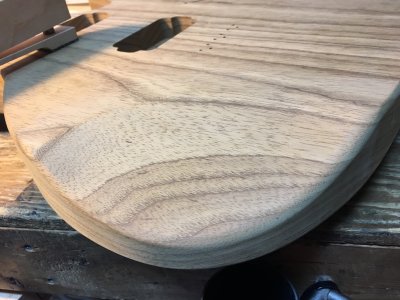
I just got this roasted swamp ash body blank and am excited to turn it into a guitar. After my roasted Soloist project, I felt that I was ready to move on to cutting out my own body shape.

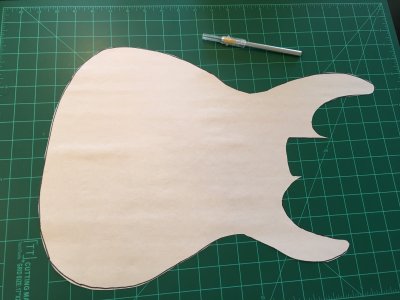
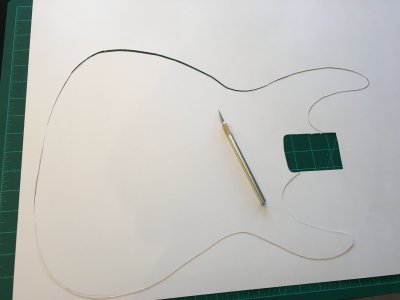
I didn't get too weird with the body shape, I still prefer a super Strat format - I've been playing a Strat or Soloist type guitar forever - but I had a few ideas I wanted to try. I transferred my sketch from my pad onto a piece of poster board and marked the center line on both sides. I also marked the center line on the slab, on both sides.

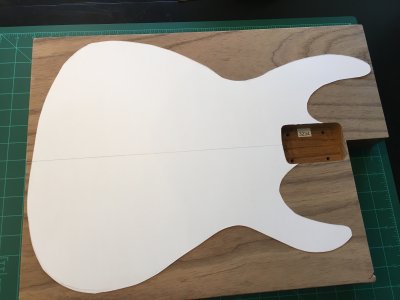
Using the neck pocket and the center lines on both sides of the slab and stencil, I traced the outline onto the blank.

Can't wait to make this into a guitar shape!
 

Attachments

  • 2018-03-09 23.25.43.jpg
    2018-03-09 23.25.43.jpg
    1.7 MB · Views: 16
  • 2018-03-11 10.01.04.jpg
    2018-03-11 10.01.04.jpg
    1.9 MB · Views: 12
  • 2018-03-11 10.20.12.jpg
    2018-03-11 10.20.12.jpg
    1.3 MB · Views: 8
  • 2018-03-11 10.28.04.jpg
    2018-03-11 10.28.04.jpg
    1.7 MB · Views: 16
  • 2018-03-11 10.40.04.jpg
    2018-03-11 10.40.04.jpg
    1.9 MB · Views: 18
I am interested in how this one turns out.  I have a bandsaw and a scroll saw but really lack the sanders needed to pull off a good build from a body blank.
 
Zhaezzy said:
I am interested in how this one turns out.  I have a bandsaw and a scroll saw but really lack the sanders needed to pull off a good build from a body blank.
I made a solid body electric mandolin many years ago with nothing but a bandsaw, a 4-in-one rasp and sand paper. With a little care you can do wonders with simple hand tools.
 
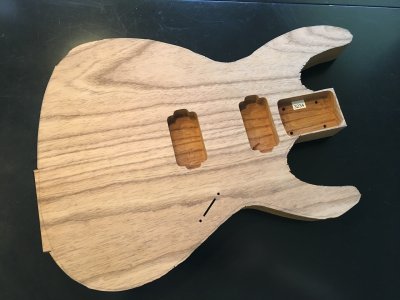
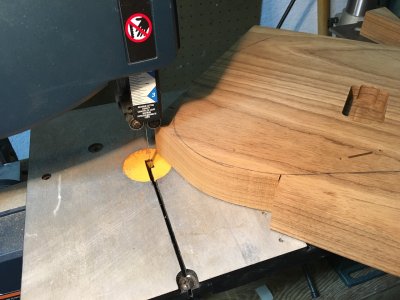
I was careful to lay out the stencil on both sides of the slab, as I wasn't sure how much wall thickness I had on the bottom edge of the control cavity. My band saw is one of the little $150 Ryobi 9" table top units, so it doesn't have a big enough table to allow some of the cuts. Marking the outlines accurately on both sides made it possible to flip the slab over to make the cuts just from one direction of feed. I indexed the stencil via the centerline and the neck pocket, so it turned out to be quite accurate, and I was able to make cuts right up to the traced lines and have them match on either side.

The little band saw actually cut quite well and surprised me with how easily it buzzed through the swamp ash. The outline is roughed out awaiting my assembling the new oscillating spindle sander this weekend (hopefully). If you are wondering why the bottom rear edge seems uncut, I left it that way as I haven't figured out exactly what I want to do with the output jack yet.
 

Attachments

  • 2018-03-11 11.44.37-1.jpg
    2018-03-11 11.44.37-1.jpg
    275.9 KB · Views: 32
  • 2018-03-11 11.07.22-1.jpg
    2018-03-11 11.07.22-1.jpg
    349 KB · Views: 19
Thanks! This routed blank is a great way to step into the shallow end of the pool - at least all the important holes are in the right place! Oh....except my bridge....that I have to locate and drill all the holes. I'm using a Hipshot and it doesn't quite match up with the Fender American Standard that is offered by Warmoth.
 
Nice work! The coming spindle sander is going to get a lot more done in less time than you're used to. After that, let the mean ol' routerbeast have its way with it, and you're well on your way. I'm looking forward to more progress pics!
 
That's a darn good job of roughing it in. It'll be a fine body when you're done. Congrats on the spindle sander. I had to get one myself and what a great tool. Not only that but it's the only power tool I know of that doesn't require ear plugs.
 
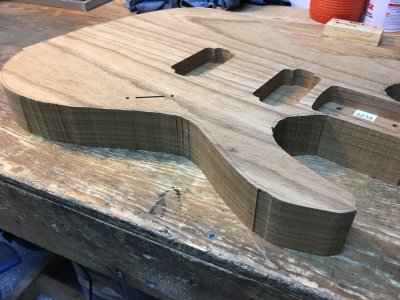
I got my Grizzly G0739 oscillating spindle sander set up and went to work on removing the saw marks and refining the rough shape of the body. The sander worked well and was worth the $150. It came with 80 grit drums, which put a pretty fine finish on the wood while cutting sufficiently quickly. I have some finer drums which I will try for the finer contouring.

My pics show the edges of the body as rough sawn and then after rough sanding to refine the contours and remove all the machine marks. The sander was very handy, though I wish that I also had a large belt sander to work the outside curves of the body. It's not really idea to use a convex surface to shape another convex one. I will make do without one, and I'm sure after finish sanding with a finer drum that I can tweak the contours as needed by hand.

Next up is the input jack, which I will cut in at an angle like on my Roasted Soloist build. Then it will be time to get out the new router and finish cut the neck pocket and do the round overs on the body. Pretty excited about how this is coming along!
 

Attachments

  • 2018-03-17 10.44.56-1.jpg
    2018-03-17 10.44.56-1.jpg
    288.4 KB · Views: 19
  • 2018-03-17 11.11.58-1.jpg
    2018-03-17 11.11.58-1.jpg
    342.8 KB · Views: 21
  • 2018-03-17 11.19.38-1.jpg
    2018-03-17 11.19.38-1.jpg
    316 KB · Views: 23
Looks pretty good. A little block sanding should smooth any irregularities on the convex curves. :icon_thumright:
 
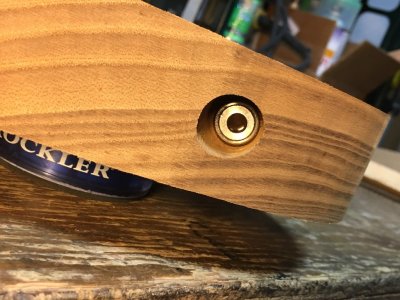
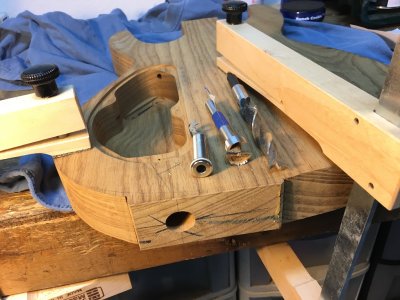
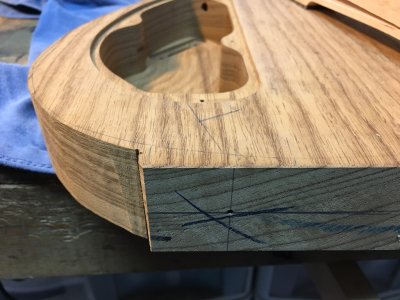
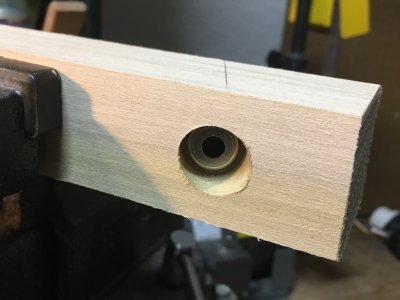
In preparation for boring the angled input jack, I went to Home Depot and spent $6 on a length of poplar. I was excited to find an actual guitar tone wood (even if it's a lousy one) at Home Depot, so that I could get a decent read on how it would respond to cutting. I used a 3/4" Forstner for the large hole and a 1/2" brad point for the through hole (Pic 1). I got it right on the first try, so I was ready to fixture and mark the body and get going (Pic 2).

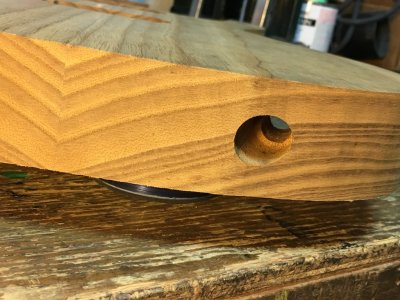
Pic 3 shows the finished work, and I am happy to report that the angled hole went in without chatter or walking. I originally wanted to fixture this and use my drill press, but it didn't have enough vertical clearance. Having now figured this out with just a hand drill, the drill press isn't really necessary.

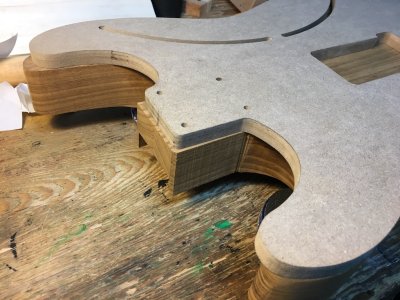
Pic 4&5 show the finished product after I buzzed off the excess wood from the rough outline. The tunnel will get flared and blended to the body during final sanding, but for now it's looking good.

Next up will be to clean up the neck pocket...probably next weekend.
 

Attachments

  • 2018-03-18 11.06.15-1.jpg
    2018-03-18 11.06.15-1.jpg
    245.2 KB · Views: 20
  • 2018-03-18 11.05.57-1.jpg
    2018-03-18 11.05.57-1.jpg
    275.9 KB · Views: 16
  • 2018-03-18 10.51.52-1.jpg
    2018-03-18 10.51.52-1.jpg
    245.2 KB · Views: 22
  • 2018-03-18 10.44.56-1.jpg
    2018-03-18 10.44.56-1.jpg
    227.2 KB · Views: 16
  • 2018-03-18 10.31.43-1.jpg
    2018-03-18 10.31.43-1.jpg
    173.1 KB · Views: 14
I like how you left a flat section on the body so you could clamp the guide onto it. Looks good.
 
That is a nice job. Drilling side jack holes is never any fun, but you pulled it off well.

My only criticism would be in using one of those threaded body panel jacks. They're notoriously unreliable, unserviceable and nowhere near as widely available as a typical Switchcraft-style 1/4" phone jack.

On the plus side, since you've already got a 3/4" recess hole started, later on it'll be easy enough to just drill a little more depth in that hole and mount a standard jack using a jackplate.
 
Thank you! I am happy with the progress thus far.

Cagey said:
That is a nice job. Drilling side jack holes is never any fun, but you pulled it off well.

My only criticism would be in using one of those threaded body panel jacks. They're notoriously unreliable, unserviceable and nowhere near as widely available as a typical Switchcraft-style 1/4" phone jack.

On the plus side, since you've already got a 3/4" recess hole started, later on it'll be easy enough to just drill a little more depth in that hole and mount a standard jack using a jackplate.

The barrel jacks aren't as common for sure, but Stewmac has been stocking those Switchcraft ones since the late 80's at least, as I bought the exact same one for a build back then. That same jack has been going strong. Ibanez also uses their version of that jack in their S and RG series, and mine have all held up well. On the other hand, I have had mixed luck with the 4 screw jack plates as the either the jack itself works loose or the screws back out. For better or worse, I'm pretty married to the barrel jacks and thankfully I have a decent stash of backups. It's also a pet peeve of mine to have the cord sticking out of the guitar at a 90 degree angle, but that's my own hangup.


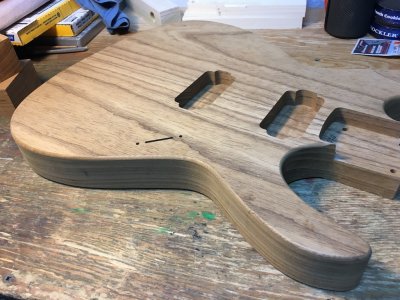
I did a bunch of block sanding to smooth out the outside contours after the roughing out on the spindle sander. I used a 6" and 12" block made from wood scraps as well as a 1.25" x 12" dowel for the interior contours. The spindle sander roughed out at 80 grit, and I only got as fine as 100 grit for the hand sanding. I'll go finer later.

I also got the neck pocket routed with the help of a Strat template. I indexed the template via the neck screw holes and centerline that I had marked on the body earlier.

I also got the edges done with a 3/16" round over bit.
 

Attachments

  • 2018-03-27 14.52.02-1.jpg
    2018-03-27 14.52.02-1.jpg
    292.9 KB · Views: 12
  • 2018-03-28 10.50.58-1.jpg
    2018-03-28 10.50.58-1.jpg
    171.4 KB · Views: 13
  • 2018-03-28 15.19.46-1.jpg
    2018-03-28 15.19.46-1.jpg
    292.3 KB · Views: 15
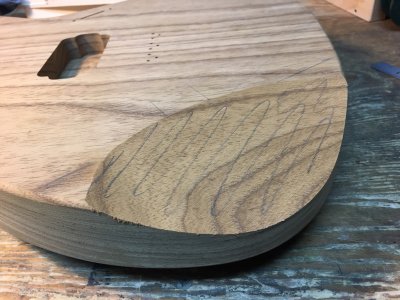
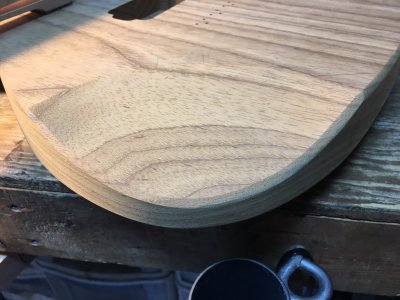
For the forearm contour, I wanted to do something different. After seeing John Petrucci recently, I noticed that his JP6 model has a forearm scoop instead of a bevel contour. I decided to give that a try. I roughed out the scoop with the spindle sander, basically following the angle at which my arm sits on the body. I marked the roughed out scoop with some pencil so I could see my progress, and smoothed out the shape with a half round razor file. More pencil was used to mark the high spots. Since the round over was cut through during this operation, I filed an edge break along the perimeter of the forearm scoop (pic 2). A little bit of 220 blended all the lines together. It feels great and I didn't need to spring for a JP6 to try out the scoop.
 

Attachments

  • 2018-03-28 16.59.12-1.jpg
    2018-03-28 16.59.12-1.jpg
    270.4 KB · Views: 20
  • 2018-03-28 17.19.26-1.jpg
    2018-03-28 17.19.26-1.jpg
    219.3 KB · Views: 20
  • 2018-03-28 17.22.53-1.jpg
    2018-03-28 17.22.53-1.jpg
    238.4 KB · Views: 19
Back
Top