Leaderboard

Multigraincaster

Tomatonator

Junior Member
Messages
133
Merry xmas all,
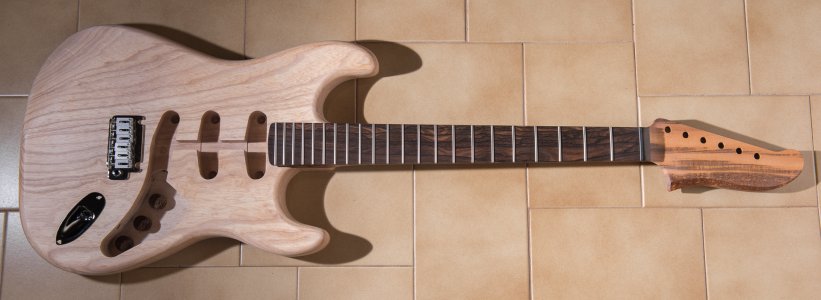
Since my 1st post I've been imagining a strat body with a goncalo neck and Mooncaster headstock. I even did a mock up in GIMP which I might share when more progress has been made but here is the gear. I bought the ash body locally and have already grain filled it with walnut Timbermate. It looks like Warmoth held up their end of the deal in fine style :)

Mooncaster modern construction
Goncalo Alves + Ziricote
25.5" scale
Standard thin profile
1+3/4" GraphTech TUSQ XL std nut
Straight 9" radius, no inlays
22 SS6150 frets
White side dots
Gotoh tuner holes
No finish
 

Attachments

  • DSC_9886.jpg
    DSC_9886.jpg
    785.7 KB · Views: 245
nice choice of woods there I like the mooncaster neck. The control cavity looks a bit tight but you will find out how that goes.
 
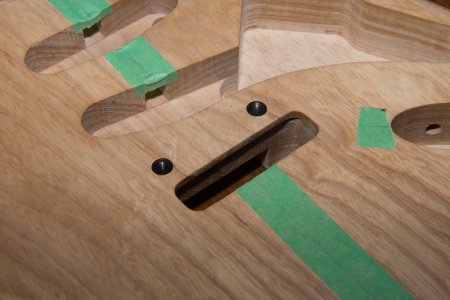
It does look tight in there. But, it's clearly designed for a pickguard, so almost all the wiring will take place outside the body.

 
Look more closely - I think it's a standard Strat cavity (with some knobs sitting in it casting a shadow).
 
Good eye! You're right. Shadows make it look like it's a different shape. With no finish on it, there's little to differentiate the levels.
 
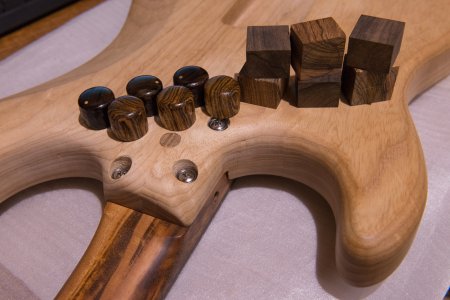
Yeah there are some knobs in there just as a visual aid - probably not aiding much sitting down in there :) I'm going to try my hand at making some too as I ordered small blocks of ziricote and bocote so those ones are mainly for if my effort doesn't work out!

Also the wiring is already done and in another guitar for now. The route this body came with was for single coils and regular pots but all 3 will be push/pull so I've already routed it too (twice actually) because it wasn't deep enough. I have taken some earlier progress shots of the grain filling etc so I'll post something with those some time later.
 
Hi all,
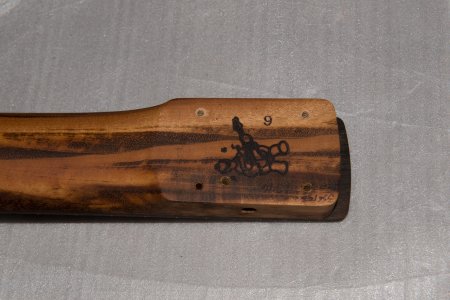
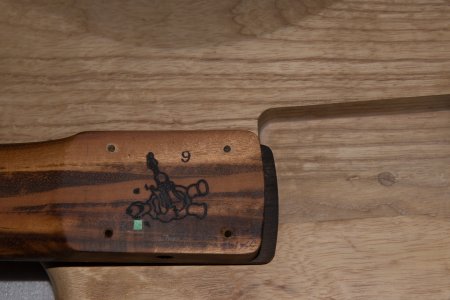
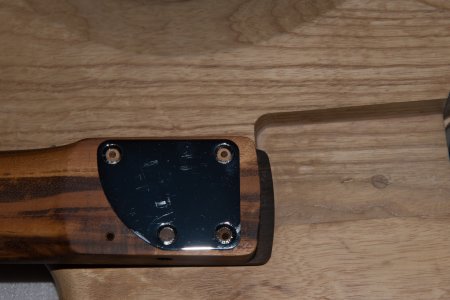
I haven't updated in a while but I've been slowly getting bits done. Initially I was just going to have a standard strat neck heel but when I held one of the ones with the contoured heel plate I liked it so I thought I'd go with that. Then I remembered Warmoth modern construction wasn't compatible with that due to the side access truss rod adjuster as you can see from info on their site.

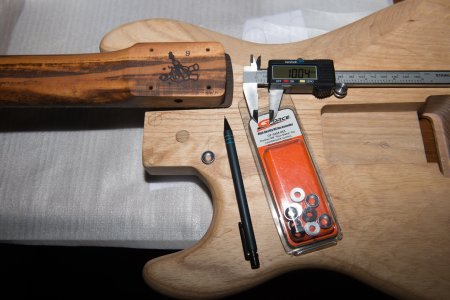
I took inspiration from Hendrix's photos of his shaped strat body/heel as the way to go in combination with diagrams of the internals of the modern heel adjust and the Warmoth video showing the cut away fretboard. So I set about working out where to place the contour short screw and using M5 countersunk washers (shown in the pack in the 1st pic) instead of any neck plate.

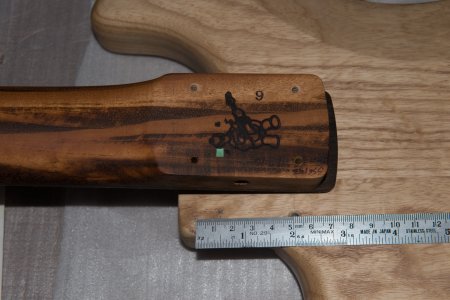
Initially I tried to mark out where I would drill the neck holes in the body by clamping and marking the end of the body on the neck and then measuring from there to the pre-drilled Warmoth holes (10mm measurement shown on the caliper from the edge of the neck pocket to the top 2 standard holes. Fortunately before doing any permanent damage I realised I either did it wrong or it was too imprecise.

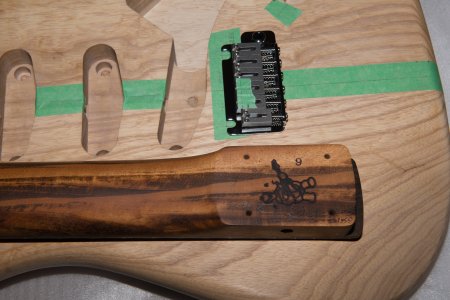
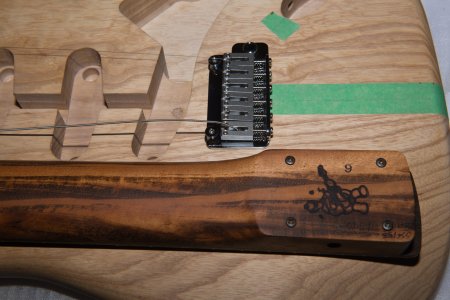
I realised I needed to place the bridge 1st before I could use the E string method to ensure the neck lined up. To place the bridge I clamped the neck as best I could and drew lines on tape to mark out the 25.5" scale line. I then measured using Will's Easy Guitar bridge placement method by adjusting the bass and other saddles to opposite extents to accomodate the scale line and mark the trem front and appropriate stud placement.

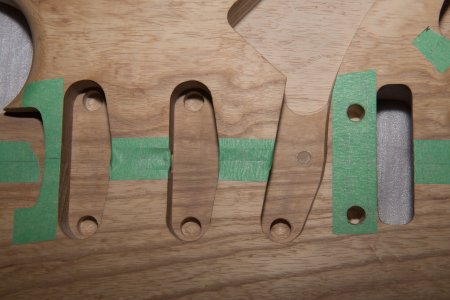
The 3rd pic shows the final drilled trem stud holes using a 3/8" or 9.5mm brad point through scrap wood to assist preventing any tear out and CNC holes in the body that had messy looking stumps in them from factory until I put the drill press into them to clean them up.

I used American standard spacing 2-7/32" or ~56.36mm. I also finished the hole with a 9.5mm split point because I was concerned the spike of the brad point could poke into the spring cavity.
 

Attachments

  • DSC_9936.jpg
    DSC_9936.jpg
    1.3 MB · Views: 48
  • DSC_9940.jpg
    DSC_9940.jpg
    1.4 MB · Views: 37
  • DSC_9944.jpg
    DSC_9944.jpg
    1.4 MB · Views: 30
Next up was installing the studs in the holes. I used the closed drill press to install tremolo studs which as a bonus allows you to hear if the body cracks. I think that would be pretty difficult using any hammer/mallet method. This happened while I was inserting the 1st one so I left it there, pushed some PVA glue into the crack and took the stud back out using an upside down screw in the hole and screwing the trem post into it to lift out the stud.

It seems to have done the job cause it didn't crack further after using a drill bit and some sand paper to slightly expand the hole then re-insert the stud. I got the 2nd one done without any damage and can't easily see where the slight split was (treble side) - it didn't split to the front of the guitar.
 

Attachments

  • DSC_9946.jpg
    DSC_9946.jpg
    1.1 MB · Views: 19
Now came the actual lining up of the neck. For me this was more difficult because I had an undrilled body to match up to a pre-drilled neck. I searched around and decided to go with frankfalbo's idea on jemsite.com of using inverted pickguard screws to mark where I would drill the holes from the front into the back. I added a step of drawing pencil lead all over the screw heads to get a good X mark to aim for.

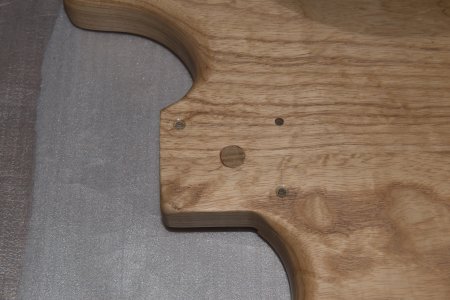
I lightly started neck holes into back of body with 5mm brad point which is the closest size I had available to centre it and proceeded to do the actual hole with 4.5mm split point. The 1/2" forstner I use for the countersink would remove any indication of the 5mm brad point bit. The last pic below shows how far out I was with my previous hand measured/drawn markings.
 

Attachments

  • DSC_9960.jpg
    DSC_9960.jpg
    1.6 MB · Views: 45
  • DSC_9952.jpg
    DSC_9952.jpg
    1.2 MB · Views: 30
  • DSC_9950.jpg
    DSC_9950.jpg
    1.3 MB · Views: 30
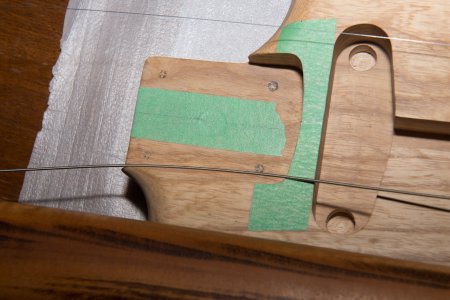
Next up are pics showing the distance from the re-marked top hole and drilled hole to the location of the contour hole for the short screw and the predicted location on the neck of the contour hole (tape in 1st/3rd pics). I drilled through the body into the neck to ensure the neck hole would be perfectly lined up with the body hole and very carefully measured the total depth for the stop on the drill  press so I didn't go too far. I also show an ebay fender style contour plate that I had bought covering my custom hole for comparison.

The 3rd pic shows some of the faint markings I used to locate my hole allowing 5mm clearance to the side adjust mechanism and distance from the edge of the neck. I moved the contour screw ~3.5mm in and ~12mm down from the normal location. You could move it even closer to the truss mechanism if you wanted.

It was 45mm through body into attached neck (26.2mm + ~19mm into the goncalo alves shaft so the hole depths match) with a 3mm bit but mine was bent so I went with 3.5mm. I then widened the body hole to 26.5mm depth with a 4.5mm bit before drilling the countersinks with a 12.7mm forstner bit to accommodate the M5 countersunk washers and shaping the contour.

The last pic shows the ultimate location for the neck hole where the body was to be contoured nicely missing the turtle and music note :) Each hole in the neck was slightly countersunk with a 5mm drill bit to reduce chipping when putting the screws in.
 

Attachments

  • DSC_9974.jpg
    DSC_9974.jpg
    1.9 MB · Views: 27
  • DSC_9966.jpg
    DSC_9966.jpg
    1.1 MB · Views: 31
  • DSC_9965.jpg
    DSC_9965.jpg
    1 MB · Views: 41
  • DSC_9964.jpg
    DSC_9964.jpg
    1.2 MB · Views: 27
Last update for today!
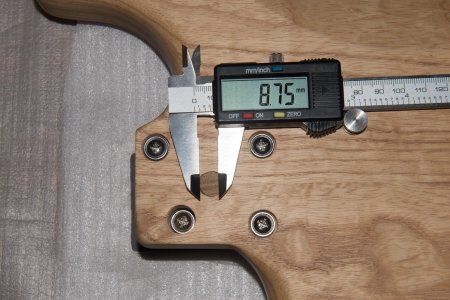
The thickness in the countersink gets down to 13mm in the relocated hole from 26.2 original thickness. The washer thickness is 3.2mm. I drilled the countersink holes 3.5mm for the normal holes and 13mm for contour hole using a 1/2" forstner bit. The 1st pic shows screws placed with washers in the holes and the caliper showing 8.75mm to the top of the screw inside the contour hole.

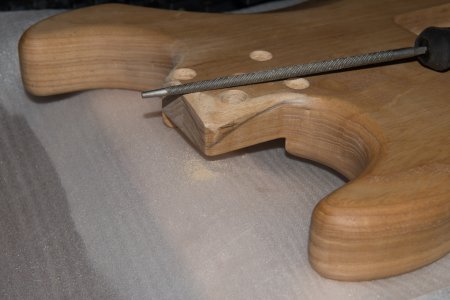
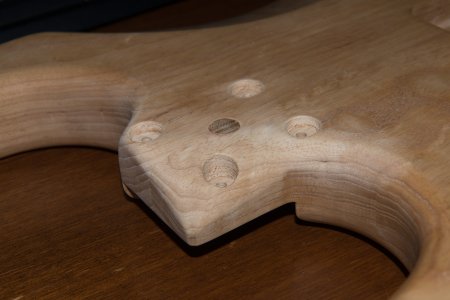
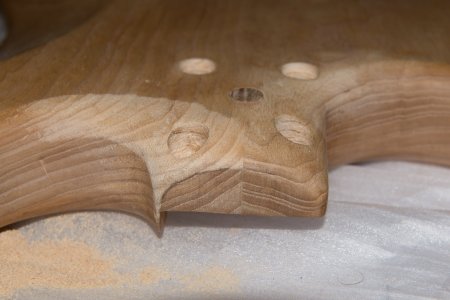
The last 2 pics show the 'bast ard' tool (without the space it was auto-censored to 'bonehead'!) used to shape before sanding/in progress and final shot of the contour. Now to decide whether I want to contour the hole on the bass side near the edge of the body too or leave it as is and decide how best to hide the index hole before any finishing i.e. shorten the oak plug I put in and top it with ash sawdust or leave it as oak. I plan to do a dark brown to yellow/gold burst so it will be under dark colour there.
 

Attachments

  • DSC_9980.jpg
    DSC_9980.jpg
    1.6 MB · Views: 52
  • DSC_9983.jpg
    DSC_9983.jpg
    1.1 MB · Views: 41
  • DSC_9988.jpg
    DSC_9988.jpg
    970.1 KB · Views: 58
Great method with the upside-down pickguard screws!! Very cool looking build, and the washers instead of neckplate is going to be really cool.
Dave
 
Hi all,
I have been slowly active doing bits and pieces while I work out what to do with the index hole as seen from the back of the body and what pickguard I want to use. I decided to go ahead and shape the whole back of the neck join so I will be using 2 shortened screws (35mm), rounded down a little more on the treble side and hand crafted some knobs which have turned out quite well. I plan to post more detailed info about those.

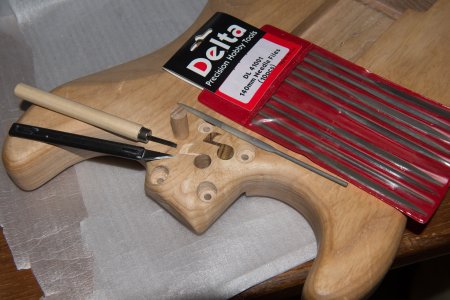
I had been aiming to find a way to knurl the sides of the knobs to aid in use on push pull pots but since I don't have a lathe I ended up chiselling them out and that seemed to work as a form of grip + makes each one a unique work... more work than with machines but I like it :)
 

Attachments

  • DSC_0042.jpg
    DSC_0042.jpg
    1 MB · Views: 46
  • DSC_0091.jpg
    DSC_0091.jpg
    1.3 MB · Views: 82
Nice! How are you attaching those knobs? Is there a friction insert or a set screw or what?
 
They're going on split shaft pots - they go on tight with just friction in the right sized hole... Here's the details:

Cut ~20mm thick block from 1" square blank and chisel or hole saw cylinder diameter of your preference
15mm total pot shaft drill depth:
5.5mm drill bit +LATER widening for pot shaft spline section (15mm depth)
6mm drill bit for width of bottom smooth section of pot (7-8mm depth)
12.7mm forstner bit countersink to fit pot fastening nut before you sand/curve the top surface of the knob (~2mm depth)
Mount drill bit upside down in drill press
Jam the knob onto it and sand to shape and grit of your choosing (800) - it holds without any help but a drop of superglue can be used if not. Beware of using too much as it can be very hard to get the bit back out! I did this and had to freeze it then twist it off after mounting it in the drill press again :)

Widen the 5.5mm drilled section to fit on the splined pot section using reverse drill bit wrapped with a layer of sandpaper
Ash markers on ziricote knobs were done with 2mm drill bit hand spun to make a little shallow hole to glue in some sanding dust

I got the idea for the method from Tim Sway on youtube:
[youtube]https://www.youtube.com/watch?v=bnyyHvQ5w0o[/youtube]
 
Guten tag all,
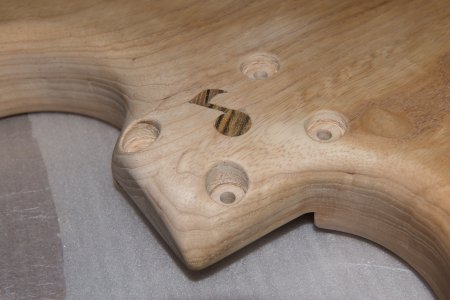
I decided to add a little music at this stage of my project as a way to hide the index hole or whatever it was in the body where a neck plate would have covered it and make it look intentional. 1st attempt at an inlay and I think it worked out ok. Handy to have the right tools around. Hopefully it will look even better when it's done and there is a finish over it :) Almost at the colour stage... Now to choose a pickguard.
 

Attachments

  • DSC_0104.jpg
    DSC_0104.jpg
    1.5 MB · Views: 52
  • DSC_0120.jpg
    DSC_0120.jpg
    1.3 MB · Views: 51
Dang, that's a deep and wide hole there.  I might pack it with a dowel for support for your inlay.  That might make it less likely that your lovely eighth-note inlay should break off, especially considering how thin the stem on it is.

But that's a beautiful solution to an ugly disfigurement.  I salute you.
 
Back
Top