rauchman
Hero Member
- Messages
- 869
Greetings,
Starting working on the Tele swamp ash body that I had ordered. It was a beautiful day Saturday and decided to work on some steps outdoors to enjoy the day. Originally was thinking of going "deep" on a complex finish, but went with Stratamania's suggestion and went for something simpler to get my feet wet.
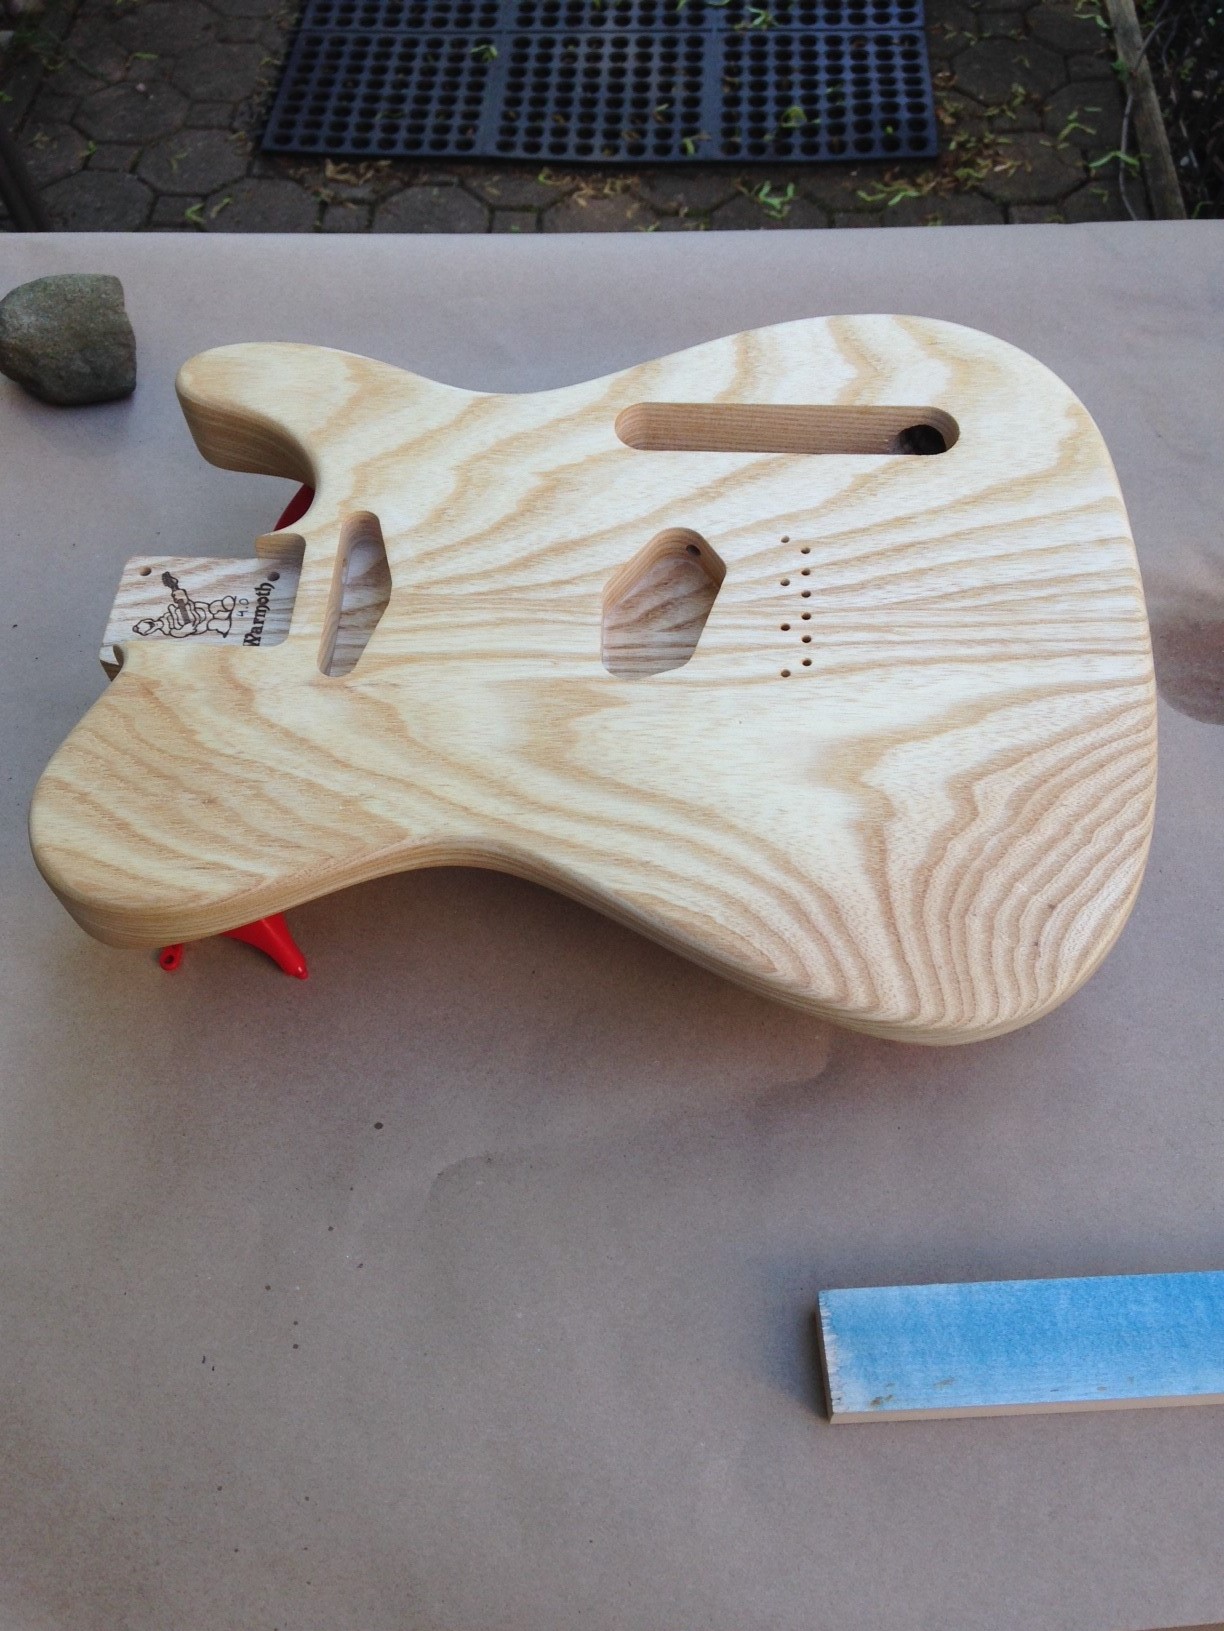
Started with this...
Steps used so far...
-Sanded body using 150 grit (as suggested by Keda Dye instructions)
-Removed dust with a paint brush and mineral spirits (as I'm learning, mineral spirits takes a while to dry, any faster suggestions for this process?)
-Used hot water to open grain
-Sealed wood with a light coat of Birchwood Casey Wood Sealer/Filler. Did not focus on a perfect coat of sealer. Waited 1 hour to dry
-Using Keda dye, mixed a combo of black, red and brown and used to highlight the open pore grain (6oz hot - warm water, 1/4 tsp of dye for each color)
-Sanded off sealer, but not a full on "must remove every bit of sealer"
-Removed dust with a paint brush and mineral spirits (one more time...as I'm learning, mineral spirits takes a while to dry, any faster suggestions for this process?)
Mixed a solution of 6oz water and 1/4 tsp blue Keda Dye
Using a rag, slowly stared from about 2" out from the center, to apply the dye, using a sweep motion from center to the edge
Applied 3 coatings. Each successive coat would be applied a little further out from the center. Also, between each coat, would take a dry rag and rub to lightly burnish the finish. Definitely noticed a "rising" of the grain from this process
Had about 3-4oz left of the blue dye solution and added an additional 1/4tsp of black dye to the solution to make the blue darker
Only applied to the outer 2" or so
Final light burnish
Applied Birchwood Casey Wood Sealer and focused on smooshing (technical term) it into the grain
Sanded with 320 grit
-Removed dust with a paint brush and mineral spirits (and yet again...as I'm learning, mineral spirits takes a while to dry, any faster suggestions for this process?)
Sunday morning/yesterday morning....
Applied 4 coats of True Oil, using a couple of fingers to work it in. A glossiness was starting to be visible by coat 2.
Tonight...
Sand using 400-600 grit. If time allows, apply another 4 coats of True Oil
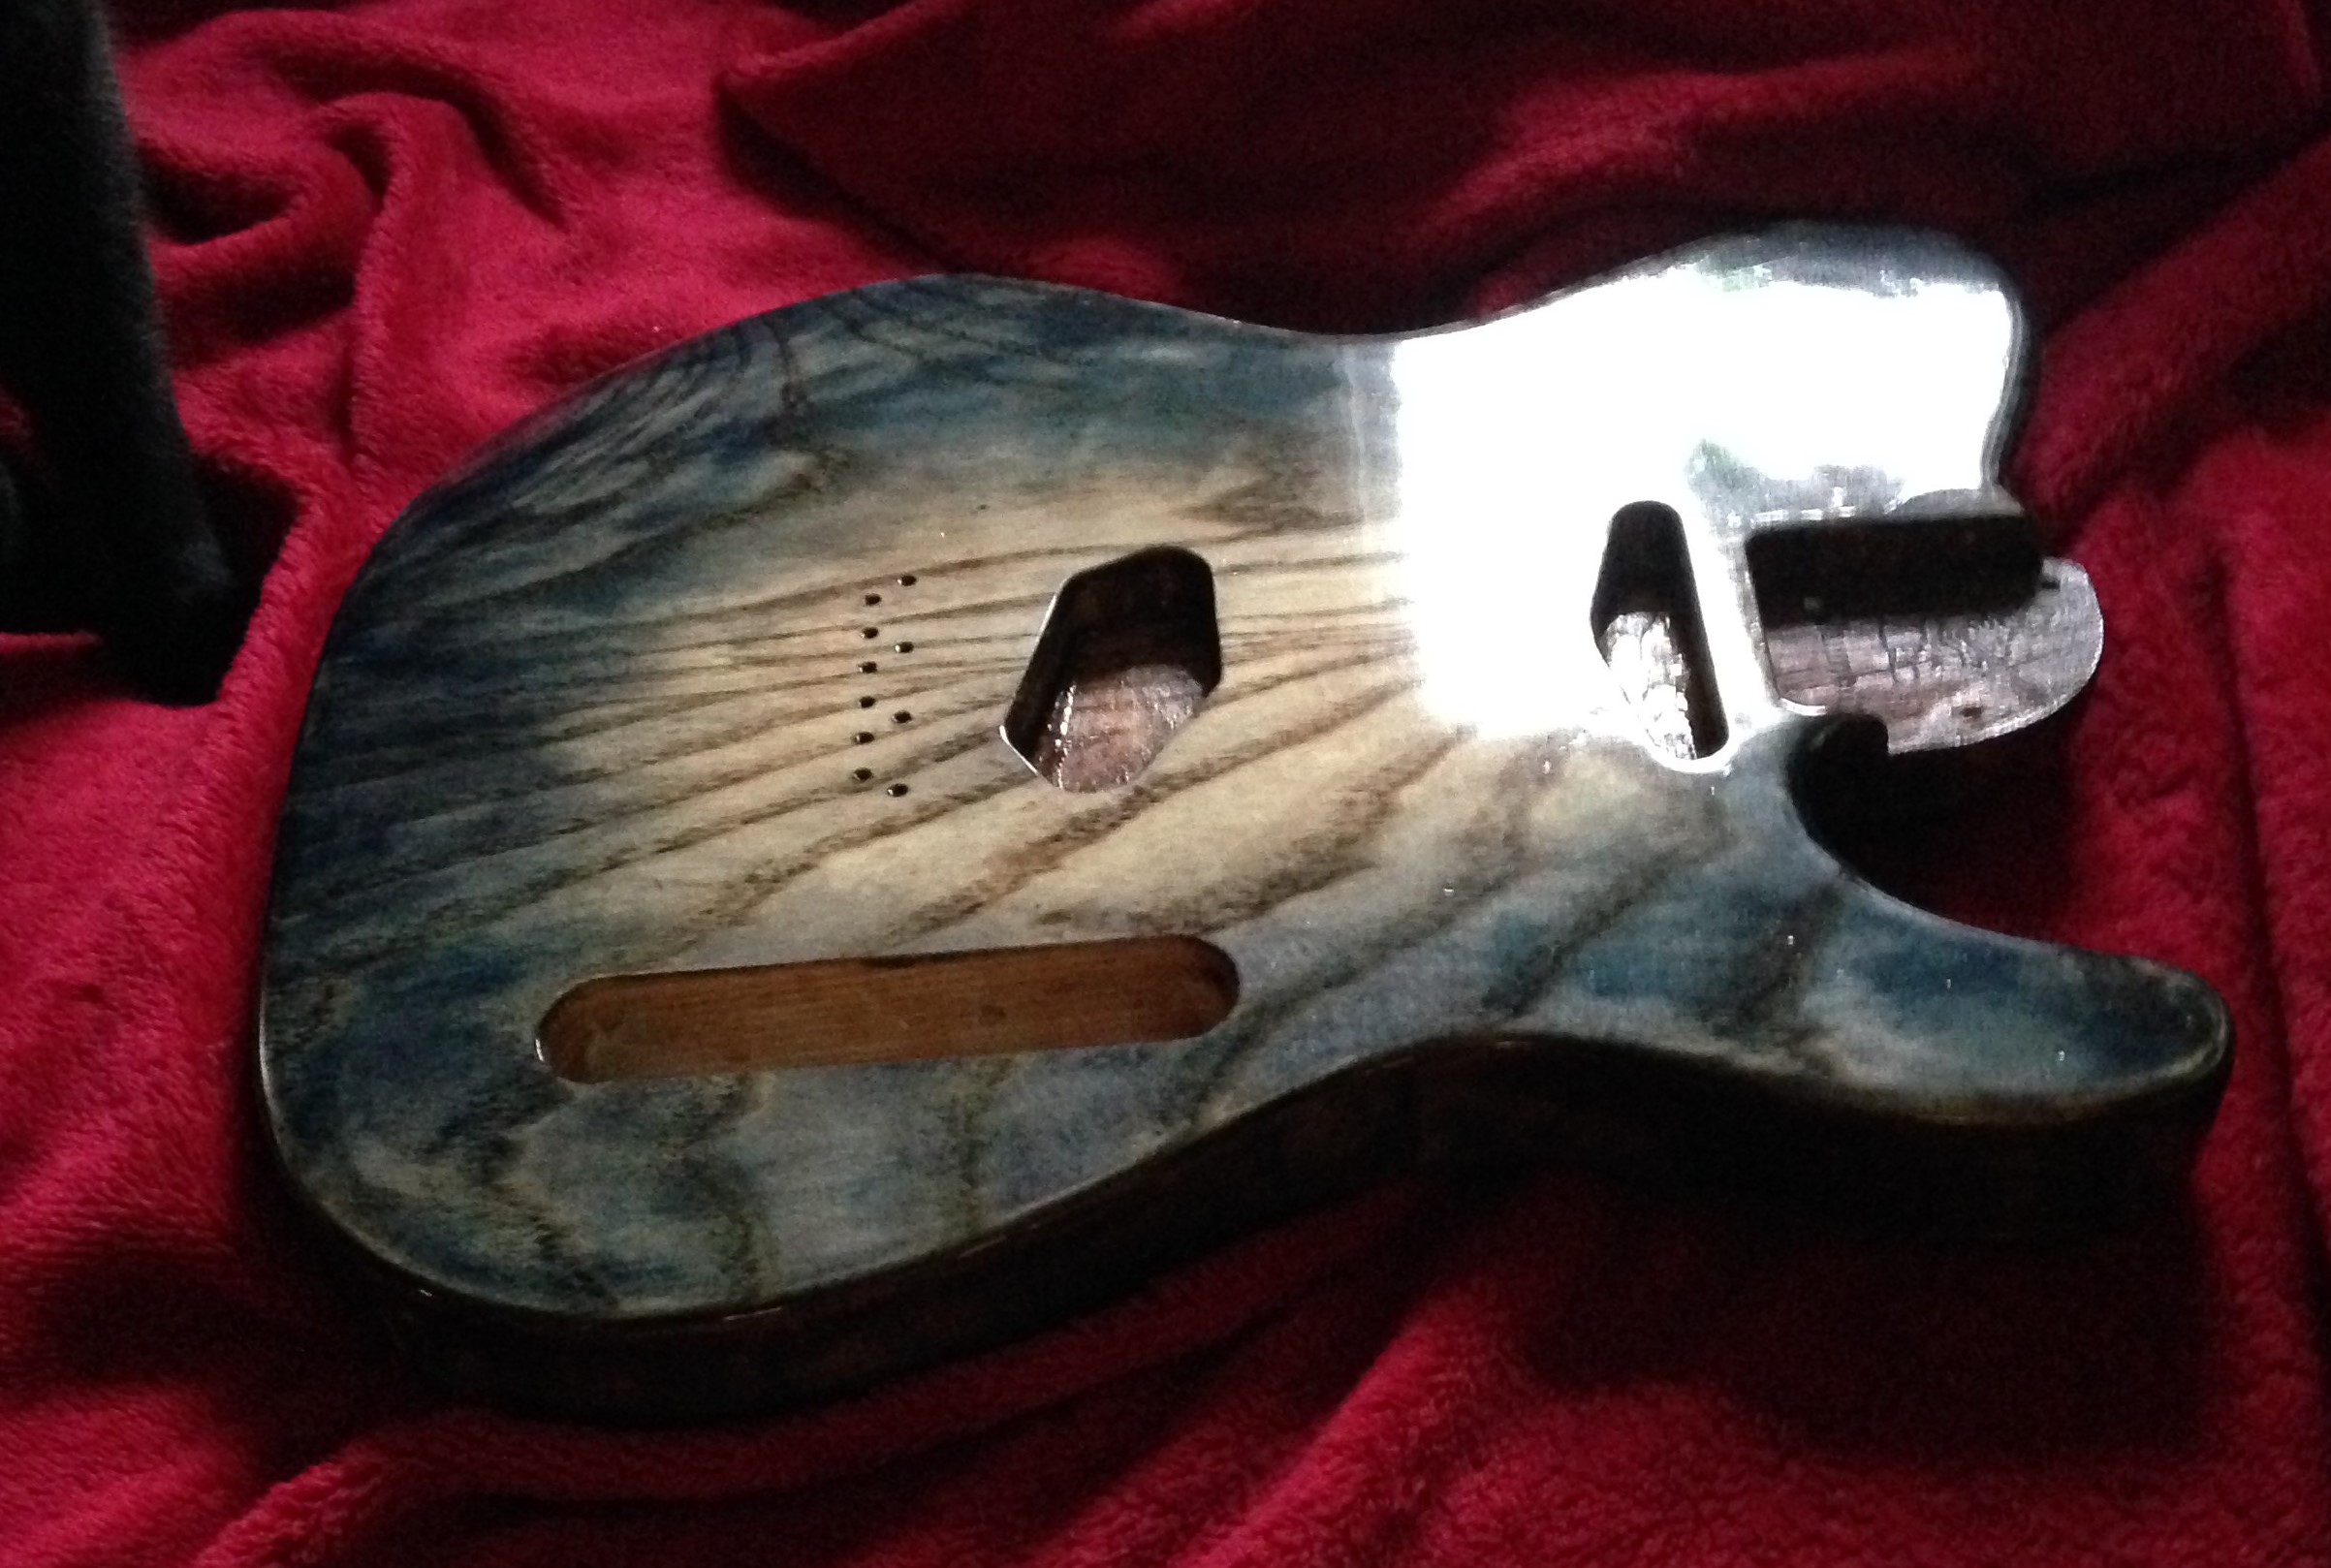
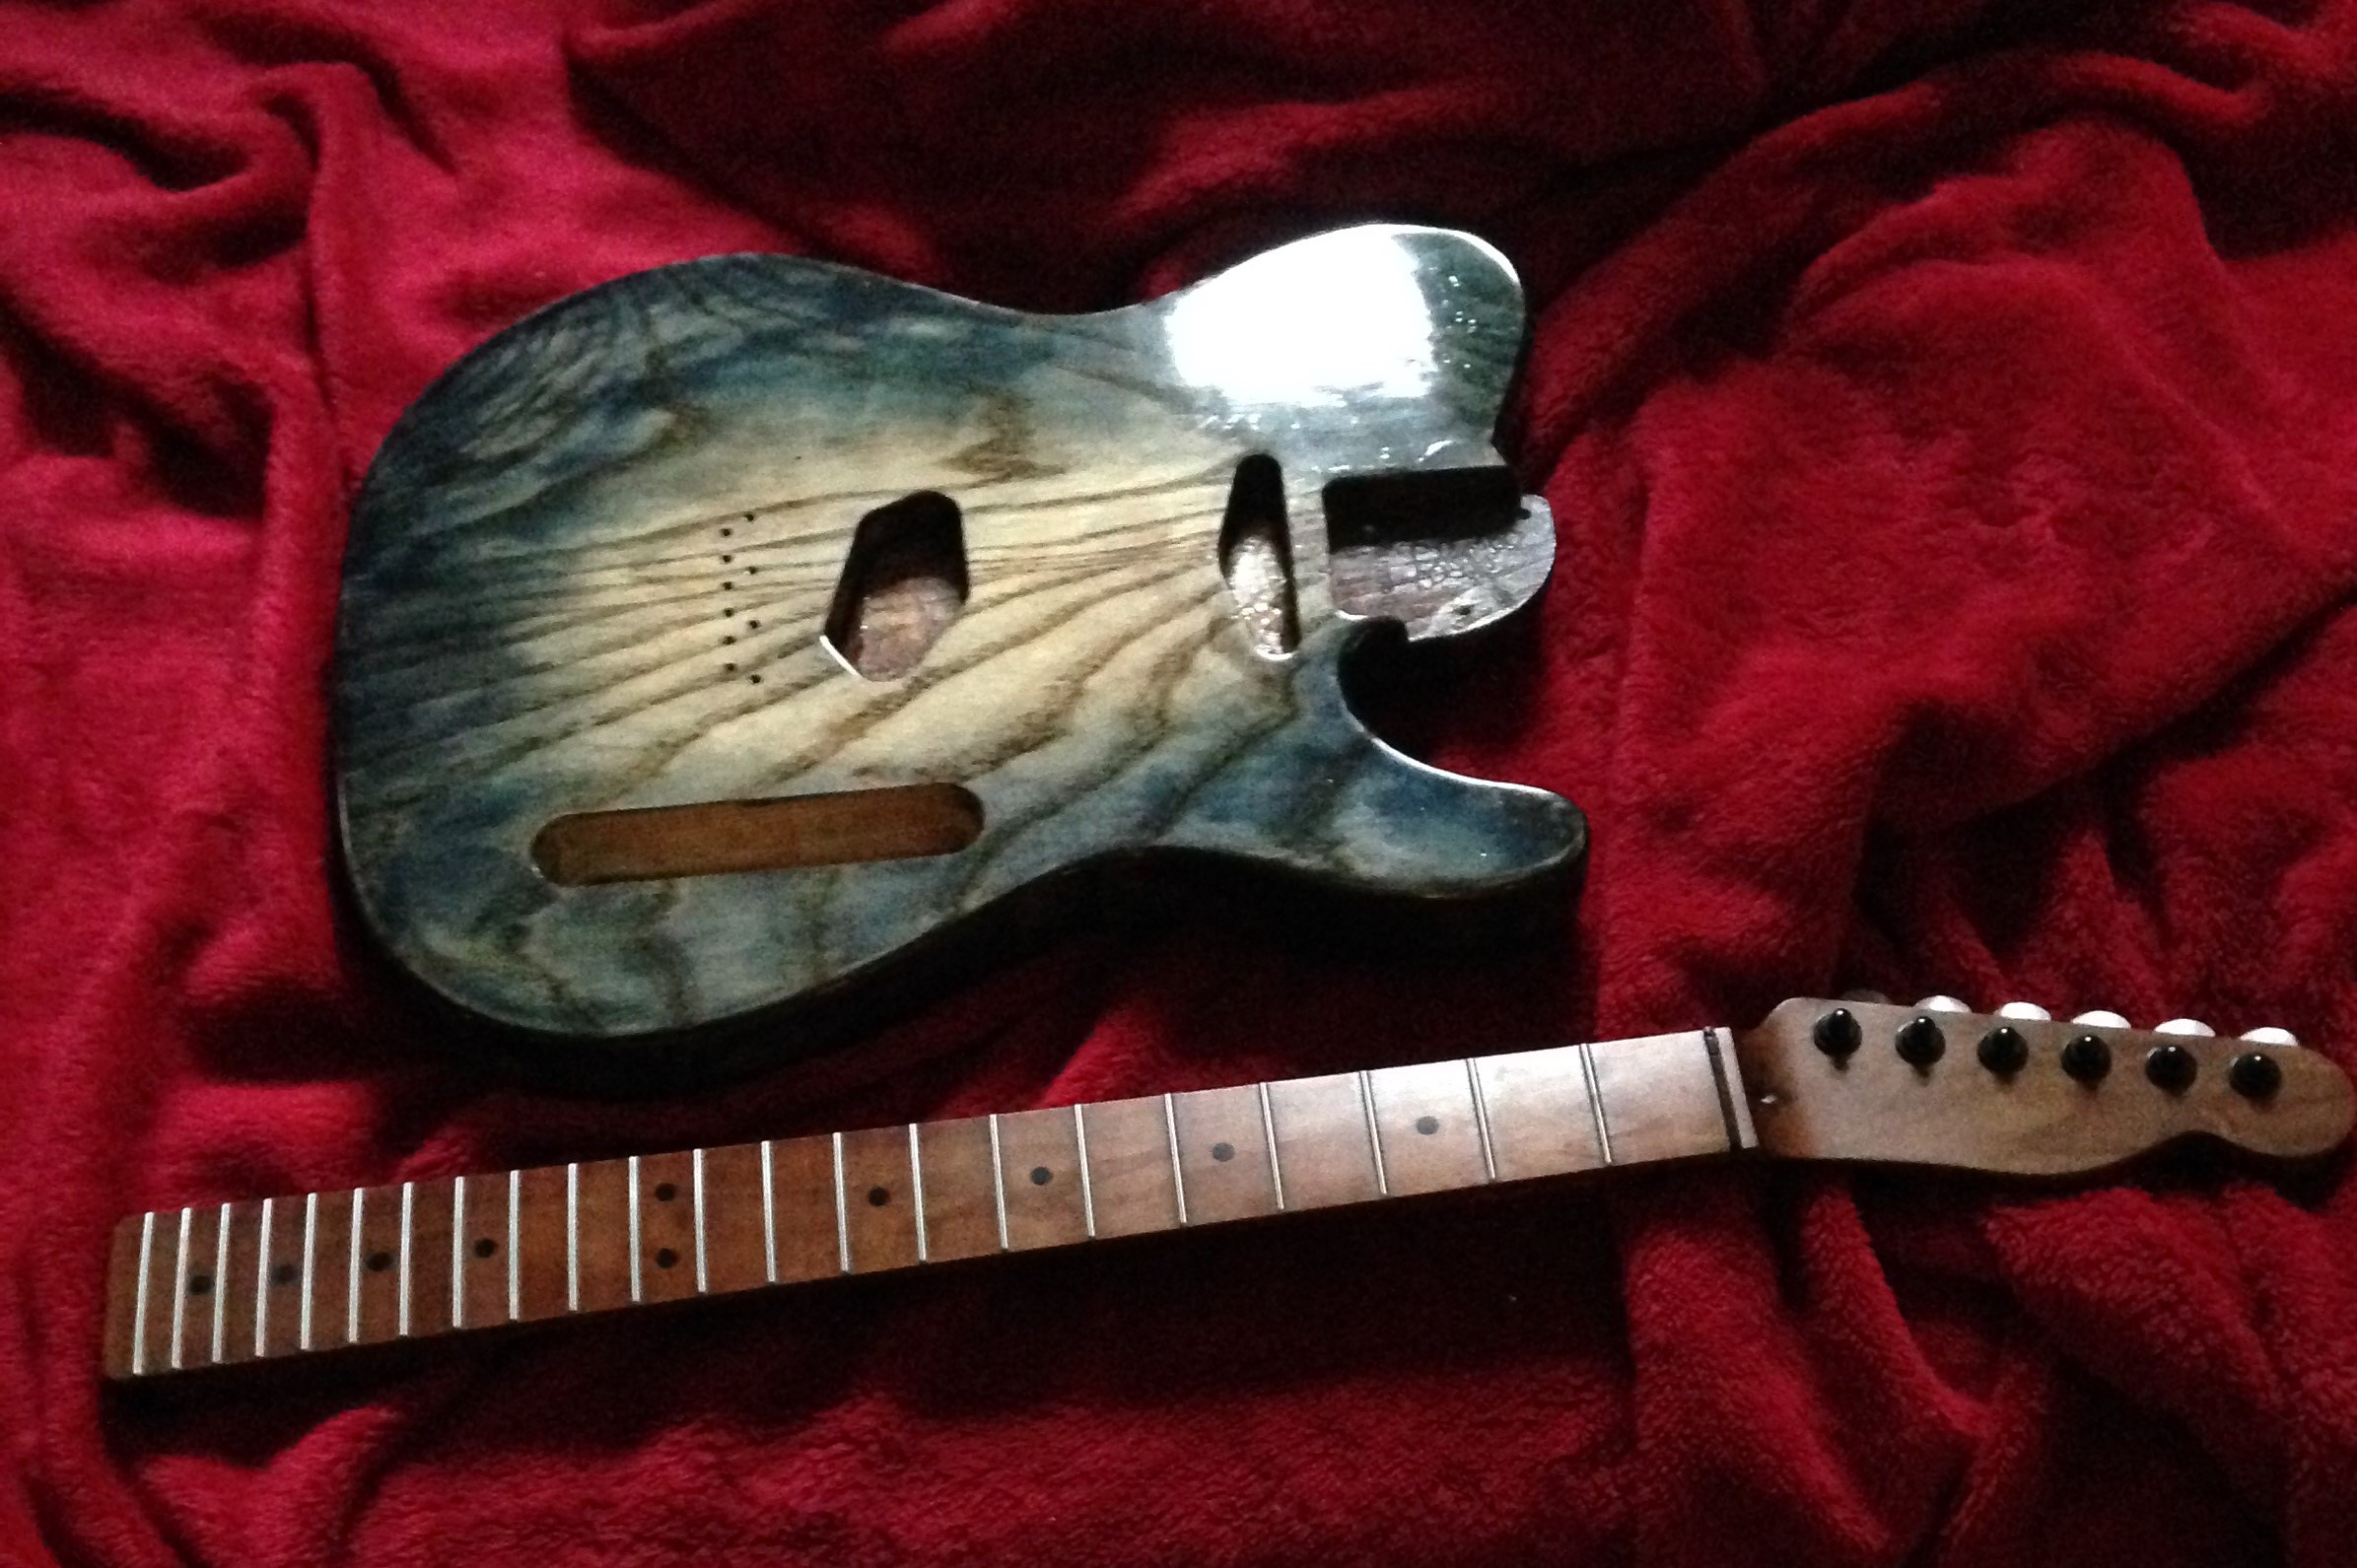
This is where we are now.....
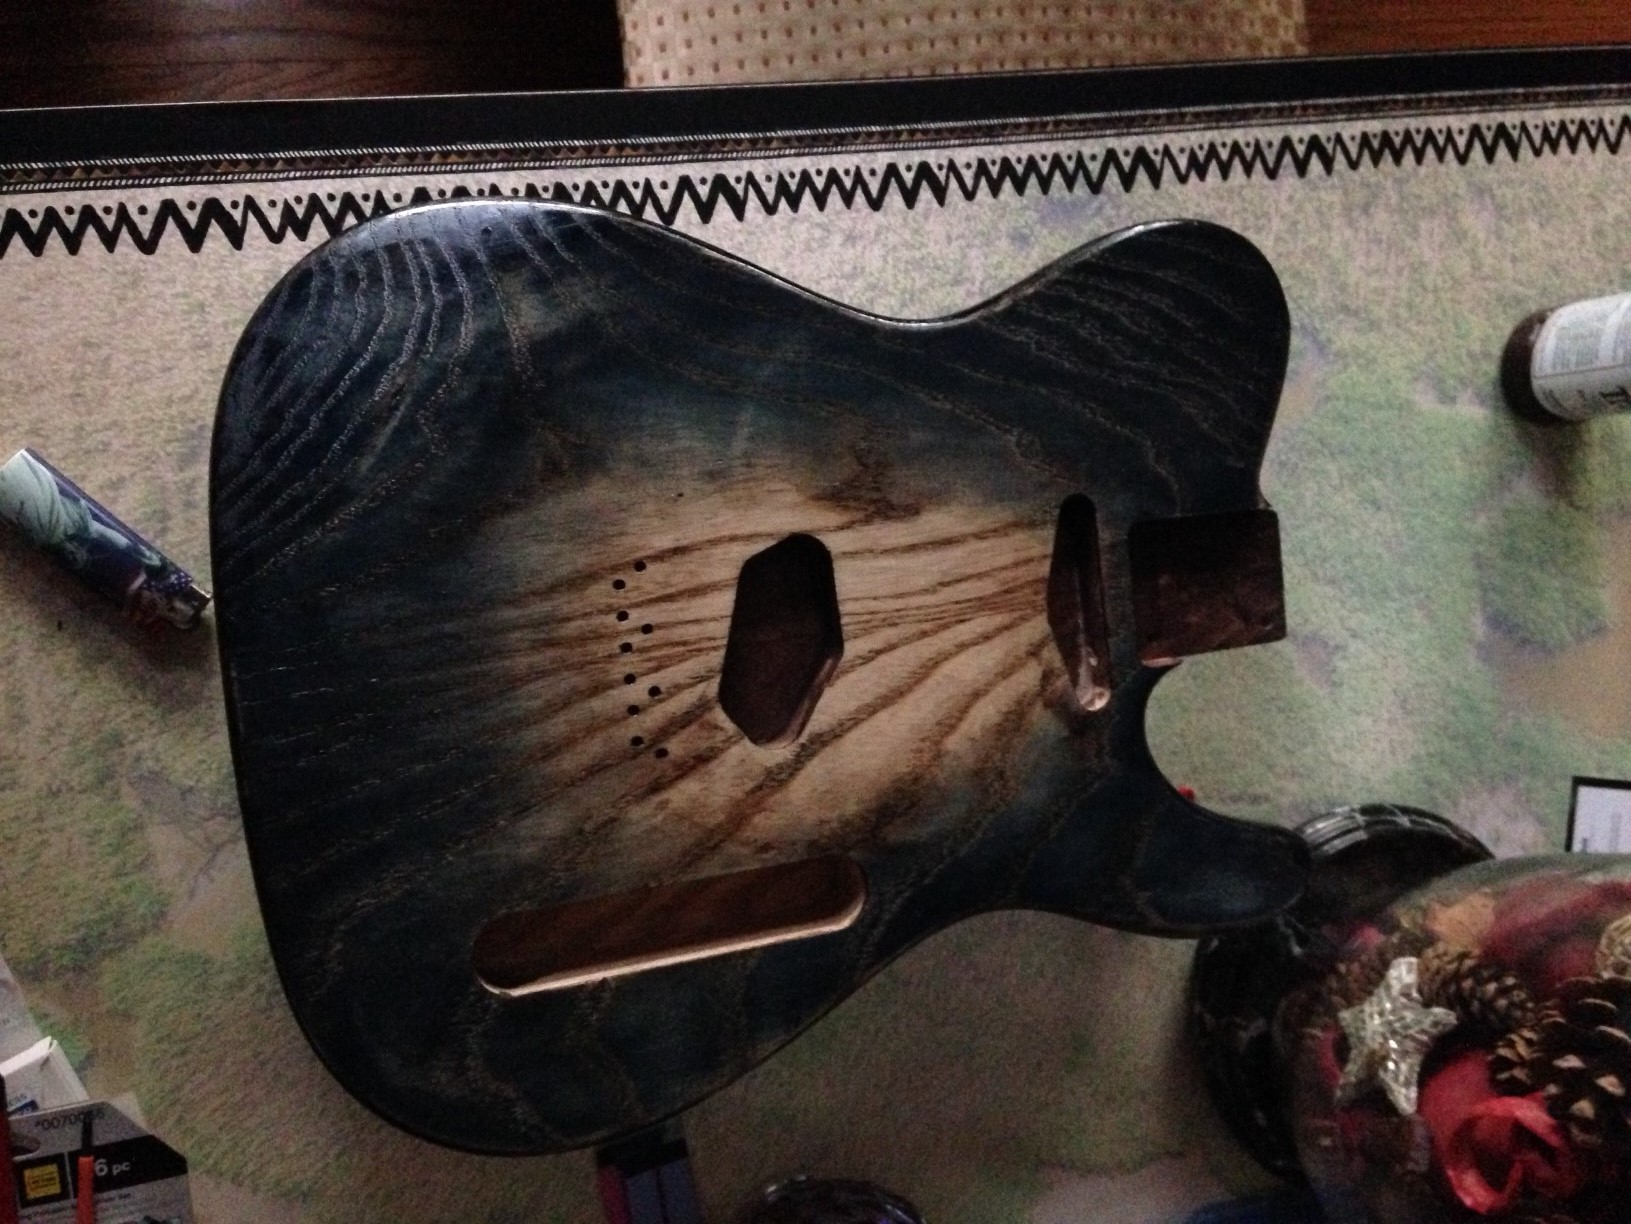
Unintended effects, but worked out awesome.
I didn't take a picture of the back / sides, however, I didn't apply much if any sealer to the wood on the edges and I didn't do a great job applying sealer to the back. The effect of this was to dye the wood varying intensities of the black, brown, red dye solution. Then with the blue dye added, it has created a beautiful worn relic look. Will take some pics tonight...
So far, I'm happy with how this is turning out.
Some questions.....
Can either a poly, lacquer or shellac finish being applied on top of the True Oil?
Can True Oil be mixed with a oil based stain?
Can an oil based stain be mixed with poly, lacquer or shellac?
Thanks!
Starting working on the Tele swamp ash body that I had ordered. It was a beautiful day Saturday and decided to work on some steps outdoors to enjoy the day. Originally was thinking of going "deep" on a complex finish, but went with Stratamania's suggestion and went for something simpler to get my feet wet.
Started with this...
Steps used so far...
-Sanded body using 150 grit (as suggested by Keda Dye instructions)
-Removed dust with a paint brush and mineral spirits (as I'm learning, mineral spirits takes a while to dry, any faster suggestions for this process?)
-Used hot water to open grain
-Sealed wood with a light coat of Birchwood Casey Wood Sealer/Filler. Did not focus on a perfect coat of sealer. Waited 1 hour to dry
-Using Keda dye, mixed a combo of black, red and brown and used to highlight the open pore grain (6oz hot - warm water, 1/4 tsp of dye for each color)
-Sanded off sealer, but not a full on "must remove every bit of sealer"
-Removed dust with a paint brush and mineral spirits (one more time...as I'm learning, mineral spirits takes a while to dry, any faster suggestions for this process?)
Mixed a solution of 6oz water and 1/4 tsp blue Keda Dye
Using a rag, slowly stared from about 2" out from the center, to apply the dye, using a sweep motion from center to the edge
Applied 3 coatings. Each successive coat would be applied a little further out from the center. Also, between each coat, would take a dry rag and rub to lightly burnish the finish. Definitely noticed a "rising" of the grain from this process
Had about 3-4oz left of the blue dye solution and added an additional 1/4tsp of black dye to the solution to make the blue darker
Only applied to the outer 2" or so
Final light burnish
Applied Birchwood Casey Wood Sealer and focused on smooshing (technical term) it into the grain
Sanded with 320 grit
-Removed dust with a paint brush and mineral spirits (and yet again...as I'm learning, mineral spirits takes a while to dry, any faster suggestions for this process?)
Sunday morning/yesterday morning....
Applied 4 coats of True Oil, using a couple of fingers to work it in. A glossiness was starting to be visible by coat 2.
Tonight...
Sand using 400-600 grit. If time allows, apply another 4 coats of True Oil
This is where we are now.....
Unintended effects, but worked out awesome.
I didn't take a picture of the back / sides, however, I didn't apply much if any sealer to the wood on the edges and I didn't do a great job applying sealer to the back. The effect of this was to dye the wood varying intensities of the black, brown, red dye solution. Then with the blue dye added, it has created a beautiful worn relic look. Will take some pics tonight...
So far, I'm happy with how this is turning out.
Some questions.....
Can either a poly, lacquer or shellac finish being applied on top of the True Oil?
Can True Oil be mixed with a oil based stain?
Can an oil based stain be mixed with poly, lacquer or shellac?
Thanks!