Baritone Telecaster Project.

TonyFlyingSquirrel

Master Member
Messages
4,436
This thread is dedicated to recording the inspiration and process of my Baritone Telecaster project. While inspired by the Thinline Telecaster that first appeared in the 1999 Fender Custom Shop Calendar, this project actually began as the first component (The neck) was supplied as a gift from my former Employer Ken Warmoth, when I worked at Warmoth Guitar Parts from June 2008 to May 2009.

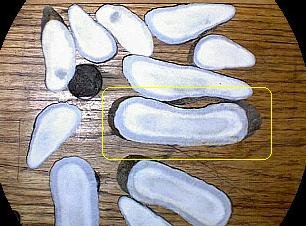
First, the inspiration/source material for this project: A Fender Custom Shop Thinline Tele covered in Elkskin, adorned with beautiful beadwook, turquoise inlay on the custom made silver plated pickguard and fingerboard, faux F-hole, custom engraving, along with an equally beautiful Elkskin Leather strap and gig-bag.

BuckskinTelecaster1-1.jpg

BuckskinTelecaster-1.jpg


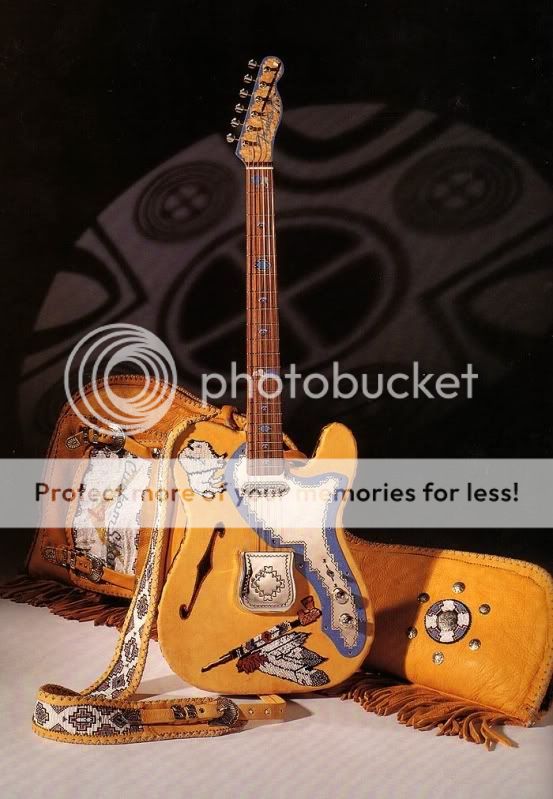
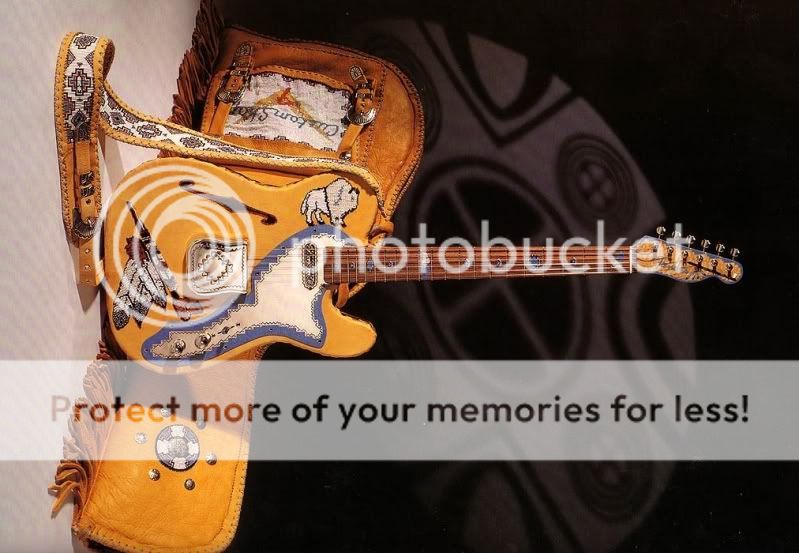
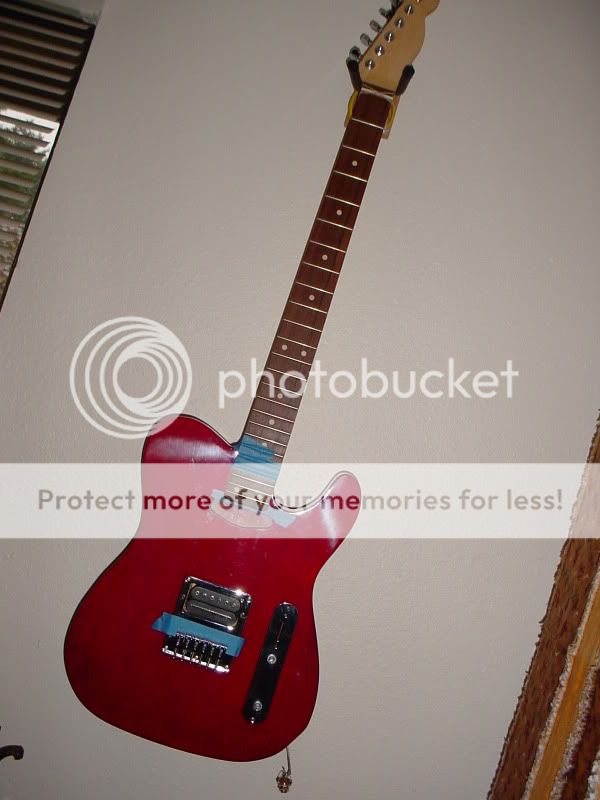
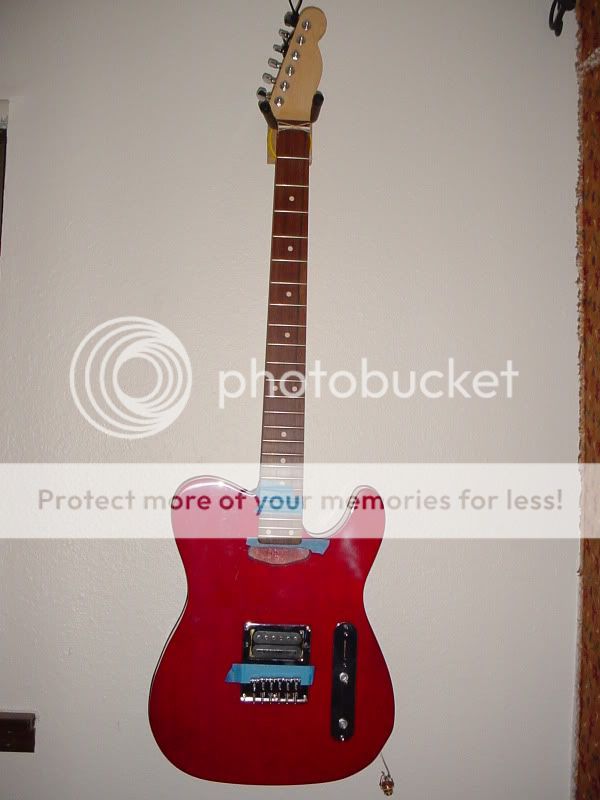
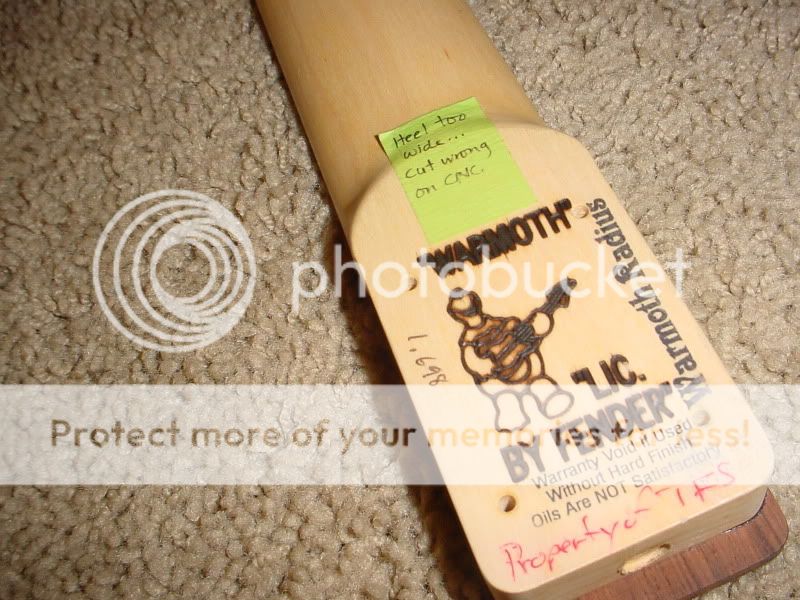
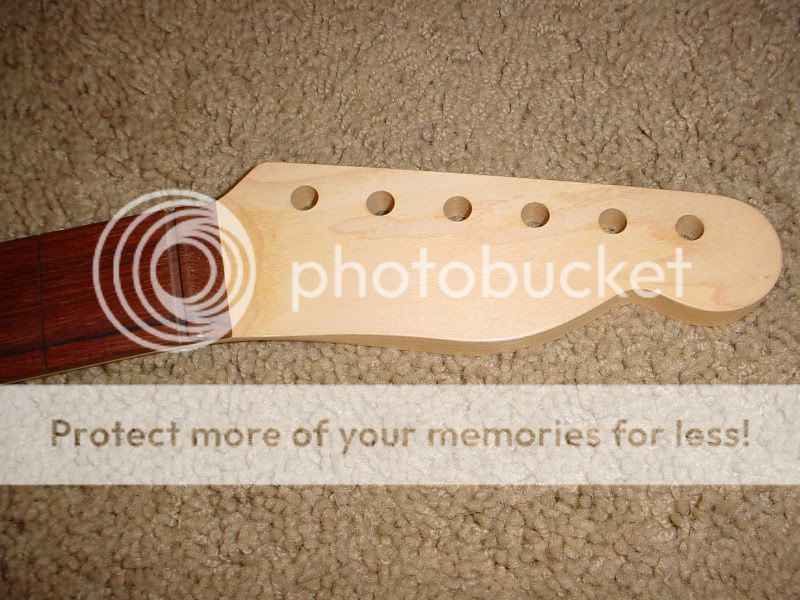
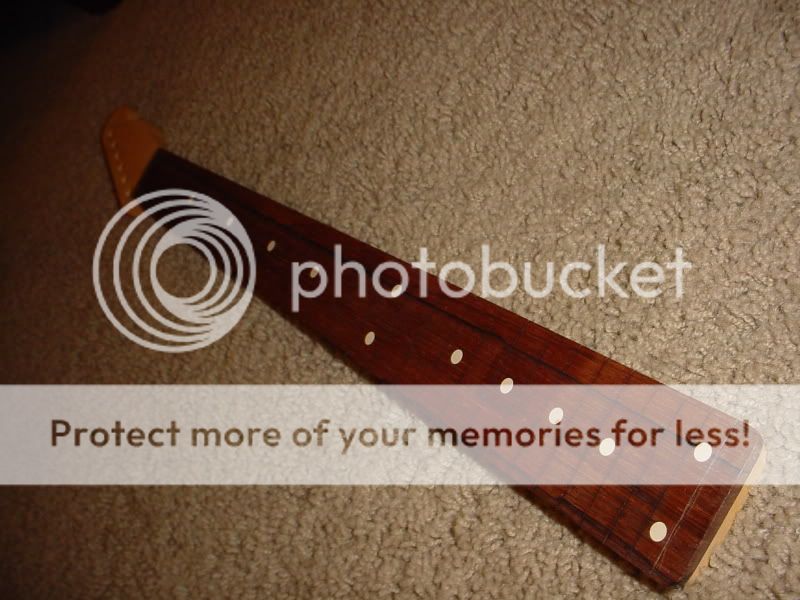
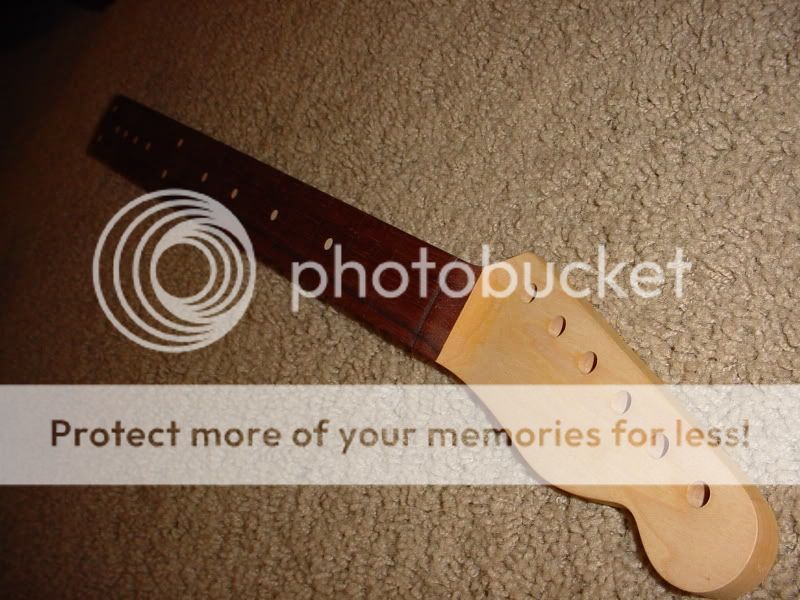
It's a simple Warmoth Baritone Tele Neck in 28 5/8" scale,Rock Maple shaft, Indian Rosewood Fingerboard, 6100 Fretwire.  Currently it has Gotoh SG38 tuners in chrome, such as those available at Warmoth Custom Guitar Parts - Custom bass and guitar bodies, necks, pickups, pickguards and hardware.

WarmothBari-Tele_Heel.jpg

WarmothBari-Tele_Headstock.jpg

WarmothBari-Tele_SitefromHeel.jpg

WarmothBari-Tele_SiteFromHeadstock.jpg

WarmothBari-Tele_HeelCloseup.jpg


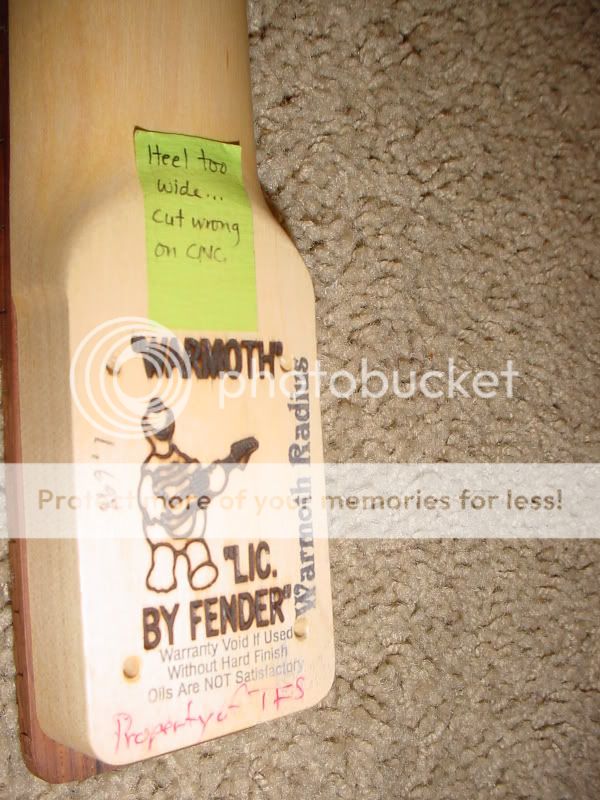
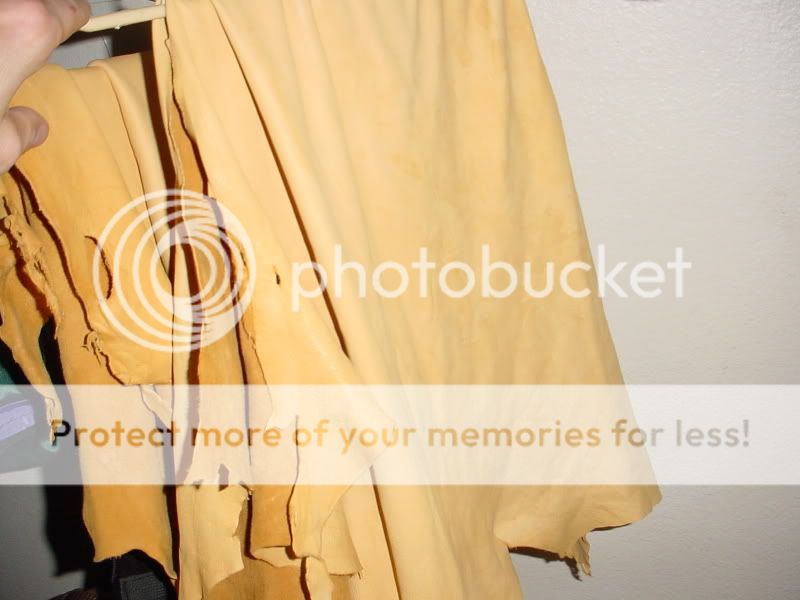
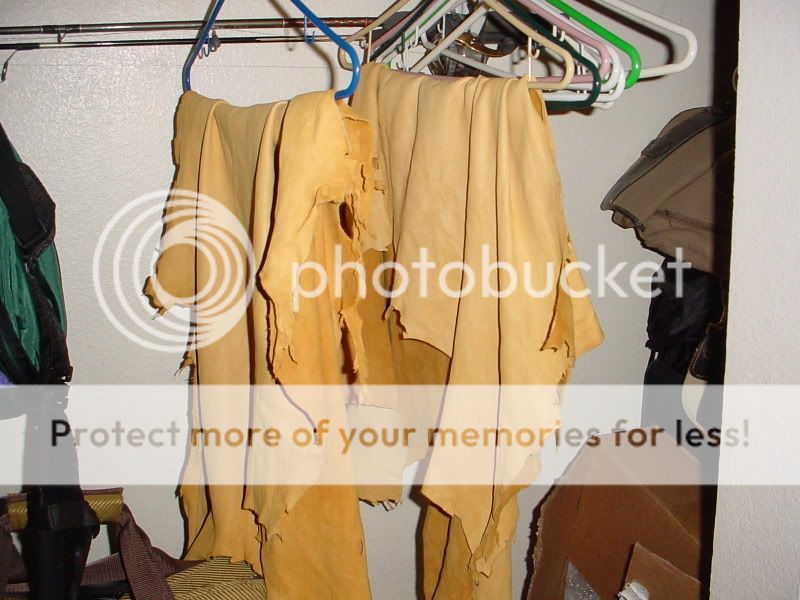
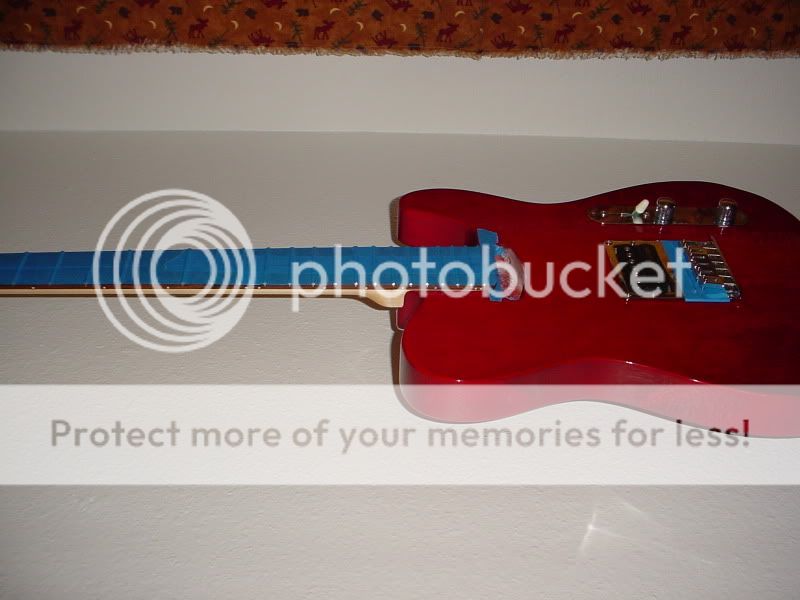
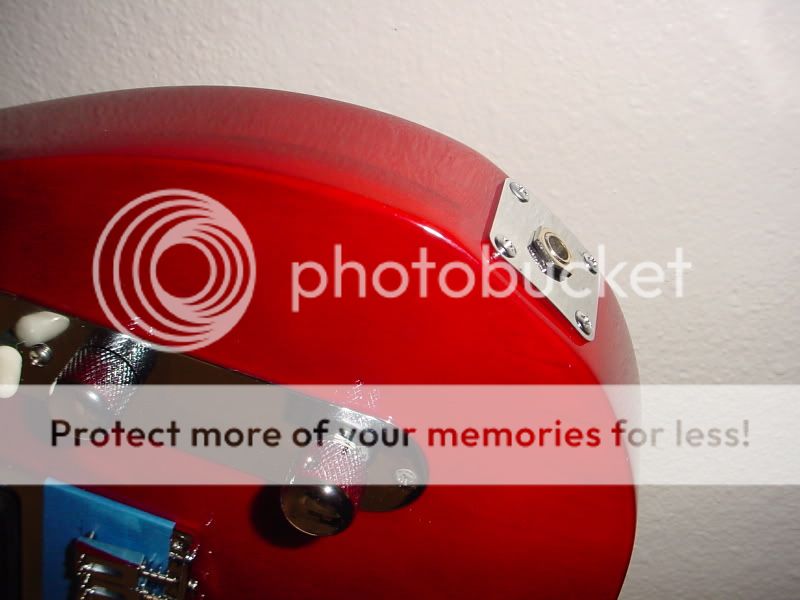
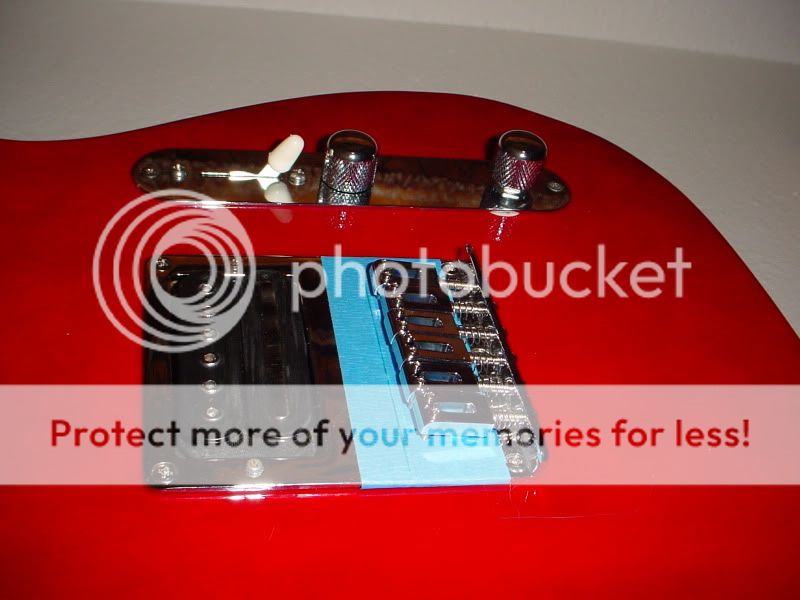
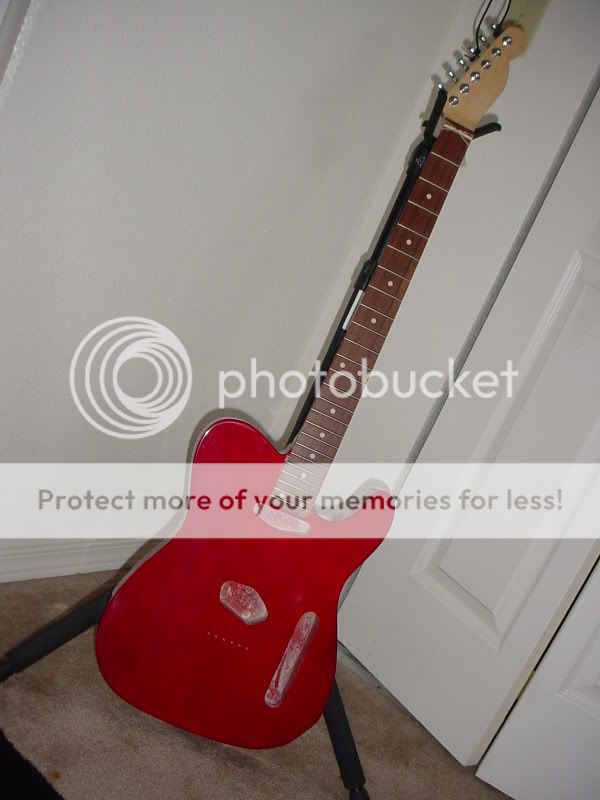
Here's a shot of a test fit after about 6 strokes of sanding in the neck pocket side walls with a fine file.  I allow for a fairly tight fit without risking cracking or breaking any of the wood on the body.  I only did this far for now until I finish the neck in True-Oil down the line once the bone nut is completely installed and slotted to setup height after additional test fits with bridge, buckskin applique's & such.  Although the body pictured here is translucent red, I will be covering this body with Deerskin from bucks that I've harvested and fed from over the years, thus adding more personal significance to this project.  I purchased this body as a cosmetic blem with some finish flaws knowing what I was going to do ahead of time, so the finish quality was not much of a concern for me.  

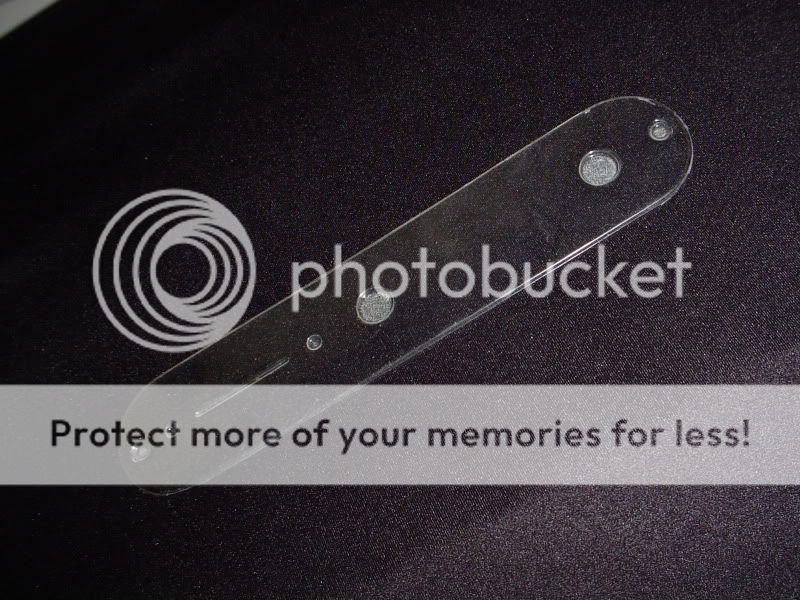
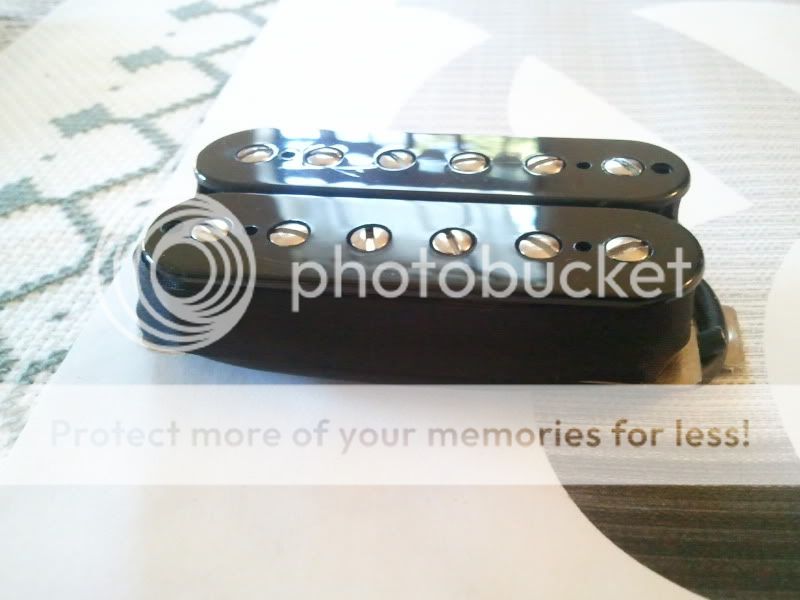
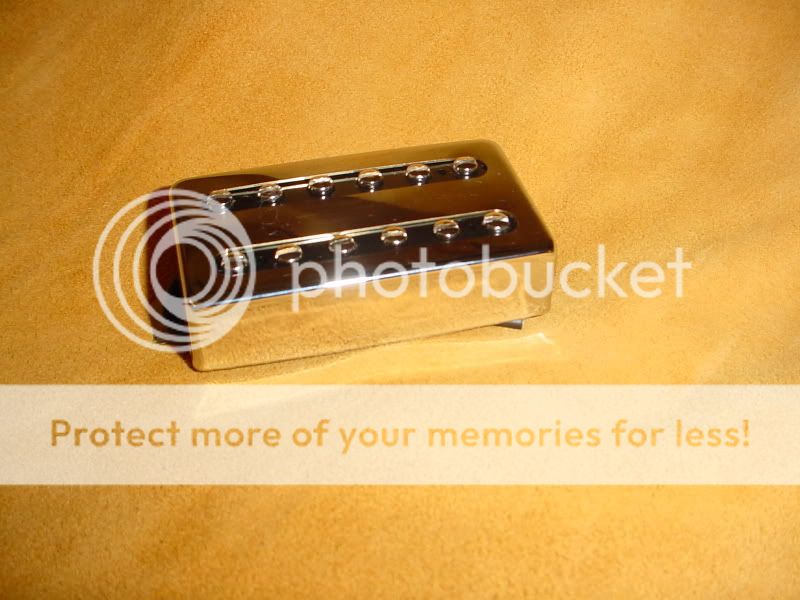
While the inspiration piece is a Thinline Tele, mine will be based on the more traditional Tele/Broadcaster style.  I'll be using lower output pickups in both positions, and modifying the bridge position to house a humbucker that has some PAF/Filtertron charm to it.  I'm toying with the idea of leaving the pickguard area of the buckskin cover completely untouched cosmetically, or marking the outline of a traditional Telecaster pickguard and doing a beadwork border on it, creating somewhat of a faux pickguard.
WarmothBari_neckandGFSTeleBodytestfit02232011001.jpg


As work progresses, I'll continue to upload pics with notes along the way.
 
You'd need to find a good-sized one, but a slice from a moose antler would make a cool tele control plate:
 

Attachments

  • 23antlr.jpg
    23antlr.jpg
    21.4 KB · Views: 78
Update: March 26th, 2011.

I received the bridge and control plate w/pots.
I mounted the bridge lining up the string through holes, pilot drilled screws and then mounted the bridge.  
Before laying the bridge down I first layed down some blue painters tape, then traced the interior of the pickup hole, scribed the trace, then I grabbed my Stew Mac humbucker routing template, and taped it down using a generous amount of double stick tape.  I routed in several 1/4 " deep passes until I reached the same depth as the factory hole.  Once I had the entire humbucker cavity to depth, I plunged the height adjustment screw areas an additionl 1/4".

What you see here is a test fit.  The Dimarzio D-Sonic pickup that is in there now is simply for test fit purposes.  I'll be using a lower output, more vintage sounding bridge pickup ala GFS Dream 180 or Nashville, both have output levels of about 8.0 to 8.8k.
WarmothBari-NeckandGFSTelebody_HardwareFit002.jpg

WarmothBari_NeckandGFSTelebody_HardwareFit001.jpg


I also used part of the packaging of the tele control plate to act as a transparent template to make sure that control plate ended up perfectly centered over the control cavity.  This way, rather than just laying the control plate over the hole and improvising, I could see everything.  Use a center punch with just enough pressure to make sure you don't cause your finish to chip if doing so over a finished body.  I only want enough of a "dent" to get the drill bit started.
When I was confident that the control plate was centered up and down, and had enought room for the brass tabs of the CRL3 switch to mount, I made my "dents", followed with the pilot drill, then mounted the pots, and pre-wired up the pots and jack with what I currently have.  I still need to order the switch and caps, plus, I want to use the vintage push back wiring anyway.
TeleControlPlateTemplate003.jpg

TeleControlPlateTemplate001.jpg


That's all for now, money is a bit tight so I'm using what I have right now to do all of the preliminary fits & such until I get all of the rest of the components I want.


Very cool design ideas. I like the personallization of the deer hyde. The beaded work is beautiful. I think that the hyde will change color slightly where your arm contacts it, and that will give it a cool worn-in, vintage tooling mark-look. Very cool.
 
Thanks Eric.
My buckskin motif will be slightly different.
I won't be using the Tele Thinline pickguard application, nor will I be doing the white buffalo beaded applique'.
I'll be adding some other personal touches just so I don't emulate what's already been done, and make it my own.
I will likely only play this while wearing long sleeves, which won't be hard considering how cold and rainy it gets here in the Seattle area.
 
Did some updated work on my Baritone Warmoth Telecaster project.
Did a test fit of the electronics, installed the input jackplate, and some basic wiring.

This is a picture of the buckskin that will be used for the front of the body as it is an older (thicker) buckskin.
DSC02141.jpg


This is both the back and front from left to right.
DSC02140.jpg


This is a pic of the neck prepped for finishing, which will be in true oil.  Of course, the neck will be removed from the body and the tuners will be rmoved from the headstock.
NeckFinishPrep.jpg


InputJackplatedrilledandinstalled.jpg


I'm using a 4 position pickup selector switch on this project. I normally only use 3 position switches. This switch will allow the options as follows from neck to bridge positions:
1: Neck and Bridge (in series) this is the added feature not normally available
2: Neck pickup by itself, (normal 3 position configuration)…
3: Neck and Bridge (Parallel, normal 3 position configuration)…
4: Bridge by itself. (normal 3 position configuration)…


ControlPlateTonePulled.jpg


Since I will be using lower output pickups, I wanted the additional option of using this guitar (on occassion) for my normal high gain applications, so I'm going to install a Neal Moser Custom Shop guitar booster.  It will be activated via the Push/Pull switch in the tone pot.  In is off, out is on, and the beauty is that the curcuit and the 9v battery will fit in the standard tele control cavity under the pots, not battery box routing necessary.  Also, unlike many preamp systems, when the battery is dead,  the guitar can still be used passively.  A dead battery will only keep the booster from working, not the whole guitar.
Single20booster20unit.jpg


Here's a bit of a video update.
Still slow going as $$ affords, but progress nonetheless.
[youtube=425,350]http://youtu.be/nQPYiMIQv-Q[/youtube]
 
Man oh man!!! After playing this for a few days, the ideas just flow.
This thing is inspiring to play.
It's so resonant and very loud acoustically.  Then neck just humms in your hand.  I sustains for days.
I can't wait to get the actual pickups I want in it, but in the meantime I'm having a blast just playing on it unplugged in the house.
 
TonyFlyingSquirrel said:
See if this works.

http://www.youtube.com/watch?v=nQPYiMIQv-Q&feature=youtu.be

Well done informative video...and I love the sound of baritones - I can't wait to build mine.
 
Thanks, I just created a couple of mock-chicken picken presets using Vox AC30 & Fender Bassman amp models in Pod Farm yesterday.  These are as close as I'm gonna get as long as I have the temporary pickup that's in there.

I just submitted my specs for the custom handwound pickup that my friend is making me.  Still trying to find a filtertron style cover in the U.S. for it though.

check out www.carlsenguitar.com

This is my good friend John Carlsen Jr., in Tacoma, Wa.  He's starting to turn some heads with his custom handwounds in the area.  A chunk of my friends have replaced their strats, teles, and even their Custom Carvins with his pickups.
 
It's currently strung up with D'Addario .012's, with a plain G.
It feels like .010’s do in A-440.

Incidentally, anyone know where I can find a chrome or nickel humbucker sized pickup cover like the Filtertron styled one pictured in this link, specifically in the United States?

The company in the link below is based in the U.K., and upon Email confirmation, they do not ship to the U.S. for reasons of Customs/Duties headaches.


http://www.axesrus.com/axepupcovs.htm#HumbPUC
 
Just got the custom handwound pickup back John Carlsen. (www.carlsenguitar.com)

He'll have some pickups for sale at the upcoming guitar show in Kent, Wa.  (www.seatackguitarshow.com) on September 11th.

Here's the requested specs per John:
"Hey Tony. That's awesome about the pickup cover. I'm excited to see it all finished! I'm all done with your pickup and was able to keep it low as per your original hope. It clocks in at almost exactly 7.0k so it should be awesome with the neck pup you have. Hope you like it! Wiring is the same as Dimarzio, tape off black and white, red to switch, green and bare wire to ground. If you get out of phase with the neck pup in the middle position, just swap red and green."

I'm now just waiting to pick up the pickup cover as we took a PAF cover and had it slotted like a Gretch.  I'll post more pics and perhaps some video of me soldering the cover to the base plate.


Behold, the Bari-Twang-Bucker
JCA_BariTwangBucker001.jpg
 
Back
Top