'59 Strat tribute/clone finish (first) and build

Steve St.Laurent

Senior Member
Messages
238
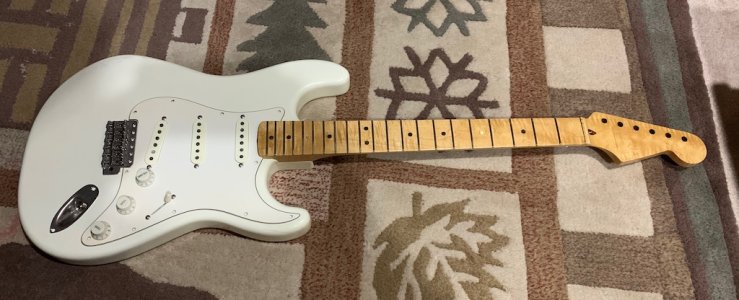
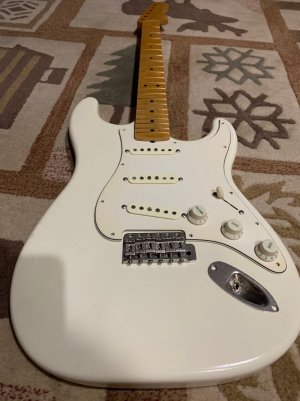
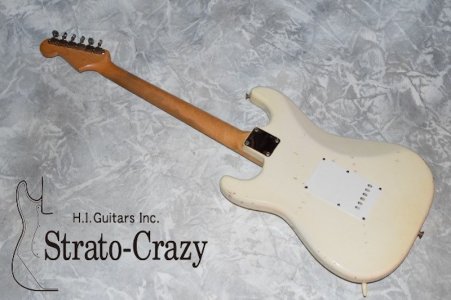
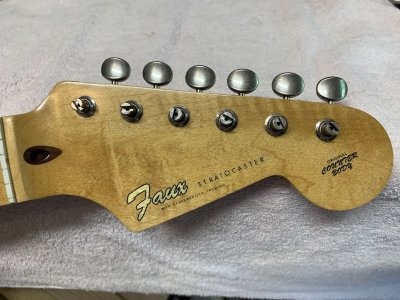
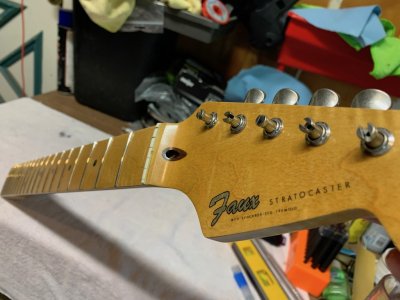
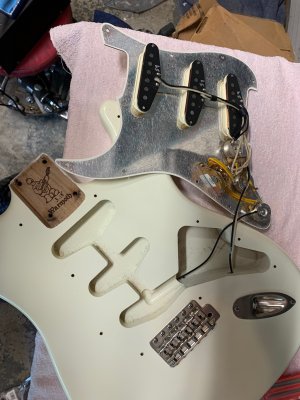
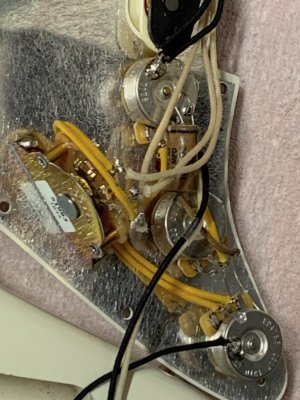
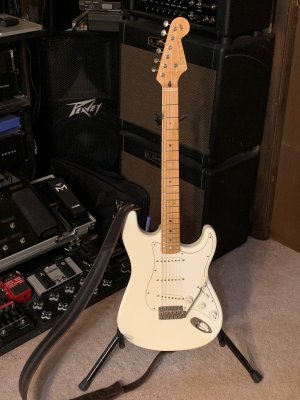
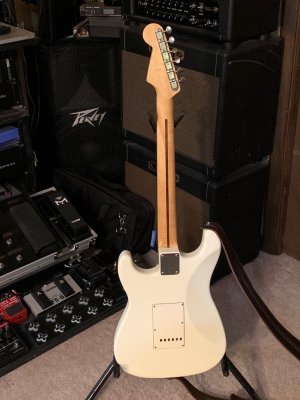
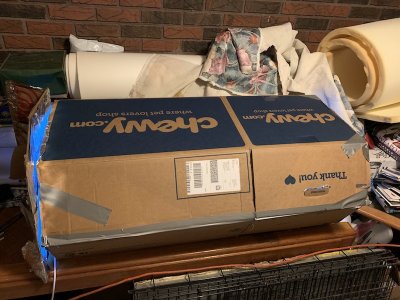
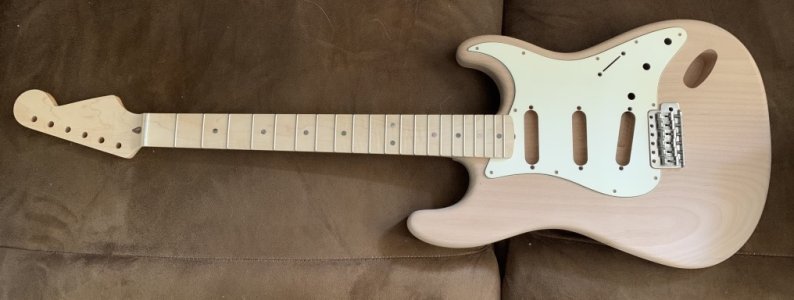
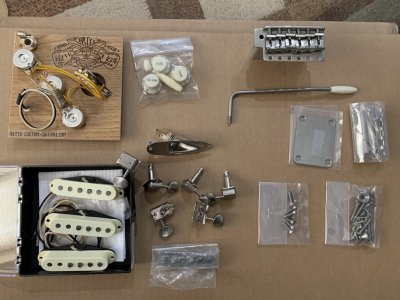
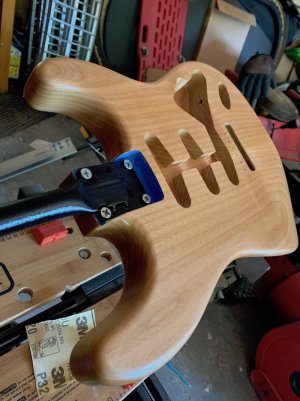
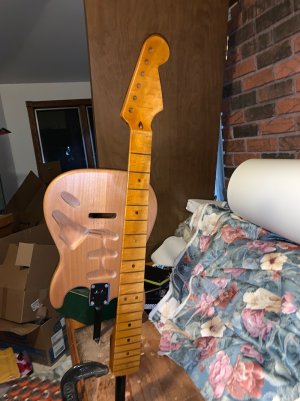
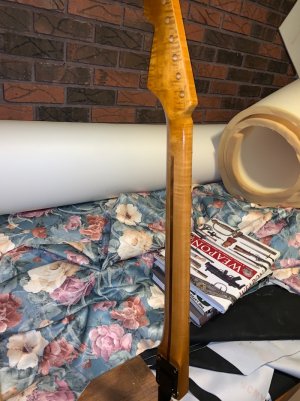
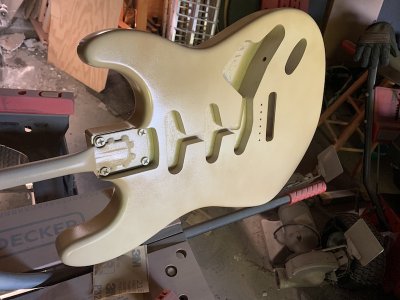
Over winter I decided I wanted to build a traditional 3 single coil Strat.  Settled on building a clone/tribute to a '59 White Strat with a maple neck and wanted to do the whole finish and assembly myself (will still take it in for a fret level) for the first time.  I received the parts mid April right in the middle of the coronavirus pandemic (I have a severely suppressed immune system) - I've been in isolation with my family since March 12th.  Here's the just out of the box thread: https://www.unofficialwarmoth.com/index.php?topic=31738.0 .  Here's the body and neck right out of the box as well as the rest of the hardware I'll be using on this build.


Attachments

  • Full1.jpg
    Full1.jpg
    108.5 KB · Views: 53
  • Hardware.jpg
    Hardware.jpg
    211.9 KB · Views: 35
Here's the specs on everything:

body:

Model: Vintage Stratocaster®
Orientation: Right handed
F-Holes: None
Scale: 25-1/2"
Wood: Alder
Rout: Top Rout
Pickup Rout: Strat®, Strat®, Strat®
Controls: None
Bridge: Vintage 6-Hole Tremolo
Jack Rout: Strat® Top Jack Rout
Neck Pocket: Strat® Shape
Mounting Holes: Standard 4 Bolt
Contours: / Tummy Cut / Forearm Contour

neck:

Style: Stratocaster®
Construction: Vintage/Modern Construction
Orientation: Right Handed
Neck Wood: 3A Flame Maple
Fingerboard Wood: 3A Flame Maple
Nut Width: 1-11/16"
Back Shape: Standard thin
Fret Size: 6105
Tuner Ream: Vintage Style (11/32")
Radius: 10-16" Compound
Scale: 25-1/2"
Fret #: 21
Mounting Holes: Standard 4 Bolt
Pre-Cut Installed String Nut: GraphTech White TUSQ XL - Standard Nut
Inlays: Black Mother Of Pearl Dots
Side Dots: Abalone Side Dots

I'm using nitro finishes from Stewmac.  This is my first time trying to finish a guitar and I've never seen a rattle can job look good before - but I figured I've got plenty of time during the lock down lol.  So first I sanded the body and then sprayed it with a few light coats of sanding sealer.  I was trying to keep the thickness of the finish down as much as possible. 


Attachments

  • IMG_3463.jpg
    IMG_3463.jpg
    245.2 KB · Views: 14
warning - I make plenty of mistakes here

I'm using Colortones nitro aged clear on the neck to tint it some.  I've never worked with nitro before and I made a couple mistakes where I got drips and sags and kept laying on more and more trying to fix the problems.  It got pretty dark (see below).  At the same point I got a number of color coats on the body with Colortones Vintage White nitro and I liked the way it looked.  But with the neck so dark thought I'd throw a light aged coat to darken it up a bit.  Bad move.  Now I had a dark ugly neck and a splotchy body.


Attachments

  • IMG_3468.jpg
    IMG_3468.jpg
    220.3 KB · Views: 24
  • IMG_3469.jpg
    IMG_3469.jpg
    261.4 KB · Views: 22
  • IMG_3484.jpg
    IMG_3484.jpg
    123.1 KB · Views: 23
So after going back and forth I decided to sand the neck down to the wood and sand the finish down on the body and start again.  So here's right before I was shooting the color coats again and then two shots of it complete with clear gloss.  I can't believe how great it looks.  You honestly can't tell that it's out of a rattle can - amazing stuff as long as you follow the directions! 
 

Attachments

  • IMG_3512.jpg
    IMG_3512.jpg
    101 KB · Views: 21
  • IMG_3511.jpg
    IMG_3511.jpg
    90.6 KB · Views: 22
  • IMG_3492.jpg
    IMG_3492.jpg
    118.8 KB · Views: 18
Then there was the neck.  I put one very light tack coat of the aged lacquer and then two light coats after that and got exactly the color I was looking for.  Finished it off with a number of Clear satin lacquer.  Here's the body with the neck up against it for the color of the neck.  Also a couple pics of it mocked up. 

Now I'm just waiting for the finish to all harden up before I start assembly.  It's coming together awesome so far!  :party07:
 

Attachments

  • IMG_3516.jpg
    IMG_3516.jpg
    201.1 KB · Views: 26
  • IMG_3524.jpg
    IMG_3524.jpg
    163.8 KB · Views: 33
  • IMG_3527.jpg
    IMG_3527.jpg
    183.7 KB · Views: 42
Oh yeah, have to put the custom headstock decal on once the finish harden's up and I can level and final sand it.  (Don't want to misrepresent what it is :) )


Attachments

  • HeadStockDecal.jpg
    HeadStockDecal.jpg
    41.4 KB · Views: 17
Thanks, here's what I've been working off (mostly) of as far as color, tint, etc.  The idea was to look like an old instrument that was taken care of.
 

Attachments

  • IMG_3505.jpg
    IMG_3505.jpg
    144.7 KB · Views: 35
  • IMG_3508.jpg
    IMG_3508.jpg
    123.5 KB · Views: 16
I'd say you achieved your goal. Nice clean job, looks like a collectors grade vintage. Well Done!  :headbang:
 
Oh yes! I made an eerily similar 59 tribute..100% Warmoth...3.12 pound premium Warmoth 1 peace Alder body, Warmoth Boatneck  very Flamed Vintage Modern Neck. Well, at first she was a custom color 69 tribute ( but without the big headstock), with very coveted 69 custom pickups from a prestigious pickup winder... but since then I was beyond fortunate to acquire an actual genuine vintage  Hendrix era 1971 black 4 bolt Fender  Strat.
So  now I have exactly your white custom color late 59 Maple neck Strat tribute,well, she is a relic nitro finish..(pretty well done don't you think?) just need 1959 replica pickups( I'm thinking Klein).Gotoh vintage style Staggered locking tuners, Callaham vintage tremolo.
]I just love these poor misguided engineer types thinking those 6 pt. trems are obsolete, and this and that , and that everything new is so much better. Balderdash!(well, the tuners were amazing new tech for sure, and still look like old tuners), plus actually Callaham uses new tech bevel on the knife edge of the trem for more stable tuning  i think. :icon_biggrin:

s-l1600.jpg


^My sweet baby, sounds fabulous, but 'modern'..does it sound like my 1971 Fender  Strat? Not hardly..the '71 is devine/glorious- the angels cry.No really, they weep.My guess is that on this forum the vintage stuff is off the charts for you guys anyhow.
 
I finished her up over the last 4 days.  I screwed up the Rothko and Frost decals - they are REALLLLLLLY thin.  I had to order more and they got damaged in transit .  .  so they sent me another sheet.  This time I got it right.  The decal looks AWESOME.  I went ahead an lacquered over it because it was so thin and fragile, I didn't want it to get damaged.  The great part is with it that thin it was real easy to make it disappear under the lacquer.

Anyone notice a subtle difference other than Fender=Faux?
 

Attachments

  • IMG_3665.jpg
    IMG_3665.jpg
    243.9 KB · Views: 24
  • IMG_3667.jpg
    IMG_3667.jpg
    178.2 KB · Views: 21
With the decal and lacquer finished I worked on the frets.  I had a LOT of coats of lacquer on them from my screw ups and redo's (it was sanded down on the wood.  I was having a hard time getting it off until I found a suggestion to file a u into a penny.  That worked AWESOME.  First I used an exacto at the base of the fret do I didn't pop the lacquer and just scraped it off the with penny.  Then I polished the frets with 3 different grades of scotch brite pad followed by a hand polish with Blue Magic. 

By the time I was done with that the finish had hardened enough to mount the tuners.  I used a reamer from Stew Mac to open the peg holes for the bushings.  I had it where I could almost drop them in with about 1.5 mm left to push them in. For the screws on the tuners I first drilled pilot holes for the threads and then clearance holes for the smooth part of the bolts.

I was also finishing up the wiring on the body.  Lastly I had a couple places where the lacquer chipped around the neck pocket that I touched
up.
 

Attachments

  • IMG_3660.jpg
    IMG_3660.jpg
    346.6 KB · Views: 6
  • IMG_3661.jpg
    IMG_3661.jpg
    349.6 KB · Views: 9
  • IMG_3666.jpg
    IMG_3666.jpg
    260.1 KB · Views: 7
All that was left at that point was putting the neck on and stringing her up.  After the strings were on I added the string tree to the headstock.  Did a setup on her and then played for a good part of the day :guitaristgif: .  I think we're going to get along fine - she played and sounded great.

Last step is I plan on yellowing the finish more now that it's together.  I have a UV light they use for yellowing testing and I'm going leave it on for a while (rotating and playing regularly).  After I see how that goes I'll put a post up in the Strat section.


Attachments

  • IMG_3686.jpg
    IMG_3686.jpg
    398.7 KB · Views: 28
  • IMG_3685.jpg
    IMG_3685.jpg
    372.4 KB · Views: 10
stratamania said:
Nice work Steve  :icon_thumright:

Anyone notice a subtle difference other than Fender=Faux?

Original Counter Body rather than Original Contour Body...

Nailed it. Figured I'd have a little fun with it. 

I'm really stoked with how everything came out.  It hardly even needs a fret level but I'll have that done for that last little tweak.  This is the first time I've used vintage tuners and they're better than I thought they'd be.

The pictures don't capture the color well, there's already a decent bit of age to it.  Reply #4 on this thread shows the color better.
 
It would be good to get some more pics now you have it finished.

You know what they say if you can't have fun with your decal, then, when can you?


Thanks guys.  I was finally able to get good pictures that accurately portray the finish.  I posted a bunch of them in the Strat forum: https://www.unofficialwarmoth.com/index.php?topic=32158.0
 
Built the UV light box today.  She's sitting in the tanning bed now :) .  We'll see if this works - will be rotating it daily.
 

Attachments

  • IMG_3845.jpg
    IMG_3845.jpg
    158.3 KB · Views: 10
  • IMG_3846.jpg
    IMG_3846.jpg
    162.3 KB · Views: 13
Back
Top