Yes, I have a problem. No, I don't want help...

PhilHill

Hero Member
Messages
1,653
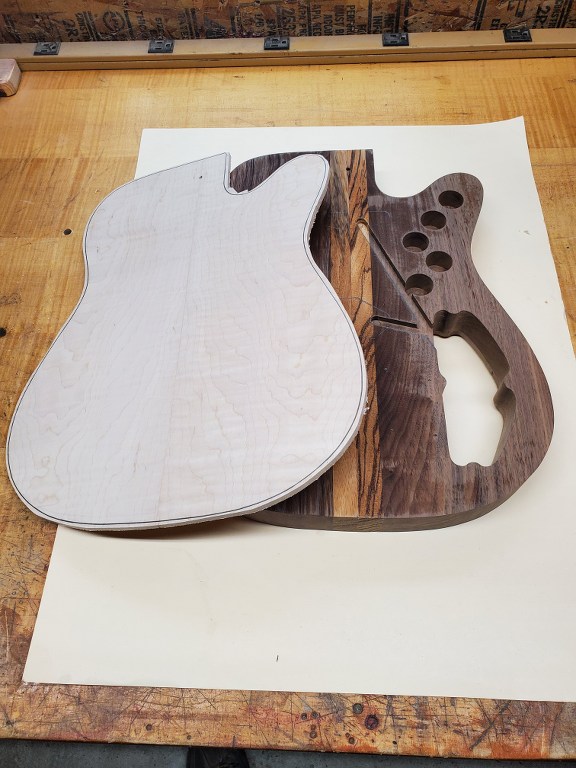
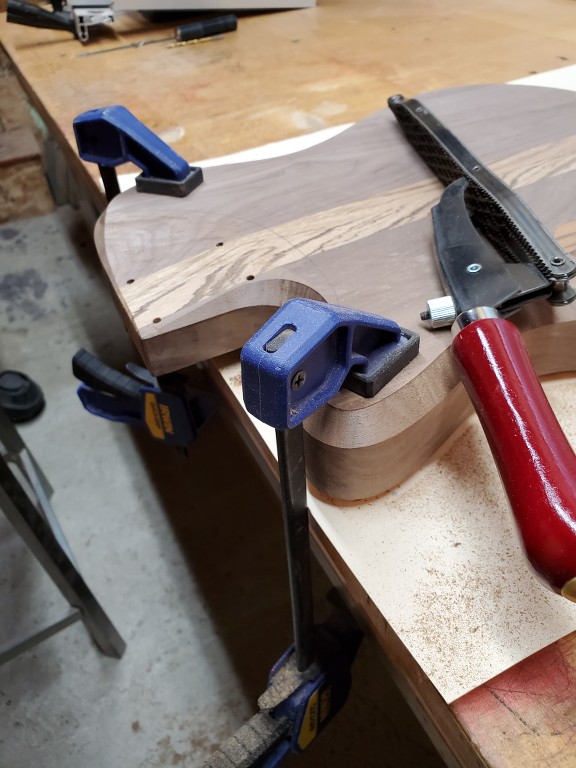
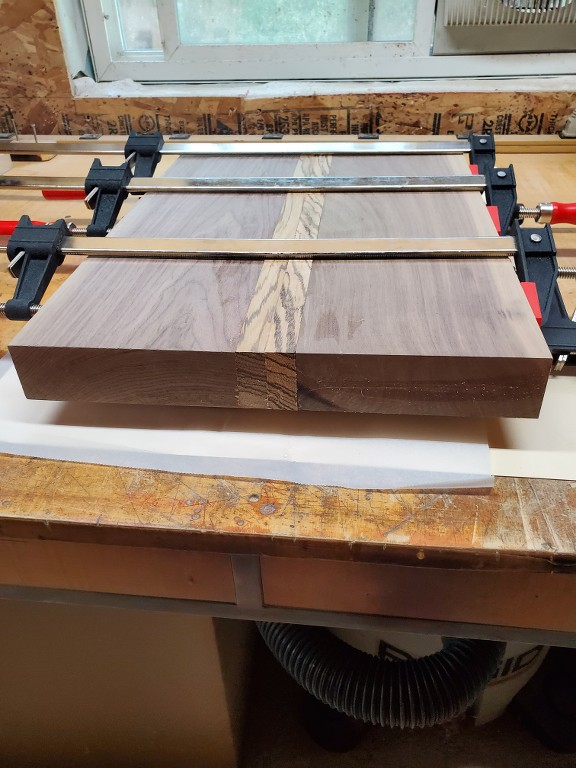
Here we go again. The Wood Gnomes have been in my shop again. I don't like it because they never clean up after themselves. I put up with it because they always leave presents behind. This time it was two large slabs of Black Walnut, and some smaller ones of Zebrawood. The walnut and zebra seemed to get along well, so I glued them up into a body blank. We shall see what results...

.
2UxP2x.jpg

POWezb.jpg


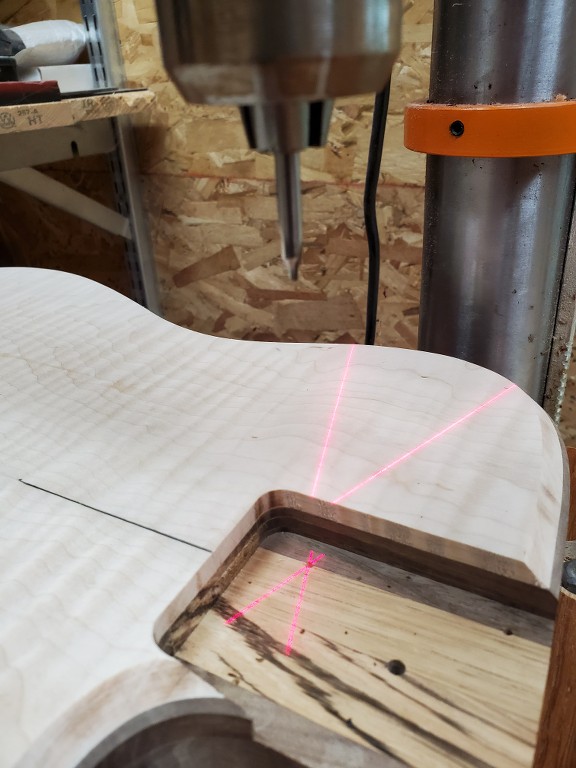
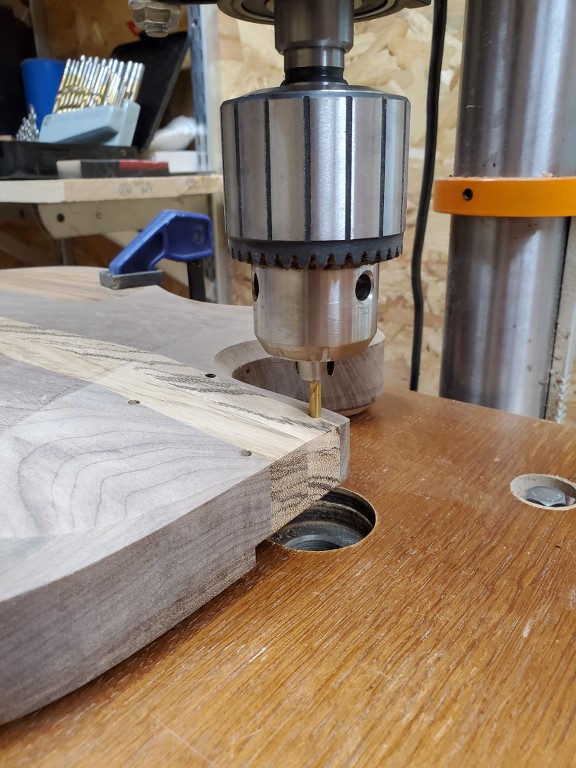
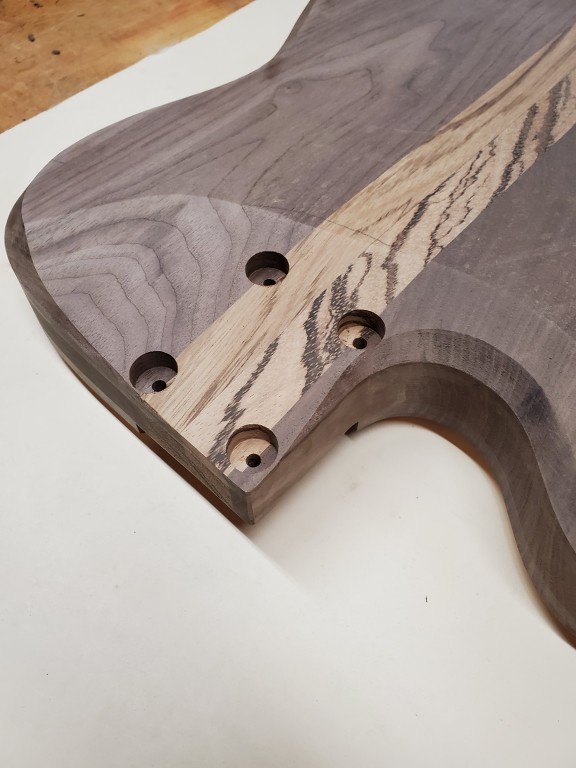
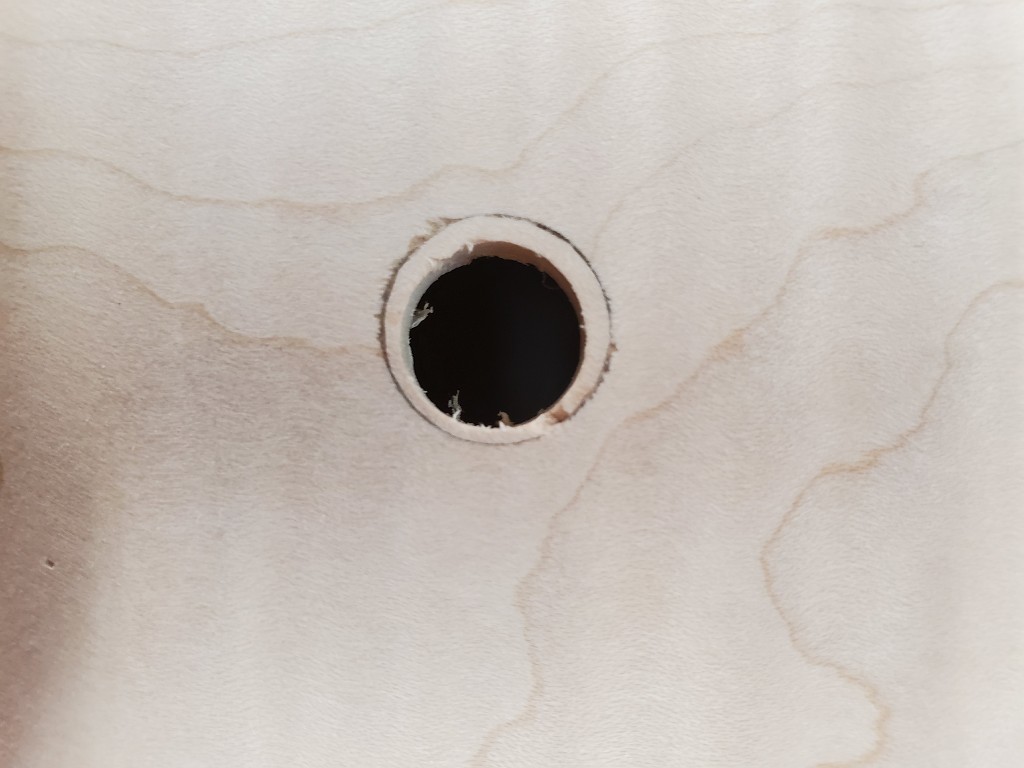
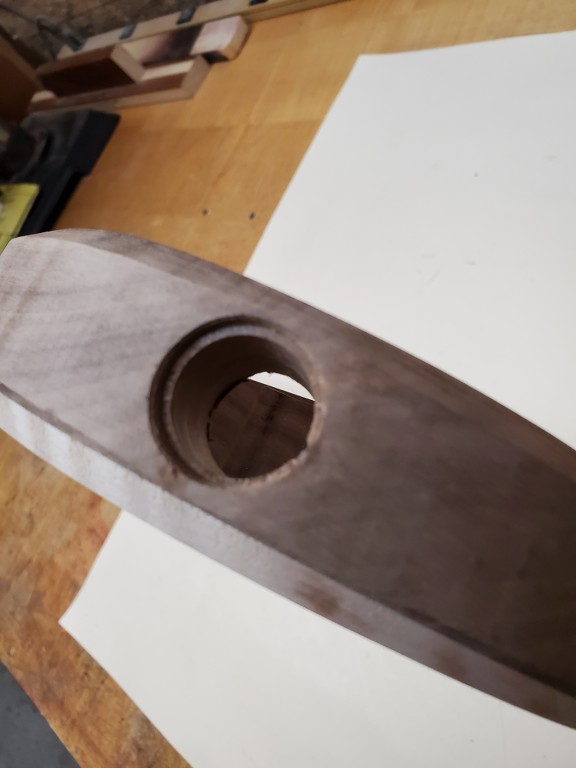
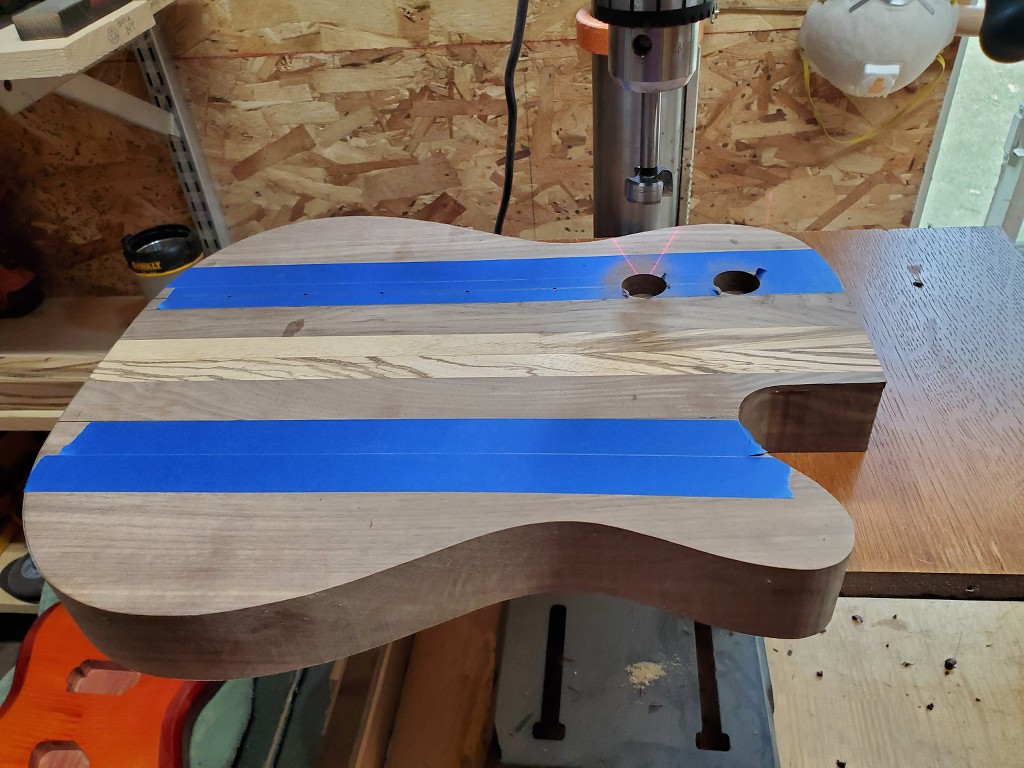
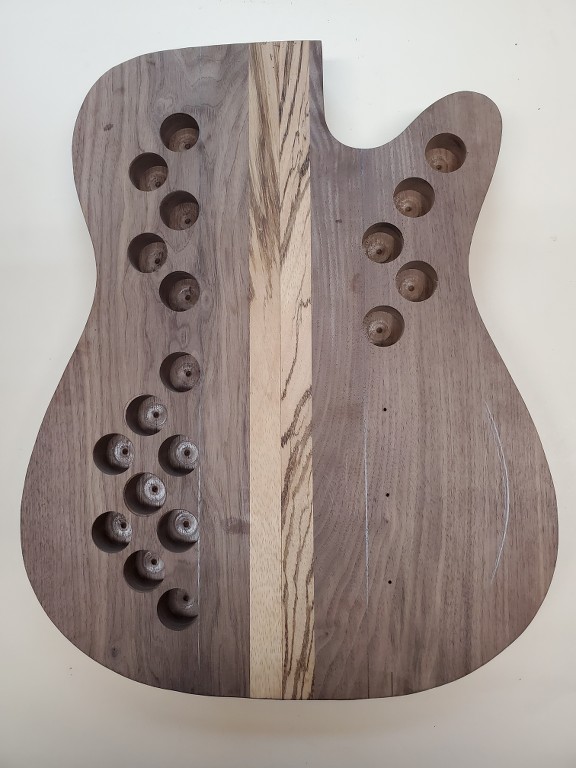
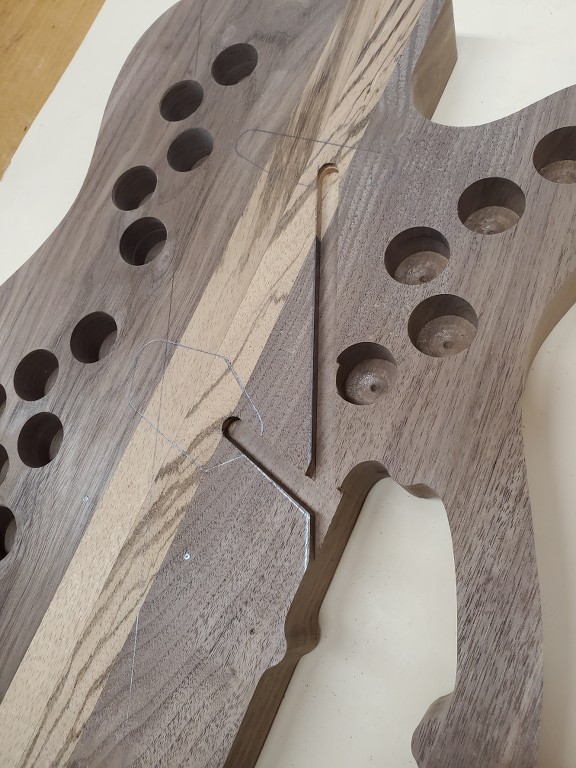
. I made a new template with a shape kinda like a small cutaway acoustic and traced it out on the blank. After bandsawing it out and doing a little smoothing on the spindle sander it seemed a little heavy. So we'll drill some pockets to lighten it up a little.

.
bABzEY.jpg

 
tw8ii3.jpg


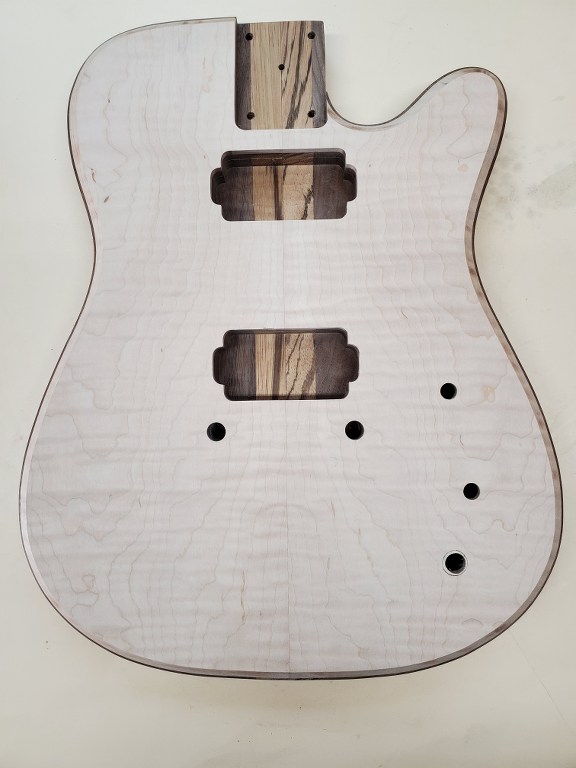
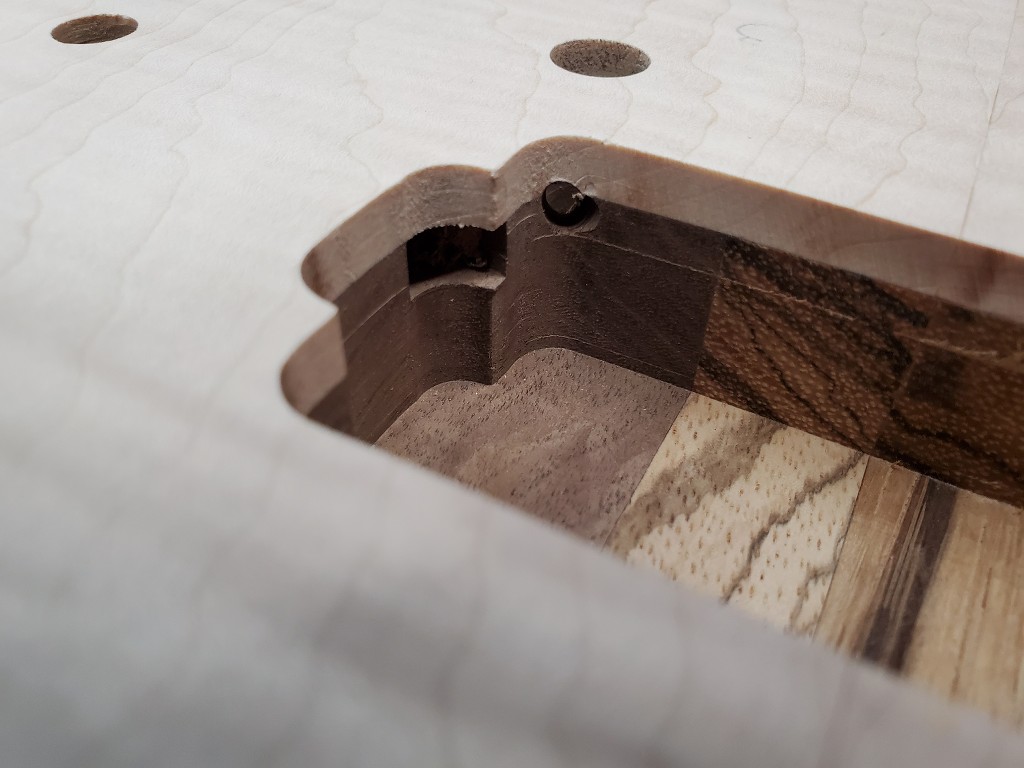
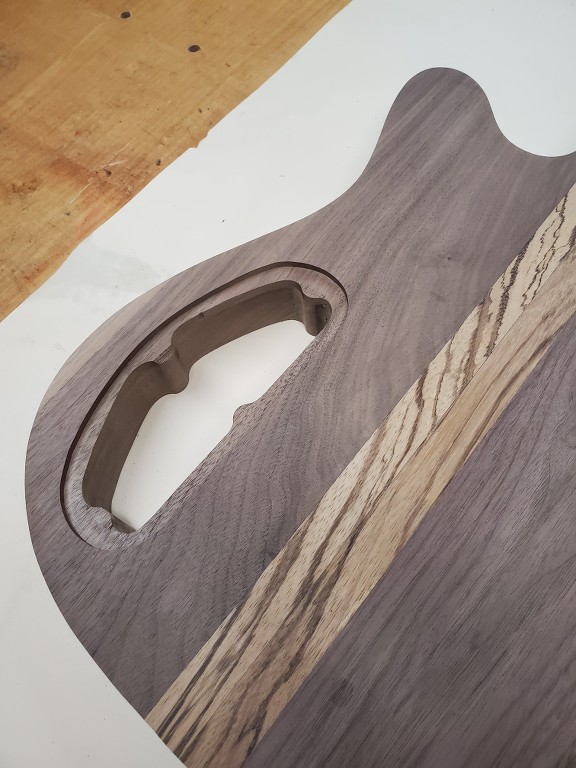
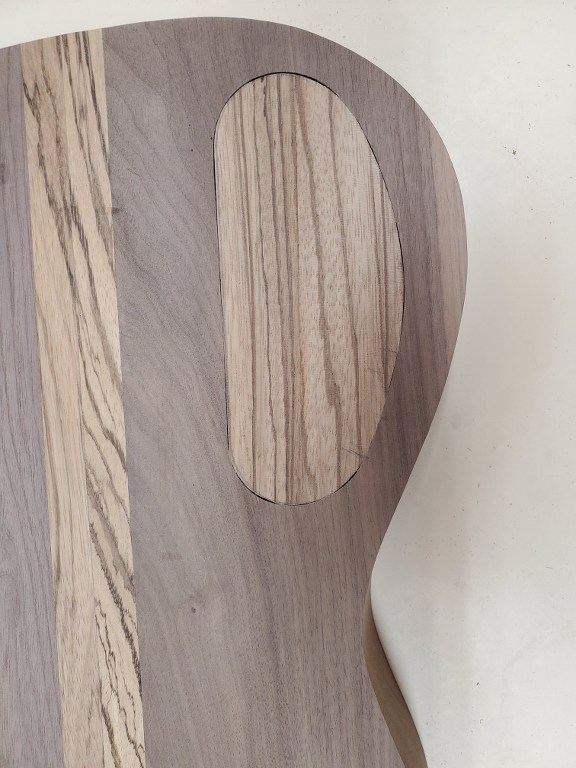
. Then of course you have to have a control cavity. Routed for a cover too.

.
ShZxIs.jpg


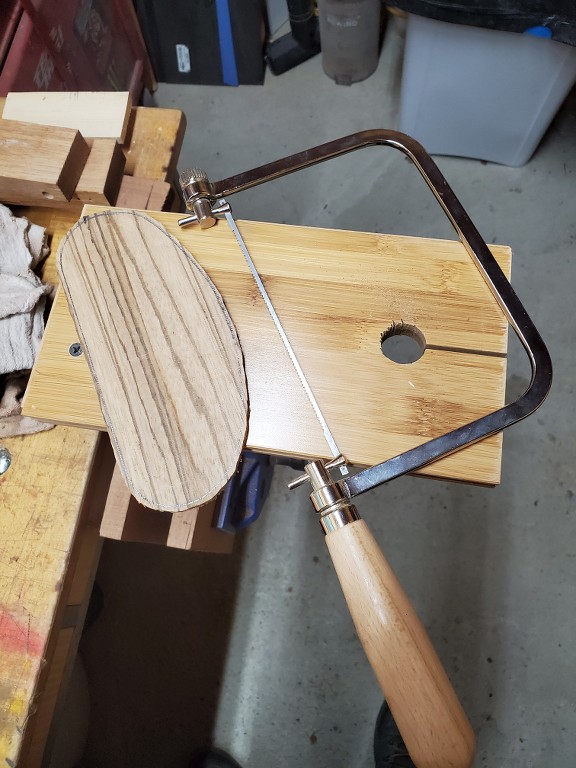
. Speaking of covers, I decided more Zebra would be good. The pieces were too narrow so I re-sawed some and book matched it. The band saw seemed a little overkill for this, so I went old school.

.
30nlNI.jpg


. And again, some spindle sanding and we're good I think.

.
1pofmK.jpg


. And on the other side, routed some channels from the pickup locations into the cavity so I don't have to drill holes later.

.
8iemld.jpg


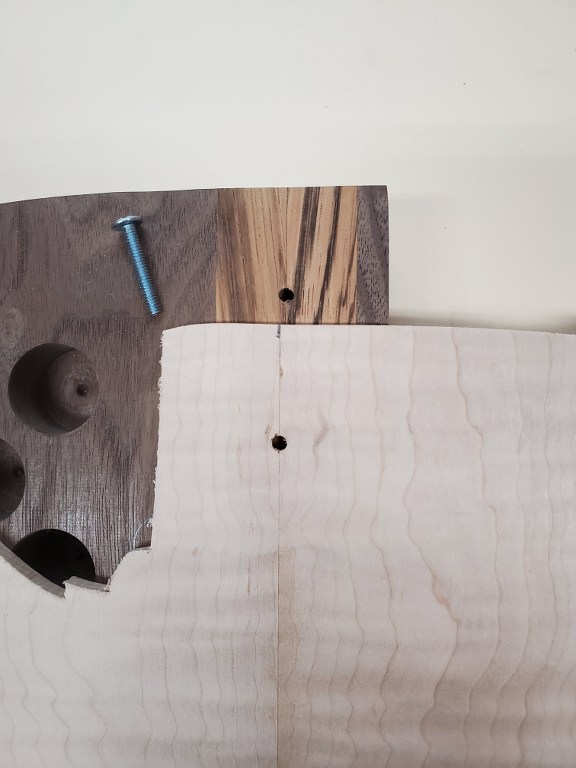
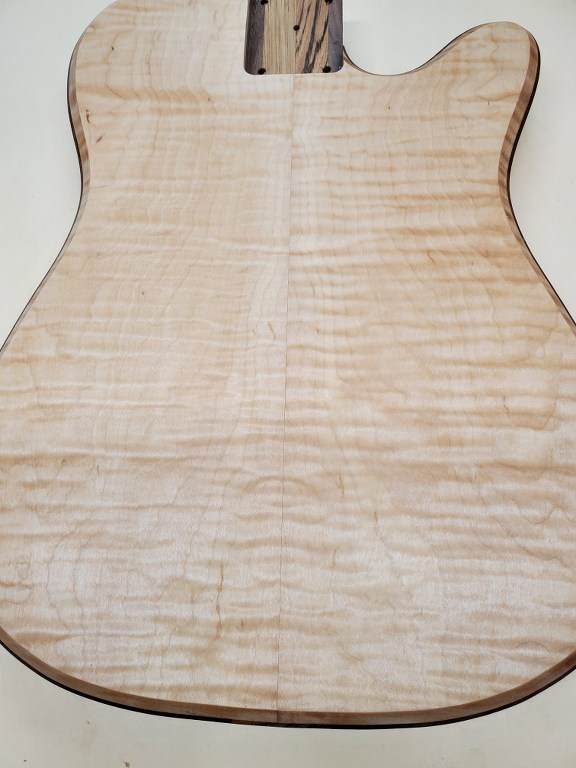
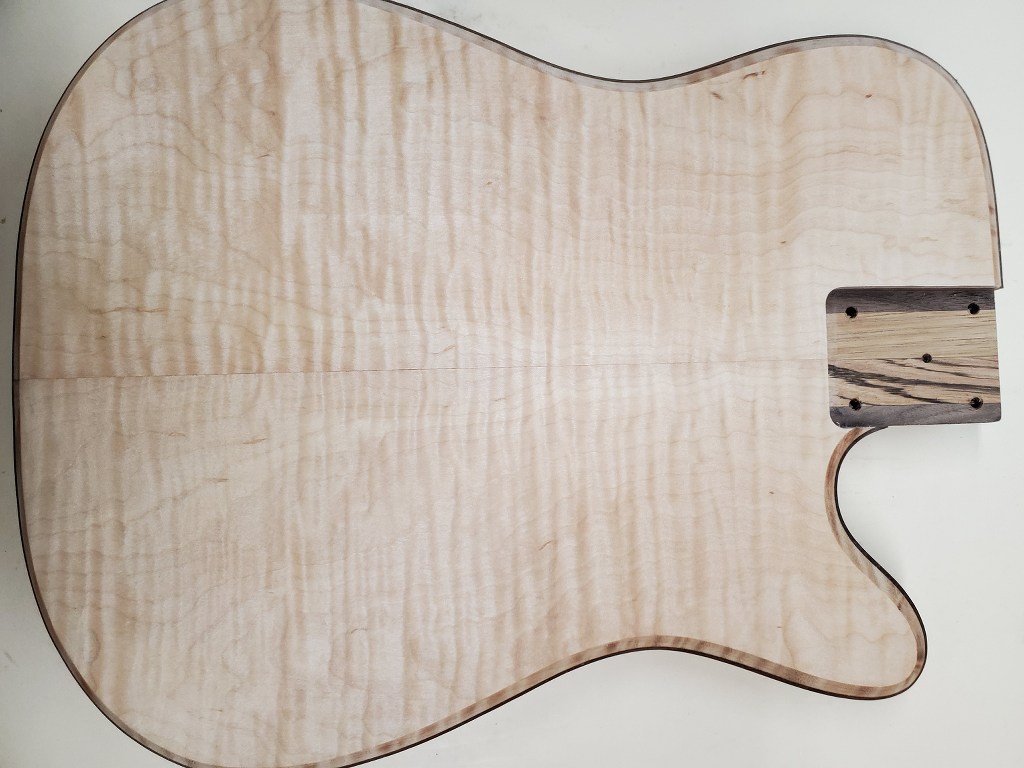
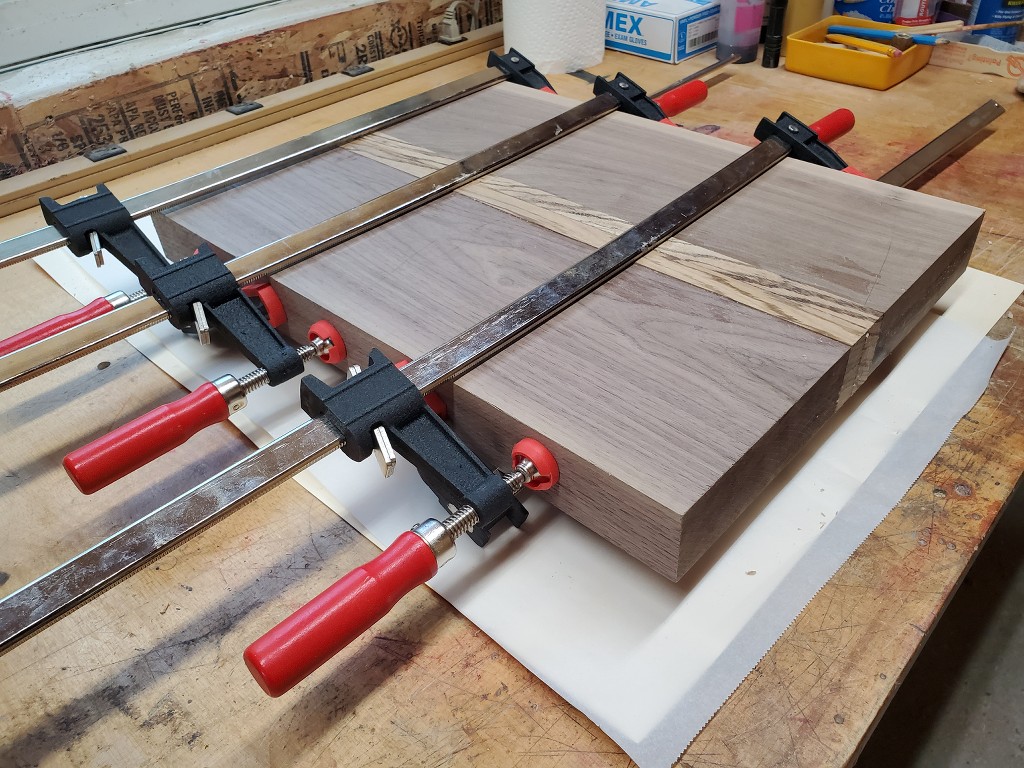
. Then we begin gluing up a top. Some curl maple should do nicely.

.
FtFfJc.jpg


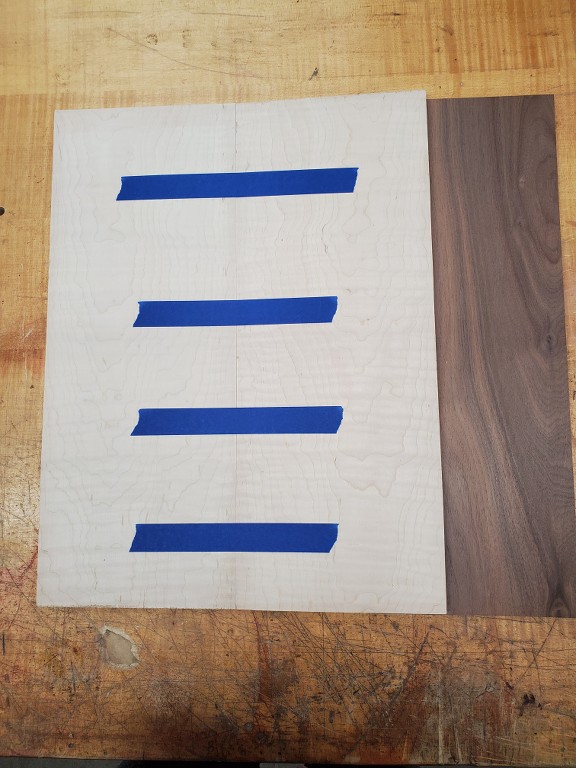
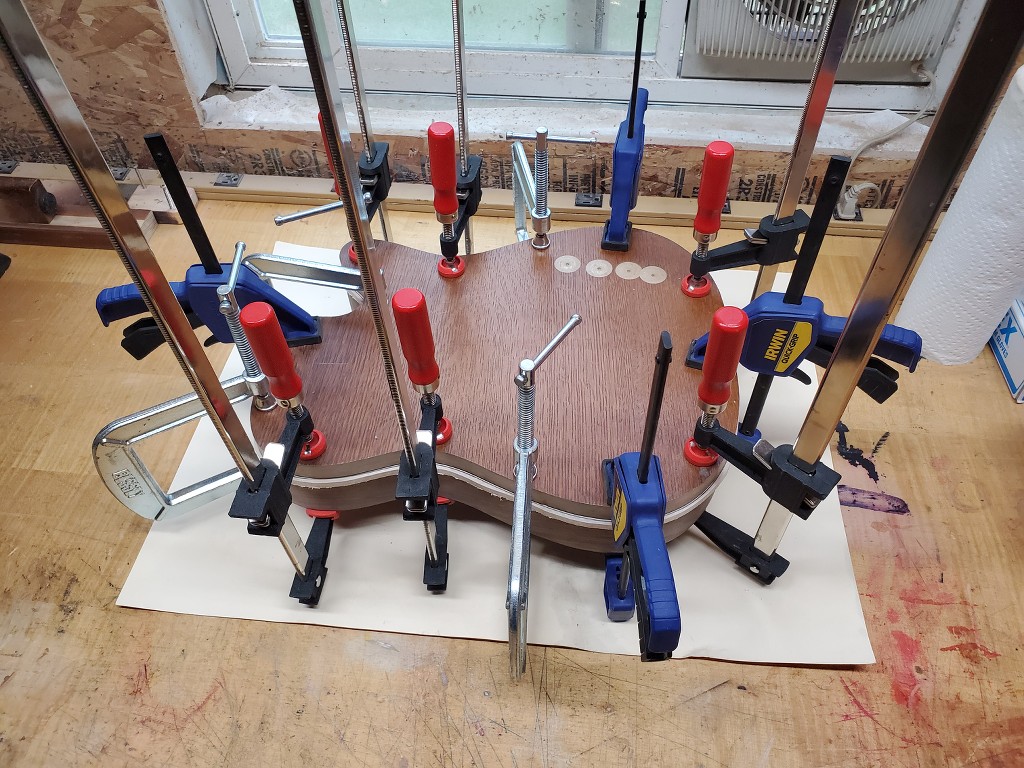
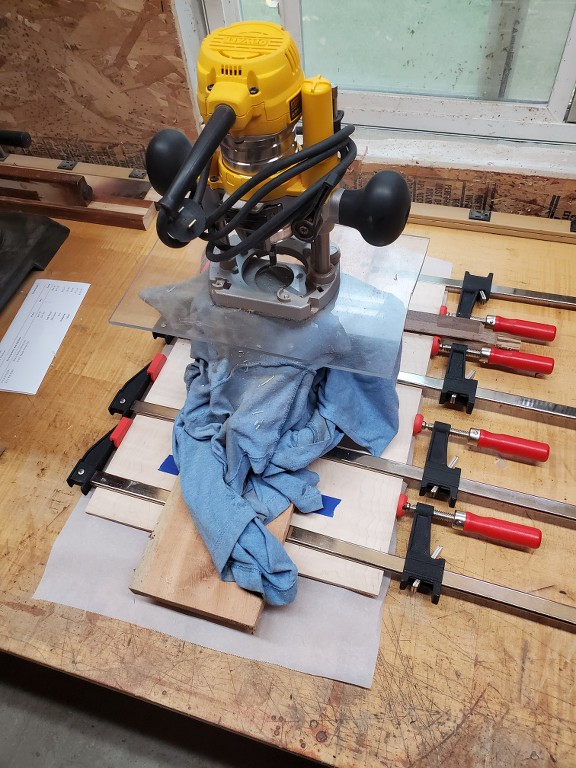
. A good trick when gluing up a book matched top is to place them together, tilt one side up a little and place strips of tape across the back. Then when you put glue on the edges and flatten it out, the tape holds it together tighter until you get the clamps on. It also helps to keep the two pieces evenly flat at the joint.

. Creative clamping.

.
KlcsES.jpg


. That's all for now...But "I'll be bock" as the Terminator once said............. :headbang:
 
Okie dokie, (Did I actually just say that) anyway now that the top is glued up it can be trimmed and glued onto the body.

.
trZOYz.jpg


. When your putting a top on a body, maintaining the center-line is very important. One way to help with this is, prior to gluing place the top on the body and line up the center then clamp it and drill a hole through the top and a little into the body. I usually do this at the neck pocket so it will be cut out later. Then take a screw the same size as your hole and once you've applied the glue, use the screw to line up that end.  Then you know it's fine and you can concentrate on lining up the other end and clamping it all with out the top moving around on you.

.
cIo0wZ.jpg


. I use a roller like the ones they use for ink printing to spread the glue out. Helps keep it even and not too thick. I don't believe in the old saying about lot's of squeeze out. You want enough glue to cover your surfaces and to soak in a little. A bunch of glue squeezing out on all sides is just wasted glue. Just make sure it covers all the way to the edges. And a template can also be useful as a clamping caul to spread the pressure out evenly. I positively hate taking the clamps off after it dries and finding a gap in the joint line.

.
aKJXxW.jpg


. Once it's dried the clamps come off and it can be trimmed to the body. I usually use a router and a piloted trim bit for this. Depends on the top material though, sometimes it's better to spindle sand it. After it was trimmed I put a little 45 angle on it just because.

.
lyeStM.jpg


. That's a later picture. I put the angle on before routing for the neck pocket so I wouldn't get tear out on the edges of the pocket. Then I put some naptha on the top to get an idea of what it's capable of.

.
fZ5Ezb.jpg

nnSJpL.jpg


. But I have to get back to work now, so I'll continue later..... :icon_thumright:
 
Beautiful. I like the beveled corners instead of a roundover. It increases the classy look of the top. I may give that a try one of these days.
 
Now then, or then now, whichever seems better. In the interest of further progress, I got off my butt and did some more. After the top dried and got trimmed down with a router and trim bit I did some light spindle sanding to smooth things out. Sometimes I'll go directly to the sander for the trim work, it depends on the type of wood that the top is. Then I routed the neck pocket and used my neck template and a transfer punch to layout the locations for the bolt holes.

.
XLqIog.jpg


. Then used a center drill to define the dimples so the drill bit would self center. Then I drilled the holes and lucked out to the point that it actually worked right.

.
6FhzfE.jpg

 
mIweY4.jpg


. Yes my drill press has a laser sight, but it's accuracy is often questionable to say the least.

.
zjfR09.jpg


. As long as I was doing neck things I flipped it over and put some angle on the back of it, seeing as how this body is rather thick. Once again the mighty Shinto rasp conquered all that came before it, including my arm muscles. (Their gonna be sore tomorrow!)

.
F5rZ1K.jpg


. Now it's time to put some counter-sink on said holes. One way to do that with holes that are already drilled is to take the bit you used to drill them with and turn it upside down and chuck it up. Take care not to tighten it too much so you don't damage the bit. Then lower the spindle till the bit is in the hole and turn it a few times by hand to make sure it's centered. Then leaving the bit in the hole clamp down the body, watch that it doesn't move on you, and then raise the spindle. Then change out the drill bit for a forstner bit of the right size and set your depth with the spindle stop. Then drill. If all works out right, congratulate yourself. I did.

.
xhGYk7.jpg

 
6U3qe1.jpg


. Okay, that's good for now. I'm old and tire easily. (Hey, that's my excuse and I'm sticking to it.)
  Until next time, remember the words of the great Marcel Marceau............
 
Rgand said:
Beautiful. I like the beveled corners instead of a roundover. It increases the classy look of the top. I may give that a try one of these days.

Thanks. Yes I like the beveled look alot. It's just a piloted bit that cuts a 45 degree angle.... :headbang:
 
Marcel was a Master of his craft. Mel Brooks was a demented Genius. Neither will ever be equaled.  :headbang: :headbang: :headbang:
 
PhilHill said:
Marcel was a Master of his craft. Mel Brooks was a demented Genius. Neither will ever be equaled.  :headbang: :headbang: :headbang:

I totally agree.
Except for one thing:
”Mel Brooks was a demented Genius” should be ”Mel Brooks is a demented Genius”, in my opinion.
:headbang: :headbang: :headbang:
 
I was thinking that He had passed away already. I stand corrected, wobbly but corrected.... :tard:
 
Well, at this point I decided that "Hey fool, maybe you ought to see how much this thing weighs". Having neglected to do that up until now, I threw it on the scale. 6 1/2 lbs. Holy Jenny Craig Batman, that's a fat bottom body!
Now I have nothing against the local chiropractor or his chosen trade. But I also have no desire to enable him to buy a new Lexus either, so some weight reduction is in order. The body is still close to 2in's in thickness so a little planing of the back may help. I got it down to a shade over 5lbs and decided to stop there, as it was also down to a shade under 1 3/4in's thick. I guess it will just be a little heavy.
This also eliminated the cavity cover recess and most of the neck heel contour, however those are easily restored. I believe I can hear the Shinto laughing at me now............... :sad1:
 
All right, after re-routing the cavity cover recess and putting in a slightly less radical heel contour, I decided to give the pickups some place to live and drill some holes for the bridge mounts. Using a Gotoh 510 Wrap-around like I have before so I had the pattern for the locations. Also drilled a hole for a ground wire to the bridge mount. And some holes for the pots and selector switch.

.
dWZqie.jpg

wpdSKD.jpg


. And this picture shows why an old guy like me shouldn't rely on his memory for the hole size for a selector switch. Luckily the poor plug job and the re-drill will be covered by the switch's mounting washer.

.
xRHYRl.jpg


.I'm still trying to decide which is worst, putting up with my ex-wife during the divorce, or using a hand drill to put a 7/8 hole through an inch of solid walnut....

.
Sl7osb.jpg


  I guess in general, and in private too for that matter, things are proceeding fairly well. I'm pretty confident that it'll all turn out great...... :help: :help:

 
Back
Top