Woodburning on quilted maple Strat

Great Ape

Hero Member
Messages
1,804
Time to try something different. I illustrate with Rapidograph pens, and thought I'd see if I could combine that with a guitar build.
I've never woodburned before so it's gonna be something of a challenge, but I like the idea & the effect, so.....
      The body....the design...basic design on body in pencil....
P8170130.jpg

 
P8170128.jpg
P8180133.jpg
 
Holy crap  :eek:  that's gunna keep ya busy for a while.

That's a great looking eagle too  :headbang:
If ya stuff up the burning  :dontknow:  you can always resort to carving it out.

Good luck, keep us updated  :icon_thumright:

Think my next build will be, a custom ordered blank  :icon_biggrin:
So I can go nuts with the dremel and drills.
 
Are you planning on a clear finish?  I wonder what a nice transparent brownburst might look like on the top of this...
 
:eek:ccasion14:

What kind of woodburner do you have? I used a Razertip which I think was about $140 but it's worth it if you plan on using it a lot. Also I used a scalpel like tip for outlines and the spoon shape for shading.
 
[size=10pt [/size]The "plan" at this point-subject to change without notice- is
Joe Barden's blade soapbars...and(so far, as of now) colorwise I'm thinkin' the eagle in an amber
to yellow fade, front-to-back, and the body in pale turquoise....This is one of my pen & ink pieces,
and I'm hoping to be able to somewhat replicate the style with the burn, using knife (fine), ball,
and shader tips...pics of progress-or disaster-will continue.
P8060110.jpg
 
:dontknow:  Is that picture (above) something you have drawn yourself ?
Or from an artist ?

Some mighty fine work in that  :icon_thumright:

 
I see we have a new entry in the "Guitar that takes a year" contest! Just ribbing, it looks nice. I hope you have the patience of the tree that grew such beautiful figure, cause you only get one shot. Good luck!
 
Updown--That's one of my drawings...so, does that mean it's
"from an artist"? :laughing7:
 
Yes sir that dose indeed make you an artist  :icon_thumright:

That is just incredible  :eek:  amazing talent you have  :hello2:

:blob7:  WOWZA !!
 
Thank you...BTW, the woodburning I'd most like to come close to is by an Aussie lady named Sue Walters. In-freakin-credible work, and, she's the only
artist I've seen who does PLATYPUSES(platypussi? platypussies? sheesh...). Seriously, though,
have a look at her website.
 
YEP know of her  :icon_thumright: ... seen plenty of her amazing stuff about.

That drawing of yours is right up there too, don't worry about that.  :icon_biggrin: 
 
Clear... you know - the wood burning lines just might give enough edge to allow you to use different color dyes in the different segments, kinda like stained glass in reverse. Then clear over all...
 
That's exactly what I'm hoping I can do. Maybe mix the dyes
with sealer when coloring within the burned areas?
 
I thought I replied to this thread yesterday but must not have clicked Send  :dontknow:

Anyway, your artwork is awesome, and you should have a curved exacto blade to clean up the edges of the burning and lighten it if some parts get too dark.
 
Thanks for the (sharp  :laughing7:) tip. I'll gladly accept any info you can give me since I have zero experience with burning...well, with burning wood, anyway....
 
Great Ape said:
Thanks for the (sharp  :laughing7:) tip. I'll gladly accept any info you can give me since I have zero experience with burning...well, with burning wood, anyway....

Black carbon builds up on the tips so you need a piece of scrap wood to wipe that off and to cool off the burner. Also, you have to keep the burner moving so the shading is consistent - if you hold it away from the wood for a few seconds, it gots hotter which can result in mistakes. You'll see what I mean if you practice on scraps first.

I too have burned a few substances in my time, and woodburning is just as easy and fun.  :) My Strat was my first woodburning project and the mistakes where I first started are not even noticeable. My burning machine went from 1-10, so I set it at 4 or 5 for medium shading, 7 or 8 for a really dark burn.
 
Firstly, you'll want to go through "search" and dig up the whole process thread that patriot54 was doing. I even saved a few of his pix in my photo bucket:

195.jpg


Just to remind myself that this:

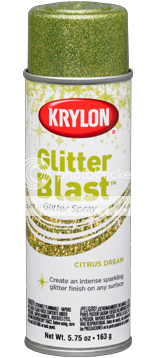
glitterblast.png


Is lame. Patriot's came out so good because of the quality of the original art, of course. I used to buy, sell, and repair fountain pens and (mostly) regrind fountain pen's nibs for fun and profit - until my eyes began acting their age around 45 and took the "fun" out of it. There isn't two hair's difference between the aniline dyes in water-based wood dyes, fountain pen ink, food coloring and RIT clothing dyes, just a few preservation ketones & such that you really do not want on Junior's Easter eggs unless you really, really dislike Junior.

Feathering is going to be your biggest enemy, and the reason why "real" Rapidograph ink may be better. Or even something with shellac & alcohol, acetone etc. For sure you'll  need a sealant coat after the burning, before the ink. Zinnser's Wax-free shellac is a great one, but you need to poke around the "compatibility" issue. You actually want some IN-compatibility, i.e. if your seal coat is shellac and you start to draw on it with a shellac-based ink, the ink can re-dissolve the shellac and... umm, randomize your artwork. The blackest of blacks inks are the carbon-pigmented particulate ones, you can thicken inks with gum arabic, speed their drying with alcohol, make then dry harder with shellac, etc. It used to be that the very best-looking & working inks were also the very nastiest, you had to flush technical pens every single time you stopped or....

skull1.jpg


And professional full-time printers have a habit of dying of the weird diseases like liver cancer, cirrhosis, pancreatitis & pancreatic cancer that are normally only the province of seriously-dedicated drunks. There have been some people doing some really good work with the Sharpies, their big brother Posca markers, Pantones and stuff - the inks all mixed, with all the evaporation & feathering & saturation figured out. My mom used to charge a pretty hefty fee for people's house drawings, the hyper-detailed pen & ink drawings that look like every single brick is painted in. She had it all figured out - draw in the big lines, get a professional copy, draw in more detail, another copy, then finish it with the fine stuff - so the buyer'd get the final full-sized original and two copies they could reduce for stationary & post cards.

ANYWAY - she had thrown over the Rapidographs as soon as the first Pigma Microns came out, no more cleaning snozzled pens. Everybody's making them nowadays, they get down to the .05mm or so range for that truly psychotic experience. I don't don't have time to stay good at both drawing and music - I'd probably have to get good at drawing first. I can still draw a mean flying eyeball...

We have another way-heavy art guy here, Kuro... something, another scary-good artist guy. I have to go to SLEEP I find later if you don't. First.

http://www.lamborghinimiami.com/sharpie_car.htm

 
Thanks Stubhead - the link is in my sig too

I've seen a lot of awesome guitars with artwork here - there was also a bass woodburned with the koi fish, the paisley bass and paisley Tele, the barn door Tele had woodburning, and the painted Maiden Strats.

And I love the Sharpie Lamorghini - I plan on doing a guitar based on that.
 
Thanks again Stub & P54. Clearly, the burn temperature is
gonna be crucial, and it sounds as though some sort of marker may be the way to go for coloring
within the burn...continuing education for me, for sure. And, yes, those Rapidographs are a constant source of frustration.       
                                                Greg 
 
Back
Top