You are using an out of date browser. It may not display this or other websites correctly.
You should upgrade or use an alternative browser.
You should upgrade or use an alternative browser.
The Adventure Begins ends
- Thread starter JPOL007
- Start date
JPOL007
Senior Member
- Messages
- 470
Thanks, hope to do some detail work this weekend. Got some light scratches in the lower horn area to remove before any color can be added.Rgand said:Good progress, it's coming along nicely.
JPOL007
Senior Member
- Messages
- 470
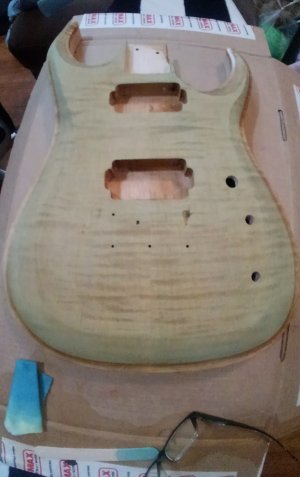
I’ve decided on applying the black TransTint using denatured alcohol. This is to help accent the grain. I used 4 ounces of alcohol with 18 drops of dye. This gave a dark grey color when it dried. One coat was applied and sanded back using 320 grit paper and palm sander after 2 hours drying. I then applied another coat and let it dry overnight (about 9 hours) and repeated the sanding process as before.
The green TransTint was mixed using distilled water. Again 4 ounces of fluid to 18 drops of dye was used for the mixture. Each coat of dye allowed the color to deepen and I stopped after 4 coats. The green was dry after about 4 hours and I lightly sanded it with 220 grit paper and a sanding block to remove any raised grain due to water being used in the dye mix.
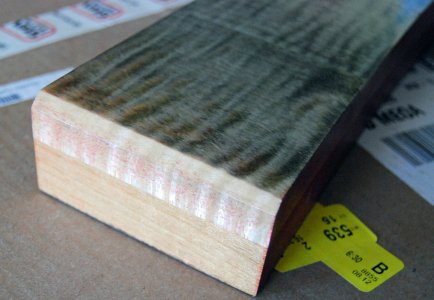
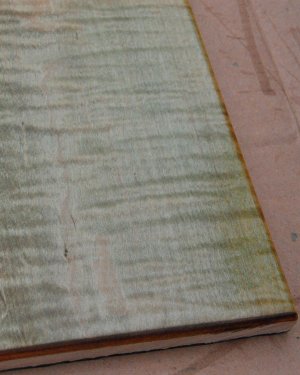
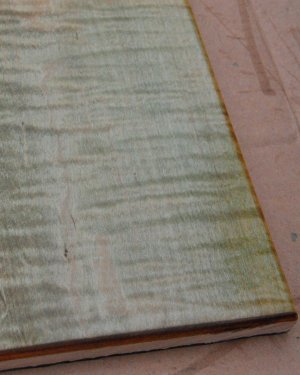
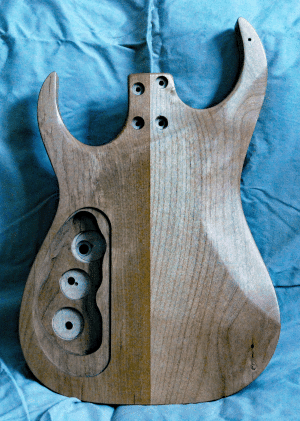
The test piece of wood is from the body when it was sawn during the building process. I sanded an angle on the end to simulate faux wood binding. Shellac was applied to the end to seal against dye leakage. I like the look it gave the alder so much; I’m just going to use shellac to color the alder. You can see why in the photo of the test piece end.
Dye was applied to the angle area to test whether the shellac would do a good job of masking the wood. The shellac was removed using a razor blade to lightly scrape the surface. You can see in the photo how well it masked the wood. I’m going to use this technique to do a faux wood binding on the body.
I accidentally found a guy who paints Hot Rod cars and has painted some guitars. I’m going to have him spray the lacquerer coat for me. I hope that doesn’t make me less of a built my own guitar guy :doh:. There is no way I’m putting all of this work in and ruining the project because I messed up the top coat.
Attachments
JPOL007
Senior Member
- Messages
- 470
Thanks, I didn't have the blotching problem using this technique that showed up in past dying attempts. The control over the color's darkness is very nice using water.The character of the alder will really be highlighted using the shellac. The alder has all of these places that look like stretch marks for lack of a better example. Not deep enough to be filled but very visible.Rgand said:That has some potential. It really accents the grain. Nice.
Verne Bunsen
Hero Member
- Messages
- 2,472
Awesome!
PhilHill
Hero Member
- Messages
- 1,653
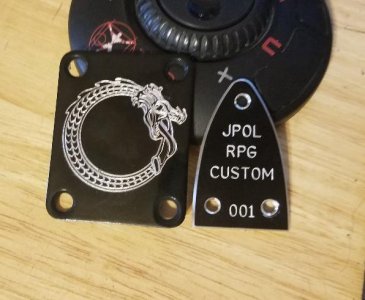
JPOL007 said:They aren't really in my hands yet but will be soon. DangerousR6 made a custom truss rod cover for the RPG and a neck plate for my family Tele build. He is as smooth as butter :headbang:
Nice! Excellent work.
BigSteve22
Hero Member
- Messages
- 2,798
Yes, he certainly is...... :glasses9:JPOL007 said:......He is as smooth as butter :headbang:
DangerousR6
Mythical Status
- Messages
- 15,478
Thanks for the props peeps, and you got a nice build there James.. :headbang:
JPOL007
Senior Member
- Messages
- 470
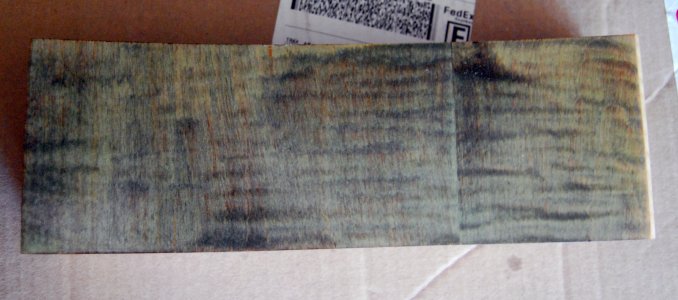
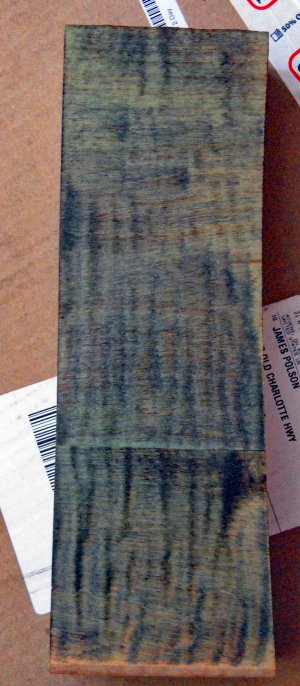
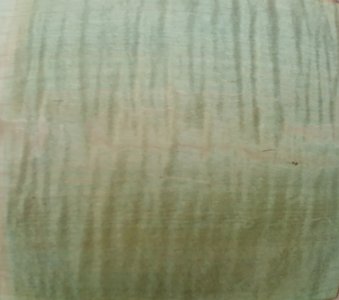
I tried vintage maple TransTint dry as the base and used the TransTint green as the top coat. This is the color combination I’ve decided to use. I wish the camera showed the color like the naked eye sees the sample. My photo skills are the real reason not the camera :doh: If things go as planned I’ll have the body colored and ready to poly coat next Sunday.
Attachments
JPOL007
Senior Member
- Messages
- 470
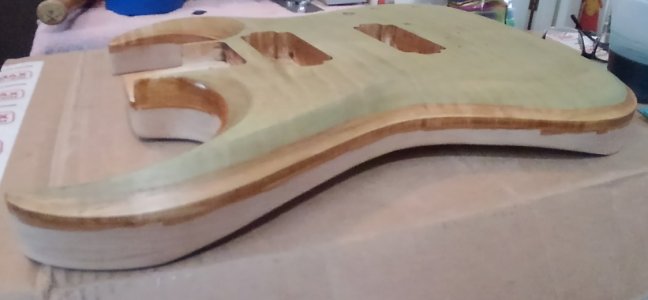
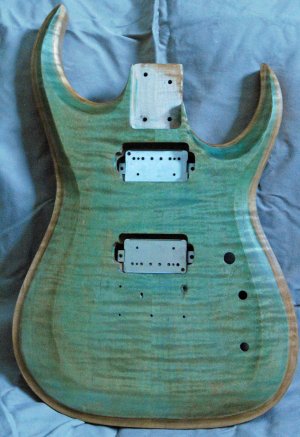
Got the body dyed this weekend. I used the TransTint vintage maple dye for the base and TransTint green for top coat. Shellac was applied to the areas that are faux wood accents. The shellac will be removed with a razor blade prior to the poly coat being applied.
I’m going to let this dry for a couple of days and sand the surface with 3000 grit scotch brite material. When the surface is smooth enough; I will apply the poly coats.
I’m going to let this dry for a couple of days and sand the surface with 3000 grit scotch brite material. When the surface is smooth enough; I will apply the poly coats.
Attachments
JPOL007
Senior Member
- Messages
- 470
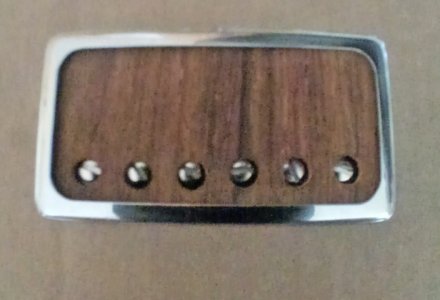
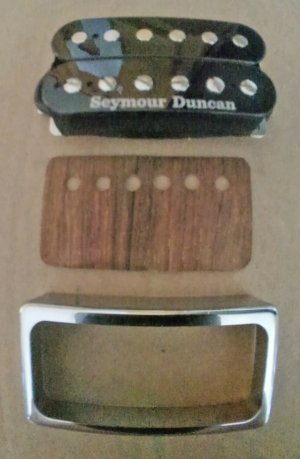
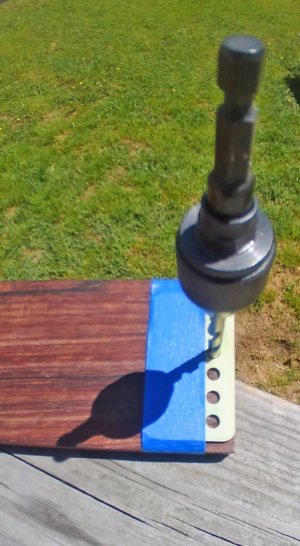
I couldn’t decide on using pickup cover rings or going straight wood mount. The pickup by itself didn’t sit well with me in the wood mount option. I found some open style pickup covers but wanted a little something more. The website also had some maple pickup covers that caught my eye. I dyed the maple using the same color green as the body; this turned out OK but lacked the contrast I wanted. I thought about making a rosewood version of the cover to pull the wood down from the fretboard and onto the body. No rosewood was to be had around here on short notice but a nice piece of Cocobolo was sitting on the shelf at my local Woodcrafters.
The maple cover was used as a template to drill the holes and define the sides of the new cover. The wood was about .375” thick and a lot of sanding was used to make the cover .065” of an inch. Stewmac has a planer tool that works with a drill press. One of those is on the way to keep me from ever doing that much sanding again.
I’ll probably try to find some premade Cocobolo control knobs instead of making them myself.
Attachments
Cagey
Mythical Status
- Messages
- 24,425
I'd be careful to do some real experimenting with that "planer" tool for the drill press. Most presses have too much runout to be any good for that sort of thing. There's and old saying - "You can drill with a mill, but you can't mill with a drill". I think if it was me, I'd find somebody with a real planer to get the thickness you want before cutting out the final shapes.
PhilHill
Hero Member
- Messages
- 1,653
Cagey said:I'd be careful to do some real experimenting with that "planer" tool for the drill press. Most presses have too much runout to be any good for that sort of thing. There's and old saying - "You can drill with a mill, but you can't mill with a drill". I think if it was me, I'd find somebody with a real planer to get the thickness you want before cutting out the final shapes.
I agree wholeheartedly. And take light cuts.
JPOL007
Senior Member
- Messages
- 470
Thanks guys for the feedback. The video for the head looked interesting and hooked me in a weak moment. That piece of equipment would be for later items; I have already finished the new covers. Two palm sanders, a Dremel and a metric butt load of sanding the thickness on sanding blocks by hand :doh: Just had to dry fit the hardware for a look see :icon_scratch:PhilHill said:Cagey said:I'd be careful to do some real experimenting with that "planer" tool for the drill press. Most presses have too much runout to be any good for that sort of thing. There's and old saying - "You can drill with a mill, but you can't mill with a drill". I think if it was me, I'd find somebody with a real planer to get the thickness you want before cutting out the final shapes.
I agree wholeheartedly. And take light cuts.
JPOL007
Senior Member
- Messages
- 470
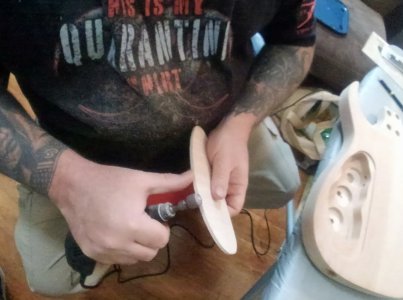
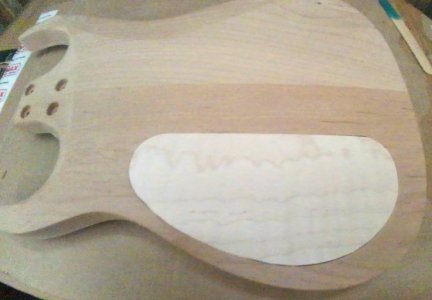
Made the control cavity cover today. I used the template from Stewmac to mark an outline on the maple. The maple was planer sanded by a friend and then the fun really started. The cover had to be fitted to the actual cavity. I used my Dremel to shape the sides and then block sanded the thickness to level the plate to the back of the body.
I’m thinking of dying the control cover green like the top. What do you guys think would look good? I would like to use magnets to hold the cover in place. Do any of you know where to purchase the type of magnets for this type of application? The shirt is a joke and I hope it doesn’t offend anyone. I didn’t realize I was wearing that shirt while working on the cover.
I’m thinking of dying the control cover green like the top. What do you guys think would look good? I would like to use magnets to hold the cover in place. Do any of you know where to purchase the type of magnets for this type of application? The shirt is a joke and I hope it doesn’t offend anyone. I didn’t realize I was wearing that shirt while working on the cover.
Attachments
JPOL007
Senior Member
- Messages
- 470
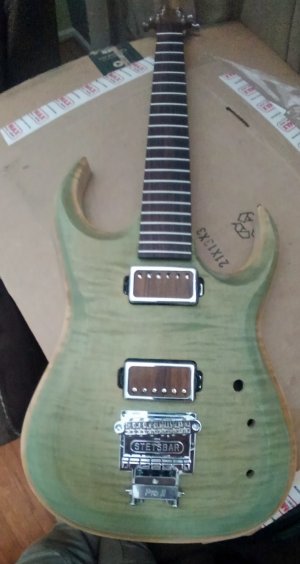
I have been working on sealing the body’s back for 2 weeks. The weather here has been humid as all get out. I lost track of the number of times shellac was applied and repaired. ScotchBrit pads were used for all of the sanding. Green 01, Red 02, Grey 03 and white 04 kit from StewMac. The back and sides are sealed and the front is polished using all of the different grades of pads. I’m going to let it sit for 72 hours and take it to get clear coated.
I’m using humbucker backing plates to direct mount the pickups. Some cosmetic rings are being made to cover the gap a normal pickup ring would usually cover. I’m using Cocobolo wood from the humbucker cover project for the rings. I’ve got Cocobolo knobs and toggle switch cap to finish out the wood theme.
I’m using humbucker backing plates to direct mount the pickups. Some cosmetic rings are being made to cover the gap a normal pickup ring would usually cover. I’m using Cocobolo wood from the humbucker cover project for the rings. I’ve got Cocobolo knobs and toggle switch cap to finish out the wood theme.


