Leaderboard

The Adventure Begins ends

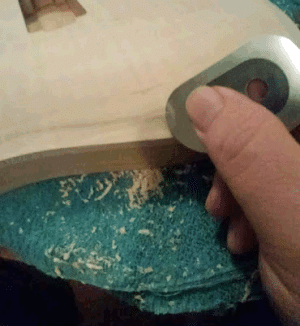
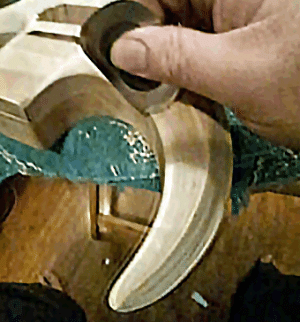
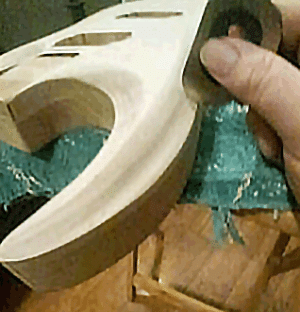
Well my Saturday involved some ditch digging so to speak. I got all 3 versions of Stewmac’s Ultimate Scraper.  Then I spent a lot of time using the scrapers to “dig” out a groove around the top of the guitar body. I really like these scrapers; hard to sharpen but the benefits outweigh that item.
 

Attachments

  • US 1.gif
    US 1.gif
    67.7 KB · Views: 13
  • US 2.gif
    US 2.gif
    68.9 KB · Views: 16
  • US 3.gif
    US 3.gif
    55.3 KB · Views: 23
Good call. I have used scrapers for years to shape and carve. These new heavy ones work even better. They leave a smoother finish than sandpaper, too.
 
I can remember not thinking a scraper was a useful tool. Then I tried one as a learning experience, and I sure did learn. Wonderful tools.
 
Looking good! Scrapers are time proven. I have furniture made by my grandfather before sandpaper was invented. Amazing work. With a little practice, they truly are outstanding tools.
 
I am going to need a small grinding wheel to sharpen the scrapers. Stewmac had a video about the scrapers and that is what the inventor suggest using. Off to Harbor freight tomorrow :redflag: Thanks to everyone for the positive support you all have always shown :occasion14:
 
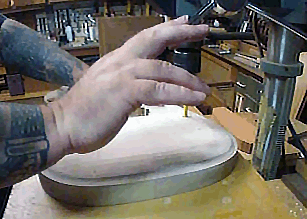
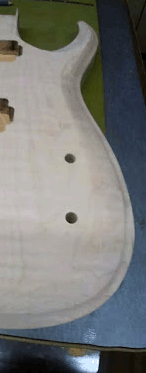
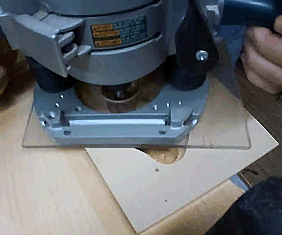
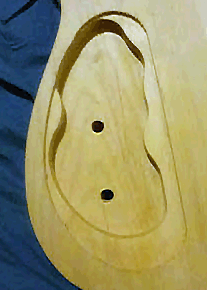
Got the control cavity routed out and installed a Buddha cut this week. You guys may call it a tummy cut, but when the tummy is the size of mine…it’s a Buddha comfort contour :laughing7: Started out by drilling the holes for the volume and tone pots. The holes were lined up parallel with the center line of the body. To avoid a control knob hitting the tremolo arm I used the tremolo to position the holes.  The holes were then drilled from the top of the body to assist in positing the control cavity routing templates. I used the pickup routing template to mark the bridge pickup position on the back of the body. This was done to make sure I didn’t rout the control cavity into the pickup cavity. May be an easier way to do this but it worked and was fast.
The Buddha cut was done using a wood rasp, palm sander and the wood scrapers. Marked the side of the body about ½” of an inch and the back about 1 ½” from the edge. Used the wood rasp to rough in the shape then the palm sander with 120 grit paper to smooth the shape. Next week will rout the selector switch hole and hope to get the holes for mounting the neck completed.
 

Attachments

  • CAV 3.gif
    CAV 3.gif
    45.5 KB · Views: 13
  • CAV 4.gif
    CAV 4.gif
    28.2 KB · Views: 18
  • CAV 2.gif
    CAV 2.gif
    33.4 KB · Views: 9
  • CAV 5.gif
    CAV 5.gif
    34.2 KB · Views: 7
  • CAV 7.gif
    CAV 7.gif
    22.2 KB · Views: 12
BigSteve22 said:
Truly exceptional! :o
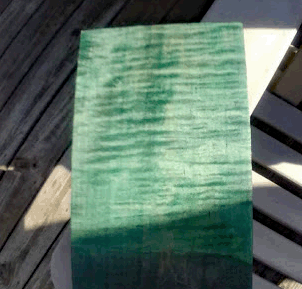
Thank you. Going to play with the dye tomorrow after work. One of the guys at Woodcraft is showing me how he got the finish looking so good on his last build. I'm making the same mistakes over and over again. Can't get the dye even. Using a piece of left over maple from the same board the top is made from.
 
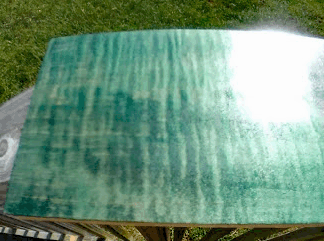
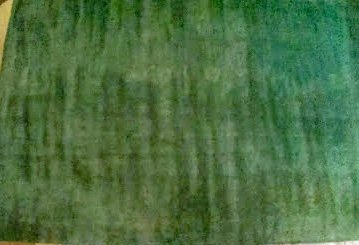
Jae at Woodcrafter gave me some pointers on using dye yesterday. Turns out I was using too much dye in my mix. This was causing a fish-eye effect when the dye dried. Showed me how using less pressure wiping the dye on helps with getting an even amount on the wood.
Tried black as the base coat versus building layers of green to pop the grain. We then tried applying black over a base coat of green to accent the grain. I like the black coat with green method. I think I’m going to do the black coat using denatured alcohol first. Sand that back and apply coats of green thinned with distilled water to get the final shading of color.
 

Attachments

  • DYE JOB 2.gif
    DYE JOB 2.gif
    51.6 KB · Views: 16
  • DYE JOB 1.gif
    DYE JOB 1.gif
    54.2 KB · Views: 16
I did some tuning on the dye sample today. Sanded the sealer coats back a little. Then I applied a coat of wipe on poly and let dry for 3 hours. Using 240 grit sandpaper I lightly sanded the poly until the surface had no shiny spots. A tack cloth was used to remove any sanding dust and another coat of poly was applied. I'll wait 24 hours and try to buff the poly.
 

Attachments

  • color 1 copy.jpg
    color 1 copy.jpg
    50.1 KB · Views: 15
JPOL007 said:
....I'll wait 24 hours and try to buff the poly.
Love that color! I don't know about that "wait 24 hours", though. Poly can take 4-6 weeks to fully cure. I know it's only a test piece, but I'd probably wait a while longer before taking a buffer to it, JMHO.
 
BigSteve22 said:
JPOL007 said:
....I'll wait 24 hours and try to buff the poly.
Love that color! I don't know about that "wait 24 hours", though. Poly can take 4-6 weeks to fully cure. I know it's only a test piece, but I'd probably wait a while longer before taking a buffer to it, JMHO.
Thanks for the tip. I had read here on the forum about spray on poly taking ages to cure. Figured if I shared my idea about buffing you guys wouldn't let me mess things up with the wipe on poly :icon_thumright:
 
He's right about the timing. If the material hasn't had enough time to harden completely, it'll never buff/polish. It won't feel like it, but "handling" dry or cured vs. an actual elapsed time for the chemical reactions to happen is huge. Why do you suppose it takes so long to get a finished body from Warmoth? If they could buff that stuff out and ship it, I'm quite sure they would.

Buffing isn't likely to get out 240 grit scratches, either. Those are going to be deep. You're going to want to go gradually up to maybe a 1500 grit or better, 200 grit or so at a time.
 
Cagey said:
He's right about the timing. If the material hasn't had enough time to harden completely, it'll never buff/polish. It won't feel like it, but "handling" dry or cured vs. an actual elapsed time for the chemical reactions to happen is huge. Why do you suppose it takes so long to get a finished body from Warmoth? If they could buff that stuff out and ship it, I'm quite sure they would.

Buffing isn't likely to get out 240 grit scratches, either. Those are going to be deep. You're going to want to go gradually up to maybe a 1500 grit or better, 200 grit or so at a time.
You sir are the man :glasses9: If I put say 2 more coats of high gloss over this coat wait 3 weeks and sand; would that get rid of the 240 scratches?
 
It might, or you may end up chasing your tail. The main problem I've found with "wipe-on" finishes is the tendency to leave "wipe marks", much like "brush marks" in other manually applied finishes. Sanding those out just isn't any fun, especially with polyurethane because it doesn't like to be worked after the fact. Some polys will flow out better than others, though. When I used to shoot catalyzed poly or enamels on cars, it used to go on looking like most spray finishes - all orange-peeled - but if you waited 5 minutes the stuff would flow out and look like wet glass. Just magical.

Unfortunately, for a variety of reasons most DIY-types aren't set up to shoot that, so the wipe-on solution is a good one to get you poly on your part, which can be a Good Thing.

I've done some necks with wipe-on poly, and I've found you have to be a little ambitious about the amount applied, but at the same time cautious not to over-apply lest you sag or run it, since it doesn't set up fast like lacquer does. If you can find the right application rate, it'll flow out without sagging or running on you and save you a lotta work later. Part orientation helps - you want the finish to lay there, not hang there, otherwise mean ol' Mr. Gravity will pull sags/runs that'll be tough to get out later.

Check what you're using and make sure you're following recommendations for temperature during application.
 
Cagey said:
It might, or you may end up chasing your tail. The main problem I've found with "wipe-on" finishes is the tendency to leave "wipe marks", much like "brush marks" in other manually applied finishes. Sanding those out just isn't any fun, especially with polyurethane because it doesn't like to be worked after the fact. Some polys will flow out better than others, though. When I used to shoot catalyzed poly or enamels on cars, it used to go on looking like most spray finishes - all orange-peeled - but if you waited 5 minutes the stuff would flow out and look like wet glass. Just magical.

Unfortunately, for a variety of reasons most DIY-types aren't set up to shoot that, so the wipe-on solution is a good one to get you poly on your part, which can be a Good Thing.

I've done some necks with wipe-on poly, and I've found you have to be a little ambitious about the amount applied, but at the same time cautious not to over-apply lest you sag or run it, since it doesn't set up fast like lacquer does. If you can find the right application rate, it'll flow out without sagging or running on you and save you a lotta work later. Part orientation helps - you want the finish to lay there, not hang there, otherwise mean ol' Mr. Gravity will pull sags/runs that'll be tough to get out later.

Check what you're using and make sure you're following recommendations for temperature during application.
Thank you very much for sharing that information. I can read the instructions all day but nothing beats actual experience. You guys are like having an online school at your finger tips :occasion14:
 
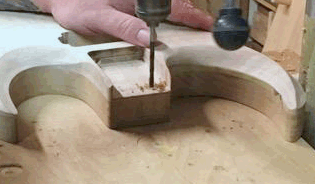
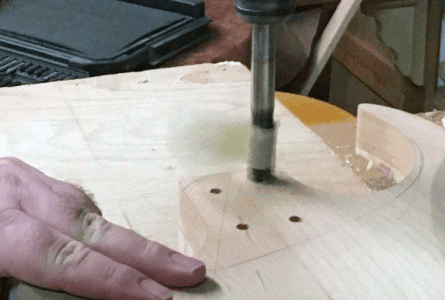
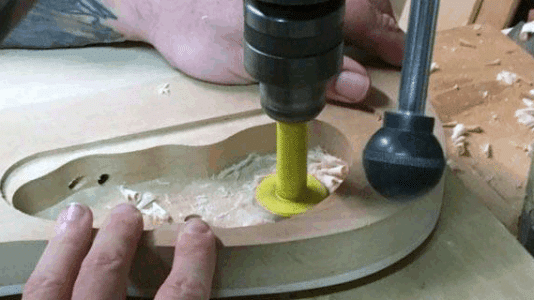
Got the neck pocket drilled for the bolts and grommets. The holes for pickup wires to the control cavity are in place. Due to the top contouring I had to counter sink the area where the pots go. If I made the entire control cavity depth uniform; I’d go through the top. The bit used to form the grommet holes had a guide on the end to keep the bit centered in the bolt hole. Problem was the bolt hole diameter was smaller than the guide. Needed to make a hole big enough to accept the guide but leave the bolt hole diameter the right size. Setup the drill bit so it didn’t go past the back’s plane. This left me a pin hole to center the larger bit for the grommet. Drilled down the distance needed to recess the grommets and left the rest of the hole diameter unchanged.
You can see in one photo where the neck heel area is marked for some contouring. This should allow more access to the upper frets. I used a French curve set to make the lines. Need to install the metal inserts in the neck heel, drill holes for mounting the StetsBar, pickup selector switch and output jack.
 

Attachments

  • Bolt Holes.gif
    Bolt Holes.gif
    32.1 KB · Views: 9
  • Grommet Hole copy.gif
    Grommet Hole copy.gif
    147.8 KB · Views: 11
  • Material Removal for Pots.gif
    Material Removal for Pots.gif
    89.9 KB · Views: 10
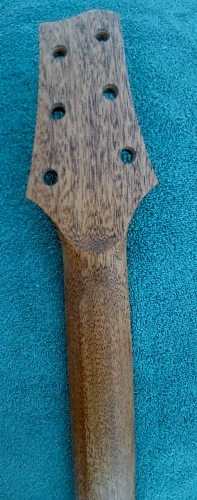
Nice weather today so I decided to fill the grain on the RPG’s neck. The grain filler smells too bad to use indoors without lots of ventilation. Used Timber Mate Black to accent the grain patterns. It didn’t feel right to hide all of that character. I masked off the fretboard first then wiped down the neck with denatured alcohol. Used warm water to thin the filler (saw a couple of videos that suggested using warm versus room temp) to what I thought might be thick enough. Got the thickness part wrong. It wasn’t runny but just wasn’t filling the pores very well. Added a little more filler material after two coats didn’t fill everything to my liking. Third time was the charm and now I have lots of grain definition with the surface being very smooth.
Tomorrow I’m going to put some shellac on the neck then poly coat it later this coming week. 
 

Attachments

  • BEFORE FILLING 2.gif
    BEFORE FILLING 2.gif
    35.2 KB · Views: 15
  • GRAIN FILL MASKED FRETBOARD.gif
    GRAIN FILL MASKED FRETBOARD.gif
    37.5 KB · Views: 8
  • GRAIN FILL HEADSTOCK AFTER.gif
    GRAIN FILL HEADSTOCK AFTER.gif
    87.2 KB · Views: 15
  • GRAIN FILL NECK AFTER.gif
    GRAIN FILL NECK AFTER.gif
    85.3 KB · Views: 14
Back
Top