You are using an out of date browser. It may not display this or other websites correctly.
You should upgrade or use an alternative browser.
You should upgrade or use an alternative browser.
Telerauder Build
- Thread starter rgand
- Start date
rgand
Epic Member
- Messages
- 5,934
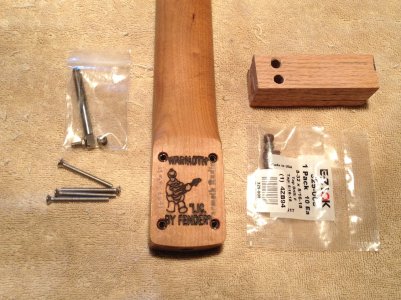
Today the cleaners came and I was underfoot so I headed to the workbench to get something done on the project. Rather than just sand away, I wanted to do something a little more rewarding so I installed threaded inserts in the neck. I chose the E-Z Lok 329-008 8-32x5/16"steel inserts. I shimmed the jaws of the vice (thanks for the tip, BigSteve) to fit the taper of the neck, clamped it in and aligned the holes with a reversed drill bit then cut them shallow with a 1/4" Forstner bit (again, thanks BigSteve). All four started, I set the finished depth for the Forstner bit and went back and drilled to the proper depth to allow the inserts to set in slightly below the surface of the heel - 3/8". I took a countersink and ran it a couple of twirls by hand to take the hard edge off the holes, Then I tapped the holes with a block drilled to keep the tap aligned (thanks for that one, Kevin). When I was done, I screwed an insert in that had been drilled out to align a 3/32" drill to clean the hole about 1/4" deeper so the screws wouldn't bottom and apply unnecessary lifting pressure to the inserts. Instead of putting tape on the bit to the proper depth, I used a dowel that I'd drilled years ago for a depth gauge and set the proper depth so I wouldn't 'oops' into the fretboard. I then blew the dust out of the holes and installed the inserts with a screwdriver. I'm pleased with the result.
The screws I got are 1 3/4" long and will need to be shortened by 3/8" or so before installing
The screws I got are 1 3/4" long and will need to be shortened by 3/8" or so before installing
Attachments
BigSteve22
Hero Member
- Messages
- 2,798
Looks to be a really nice bit of work! Glad my post was helpful. I'll probably go with the steel inserts next time around, AND seems I'll also have to break down and buy the right tap. I experimented with a 5/16-32 tap on some scrap maple. While the 32 pitch, being twice that of the 5/16-16, did allowed the inserts to thread in by grabbing every other thread, the fit was too loose to keep the inserts straight during installation. Probably because the finer pitched tap enlarged the bore, (the finer the pitch, the larger the bore). :icon_thumright:
rgand
Epic Member
- Messages
- 5,934
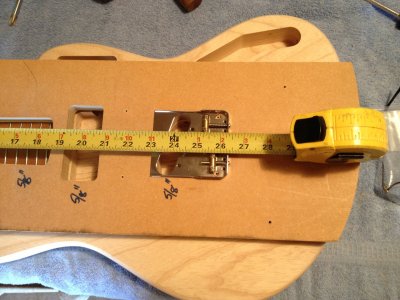
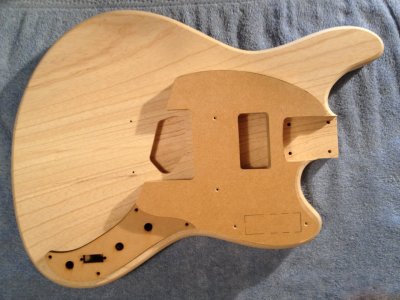
I had a few minutes today so I shortened the screws by a quarter inch and bolted the neck on. It went on slick as pond scum. The neck pocket, which I had widened just a tad, fit like it should and the neck aligned nicely with the body center line. I laid the pickup cavity/bridge pattern on and measured to see if there was enough adjustment for the saddles where the holes were. With one saddle way forward and another way rearward, they looked good.. I removed the neck and screwed the pattern back on and drilled the two end mounting pilot holes so I can later attach the bridge and get all the mounting and string holes in the right place.
Attachments
Cagey
Mythical Status
- Messages
- 24,425
It's probably worth mentioning that the high E saddle will be closest to the actual scale length once intonated, with the others being behind that (longer strings). So, it might be worth it to push that one farthest forward to find the mounting point for the bridge.
rgand
Epic Member
- Messages
- 5,934
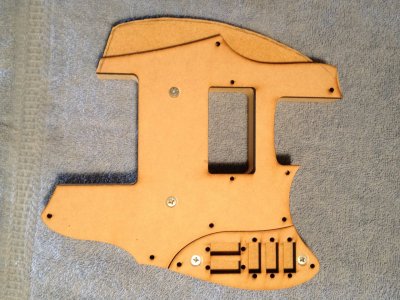
Today I had the urge to get the pickguard pattern done so I concentrated on that.
I combined two of the pattern pieces from the set and modified the total to be Tele-ish. Then I found out that my 1/4" diameter bit has only a 5/8" cutting length. Since I had 3/4" MDF to make it from, it took a bit of fiddling to get the corners of the pickup route cut right but in the end I was successful. It looks good and I'll use this pattern for the final design. Next time, I'll make the pattern out of thinner material. I know the pattern looks like it's too close to the edges but that's just parallax from the thick pattern. I still need to cut the mounting for the blade switch.
The control plate will get cut out of 14 ga stainless.
Attachments
Verne Bunsen
Hero Member
- Messages
- 2,472
This is such a cool project to watch. :icon_thumright:
rgand
Epic Member
- Messages
- 5,934
Thanks, Logrinn. I am sort of leaning more toward straight fore and aft although it would fit at a bit of an upwards angle like a Strat without getting in the way. Not sure if that would make much difference , though. Straight up and down would definitely get snagged while picking. The verdict is still out on this one.
rgand
Epic Member
- Messages
- 5,934
Thank you, all.
Actually, I'd have to think on that. The biggest challenge, the finish, is still ahead of me.
My wife says I should do that better. :icon_biggrin:Logrinn said:Now ... do you take orders? :icon_jokercolor:
Actually, I'd have to think on that. The biggest challenge, the finish, is still ahead of me.


