Leaderboard

Stratocaster Body neck pocket depth

Ardie

Junior Member
Messages
72
Hi Friends  :blob7:

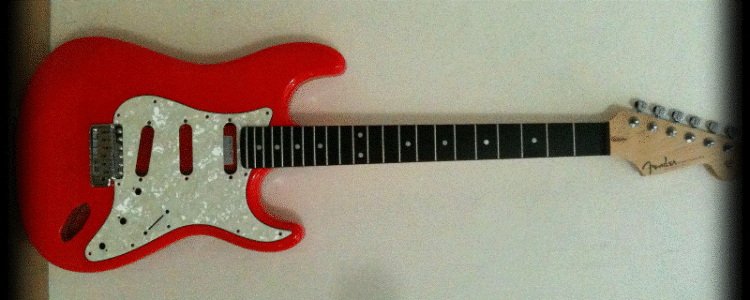
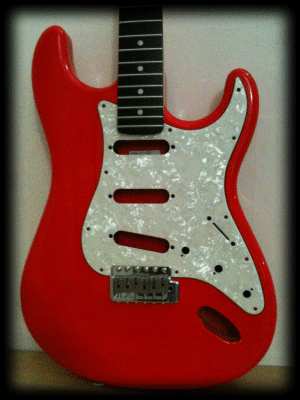
Working on my second Stratocaster project.
Im having some issue on the guitar body. The problem arises while im adjusting the saddle on my 6 hole vintage Bridge, The saddle already reach the maximum height but still the string touches the fretboard and I dont have anymore room to adjust. I spoke to my friends and they told me the body might not have enough depth on the neck pocket, and they advise me to deepen more the depth about 3mm..

So measured carefully the dimension of the following parts but seems to be OK....My guts tells me to deepen the neck pocket about 3mm.
1. Neck Thickness = 1" (25.4mm)
2. Neck depth pocket = .625 (15.88mm)

I search from the forum that the immediate solution is to deepen the neck pocket about 0.125" (3mm) then this issue will be solve.

Can anybody advise me what to do...thanks alot
 
I have the exact same problem. Not sure how it can be happening. I'm using a Gotoh hardtail bridge, and I'm going to have to put a spacer under that, or route the neck pocket deeper. Haven't decided yet. Either solution will work. It's definitely not the nut, though. I haven't been able to find anything definitive, but I suspect Fender's hardtail Strats have deeper neck pockets. .625" is the normally the correct depth, but 98% of all Strats have vibrato bridges that sit taller, so that's off by probably .050 to .075 or so for the shorter hardtail bridges.
 
Thanks Kyler and Cagey!

Im sure its not he NUT coz the saddle setup on the Wilkinson vintage bridge was to high and its unusual to be that high to reach he maximum setting on the set screw.
I noticed also this on my 1st Warmoth project i have to set the saddle that high to have about 1.5mm string clearance.. even though i dont get that string buzz most of my Friends commented that my saddle was set to high, Im referring to my first Warmoth Strat project.

But for this 2nd project im using a diff modern vintage bridge but again comparing the spec.. are still the same.. I think i will go on to deepen the Neck pocket. to solve the issue. But im sure the LSR nut or the neck relief is not the one causing the problem, coz the string was really low. It might be the height of the Bridge but as I said comparing to GOTOH spec itis similar.

I read someone from this forum that he deepen the pocket to solve this issue..
 
I've had two different necks on this body, both with well-cut nuts, both of which worked fine on other bodies. So, I know it's not a neck or nut issue. It's gotta be the neck pocket/bridge combination. Since I can't believe there's some kind of conspiracy amongst all the bridge manufacturers to make bridges that can't possibly work on Strats, but market them as being designed for that body style, that it's gotta be the neck pocket just isn't deep enough.

But, I'll fix it. I have a well-equipped shop here, and I got tools to work on tools. That body's gonna learn about defying me <grin>

Tim_Allen.jpg


I know what this thing needs...
More power! So, I rewired it.
 
Thanks Cagey for ur confirmation in line with this issue.

I can put this on the CNC machine and cut the depth more deeper, or i just have to do it manually coz putting it on the CNC machine i dont have the fixture.

But anyway I just want to make sure anybody have the same experience like this, before doing the rework.

Better to confirm than sorry..... thanks again CHEERS! but thinking of it what really is the problem i have no idea, i cannot compare it to other guitar, or bridge.

But I manage to compare the Warmoth Neck and body to the other maker which im working on my 2nd project and list down all he spec.. but it was the same... i dont know what causing this problem.


Attachments

  • STRAT assy-2.gif
    STRAT assy-2.gif
    153.1 KB · Views: 629
  • STRAT assy-1.gif
    STRAT assy-1.gif
    272.2 KB · Views: 665
You were saying "vintage" bridge, and for some reason I was thinking "hardtail". Now that I see the pictures, I realize it's a vibrato bridge.

I haven't messed around with 6 point vibrato bridges in so long I can't remember because I consider that a piss-poor design, but I'm pretty sure you can raise the pivot point on those things by backing the screws out. That has the effect of raising the bridge overall, which would allow you to lower the saddles to get the proper action. I could be wrong, though. It really is a crummy design. Still, it's worth checking into.

I agree that trying to fix the pocket on a CNC would be a problem if you're not set up for it, since you only get one chance. But, you can buy a router template from Stewart-MacDonald that'll make that kind of thing fairly easy, and they're not terribly expensive. You'll need some pattern follower bits, but given those, it's pretty straightforward.
 
Yup Cagey i have tried to raised up the 2 screw just like what we are doing for Floyd rose. But in a 6 hole vintage the design is the pivot point of the bridge is from the the Face of the guitar body and it will be guided by the 6 screw. the front bottom edge plate of the 6 hole vintage bridge has a champer this will allow you the bridge to float. Again i might be wrong but i have check  You tube how they install this floating bridge and im sure im doing the right thing.
 
It seems to me that the logical solution would be to get longer saddle adjustment screws so that the saddles can be raised higher.  :icon_scratch:
 
Installing a longer screw to get a higher adjustment doeskin looks nice. And doing this you can't be able to adjust ur intonation screw bcoz its will to much off center from the hole.

Thanks alot guys for ur comments I appreciate it. hope some thing came up this weekend.... cheers!
 
Is it possible you were sent a body that had a neck pocket with the angle done for a non-recessed FR or T-O-M, regardless of what your actual bridge is?  I say this because I have a 3rd hand 90s MIJ Strat.  It originally had a locking trem that was stripped and deemed useless before it got to me.  Not being able to find a suitable replacement, I retrofitted a 6-hole vintage trem, and the middle 4 saddles have to have a shim under them not to exhaust the sasddle height adjustment.
 
I had to raise the saddles up significantly when I changed from my stock MIM maple/maple neck to a W Mahogany/Ebony.

One more pointer: make sure your 22nd fret overhang isn't getting caught on the pickguard and angling up at all.
sanding the bottom of the overhang or that section of the pickguard may help, especially if you go ahead with trimming the neck pocket.
 
Ardie said:
Installing a longer screw to get a higher adjustment doeskin looks nice. And doing this you can't be able to adjust ur intonation screw bcoz its will to much off center from the hole.

Thanks alot guys for ur comments I appreciate it. hope some thing came up this weekend.... cheers!

I can't imagine that such a small height increase would cause intonation adjustment screw problems.

Definitely make certain that the neck is seated all the way down in the pocket. You should not be having this problem. If the neck and pocket are the correct measurements, you may have a defective bridge.
 
Hei guys i milled down the neck pocket 3mm down. The issue solve. This is the only quick fix i can think off. What really went wrong it might be the bridge.. As i said the spec of the bridge is simillar to other 6 hole vintage bridge. Thanks alot guys for ur comments.

Cheers!
 
The disastrous problem with milling the pocket is going too deep so it's best to stay well within calculations. The objective is to windup with a solid fitting neck pocket and bridge saddles not low or high.
When setup, a USA Fender 57/62 bridge should have around one full 360 degree screw thread and a hair protruding above the G and D saddles. Generally if the D and G saddle height is correct it puts the lower A, B, E, E saddle height on the money.
Having to mill certain Strat/Tele bodies to accommodate Warmoth necks is not uncommon. However most require minus .010 to .035 inch. Minus .125" is unusual.
Providing you do not have a compound milling table, the following is the way I've milled Strat/Tele neck pockets; not recommended for the inexperienced, faint of heart or those who make their living playing instruments. I use a floor standing drill press with a table large enough to support a Strat body and a RotoZip 1/4" shank straight cut bit with a carbide tip...land shark.
Cover the drill table with paper, be sure the body has no ferrules on the back and lays flat, it's well lighted and unobstructed. Set the drill speed to run fast, most have adjustable pulley ratios. Note pocket thickness prior to milling with a caliper or micrometer. Lower the bit until it lightly touches the center of the neck pocket and set it. Hold the body to table and move it forward and backwards and side to side beneath the bit to check for square, etc.
Again lower the bit to lightly touch the pocket center then increase cutting depth close to desired amount and set it. Hold the body firm to the table. Start the drill press and slowly move the body around to cut a small circle. If everything looks right continue "erasing wood" until the entire pocket is clean.
The sides of the pocket are a little difficult to avoid contacting with the bit I use because it has no bearing guide however it tests skill. Compressed air or a vacuum keeps debris out of the way and makes the going easier. Since you're not working blind like a router setup you can use a head strap magnifier for detail. If the body is unfinished factor in paint thickness for setup. And consider possible overhang contact with pickguard. Practice on scrap wood first. Not recommended for neck pockets with inspector stampings, etc. Good luck.


Seems like you could do the same with a router and a template bit, using the pocket itself and some same thickness wood on the sides as a guide.
 
That's what I'm going to do, but I've got an actual neck pocket template from StewMac. The drill trick would work, but it would be a lot of work. Much easier to just use the right tool for the job if you have it. Plus, the results are cleaner.
 
Dear freinds milling the depth pocket might not work you. I suggest check all aspect were things goes wrong. Double check and measure the actual dimension.

I decided to mill the pocket depth to match it with the bridge....neck will be subject to wear and tear when season but the body and bridge will stand the test of time. In the case i change the neck in future i will still have the same body that matching the bidge.
1. NC machine is the best machine to rework this which the one i used..
2. The tool i used is called side and face mill cutter some shop thy call it sliting cutter. Then finish it with wood chisel to removed the un machined area on the corner radius.
3. Its just basically a facemill cutter were the shank or tool holder is smaller than the cutter diameter, using ths kind of tool you wont having issues of the cutter is milling away the original wall which u dont to happen.
4. Apply some blue ink onthe surface u dnt want to be machine in ths way its easy to identify.
5. Ths is the most difficult part how to hold the body without scratching the paint job.
6. 3mm thicknes cardboard to protect the back face of the body same goes with top face the, place a plywood to protect the top surface. Round metall stopper mounted on the NC TABLE to secure all side to ensure not move during cutting..Strap clamp tighten lightly..
7. Cut lightly about .5mm, total 6 pass

If u have a steady hand u can use wood chisel make sure cut scrape lighly and measure frm time to time..The same trick u need to apply blue ink to identify the un touch surface. 3mm is not that much you can easily scrape this away. Stick some tape on the wall of the neck pocket ensure you wont be scraping the neck width.

Again i work as fixture designer and i have skills to utilse CNC machine.. So if ur not conident to do it the i suggest send it to luither.

Thanks alot guys!


Hate to disagree but I've used the Stewmac template/router and the results are not as accurate, setup was more trouble. IMO If it were better I'd use it. How long does it take to chuck a bit, lower it, lock it and go to town? Once you've done it that's basically all there is to it. And, there's no second setup to remove more material which is a probability. Try the drill press plus a $5.00 high speed straight cut bit on a scrap piece of wood for accuracy and if you don't like it I'll buy you a coke.
In the '80s I spent hours making tools necessary for building violins from blocks of Spruce and Maple. Compared to building a fiddle, building a Strat or Tele from semi finished parts is a cakewalk for me. Thank you Warmoth, Fender et al.
A CNC, Bridgeport, etc. to deepen a neck pocket is a little overkill but if that's all you have it must be nice. I'd like to know what body/neck combo requires .125" removed from the pocket?


Well, as it turns out, the StewMac template isn't needed or even appropriate for this operation. In fact, I'm not sure what good it is; the pocket width you'd end up with would be too wide. So, that was a six-pack's worth of good money wasted. But, on the plus side, I recently bought a 1/2" dia. 1/2" cutting length pattern follower bit similar to this...

3004.gif


...but in the dimensions given to open up a pickup cavity from single coil to humbucker. Since the neck pocket is already .625" deep, the bearing will ride the interior dimension of the pocket and only cut to the depth I set the router at. So, the side cut will be perfect, as will the depth, with no setup other than depth needed. No more Warmoth logo, though.
 
Back
Top