Sandblasted Warwick finish

Soloshchenko

Senior Member
Messages
430
I must say I absolutely LOVE the finishes that Warwick do on their basses particularly the sand blasted look but I'm a bit short of sand blasting equipment in my garage!!!  :icon_smile:

http://www.warwickbass.com/basses/_corvettetaranis_4.htm

Any idea how I could achieve this look on Swamp Ash at home without expensive equipment?

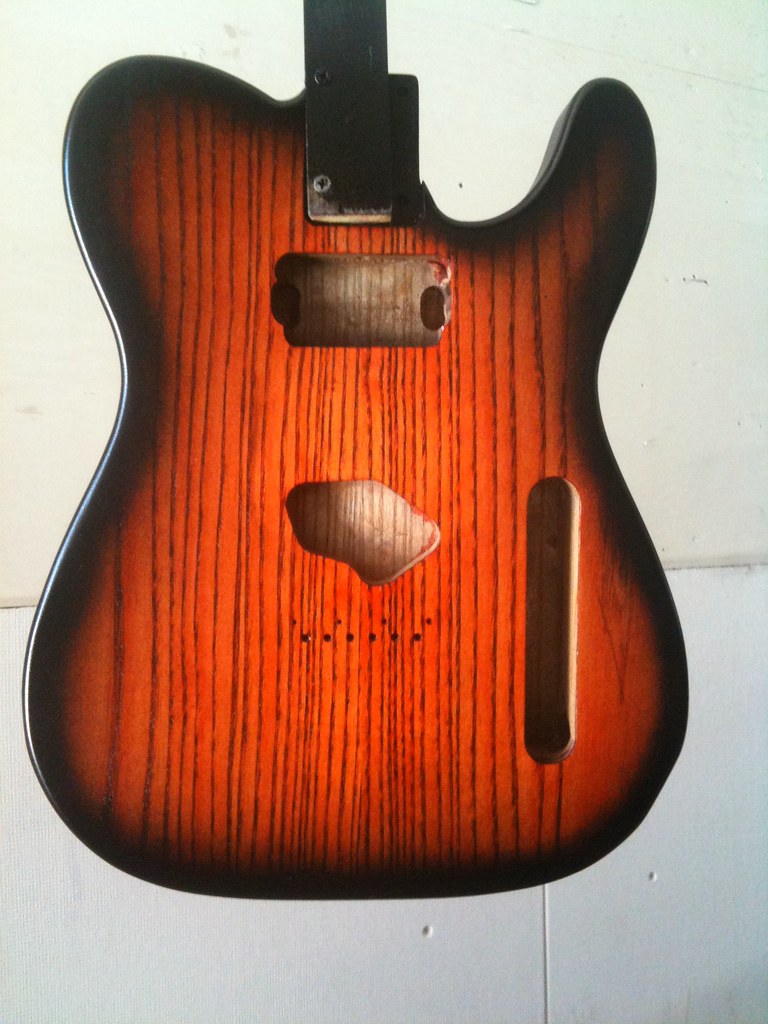
I've seen a vaguely similar thing on a tele that wasn't filled before finishing and the grain went kind of bumpy like this. I'll try and post a pic

 
I know EXACTLY how to do that from an experiment on an ash body...

1.) Select a swamp ash body with an interesting "wide" grain pattern
2.) Tint/dye/stain to desired coloration
3.) Skip all grain filling/sanding sealer steps
4.) Shoot directly, applying relatively heavy coats of nitro; aerosol cans from StewMac/reRanch work fine.
5.) Allow at least 24 hours between coats

The nitro will sink down into the grain and the overall pattern should "orange peel"/dimple like a champ!
 
Sir Schmoopie said:
thats so cool, i always wanted a finish like that.
with out the price of a warwick.

I think Warwick finishes rule for their sheer "natural" feel and I'm not even a bassist!

I particularly like the way they will take a gorgeous flame maple top and...do nothing to it!!! Seriously they just oil finish it and there you go. You rarely see that in guitar building, people like to burst it or mess with it, I think Warwick finishes prove that simplicity can be stunning.

Cheers for the info Jack. Incidently have you got any pictures of that body?
 
That particular body is fixing to get stripped again for another experiment; will take a couple of pics when I get a chance before stripping the top off; saw CB's story about using shoe polish for stain on another thread and it made me curious....
 
I just did the same thing on a Stratocaster body. I use the nylon wheel brush in my drill to open the grain up and deepen in the ridges. I skipped the grain filling process and shot directly over the open grain.
AD4307E9-1906-4D3B-8DD8-C6802D0ACE2A.jpeg
If you want to see the full process follow this thread on Facebook.
Sandblasted
 
Very nice, I have seen something very similar before............ :unsure:
 
That's pretty snazzy. You don't often see a necropost that makes you want to rengage the original topic. This one does, though.

Is that burst all dye? Or did you dye the top, then spray the burst edge? Inquiring minds, etc., etc.

Peace
Bagman
 
That's pretty snazzy. You don't often see a necropost that makes you want to rengage the original topic. This one does, though.

Is that burst all dye? Or did you dye the top, then spray the burst edge? Inquiring minds, etc., etc.

Peace
Bagman
Thanks Bagman
I use dye and then a black rattle can to finish off the burst.
 
It looks great. I did likewise on my first finishing project. Mine, however, ended in disaster, and also was a disaster at various points along its lifespan. But before it all turned to poo, it looked like this. I colored the grain on mine by painting the top with black India ink, and then sanding back. Dyed with General Finishes water-based dye stain, then shot the edge with Behlen black lacquer.

I may have to revisit this technique, actually, now that I know what I'm doing a little better... maybe it won't go pear-shaped this time out.

5902217569_fa655b5d0f_b.jpg
 
What happened? A Series of Unfortunate Events.

I have read that novelists should get write the first one just to get it out of their system, and then burn it; then get on with the real work of their lives. Maybe that's how guitar-building works for me.

I bought the body for a song on eBay to do my first project, knowing full well that I would commit all manner of newbie errors along the way. And I did; but I figured out how to recover from most of them. One glorious event that resulted in the utterance of numerous swearwords, both the shopworn favorites and new ones previously unknown to the sensibilities of man, was when I hung it from a hook after what I intended to be the final coat of clear lacquer topcoat. Overnight, the hook pulled out of the ceiling and the body fell to the rough concrete floor, suffering heavy ding-age. Needless to say, I was peeved.

The final straw was when not one, not two, but three bridge screws snapped off in the body during installation. Evidently cheap-@ss Chinese screws are no match for heavy northern white ash lumber, pilot holes and waxed threads be damned. I could live with two dowel-plugged screw extraction holes, but when the third screw snapped, so did I. I didn't get all angry and shouty, but I decided the universe was just not into me completing this axe. And so: into the bin for my 65-dollar test bed and countless hours of effort.

The neck I had bought to match with the body went on to be part of my guitar-of-the-month/guitar-of-the-year winner. So I got over it.
 
That sucks, but at least you made the best of it.
That Macassar ebony fingerboard neck is killer.
Congrats on guitar of the month!!
 
Back
Top