Leaderboard

New Build - Carved Top Soloist Super-Blues-Strat

For that type of drilling, place a block of scrap wood at the back of the part to be drilled out. That way the drill does not go into thin air.
In retrospect, yeah, that’s what I should have done, but I didn’t have the scrap wood :confused:. What I was really intending to do was drill most of the way down, then turn the body over and drill from the other side until the full bore was complete, but it felt almost like the drill bit was pulling down, and I was through the back side before I could slow down. Another thing I might have tried was a stepped bit. Of course, the best option is a drill press, but I don’t have one, nor do I have the space for one :cry:. A local community college has a luthier program; maybe next time I’ll enroll there and have access to their shop…

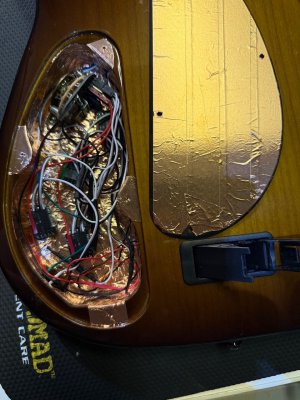
Anyway, highlights of today so far: got the battery box installed, and copper tape applied to the electronics cavity and its cover:
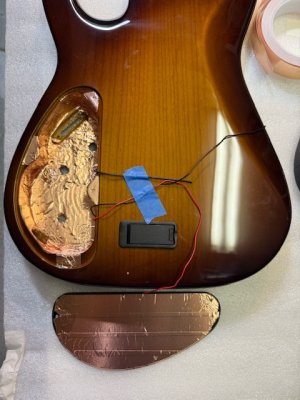
IMG_1646.jpeg
The battery box was a mild PITA: I didn’t sand the finish in the battery box compartment, so the whole thing fits kind of tight. I ended up doing a mild sanding of the tabs that lock the battery container part closed, and that got rid of just enough friction to let me open the battery compartment without needing tools to pry it open ;)

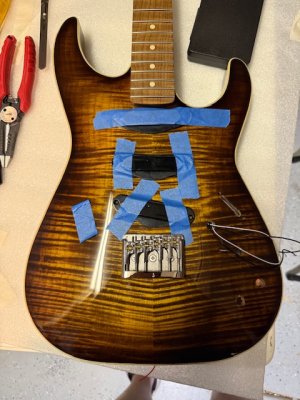
Next, I test fit the neck, bridge, and pickup rings:
IMG_1647.jpeg
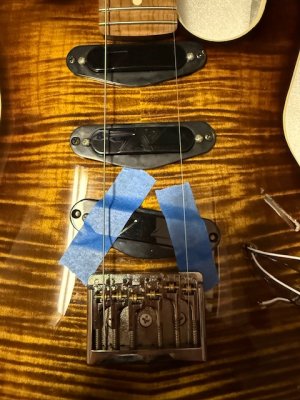
(Yes, I overlooked that bit of tape on the upper right corner of the bridge and had to fix it later :rolleyes:.) The pickup routes have tons of room, but the pickup rings I chose are a really tight fit with the Zexcoil pickups; I may have to redo this later to be able to raise the pickups to the recommended height. Here’s a pic with the neck and mid pickups screwed in (ignore where the 1st and 6th strings looks to be, the perspective is wrong):
IMG_1653.jpeg
When I was doing a rough measurement of string height with a hand-tight 1st and 6th strings installed, I really had to jack up the bridge elements, so much so that I was afraid I’d run out of adjustment room, so I installed the Schaller spacer for this bridge:
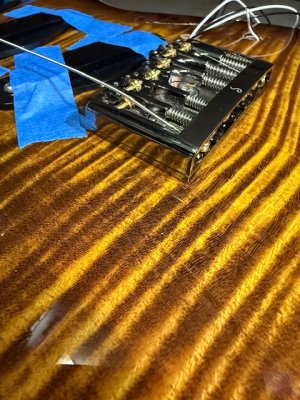
IMG_1648.jpeg
I might have to redo this when I get the neck fully strung, but it looks promising for now.

Next up: electronics hookup! Will at least start this tonight; I’ll see how far I get…
 
Local community College luthier class sounds awesome, I wish I wish I wish...
Well, to be honest, it was several years ago I checked into that class; it’s possible they don’t have it anymore. Around the same time I was looking into the luthier class, a coworker took the general woodworking class there, and loved it.

Final pic of the night:
IMG_1654.jpeg
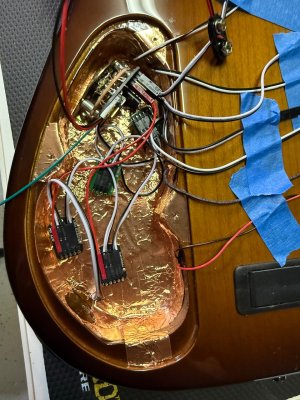
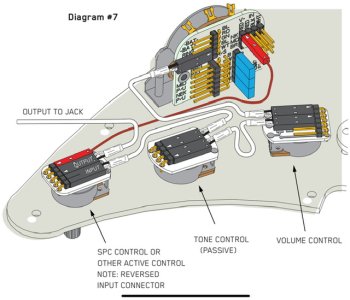
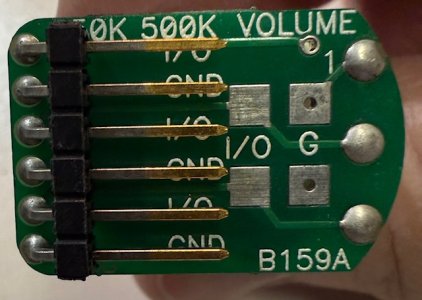
This may look like some kind of abdominal surgery but it’s actually a nearly complete wiring job, using the EMG solderless system. Upper left is the 5-way switch; upper-right is the master volume (500k passive pot); middle is master tone (another 500k passive pot plus a .047 uF tone cap); lower left is EMG’s AB220 active clean boost; lower right is EMG’s SPC (“Strat Presence Control”) active mid-boost. The 500k pots are recommended by Zexcoil. The EMG clean boost and mid boost together are pretty similar to the Fender “Clapton” boost, but with the clean and mid boosts separate and the clean boost controllable (on the Fender system, you get the 12dB clean boost like it or not). The two boosts are in series.

It’s pretty intuitive to hook this stuff up. The only soldering is (a) connecting each pickup wire to a two-wire harness that plugs into the 5-way switch, and (b) soldering the EMG battery connector wires to the battery box wires. Hopefully it all works :unsure:

The biggest issue so far is that the standard short-shaft controls just BARELY provide enough length to fasten them securely, given the thickness of the top. I’m thinking about adding some Loctite to make sure everything is secure.

Should have the pictures of the final steps tomorrow! And at some point, I’ll see if I can upload some short sound samples to give people an idea of how the active controls sound, but it might take a while to make that happen.
 
Well, to be honest, it was several years ago I checked into that class; it’s possible they don’t have it anymore. Around the same time I was looking into the luthier class, a coworker took the general woodworking class there, and loved it.

Final pic of the night:
View attachment 65160
This may look like some kind of abdominal surgery but it’s actually a nearly complete wiring job, using the EMG solderless system. Upper left is the 5-way switch; upper-right is the master volume (500k passive pot); middle is master tone (another 500k passive pot plus a .047 uF tone cap); lower left is EMG’s AB220 active clean boost; lower right is EMG’s SPC (“Strat Presence Control”) active mid-boost. The 500k pots are recommended by Zexcoil. The EMG clean boost and mid boost together are pretty similar to the Fender “Clapton” boost, but with the clean and mid boosts separate and the clean boost controllable (on the Fender system, you get the 12dB clean boost like it or not). The two boosts are in series.

It’s pretty intuitive to hook this stuff up. The only soldering is (a) connecting each pickup wire to a two-wire harness that plugs into the 5-way switch, and (b) soldering the EMG battery connector wires to the battery box wires. Hopefully it all works :unsure:

The biggest issue so far is that the standard short-shaft controls just BARELY provide enough length to fasten them securely, given the thickness of the top. I’m thinking about adding some Loctite to make sure everything is secure.

Should have the pictures of the final steps tomorrow! And at some point, I’ll see if I can upload some short sound samples to give people an idea of how the active controls sound, but it might take a while to make that happen.
It actually seems well designed, and pretty straight forward to install. Good Kit!
 
What I was really intending to do was drill most of the way down, then turn the body over and drill from the other side until the full bore was complete, but it felt almost like the drill bit was pulling down, and I was through the back side before I could slow down.

You would need to be drilling thicker wood for that type of approach, as you have found out, those bits can run away with you. Also regarding using wood backing or a waste board is also used with a pillar drill (drill press), to prevent chip outs.

I assume and add for other readers that your Zexcoils are passive, and you are using the battery and EMG for the boost and SPC.
 
As is typical, the first time I plugged it in…dead silence :rolleyes:. So I worked back to the minimum viable configuration, the pickups, the 5-way switch, and the output jack. Still no sound. Triple-checked connections, sure looked just like the EMG instructions. Switched out the output jack, and got sound. Went back to the original jack, a really nice Pure Tone stereo jack (you need the ring connector to detect that a cable is plugged in and start providing power to the active boosts), but it’s slightly bigger than a more conventional jack, and…what do I see with my magnifying lenses…looks like the tip connection spade lug is bent down and grounding out! So I got that fixed, plugged into it, and…sound on all three pickups! I then built the signal chain back - first the string ground, then the master tone, then the two active tone controls, and everything worked! I will say that the about an hour I spent on this would’ve been triple that time without the EMG solderless system; works great!

Here’s the “ready to close it up” shot:
IMG_1655.jpeg
Looks like more of a rat’s nest than it is…

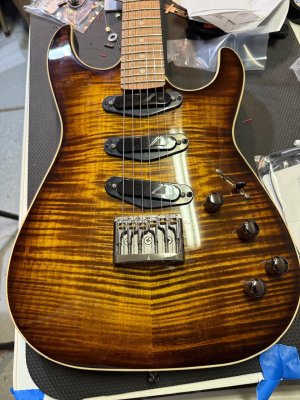
And here’s a “strung and ready to play” pic:
IMG_1656.jpeg
I love that Schaller bridge!
Of course, I haven’t finished the setup yet; the intonation is not too good, and I don’t have the relief where I want it yet, but I’ll mess with that stuff in the next few days.

A fun build, and I’m already liking the active controls a lot. Plus the burnished neck is fabulous!

I’ll take some glamor shots and post them in the next several days, but other than that, I think this build is pretty much wrapped up. Please feel free to comment in this thread anytime, ask questions, etc. I really appreciate the community’s engagement, enthusiasm, and suggestions!
 
Back
Top