Leaderboard

First ever Warmoth Strat! Natural binding trans red with black burst

You're right; the route is easy to cover, but it's difficult to see the best place to drill.

The main considerations are that the jack doesn't get interfered with and the retaining screws have some decent meat to bite into. So, install the jack on the plate and plug a cord into it, then place it on the body. Move it fore and aft to get a sense of where the interference is, and split the difference. Mark one of the holes with something pointy and remove the plate. If it's too close to the edge of the route, you're off. Start over. Once you've located that point to your satisfaction, drill that hole, place the plate, wax a screw and run it in, then drill the other hole. Wax a screw and run it in, and call it a love story.
 
Tony Ounsworth said:
I have a question about how to locate the jack plate before I drill the holes for that.
Is it just a question of doing it by eye so that it looks right next to the pickguard,
:redflag:  My Simple Tip ...
Get some clear plastic (like sperzel tuner box cover)
Trace the jack plate & holes onto that.
Then just place that over the jack-hole rout on the body, to get centred.
Then mark your holes.
Good to go ....... 

Easy as  :icon_thumright:

I do that with mounting pup rings & etc.
Then you have a templates for the next build  :icon_biggrin:
 
So things have moved on a little bit with this. Well, quite a lot actually, at least in terms of $$$ outlay!

First up I drilled the remaining holes, i.e. the jackplate, and the strap pegs. The jackplate I just did by eye in the end, quite an easy job really. The strap peg holes I measured as best I could, and got them about 99% straight I reckon.

Next up I tackled the string ferrules. This started badly. I attacked the inside of the low E string hole with a metal file, and it was going well until I heard a sort of crackling sound and a tiny bit of lacquer flaked off. Fortunately the lip of the ferrule hides most of it, and I switched to just using some rolled up sandpaper for the rest. They went in with no issues after that. Can you see the chip?


Nah, neither can I. But I know it's there.

So that's all done, but then I started to feel a certain loss of confidence over the visual look of the guitar. The colour of the body turned out a bit more red than I was expecting, which threw off my original mock ups a bit. Also something about the plain rosewood neck I had bolted on, and the SD pickups I'd chosen didn't look right, and I wasn't really feeling like the guitar had that luxury feel I was looking for, other than in the body's finish itself, and certain other aspects like the excellent Callaham bridge.

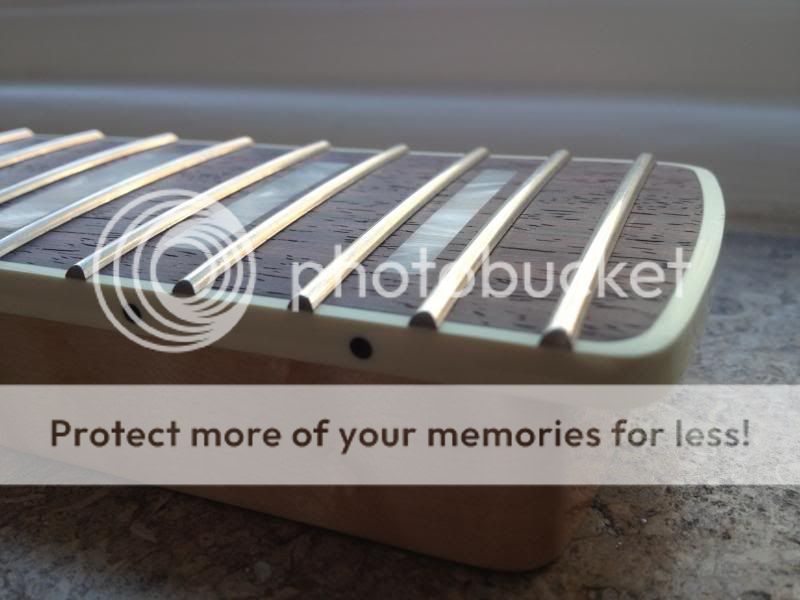
Then I had a look on the Warmoth site and saw this neck:


Oh baby! I'd always wanted binding on the neck, and I'm a sucker for block markers as well. I'd previously thought I didn't like Birdseye maple, but something about this one really excited me. Plus it fits the whole "Gibson finish in a Strat shape" aesthetic I had in mind.

So I only went and ordered it. This has doubled the price of the guitar! Oops. But most importantly I'm excited about the project again.

Next issue to be solved is the pickups. I was toying with the idea of humbuckers, and last week I'd pretty much decided on three Seymour Duncan mini humbuckers. They sound amazing in this video:

http://www.youtube.com/watch?v=nUWw-W8sehc

Plus I think they would add a certain class to the look of the guitar. However, I'm certainly not 100% on that. The main reason for this is that when I mock the guitar up I can't shake the thought that good old single coils just look...right!

I'd really be interested in what you guys think. This is my current preference in descending order, although I do have some cream pickguards on order as well:


The second set of pickups below are these by the way:

http://www.guitarfetish.com/Brighton-Rock-Vintage-Spec-Alnico-Pickups-Classic-Queen-sound_p_1514.html

They're an idea I keep returning to that could really work I think.

Opinions welcome!
 
Yeah, my trem needs are covered elsewhere. I'm going for total simplicity with this.

I think I'd prefer the SD minis without the logo:


Congrats - that neck is something else. I'm not that keen on birdseye when it's just 'spotty', but when it's wild curly stuff like that it can look amazing.

Blocks and binding too! WOW. I find block markers on Fender style instruments looks wrong in just the coolest way - my Tele with blocks always puts me in a good mood just by looking at it. So be warned - I'm now having to get another Warmoth to play angry music on.

I say do the 3 mini-hums - on a dark plate. Also kinda wrong in a very cool way - a bit Hofner-ish.

Why not look at some Brit pickups? Catswhisker do nice minis. Not sure if The Creamery do, but they do a Tri-Sonic style.
 
Great looking parts! I'm surprised that no one's mentioned that Seymour Duncan makes several different humbucking pickups that are the same size as regular single coil Strat p-ups...available in either white or black covers...check 'em out (Musician's Friend or Sweetwater both have them).
 
Yes, my first choice was a Little Screamin' Demon/Little 59 combo, and indeed I have some on loan from Jumble Jumble of this parish. They sound great, But I'm not hugely keen on how they look. I'm not ruling them out though, maybe I should do some mock ups with those in.
 
Here's a mock up with Lil Screamin Demon, Lil 59, Lil 59 in the top guitar, and Hot Rails in the bottom.


And the same, only without logos:


Thoughts?
 
Tony Ounsworth said:
Thoughts?
That really is a personal choice.
Either looks ok  :icon_thumright:  .... if thats what your asking. 

Personally I like the SD rails using pup mount rings ....
Like so
f8aa1dfb.jpg


7ba0849c.jpg


And the SD's 59' / Screamin' Demon etc with a pickguard.
97788e23.jpg
 
And it's arrived.

Oh. Em. Gee.

Neck3_zps9ed8d22a.jpg


Neck1_zps278d2b31.jpg


Neck5_zps77217d97.jpg


Neck7_zps75ba59f0.jpg


Neck6_zps61143d68.jpg


Neck2_zpsdbbcddbc.jpg


Neck4_zps1f773dbd.jpg


Apologies for huge number of pix but it's the only way to get across how lovely this neck is. I've only ever owned/played standard Fender/Squier necks before (with the odd exception), nothing like this.

 
They do a fantastic job, don't they?

I knew about Warmoth for years before I bought my first parts from them, resisting it because it didn't seem like a good value. Then I got my first parts from them. Now I understand. They set the bar pretty high. You'll never look at production guitars the same way again.
 
Bumped into Tony outside Blackfriars station yesterday and he had the neck with him. The pictures don't even do it justice, the figuring in the neck is incredible. It's flawless.
 
I was so scared I was going to get mugged/drop it down a manhole cover/leave it on the train. I sat with it between my knees all the way home.

What you say is so true Cagey. It's the most money I've ever spent on a guitar now, but you can see and feel every penny.

I bolted it on last night and it's the first time the guitar has really felt like it's coming together.

Now to drill the headstock for tuners. Gulp!
 
Tony Ounsworth said:
Apologies for huge number of pix but it's the only way to get across how lovely this neck is.
:redflag:  No need to apologies at all. When posting pic's.


We ALL love pic's  :blob7:

Yum yummie yum yum .... she a lovely neck  :o
 
Tony Ounsworth said:
Now to drill the headstock for tuners. Gulp!

Ain't no thang!

Hold the drill bit up to the side of the headstock in such a way that it doesn't reach all the way through...

HeadstockDrillDepthSm.JPG

Then wrap some masking tape around it to mark the depth...

HeadstockDrillDepthMarkSm.JPG

That'll keep you from drilling too deep and breaching the top surface of the headstock. Also saves your imagination for inventing new cuss words for other mistakes.

I've found that a 1/16" bit works best most of the time, but it really depends on the screw. I don't know offhand what 1/16" is in metric, but I'm confidant you can find out. In any event, you need to hold the screw behind the bit with some light behind it, and you should only be able to see the threads, not the shaft. If you can see the shaft, the bit is too small, and you're may twist the screw's little head off trying to run it in. They've got all the structural integrity of wire, which is what they're made of. Very easy to break, is what I'm saying.

Which brings us to another VERY IMPORTANT POINT: You need to wax the screw. The best stuff is beeswax, but if you're peeing your pants to get a move on, a candle or a crayon will work. Scrape the screw threads across the wax before running it in to lubricate things. Neck woods are very hard and don't displace easily. Without lubrication, the friction will make the shaft of the screw stand still while you're torquing on the head, and it'll twist off. While it's possible, getting broken screw parts out of hardwood is no fun at all. You really want to avoid that at all cost.
 
Back
Top