TonyFlyingSquirrel
Master Member
- Messages
- 4,782
alexreinhold said:Thanks for the explanations everyone - I get the difference between series and parallel at this point but I would still be a lot more happy if I actually understood the fundamental electrical engineering component better. A colleague of mine is a physicist who builds amplifiers himself - so I will let him crash-course me")
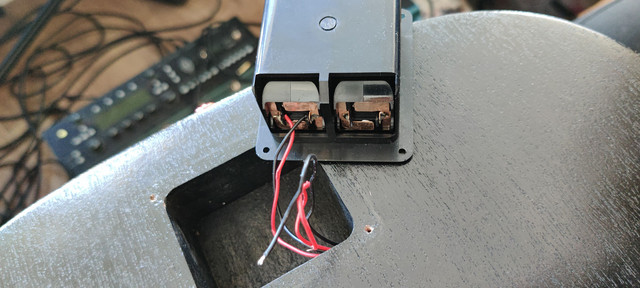
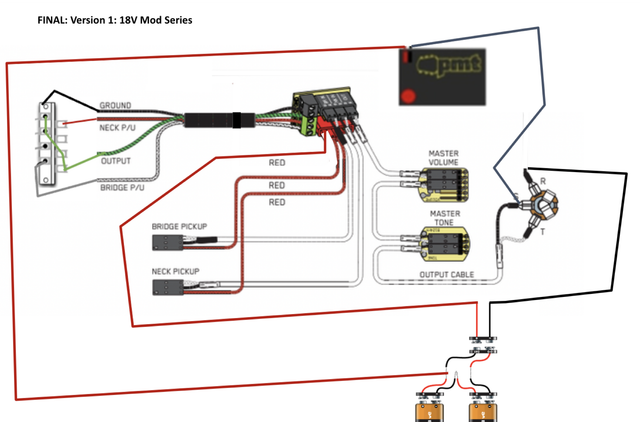
stratamania said:Having a switch to switch between 18V series or a single battery running in 9V as EMG suggested might give a chance to see which set up you prefer. Though the only practical purpose I can think of is if you need to replace batteries and only have a single replacement available as you are about to play Madison Square Garden may have a benefit. Though the moral here is if you are using active pickups is to have spare batteries in the gig bag.
@Stratamania I have 2 questions and 1 remark regarding that. Questions:
1. so the push/pull wiring diagram from EMG makes sense, you just don't see the practical purpose in it, right?
2. isn't there supposed to be an actual sonic difference between 18V and 9V?
Remark: Madison Square Garden might be a stretch but I refuse to stop dreaming
To answer your question number two, look to the link that I posted that indicates perceived results to be subjective specifically to headroom. To understand headroom, read up on “audio gain staging” or “gain structure” to put into its proper context.