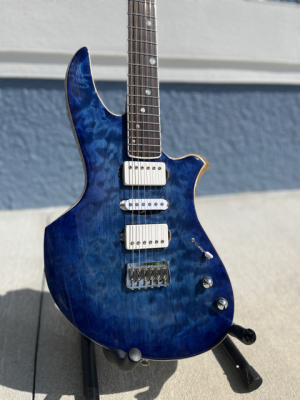
Z Body Dream Build - Poseidon!

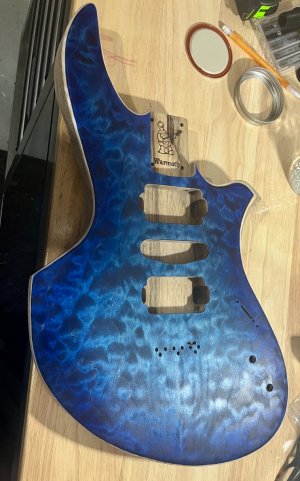
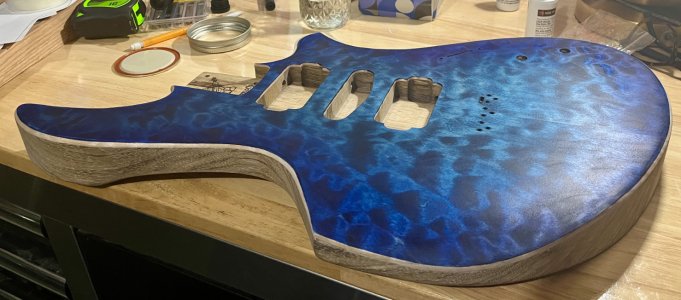
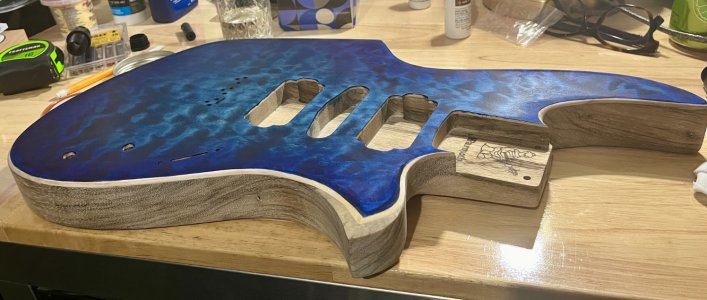
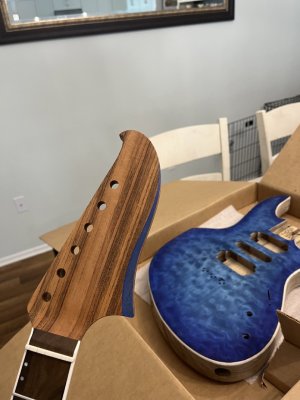
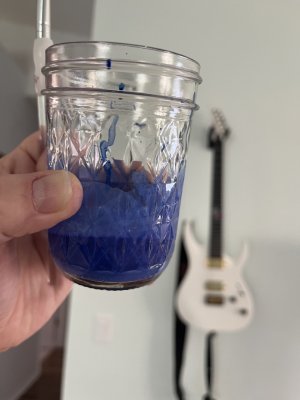
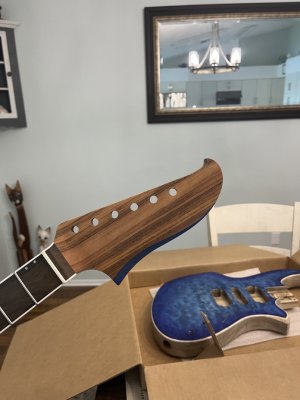
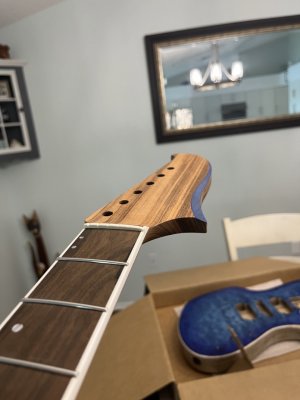
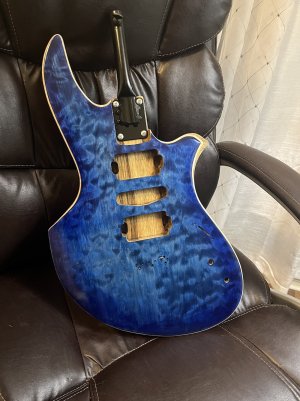
Finished the binding scrape and sanding (thanks Spud for the advice on that). I had to do some light sanding to the top where the water-born dye had raised the grain. So then I had to make another pass with some turquoise dye as a wash to feather everything in. She is all set for me to start the finishing process this weekend :)
 

Attachments

  • IMG_7815.jpg
    IMG_7815.jpg
    948.3 KB · Views: 69
  • IMG_7816.jpg
    IMG_7816.jpg
    951.7 KB · Views: 49
  • IMG_7817.jpg
    IMG_7817.jpg
    951.3 KB · Views: 45
Finished the binding scrape and sanding (thanks Spud for the advice on that). I had to do some light sanding to the top where the water-born dye had raised the grain. So then I had to make another pass with some turquoise dye as a wash to feather everything in. She is all set for me to start the finishing process this weekend :)
Nice job sir! Heck I might even say SASSY!
 
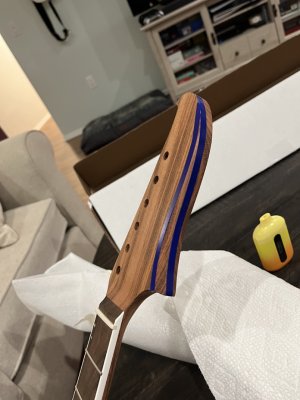
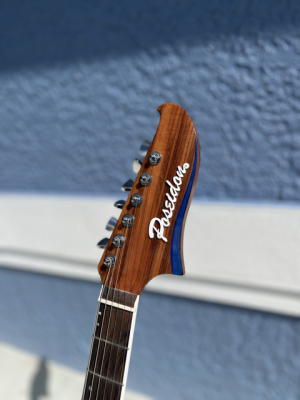
Time for doing a little more headstock tweaking, this time with color. Taped off the beveled edge and applied some Transtint Aqua. The Goncalo Alves takes tint wayyyyyy different. I did a few tests on the heel of the neck to get my mixes right.

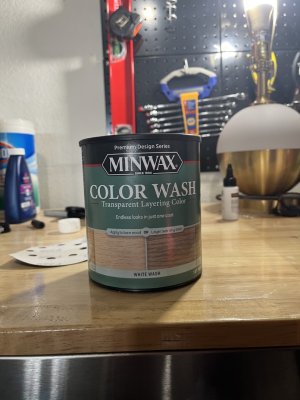
After the aqua went on (which looks almost black in certain lighting) I added a few drops of Minwax white wash to the Aqua dye and put on a second coat. The white wash added the right amount of opacity to the tint that it made it pop against the darker wood to match the blue tones of the body. I'm very pleased with how it came out. There is a bit of an optical illusion making the headstock profile seem much slimmer now. It also adds a bit of continuity with the blue theme without painting completely over the beautiful wood of the Goncalo.
 

Attachments

  • IMG_7827 Large.jpeg
    IMG_7827 Large.jpeg
    215.9 KB · Views: 34
  • IMG_7833 Large.jpeg
    IMG_7833 Large.jpeg
    209.4 KB · Views: 31
  • IMG_7836 Large.jpeg
    IMG_7836 Large.jpeg
    173.4 KB · Views: 30
  • IMG_7835 Large.jpeg
    IMG_7835 Large.jpeg
    191.4 KB · Views: 29
  • IMG_7834 Large.jpeg
    IMG_7834 Large.jpeg
    159.9 KB · Views: 28
  • IMG_7846 Large.jpeg
    IMG_7846 Large.jpeg
    226.5 KB · Views: 39
Spent most of the weekend playing with waterbased poly sanding sealer and level sanding. I probably won't have any progress pics for about a week as there is not much to update as I stack on the coats. I will probably only be able to do one a day as my work schedule is rather demanding during the week.
 

Attachments

  • thumbnail_IMG_7858.jpg
    thumbnail_IMG_7858.jpg
    604.8 KB · Views: 37
  • thumbnail_IMG_7856.jpg
    thumbnail_IMG_7856.jpg
    600.4 KB · Views: 42
Finished the binding scrape and sanding (thanks Spud for the advice on that). I had to do some light sanding to the top where the water-born dye had raised the grain. So then I had to make another pass with some turquoise dye as a wash to feather everything in. She is all set for me to start the finishing process this weekend :)
That's very handsome work. Thanks for sharing with us.
 
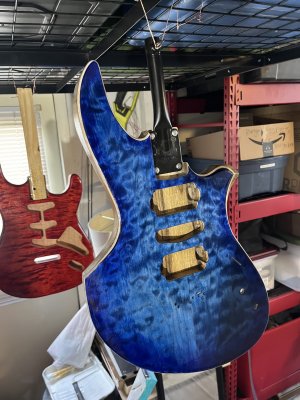
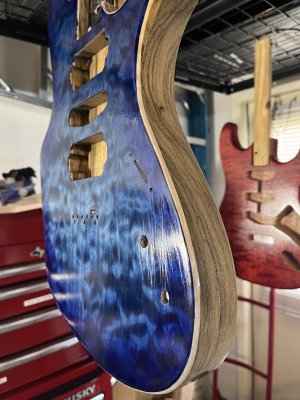
Ok so quick update here. I was VERY unhappy with how the wipe on poly was going with this so I sanded it back and went with rattle can nitro. I was using Oxford brand on the Red Strat in my other post, and ordered Colortone nitro from Stew Mac for this Z Body and boy am I happy with it. I have 4 coats of sanding sealer on and took this photo after the first coat of clear had dried. I should have about 7 more coats stacked on by the end of this week.

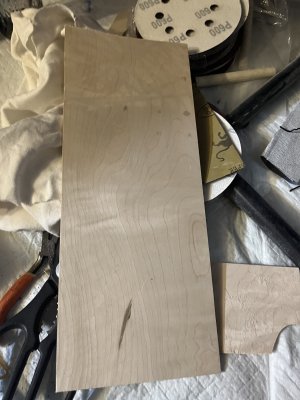
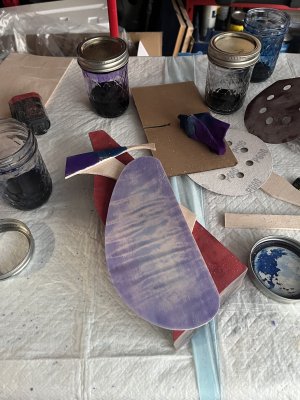
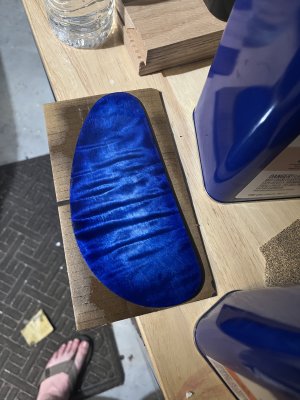
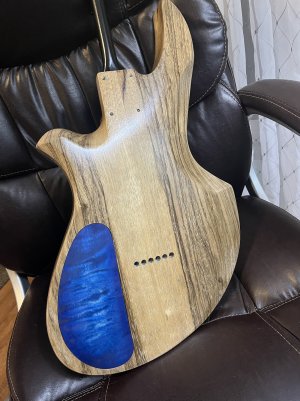
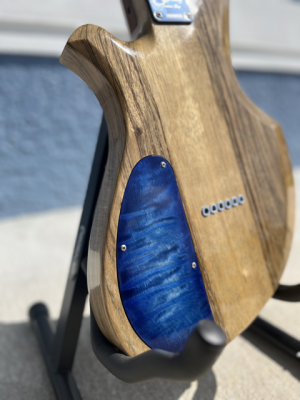
I also got my hands on a piece of 1/8" thick curly maple that I traced out the control cavity plate cover onto and cut out with my scroll saw. I did my best to match the finish to it last night and applied a quick coat of sealer to it. I'll be stacking several more coats of clear on it but I'm pleased with how it came out thus far. Let me know what you guys think :)
 

Attachments

  • IMG_7946.JPG
    IMG_7946.JPG
    562.1 KB · Views: 20
  • IMG_7944.JPG
    IMG_7944.JPG
    688.2 KB · Views: 23
  • IMG_7945.JPG
    IMG_7945.JPG
    646.1 KB · Views: 26
  • IMG_7950.JPG
    IMG_7950.JPG
    754.9 KB · Views: 28
  • IMG_7949.JPG
    IMG_7949.JPG
    681.7 KB · Views: 29
Thanks Eddie.

Forgot to mention a fun little fact @Aaron and those of you who watched his video on using rattle can nitro. I too felll victim to the index finger blister from those damn tiny little nozzle caps 😂
 
Ok so quick update here. I was VERY unhappy with how the wipe on poly was going with this so I sanded it back and went with rattle can nitro. I was using Oxford brand on the Red Strat in my other post, and ordered Colortone nitro from Stew Mac for this Z Body and boy am I happy with it. I have 4 coats of sanding sealer on and took this photo after the first coat of clear had dried. I should have about 7 more coats stacked on by the end of this week.

I also got my hands on a piece of 1/8" thick curly maple that I traced out the control cavity plate cover onto and cut out with my scroll saw. I did my best to match the finish to it last night and applied a quick coat of sealer to it. I'll be stacking several more coats of clear on it but I'm pleased with how it came out thus far. Let me know what you guys think :)
It has to go on really thin and sometimes thinned too.
 
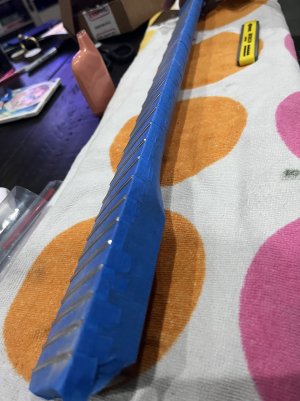
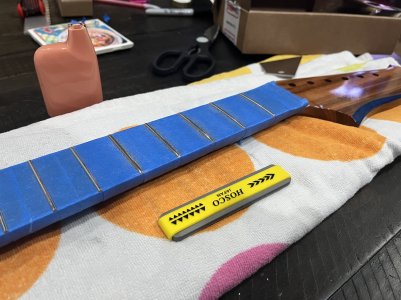
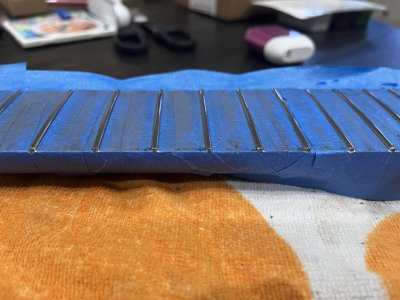
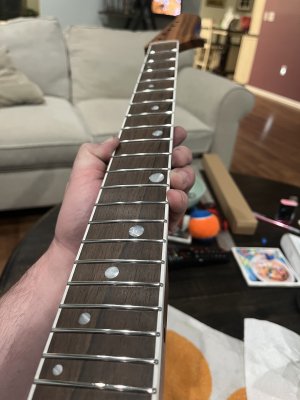
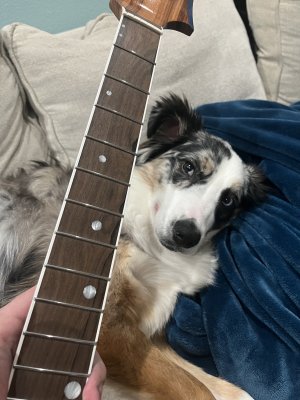
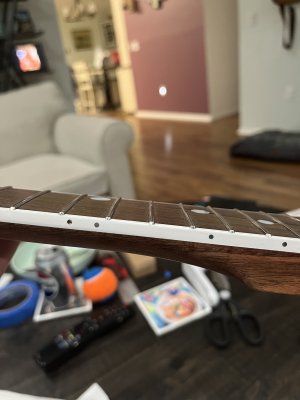
Much like the Strat project I'm building simultaneously I took to the frets on this last night. Taped off, leveled, crowned, sanded, and polished to a mirror shine. I think my technique on rounding off the fret ends is getting in the realm of passable and I'm very happy with it!
 

Attachments

  • IMG_8007.JPG
    IMG_8007.JPG
    649.8 KB · Views: 18
  • file.JPG
    file.JPG
    661.2 KB · Views: 17
  • IMG_8008.JPG
    IMG_8008.JPG
    693.5 KB · Views: 19
  • polished.JPG
    polished.JPG
    587.7 KB · Views: 22
  • polished3.JPG
    polished3.JPG
    729.7 KB · Views: 24
  • IMG_8012.JPG
    IMG_8012.JPG
    567.2 KB · Views: 30
Last edited:
Much like the Strat project I'm building simultaneously I took to the frets on this last night. Taped off, leveled, crowned, sanded, and polished to a mirror shine. I think my technique on rounding off the fret ends is getting in the realm of passable and I'm very happy with it!
Nice work. I personally like to string up a guitar neck and adjust the truss rod, saddles and play it for a month or more before I futz with the frets or nut. (unless a fret rocker were to find something very amiss initially which has only been once) YMMV.
 
I'm pretty excited to do my second (and third) Warmoth build. My first was a Tele that I did back in 2016. I ended up ordering an in stock "screaming deal" strat body and neck that I will be working on at the same time as this Z body, stay tuned for a separate post.

Z Body
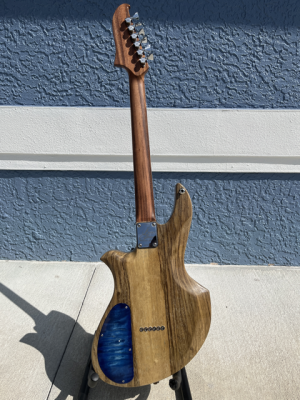
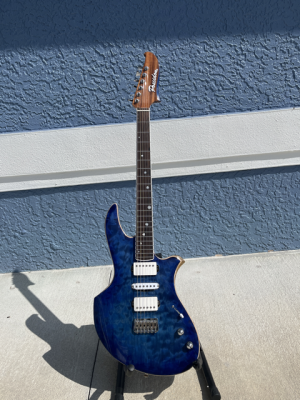
Body - Limba w/ quilted maple top *unfinished*
Neck - Goncalo Alves w/ bound Zircote Fingerboard
12"-16" compound radius Wizard profile
6105 Stainless frets and Nightswan inlay
Well done on that neck! As I always say around here, stop looking at me SCHWAN... most people don't get it.
 
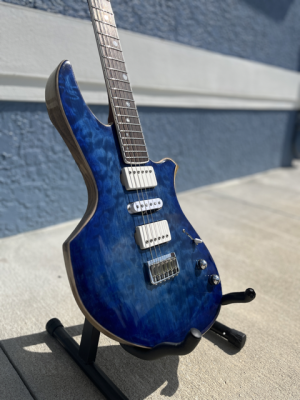
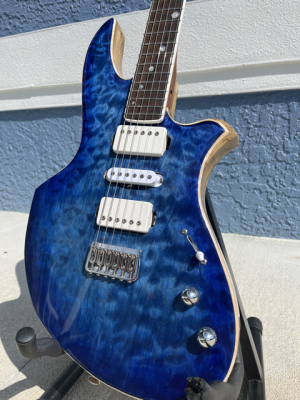
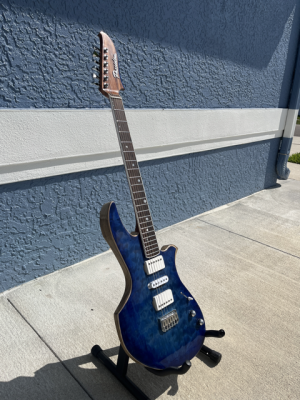
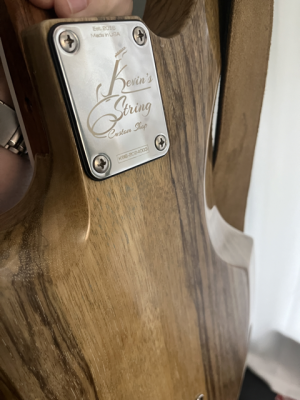
Sorry I went dark for a while on this. Everything is all complete and she plays and sounds unbelievable. My buddy told me that the finish on it looked "underwater" so I named it Poseidon and had a metal badge made by an awesome guy on Etsy.

Hipshot bridge, Hipshot open back locking tuners
Neck left raw and burnished to 2500 grit
Bridge PU: Bareknuckle Holy Diver on a FU Tone Brass direct mounting plate
Middle: BKP Treyarch
Neck: BKP Polymath on a FU Tone Brass direct mounting plate
5 Way switch
Treble bleed circuit, 250k resistor on middle pickup.
Master Volume and a blender knob for bridge and neck
Knobs are Ernie Ball from the JP signature line.

The electronics were rewired about 8 times to find the right setup to get the best on the in between tones on position 2 & 4. This is a very versatile setup and simple. No push pulls or extra switches, just a 5 way and two knobs.
These BKP are absolutely amazing. This guitar sustains for DAYS and is extremely harmonic which is probably a sum of its parts and not one thing in particular. My friend says it's the Limba, I'm still blown away every time I play it.

IMG_8327 Large Medium.pngIMG_8334 Large Medium.pngIMG_8340 Large Medium.pngIMG_8326 Large Medium.png
 

Attachments

  • IMG_8335 Large Medium.png
    IMG_8335 Large Medium.png
    670.5 KB · Views: 19
  • IMG_8331 Large Medium.png
    IMG_8331 Large Medium.png
    513.8 KB · Views: 23
  • IMG_8328 Large Medium.png
    IMG_8328 Large Medium.png
    568 KB · Views: 24
  • IMG_8324 Large Medium.png
    IMG_8324 Large Medium.png
    667 KB · Views: 20
  • IMG_8261 Large Medium.png
    IMG_8261 Large Medium.png
    558.4 KB · Views: 19
Last edited:
Back
Top