rauchman
Hero Member
- Messages
- 1,087
Greetings,
This is my 3rd Warmoth partscaster and for this one, wanted to take it a little further. I bought an all mahogany Velocity body to be mated with a roasted maple / ebony Tiltback Strat 24.75" conversion neck. And.....
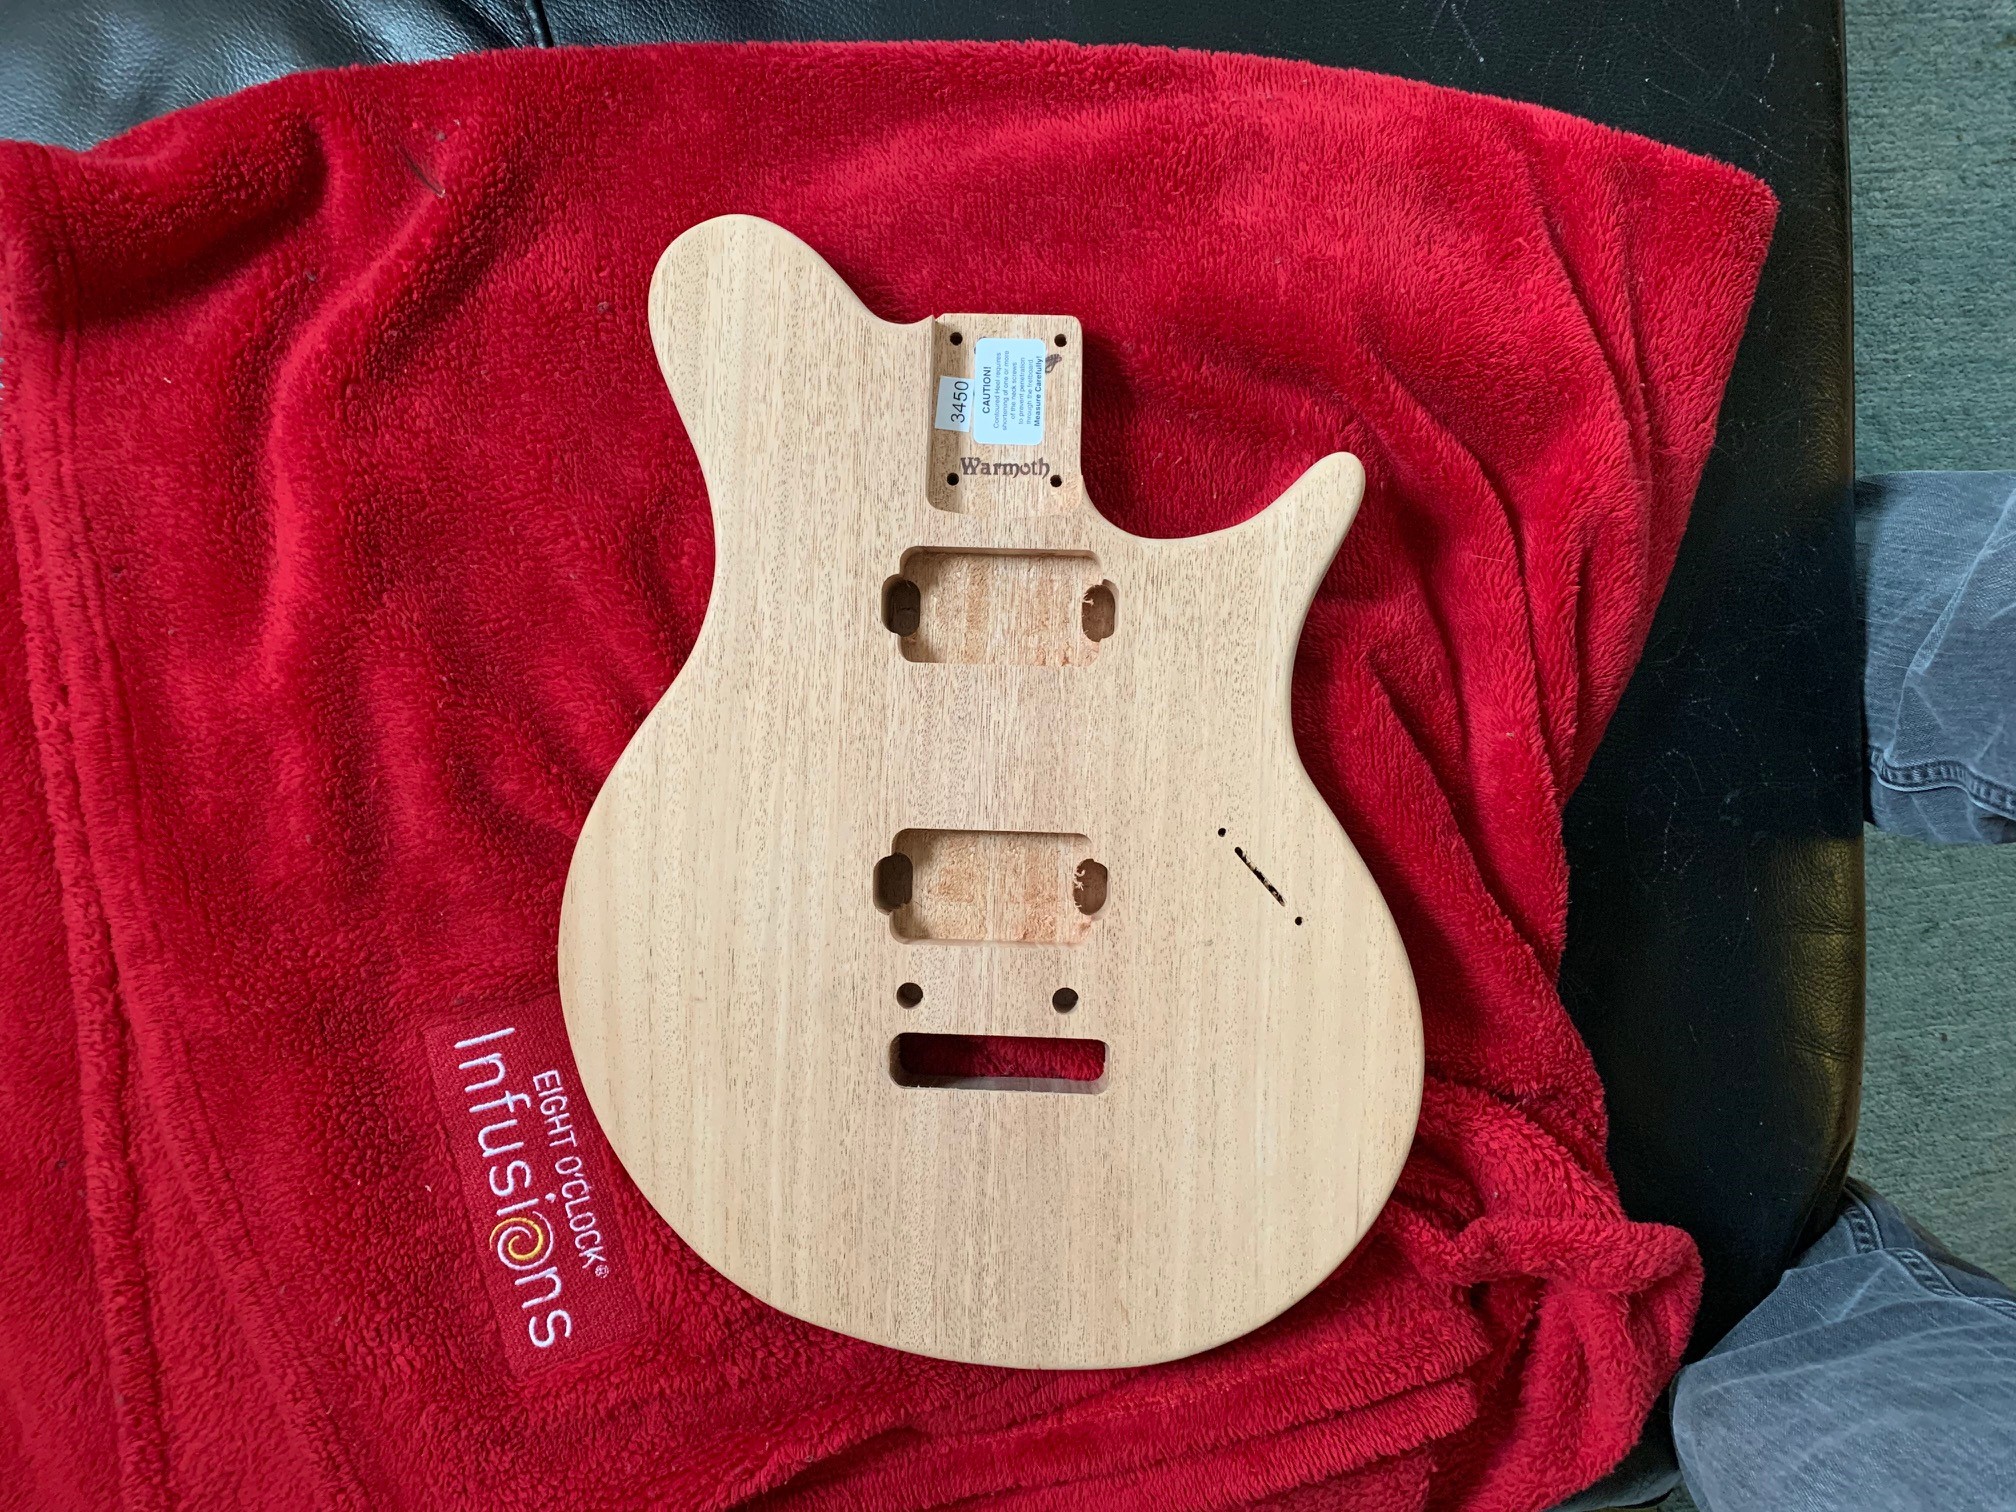
The body as it came from Warmoth...
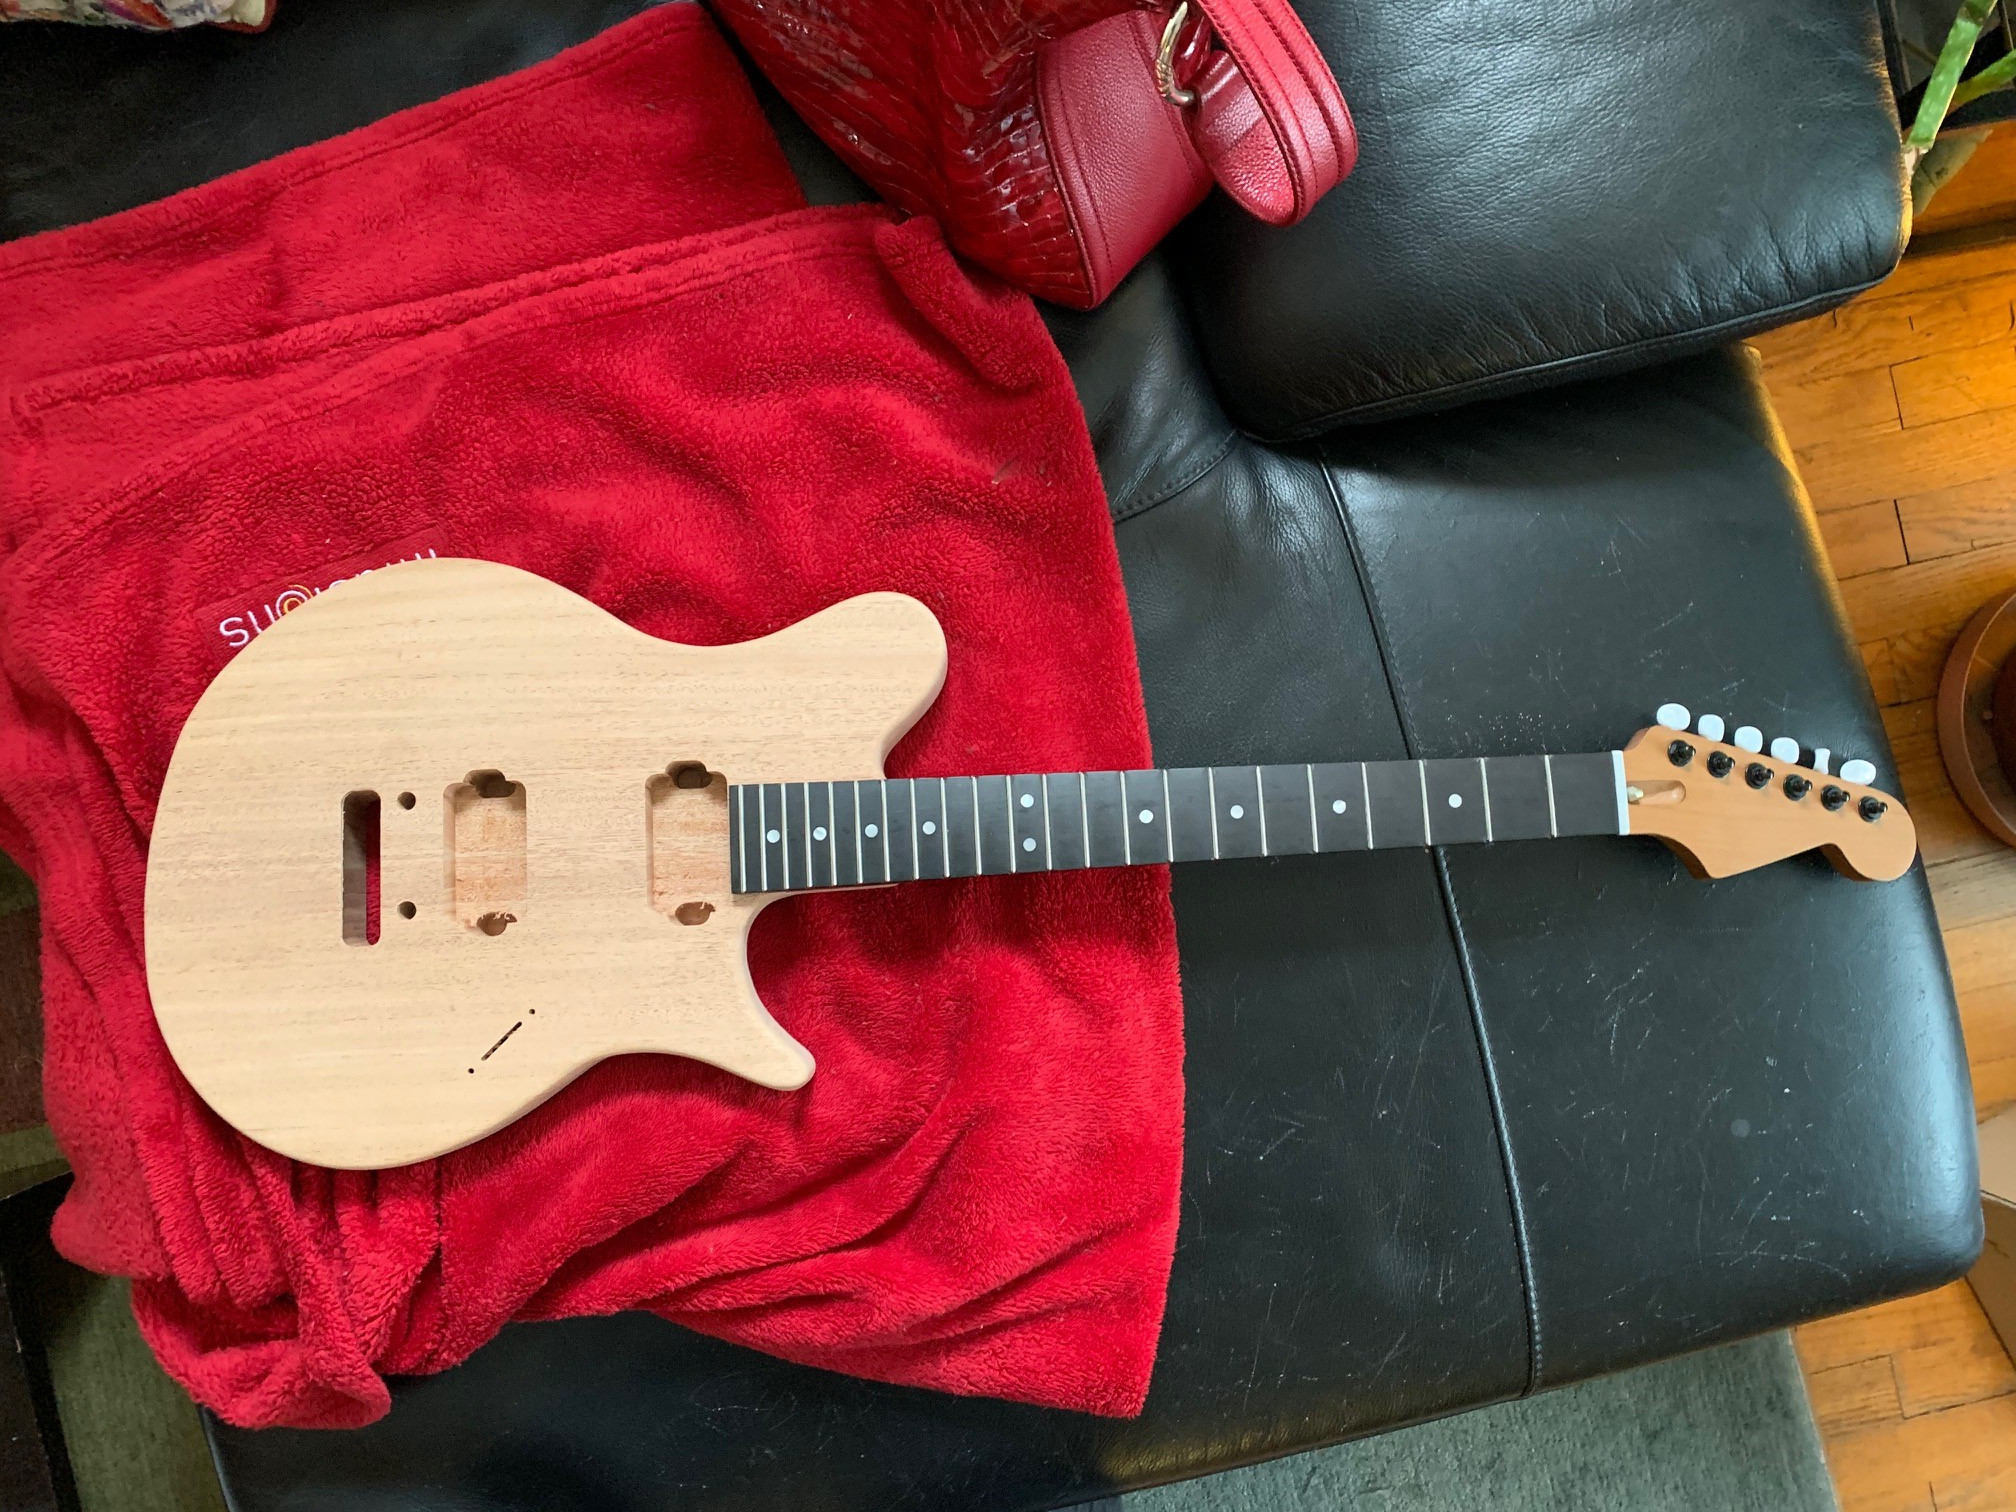
Body with the neck...
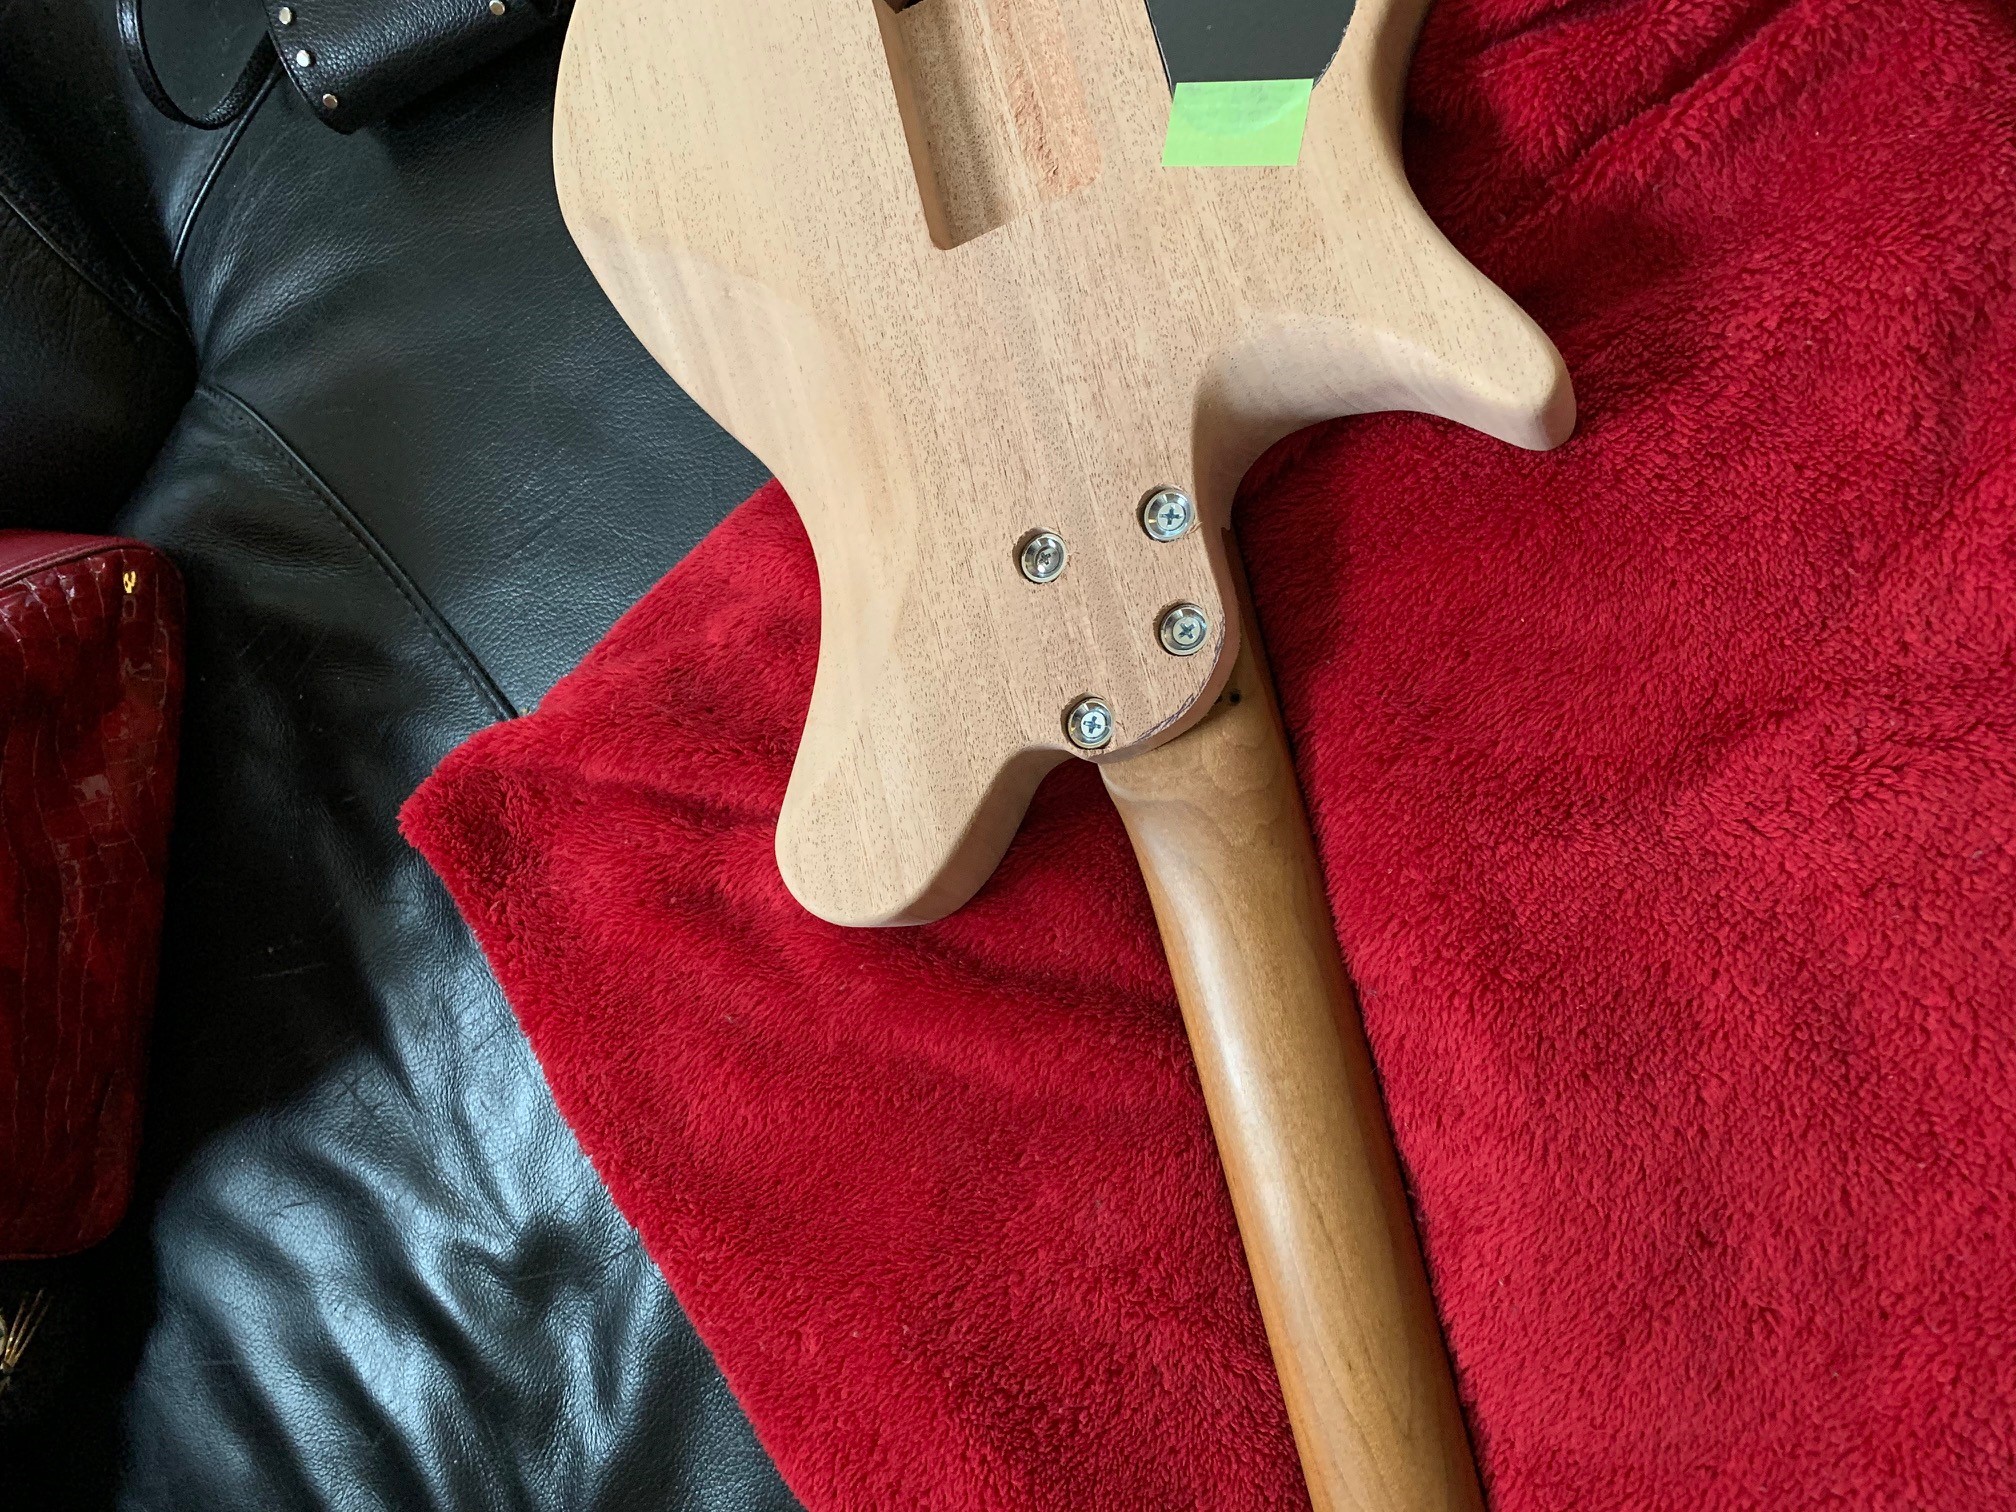
Modified neck heel (still needs to be cleaned up)
And now the fun begins...
I wanted to put binding on the guitar and some form of inlay. I easily spent as much on tools and supplies as I did on the guitar itself. StewMac saw a lot of use of my credit card. They truly have some great tools, among them, high quality Dremel accessories. Also picked up a Makita router.
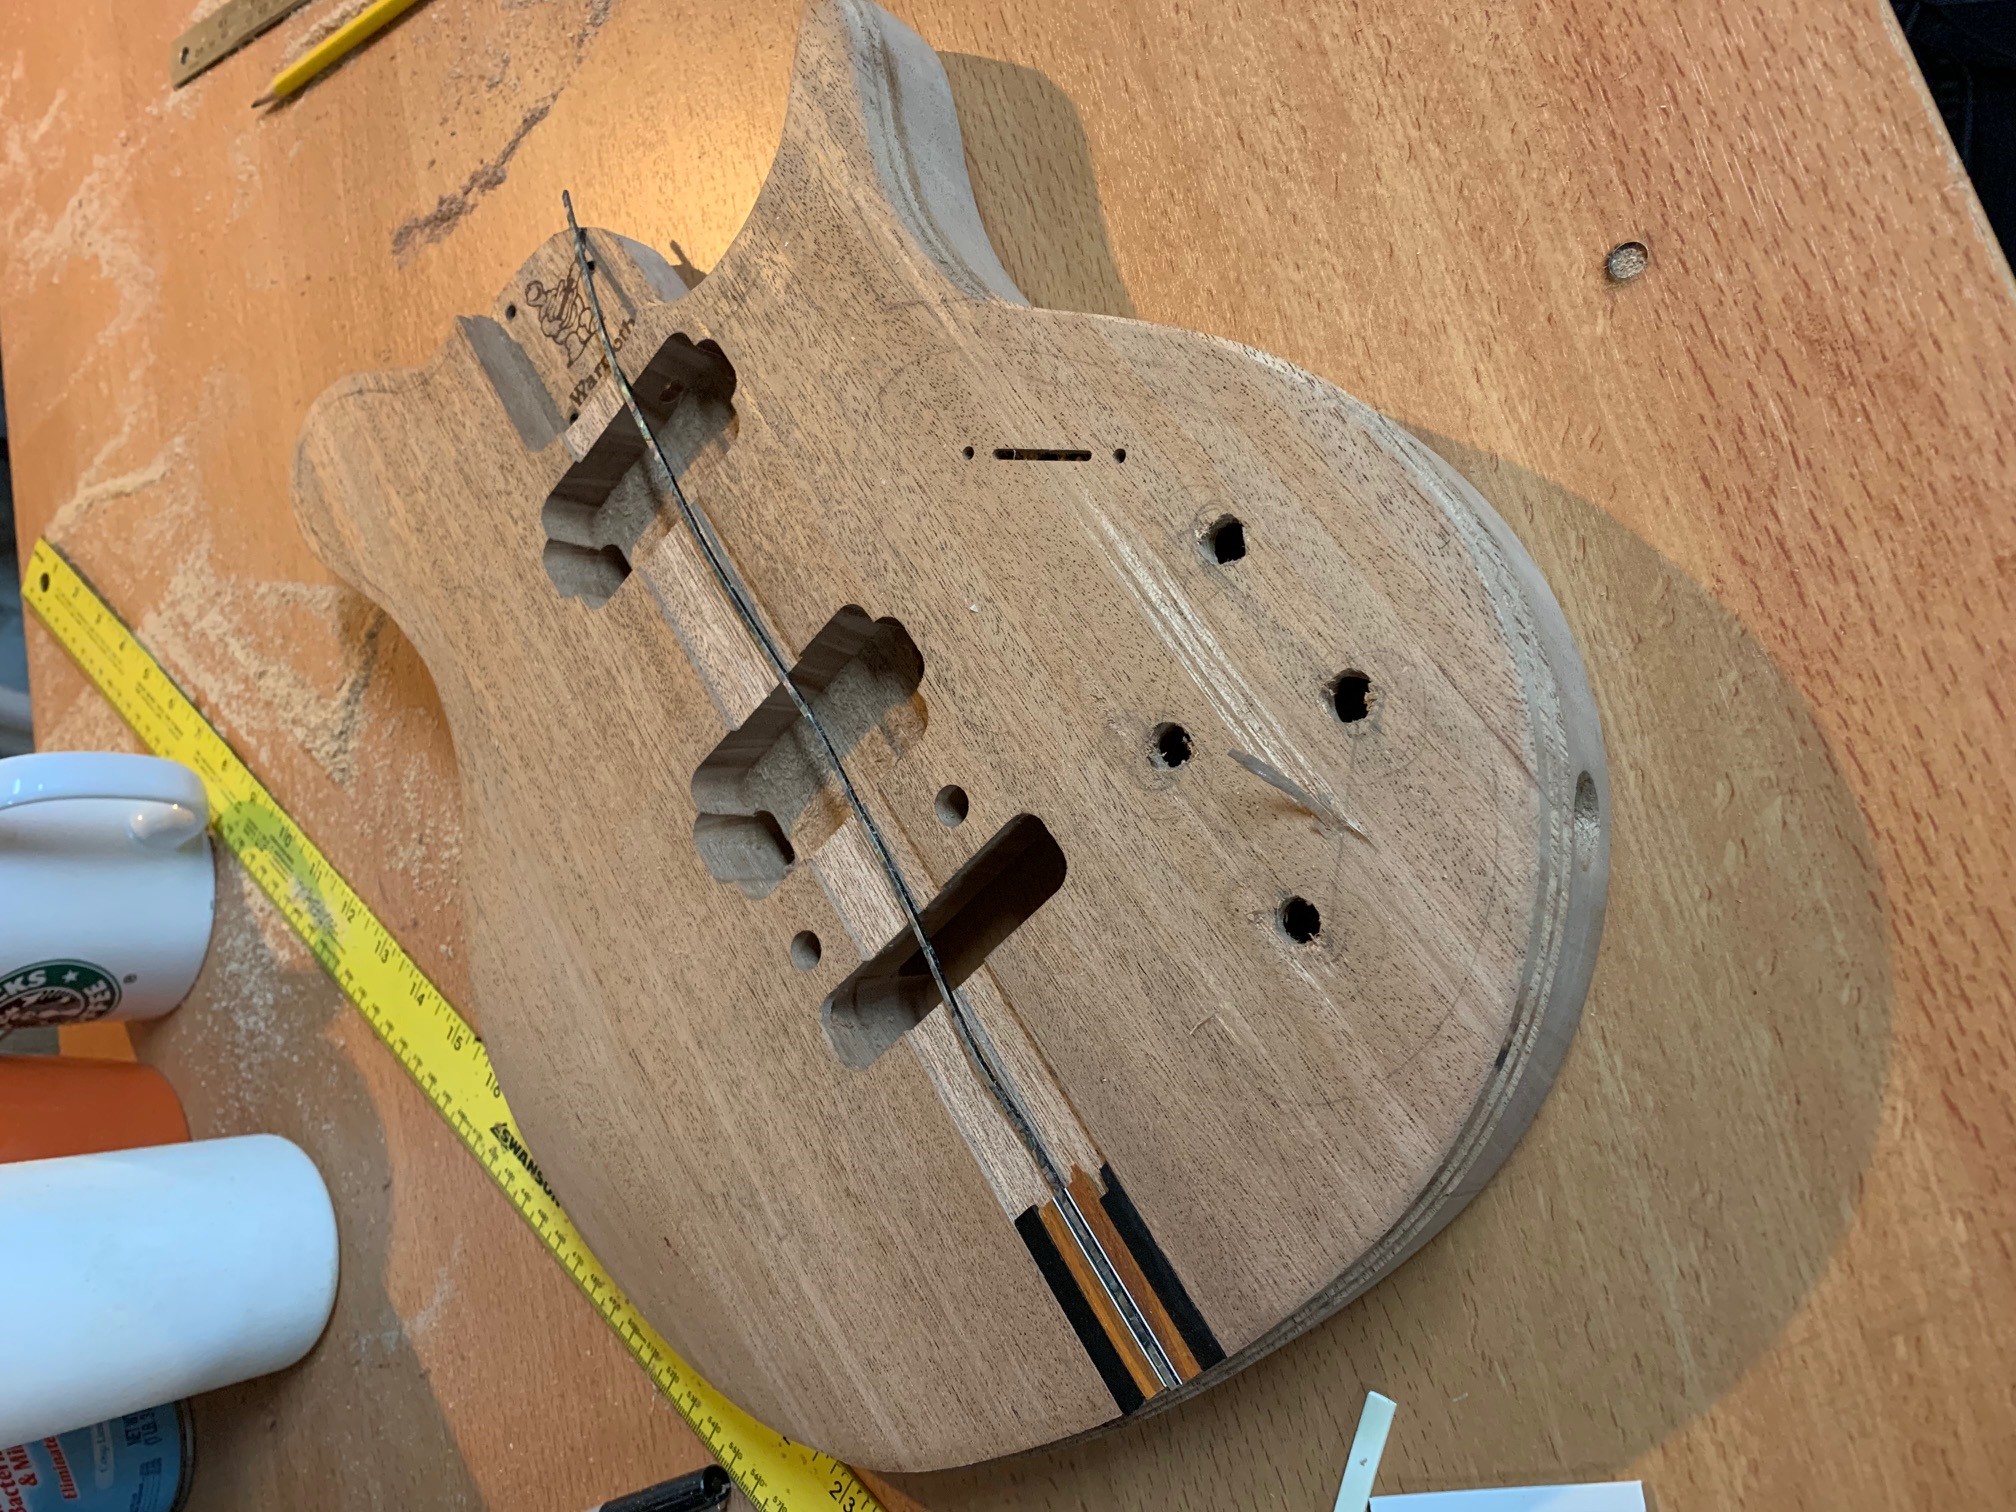
In the below pic, I started off making a channel for the abalone strip (from StewMac and this is great stuff, makes application easy), then realized I wanted something "more". Bought ebony and coco bolo w/ white binding strips from StewMac, and then routed around the original channel made for the abalone. Of course, the depth of the wood is about 1/32 deeper than the abalone, so had to route that much deeper around the original channel. Was very fortunate there was no tear out. Having said that, when I was drilling the vol/tone holes, I used masking tape, and when I pulled the tape off, I did get tear out. Fortunately, the folks on this site provided some great advice on how to fix...
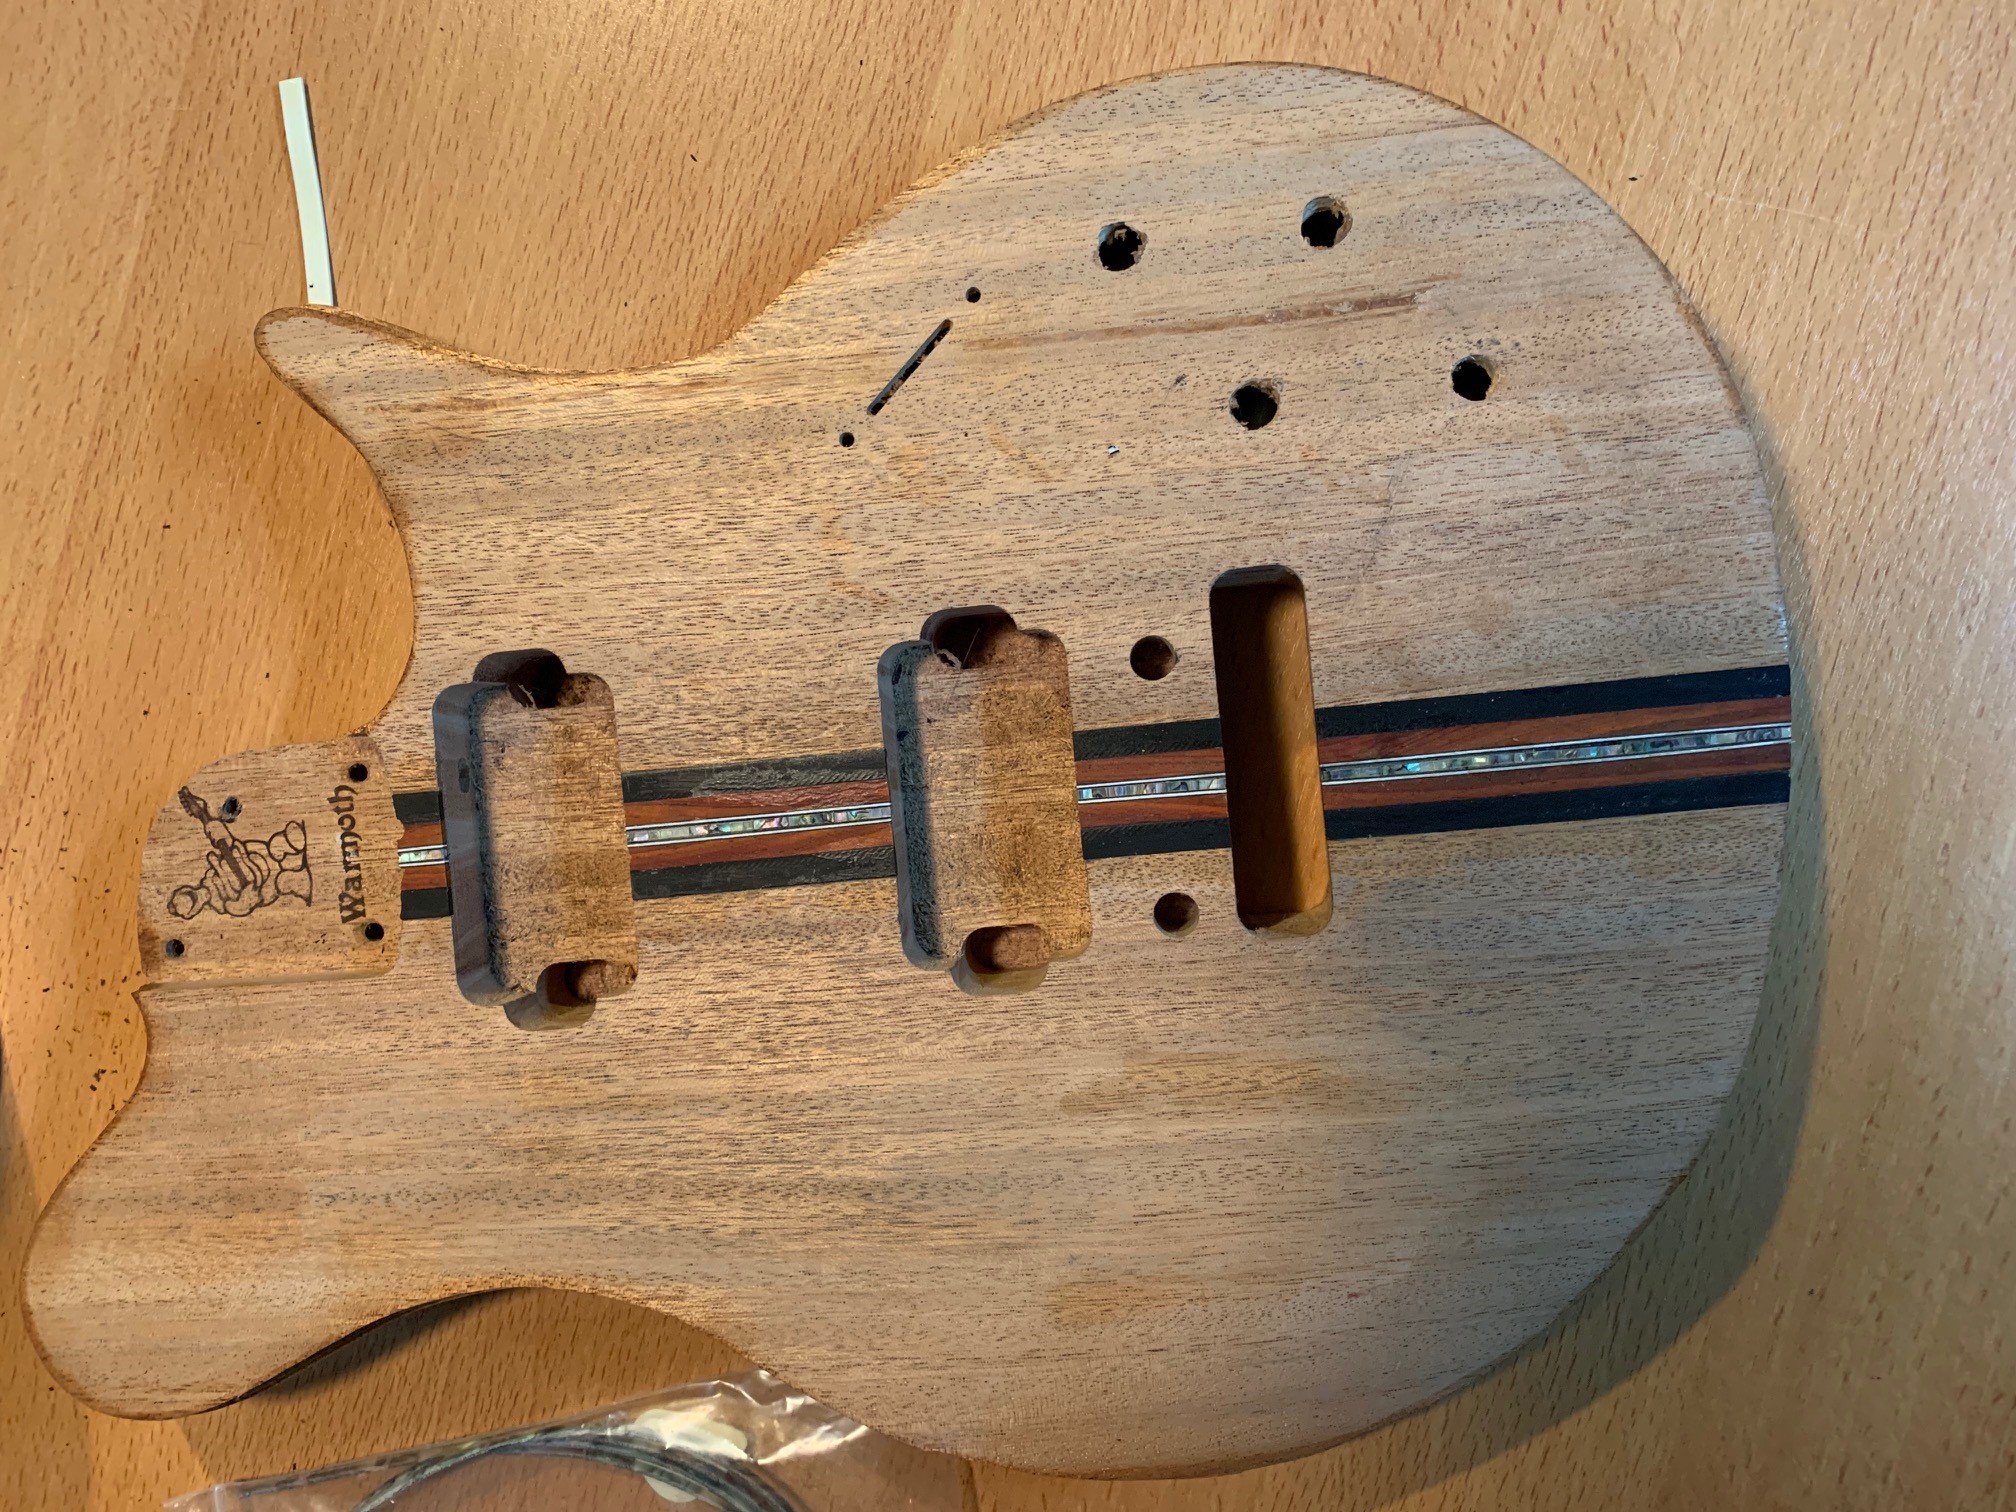
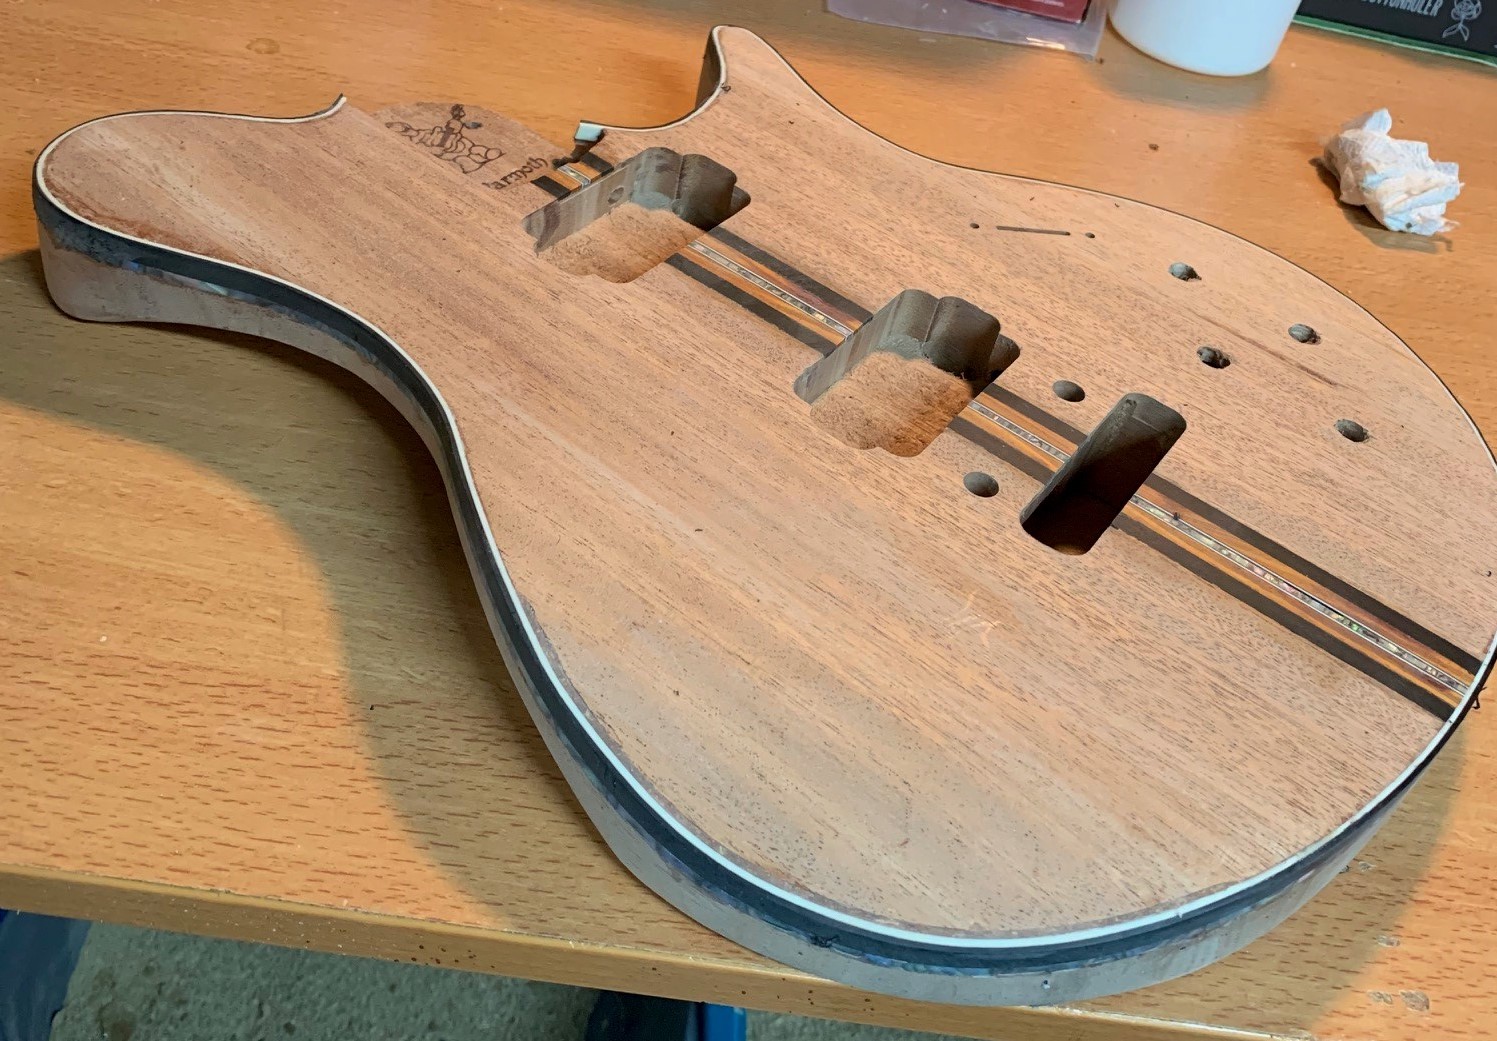
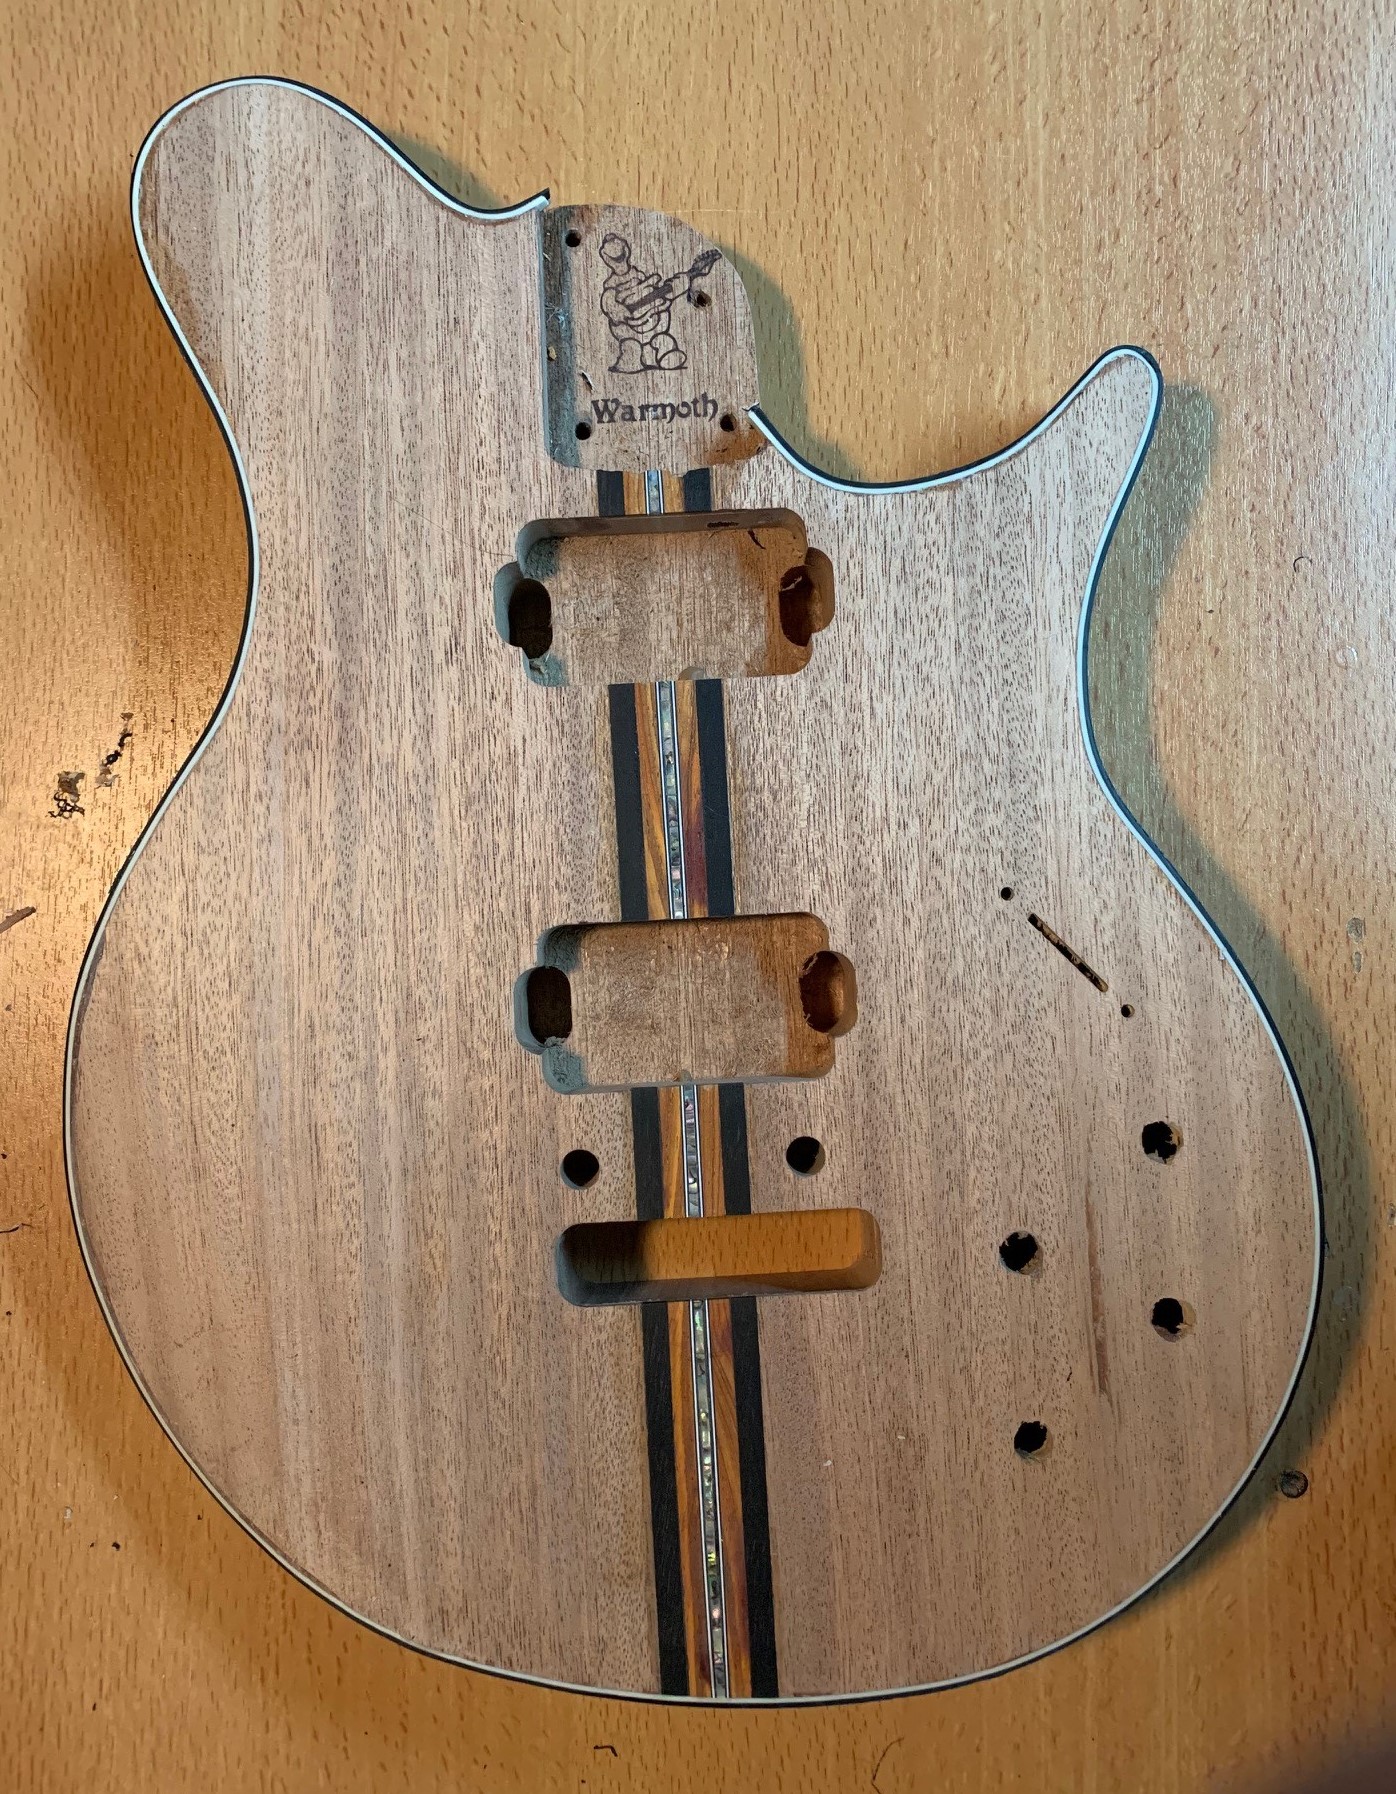
In this pic, the centerline inlaid woods and abalone has been applied, and the wood tear out has been fixed...

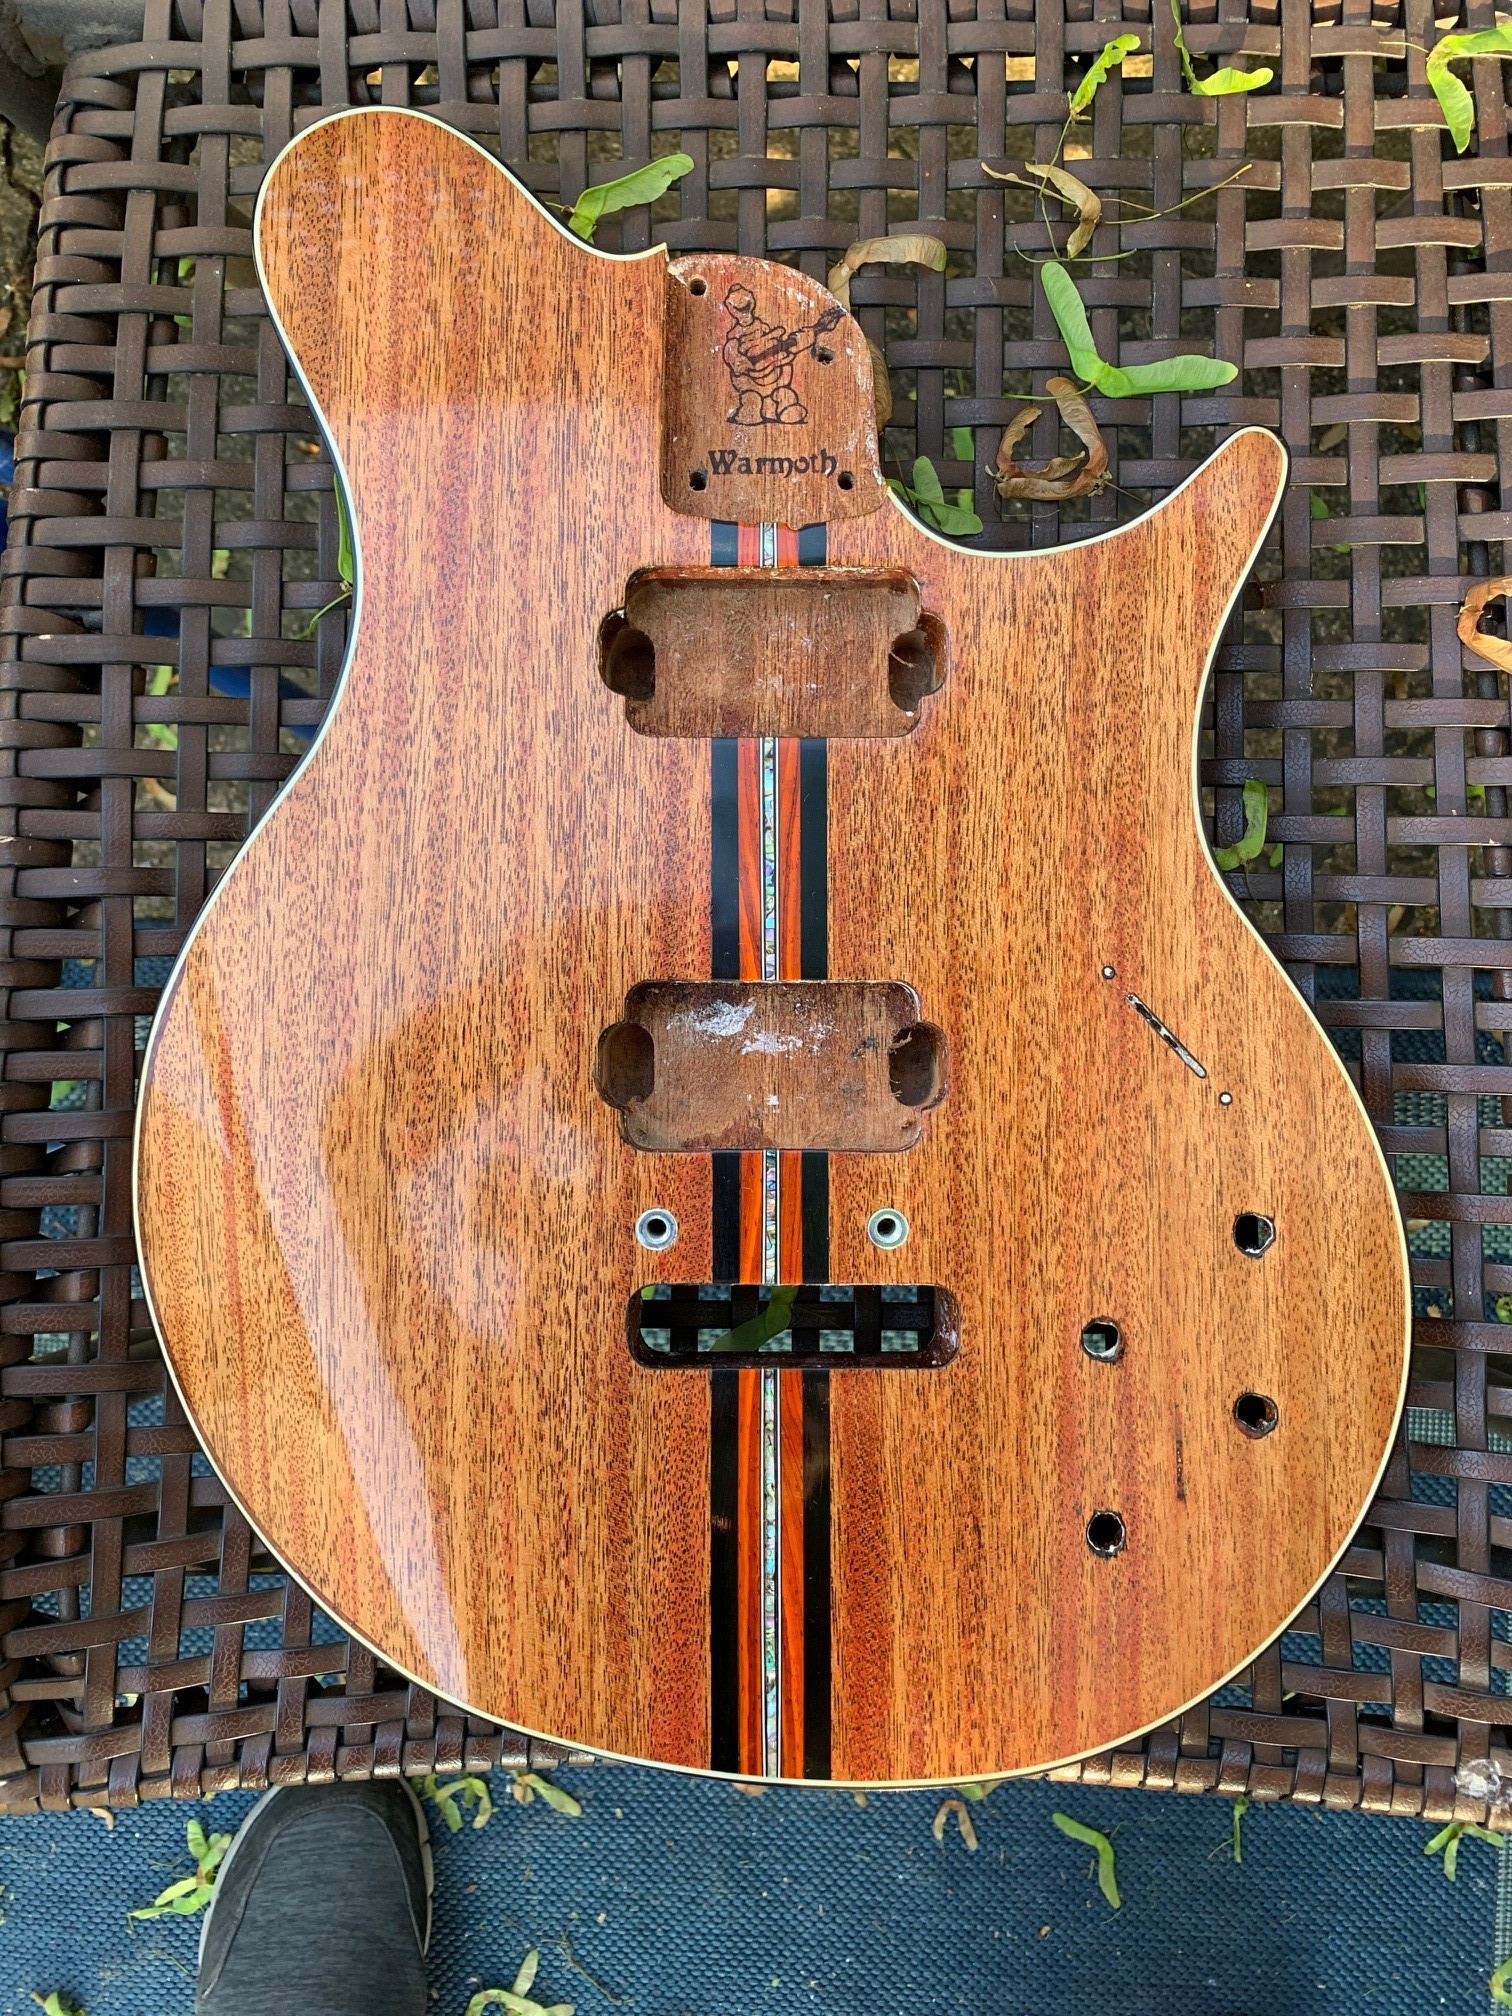
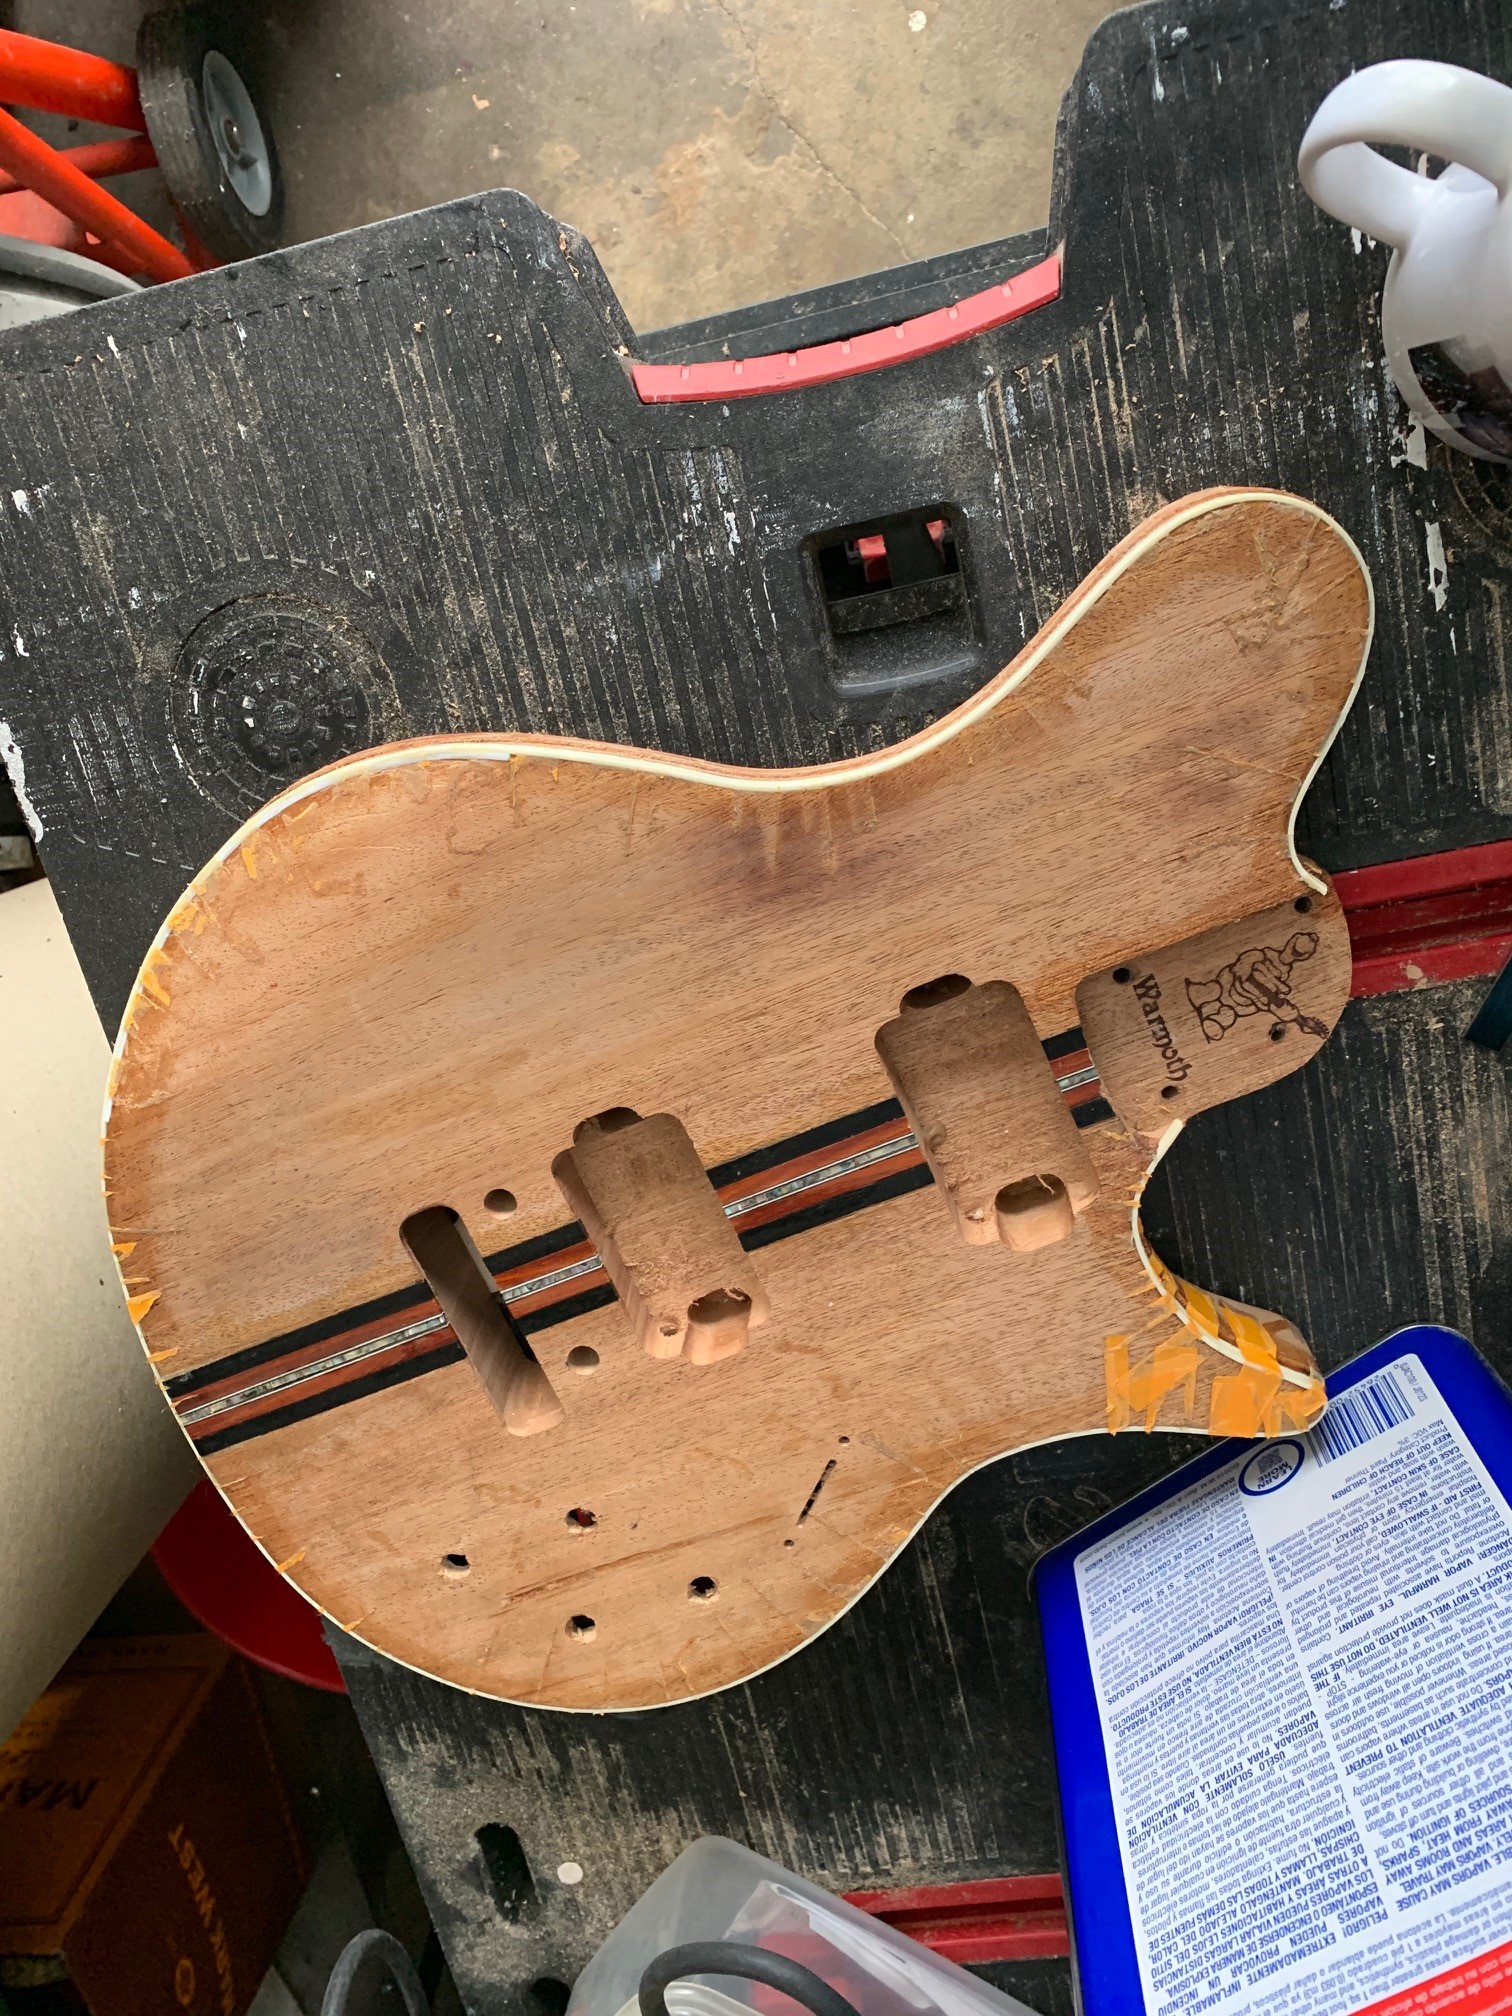
And now the centerline inlay has been routed flush to the body and pickup bridge cavities.
For the binding. I saw some vid's on Youtube where a luthier went about backwards engineering the unit that StewMac makes.
https://www.youtube.com/watch?v=sljb3JPa-UQ
I liked this version better, as it would accommodate following the forearm comfort cut better. I bought some CNC racking and a gantry plate, mounted the Makita router to it, bought some StewMac binding channel router bits with the different sized bearings, and a lot of time and patience. The biggest challenge with this was getting the contour of the underside of the plate where the router sits, to float correctly with the guitar body contours. I bought some lexan and tried that (which is what the guy in the video used), but this wasn't working out for me. It requred making threaded holes in the lexan to attach to the gantry plate for the router, and I couldn't get the threads correct. Plan B was getting a strip of oak, sizing it and making the contour. I went through about 3 prototypes for the lexan before calling it quits with the lexan, and about 5 prototypes with the oak. Had it almost perfect, but needed something to provide a different angled contour against what the oak shelf was doing. Wound up perusing Home Depot and Lowes in the plumbing section. Looked at PVC caps (would cut a hole in the cap for the router bit to go through. This almost worked, but not quite. I found what I needed at a plumbing supply store. A simple Delrin ring with angled sides glued to the underside .....worked!
I cut the 1st channel, and all went well. Then figured, wow that was easy and started thinking of more elaborate designs. Decided to go back and a deeper route into the body and make a multiple binding layer (closest thing I can of to describe this is, on a Les Paul Custom there are multiple black and white binding layers). All was good until I hit the forearm contour and the router bearing jumped onto the previously routed channel, creating a 3rd depth layer around the forearm contour. Ughhhhhhh. Moral of this story it, start at your most recessed depth and work forward to the side of the body from their. Not start at the outer depth and then go back and route a deeper channel. For the fix, StewMac sells a teflon binding strip that is used to fill a purfling channel clear while the binding is applied. Some pics....
1st layer of binding. I used more the teflon strip to apply pressure to the bottom area of the binding. The binding was glued in used very thin viscosity CA Glue (Superglue). The CA glue doesn't stick to the teflon strip, but I used a bit much of the glue and stripping back afterwards was a lot of time and work
After (you can see the teflon stip against the inside of cream binding layer in the forearm contour, this will be filled in with mahogany sawdust and glue)...
And now, the 2nd (outer black strip) and 3rd layer of binding (plastic abalone strip that sits under the black binding strip)
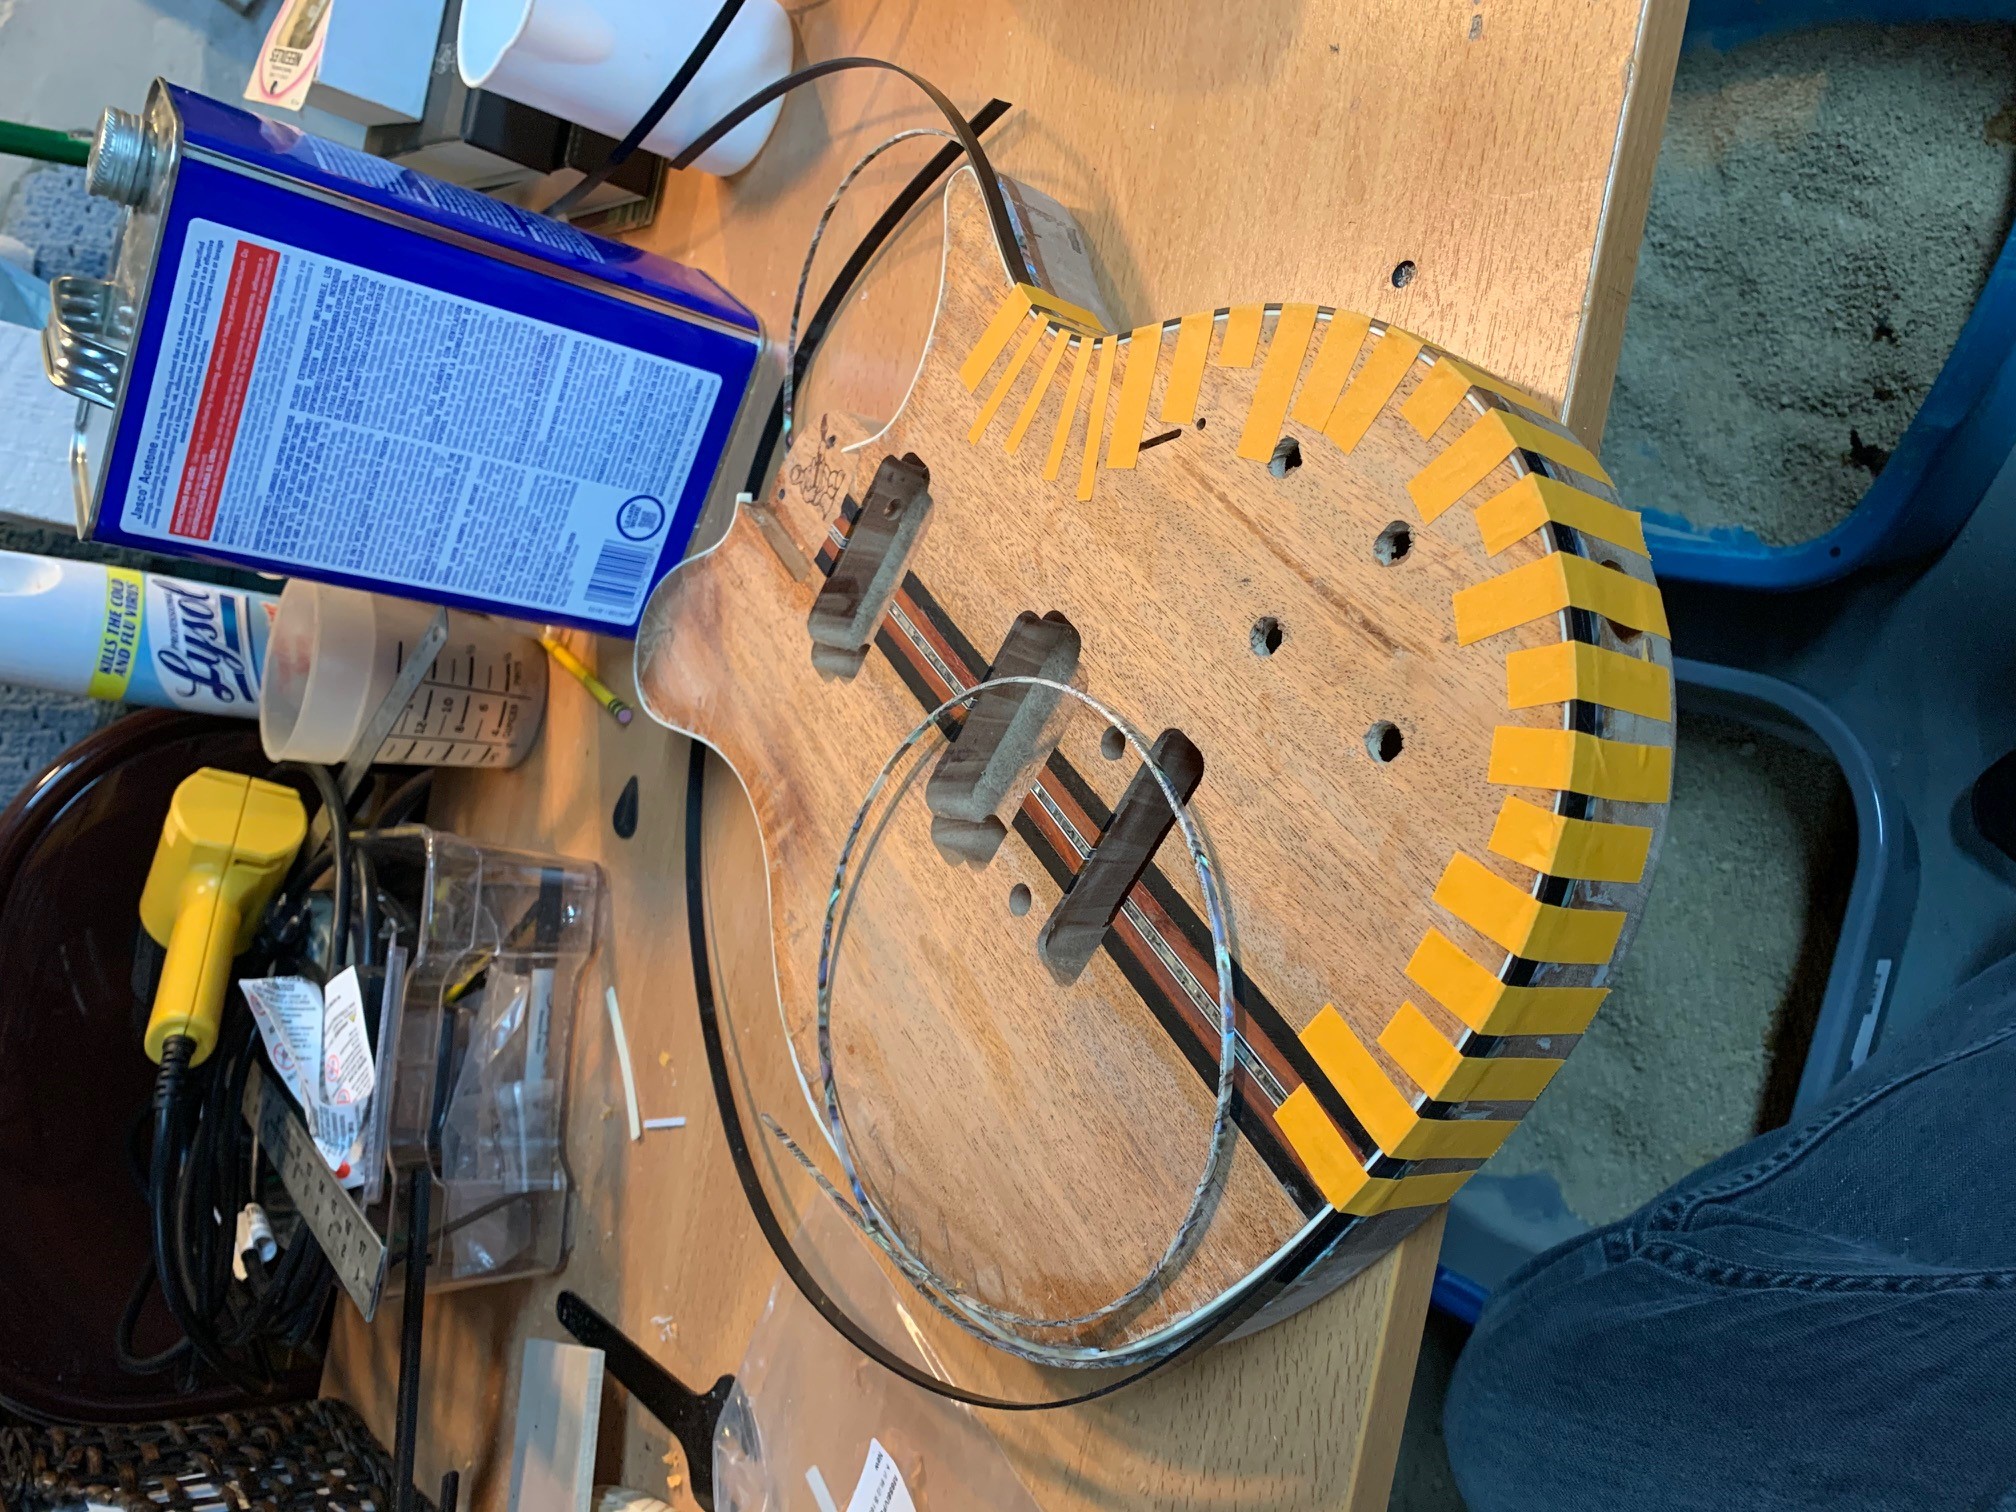
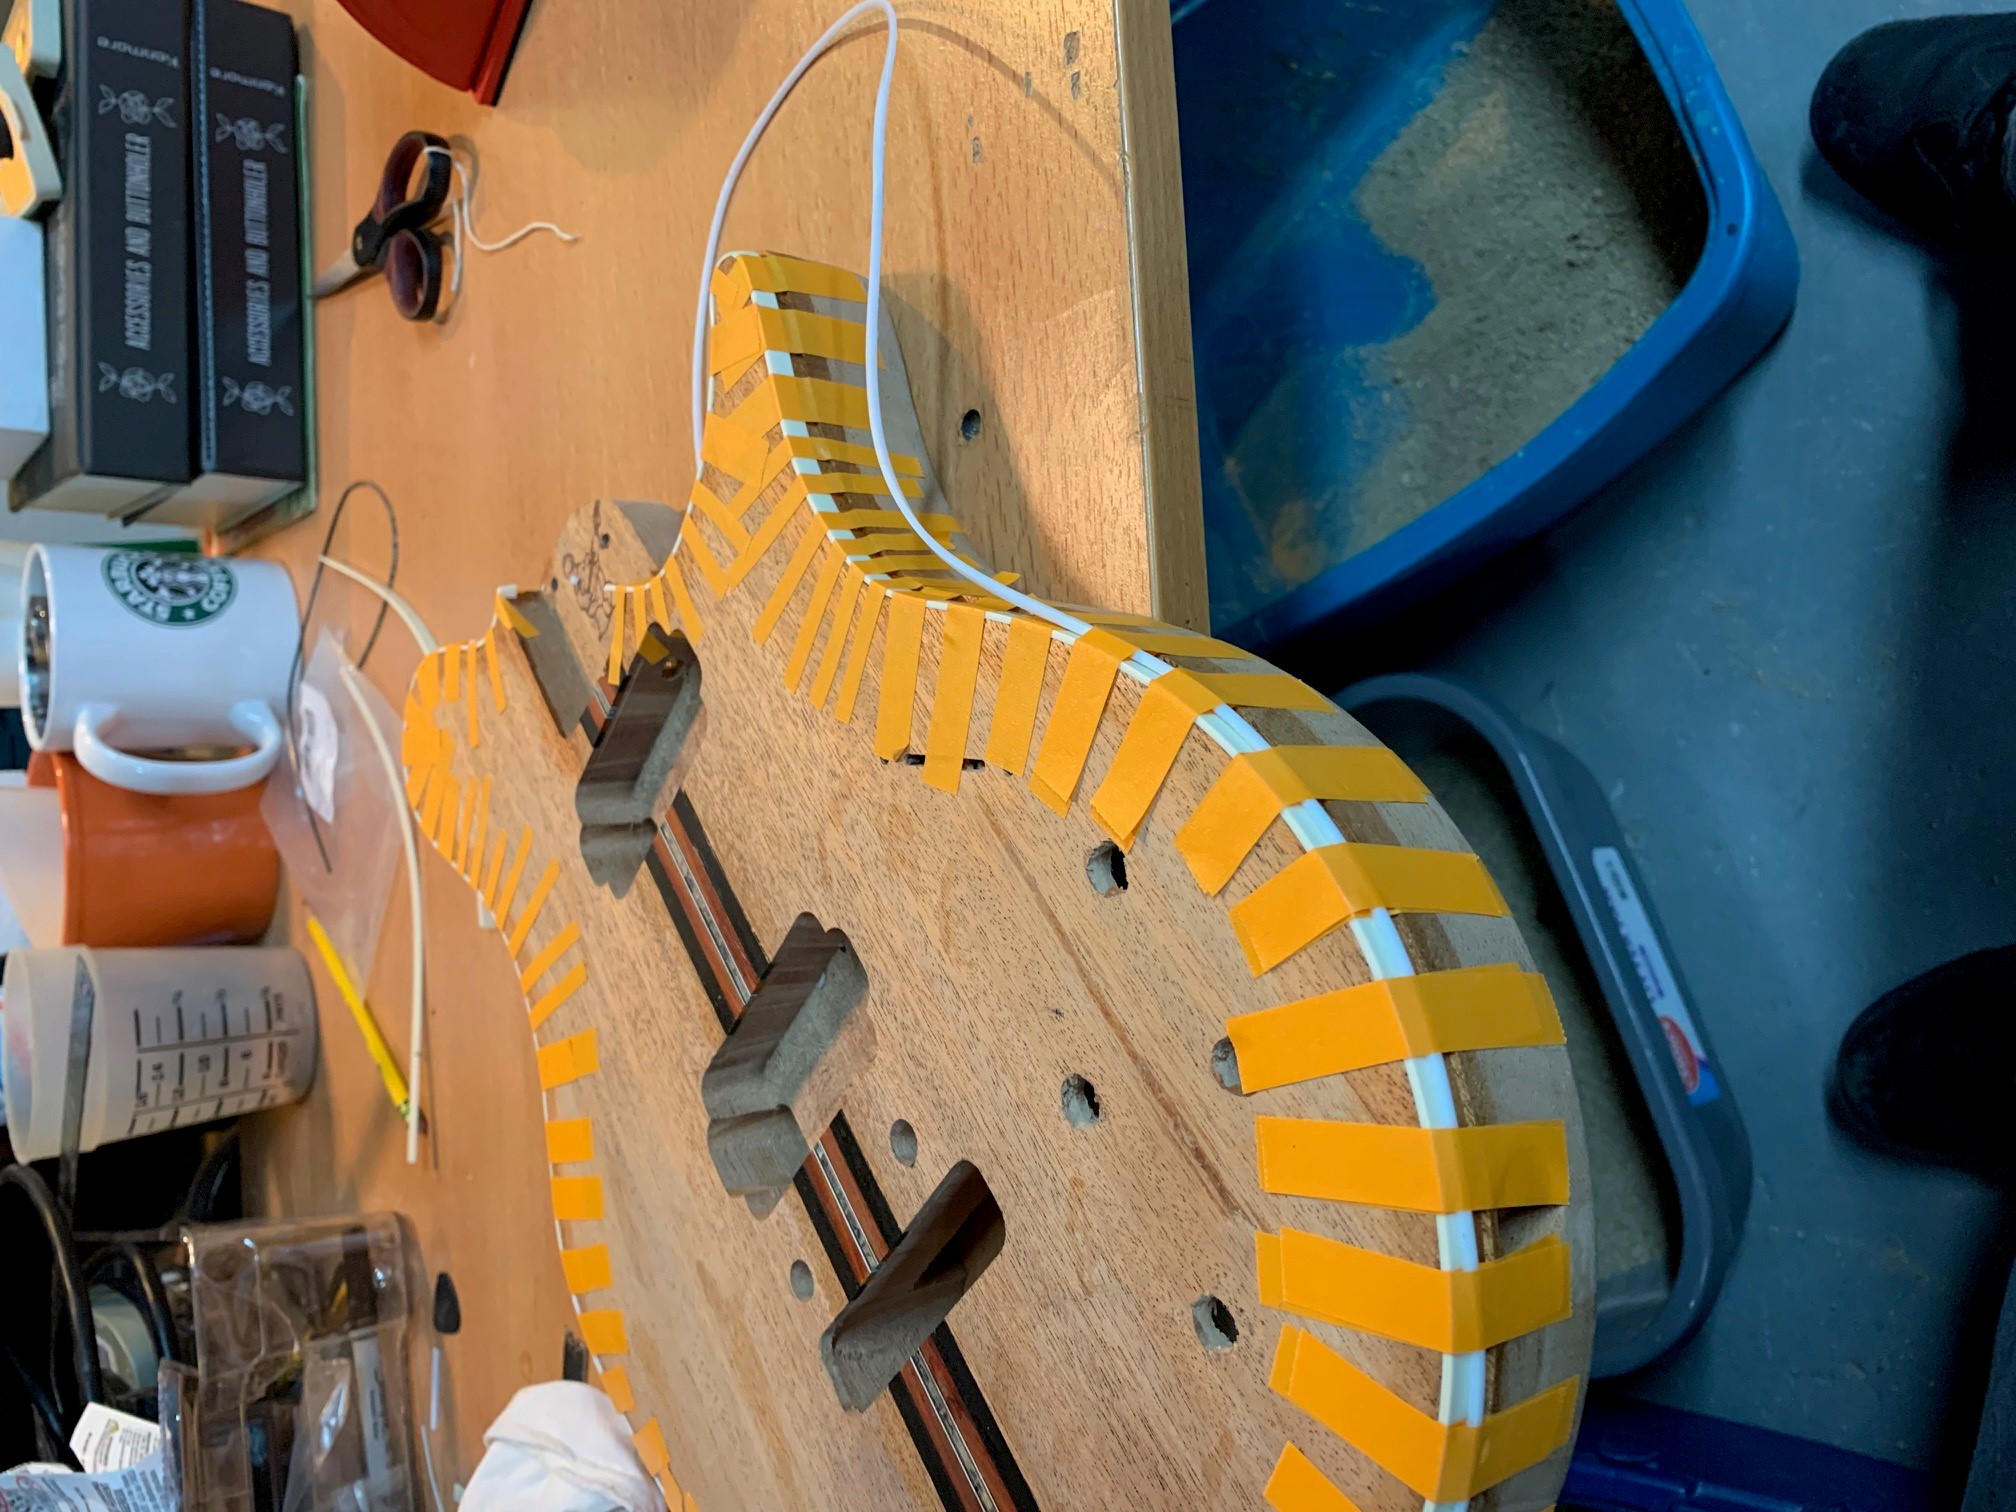
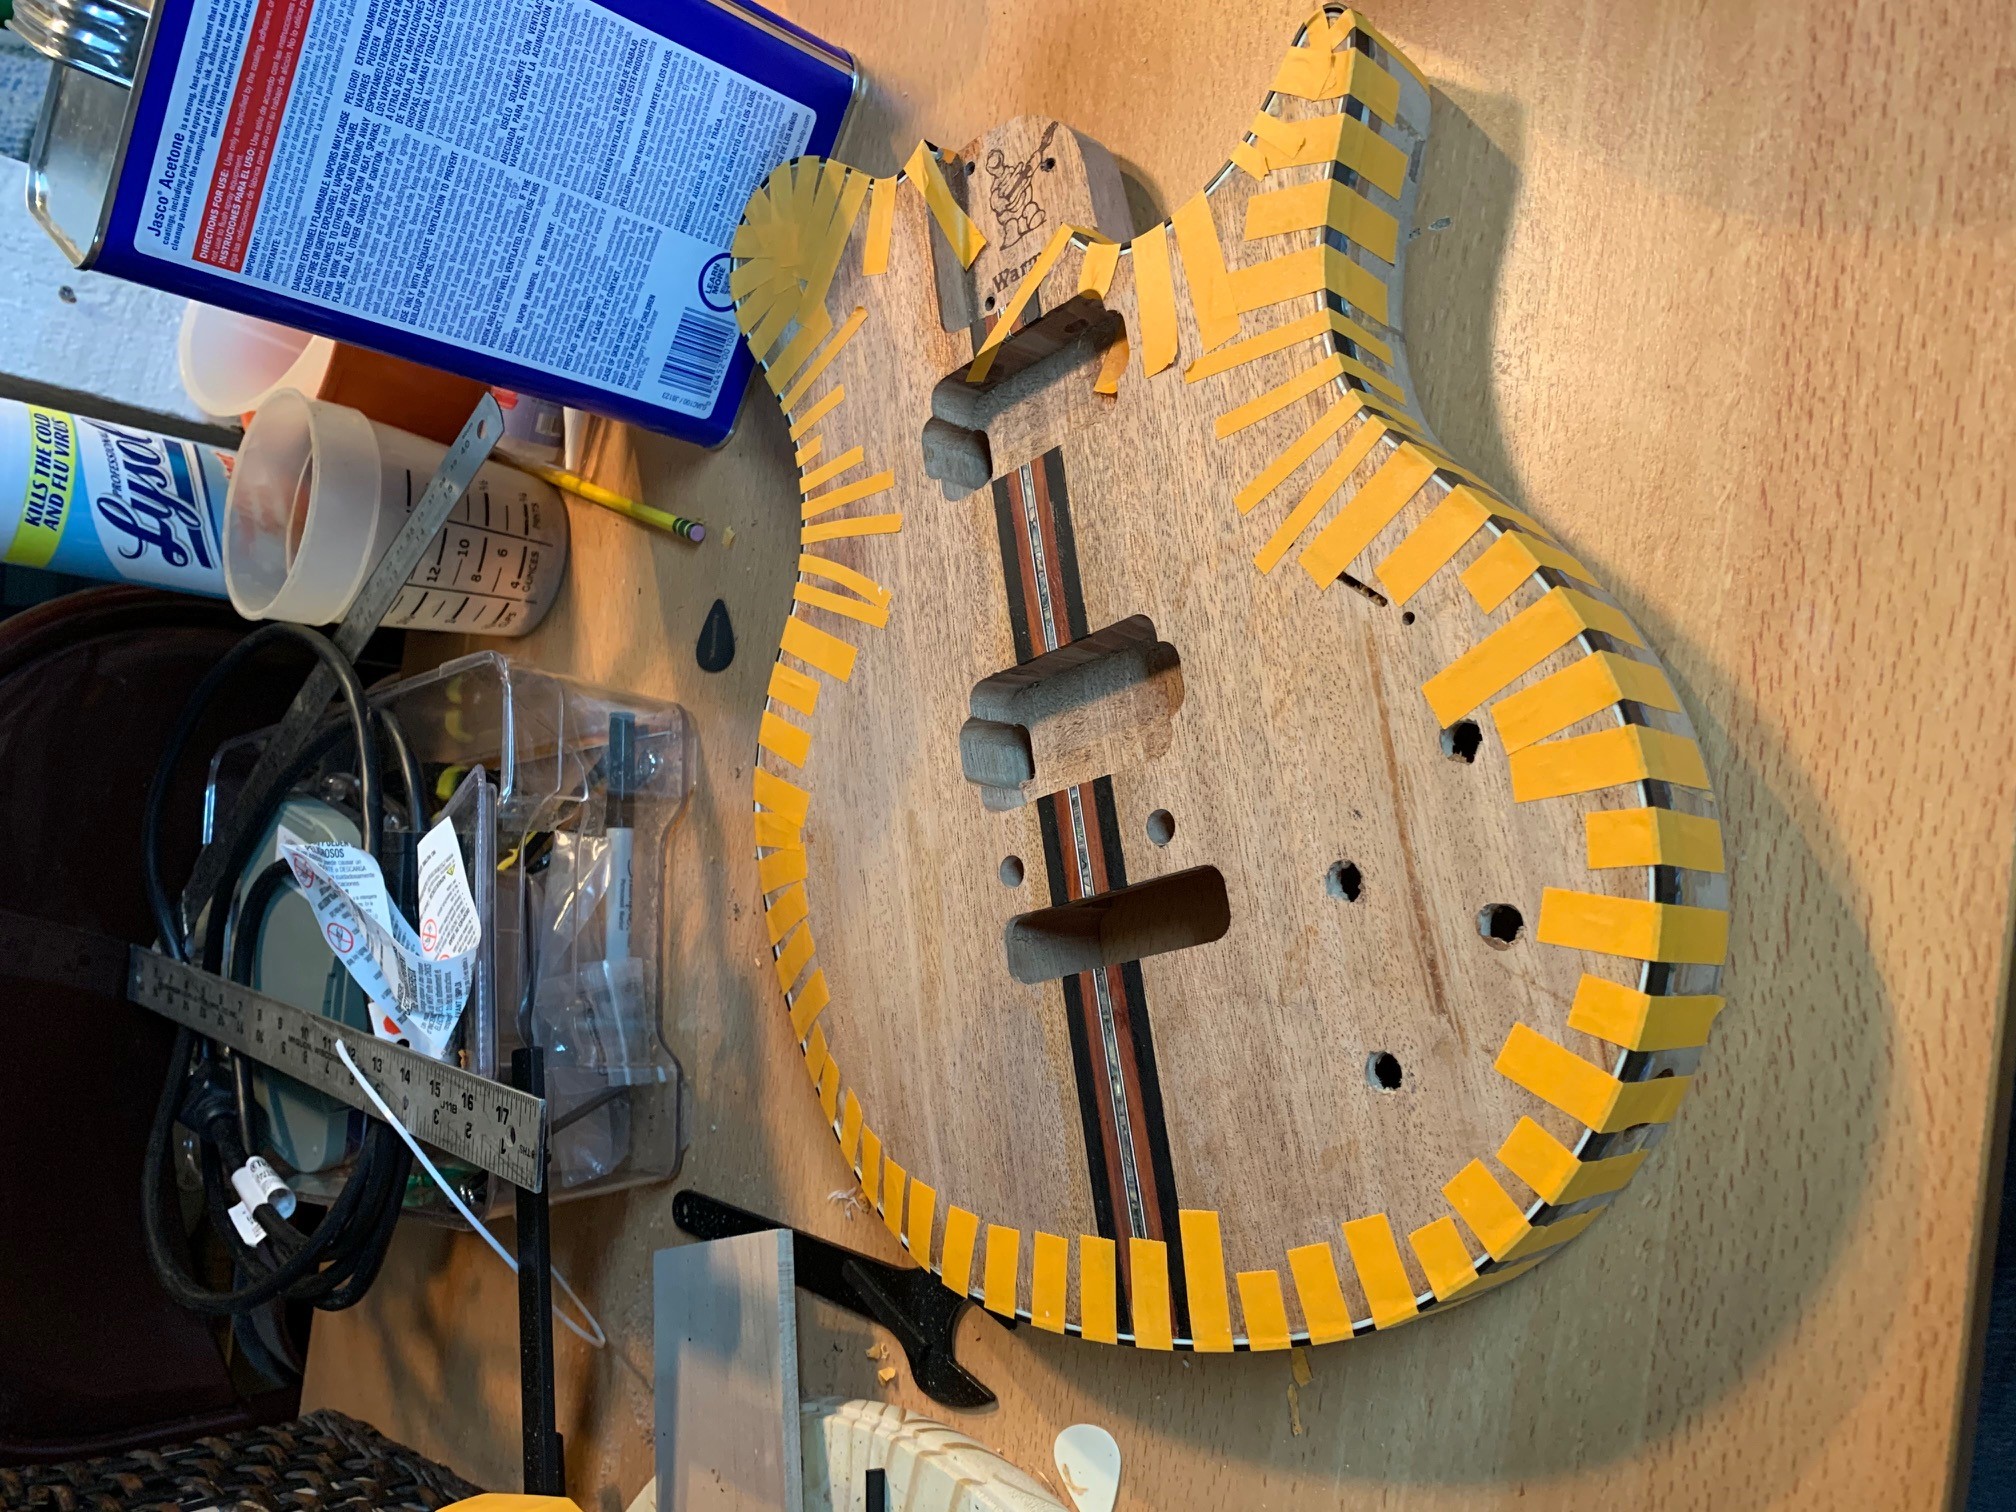
All taped up...
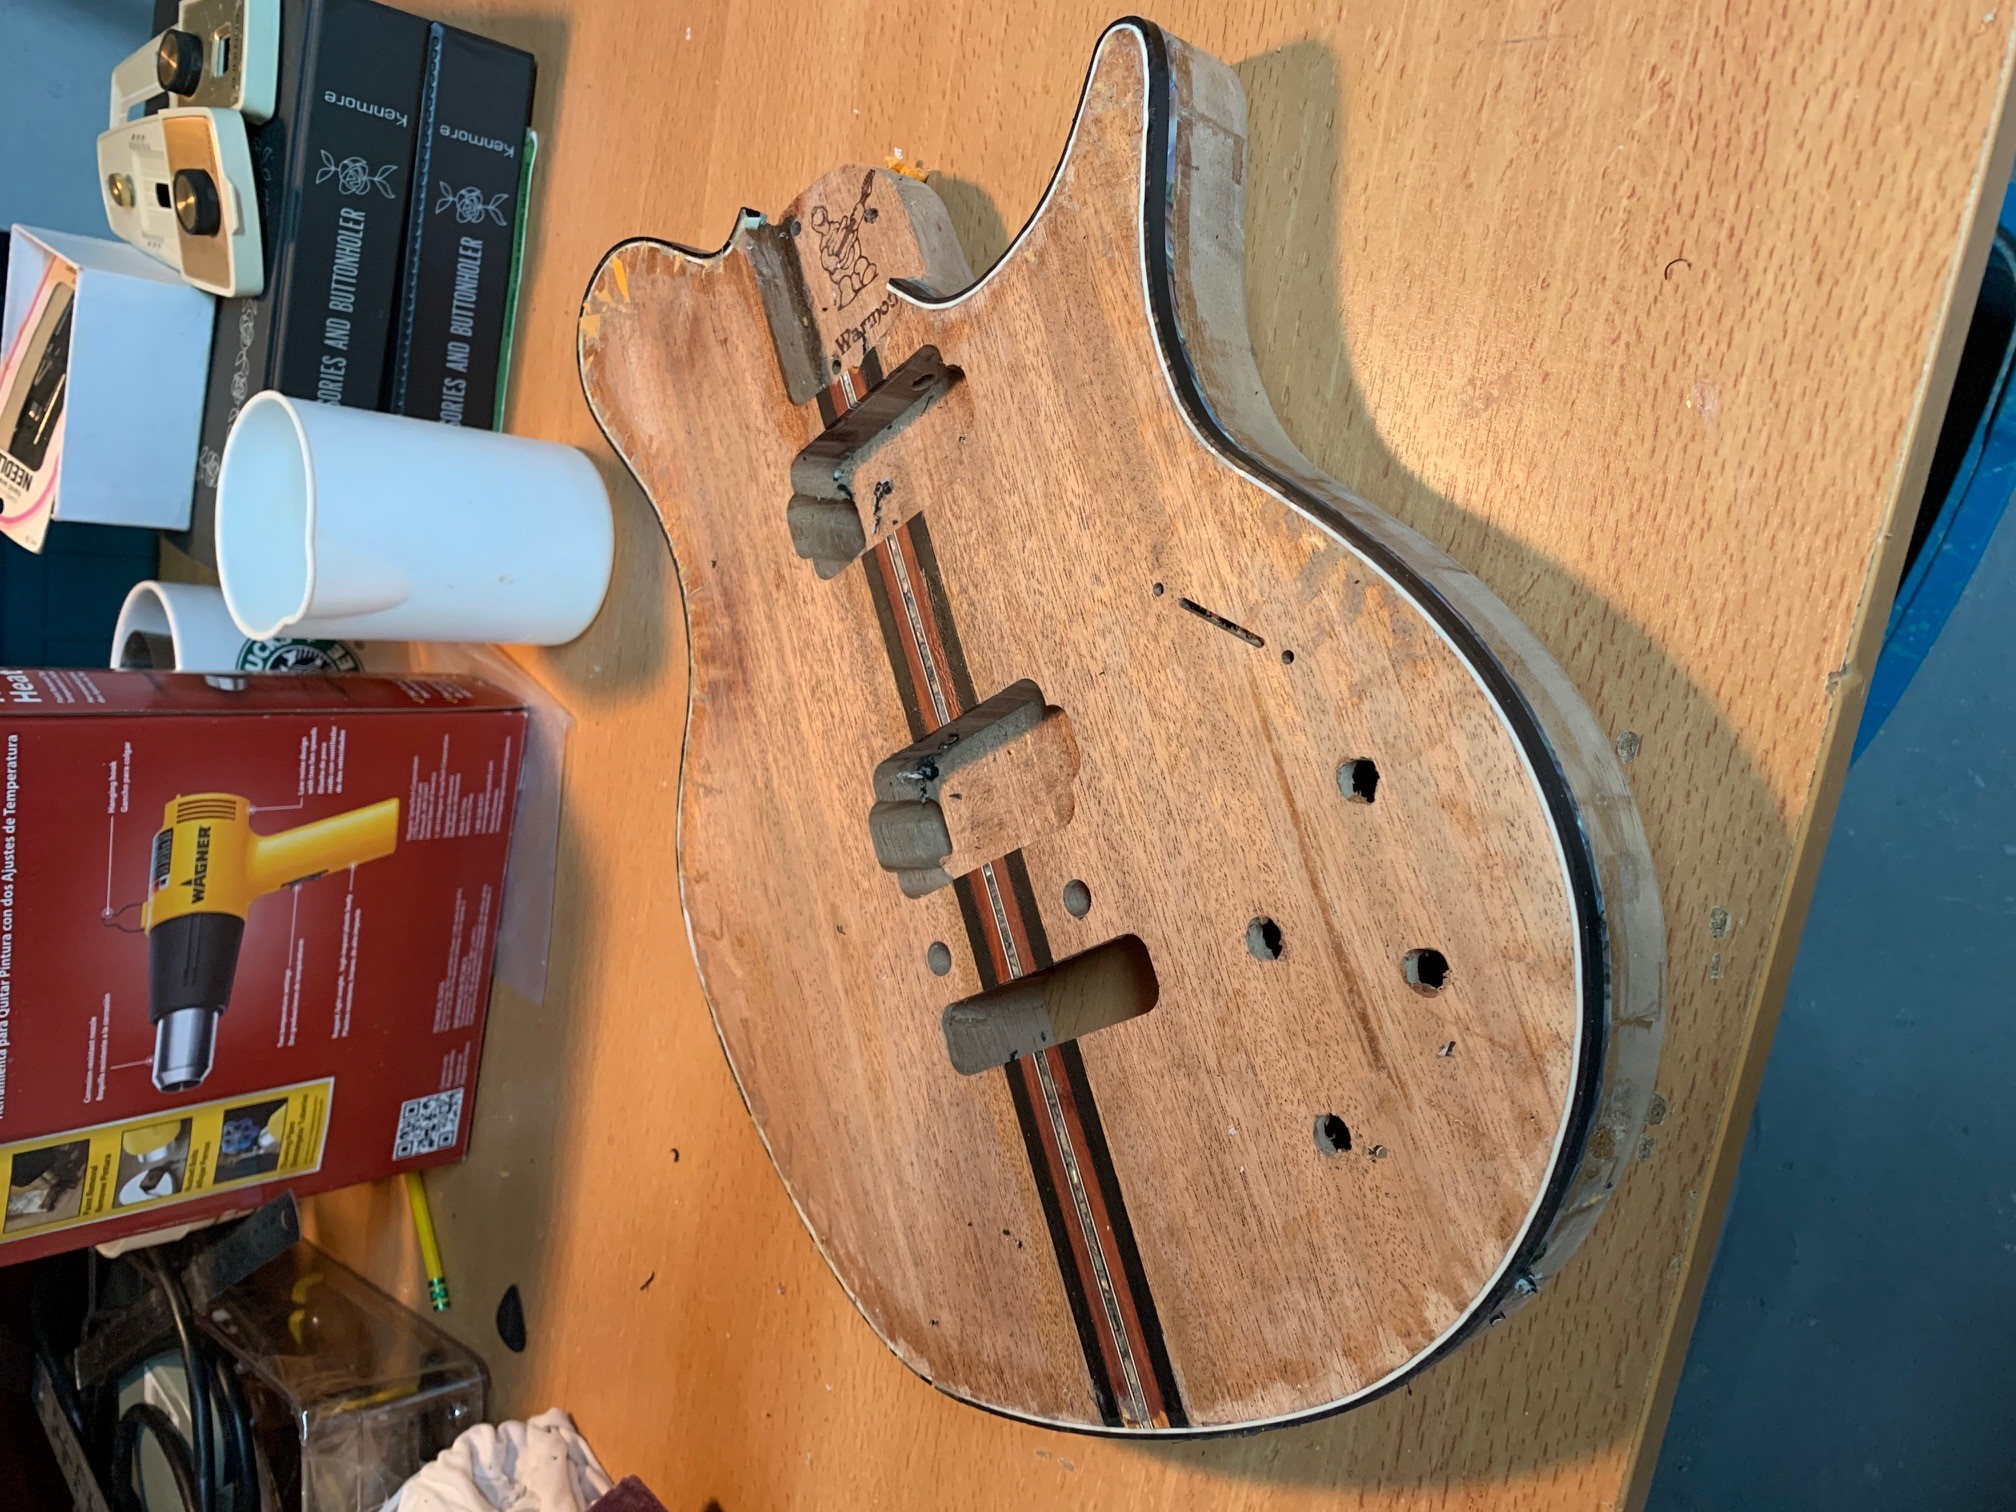
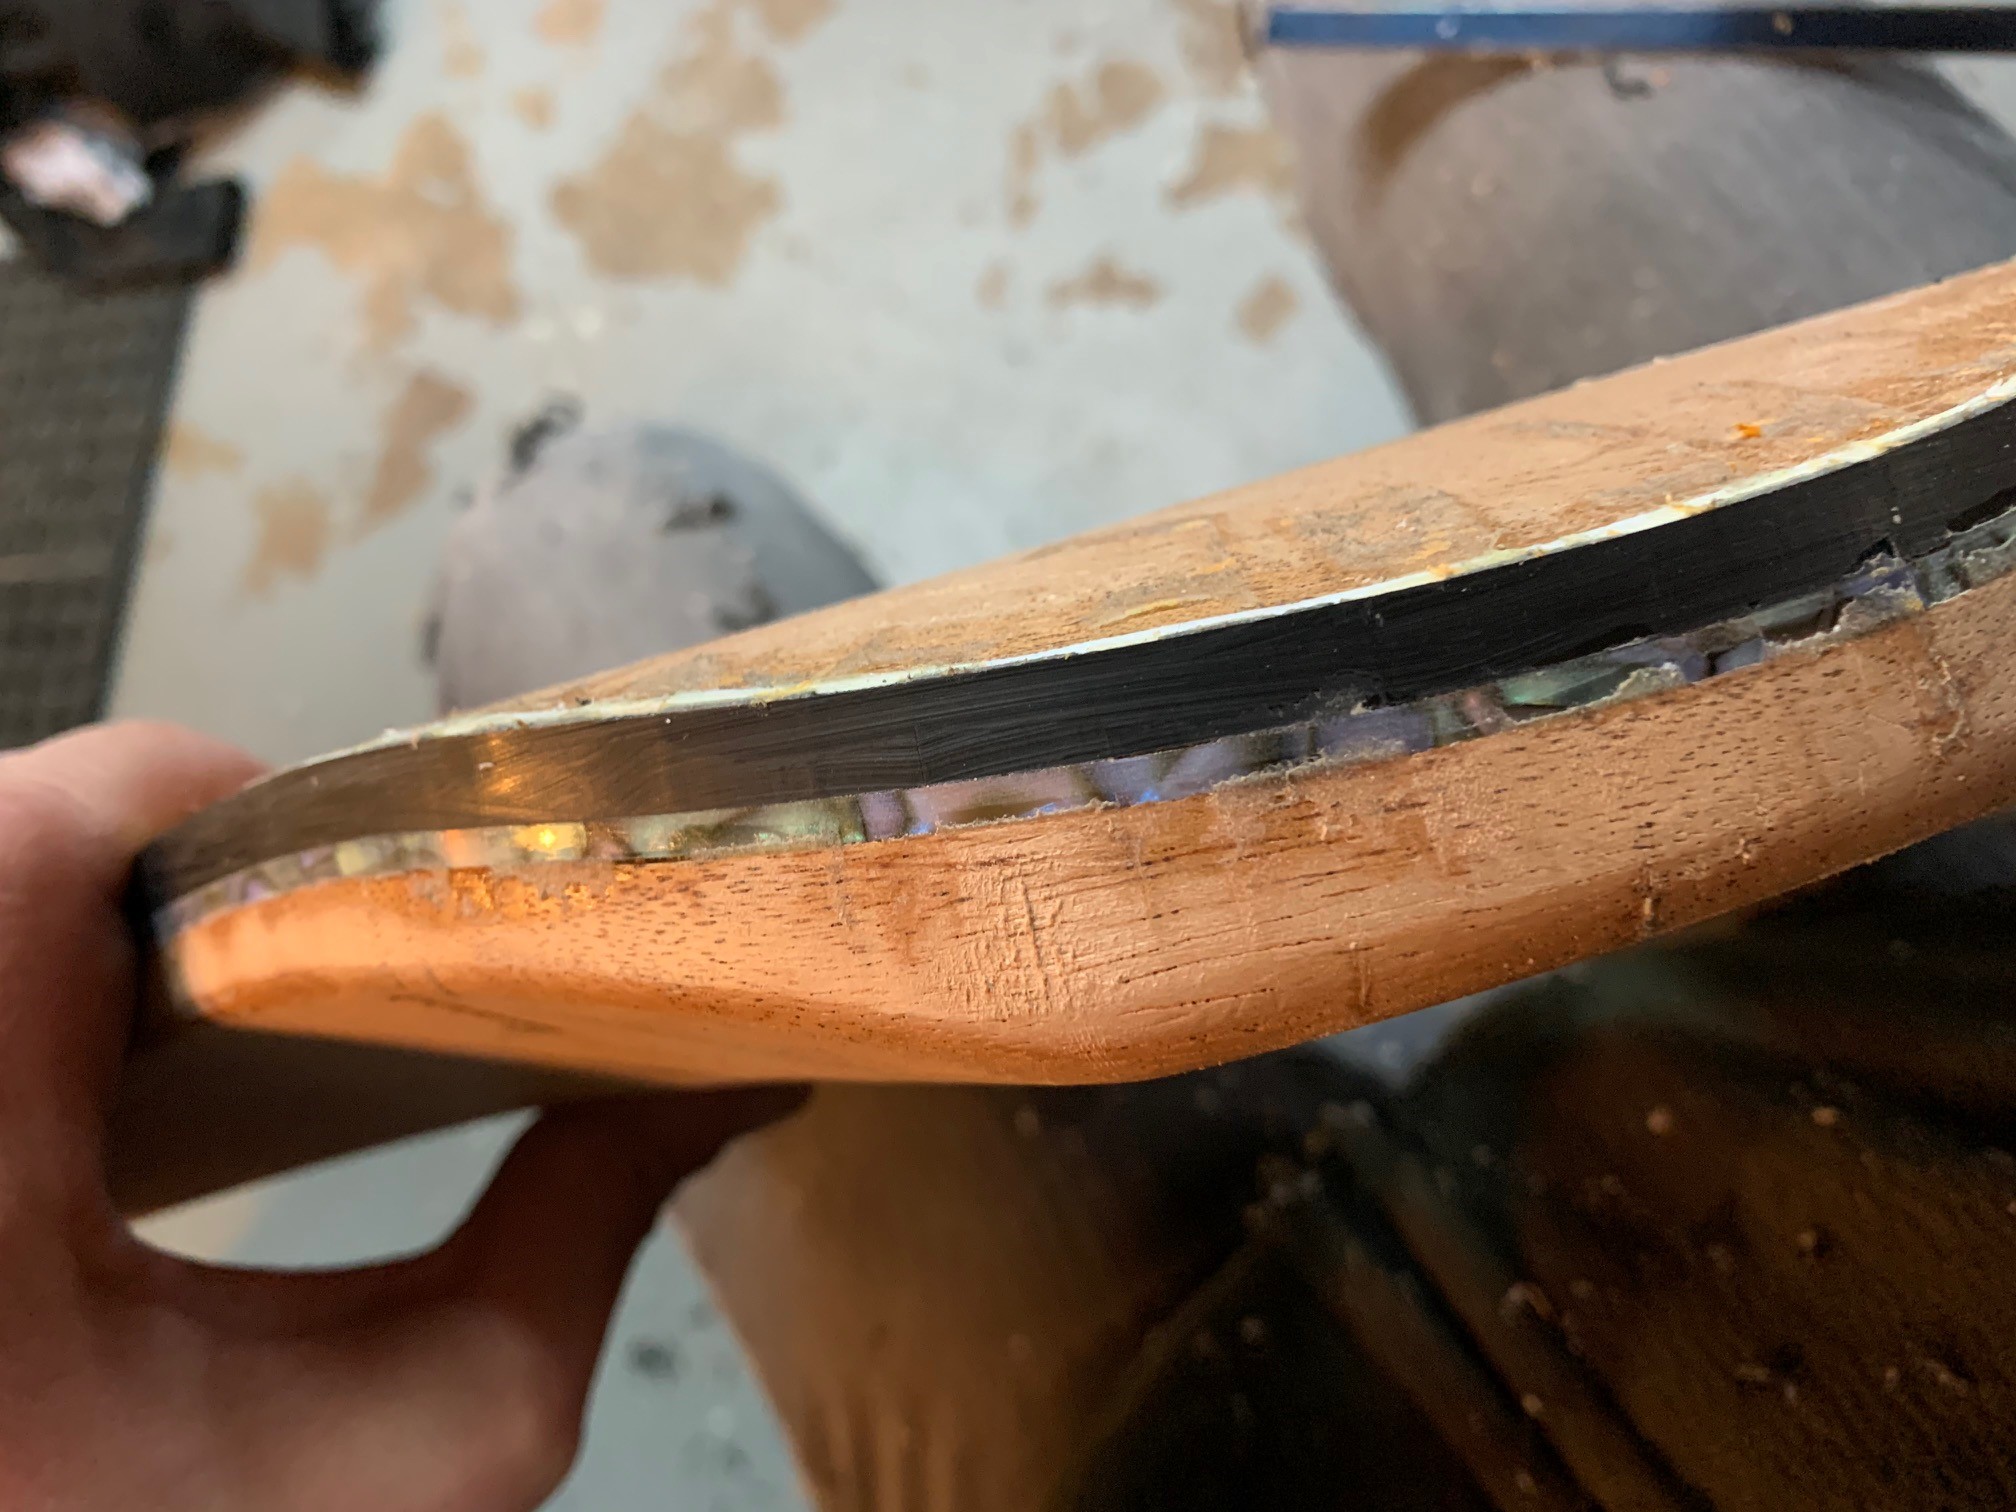
And where I am now. Currently in the process of "scraping" the binding strip to be flush with the body...
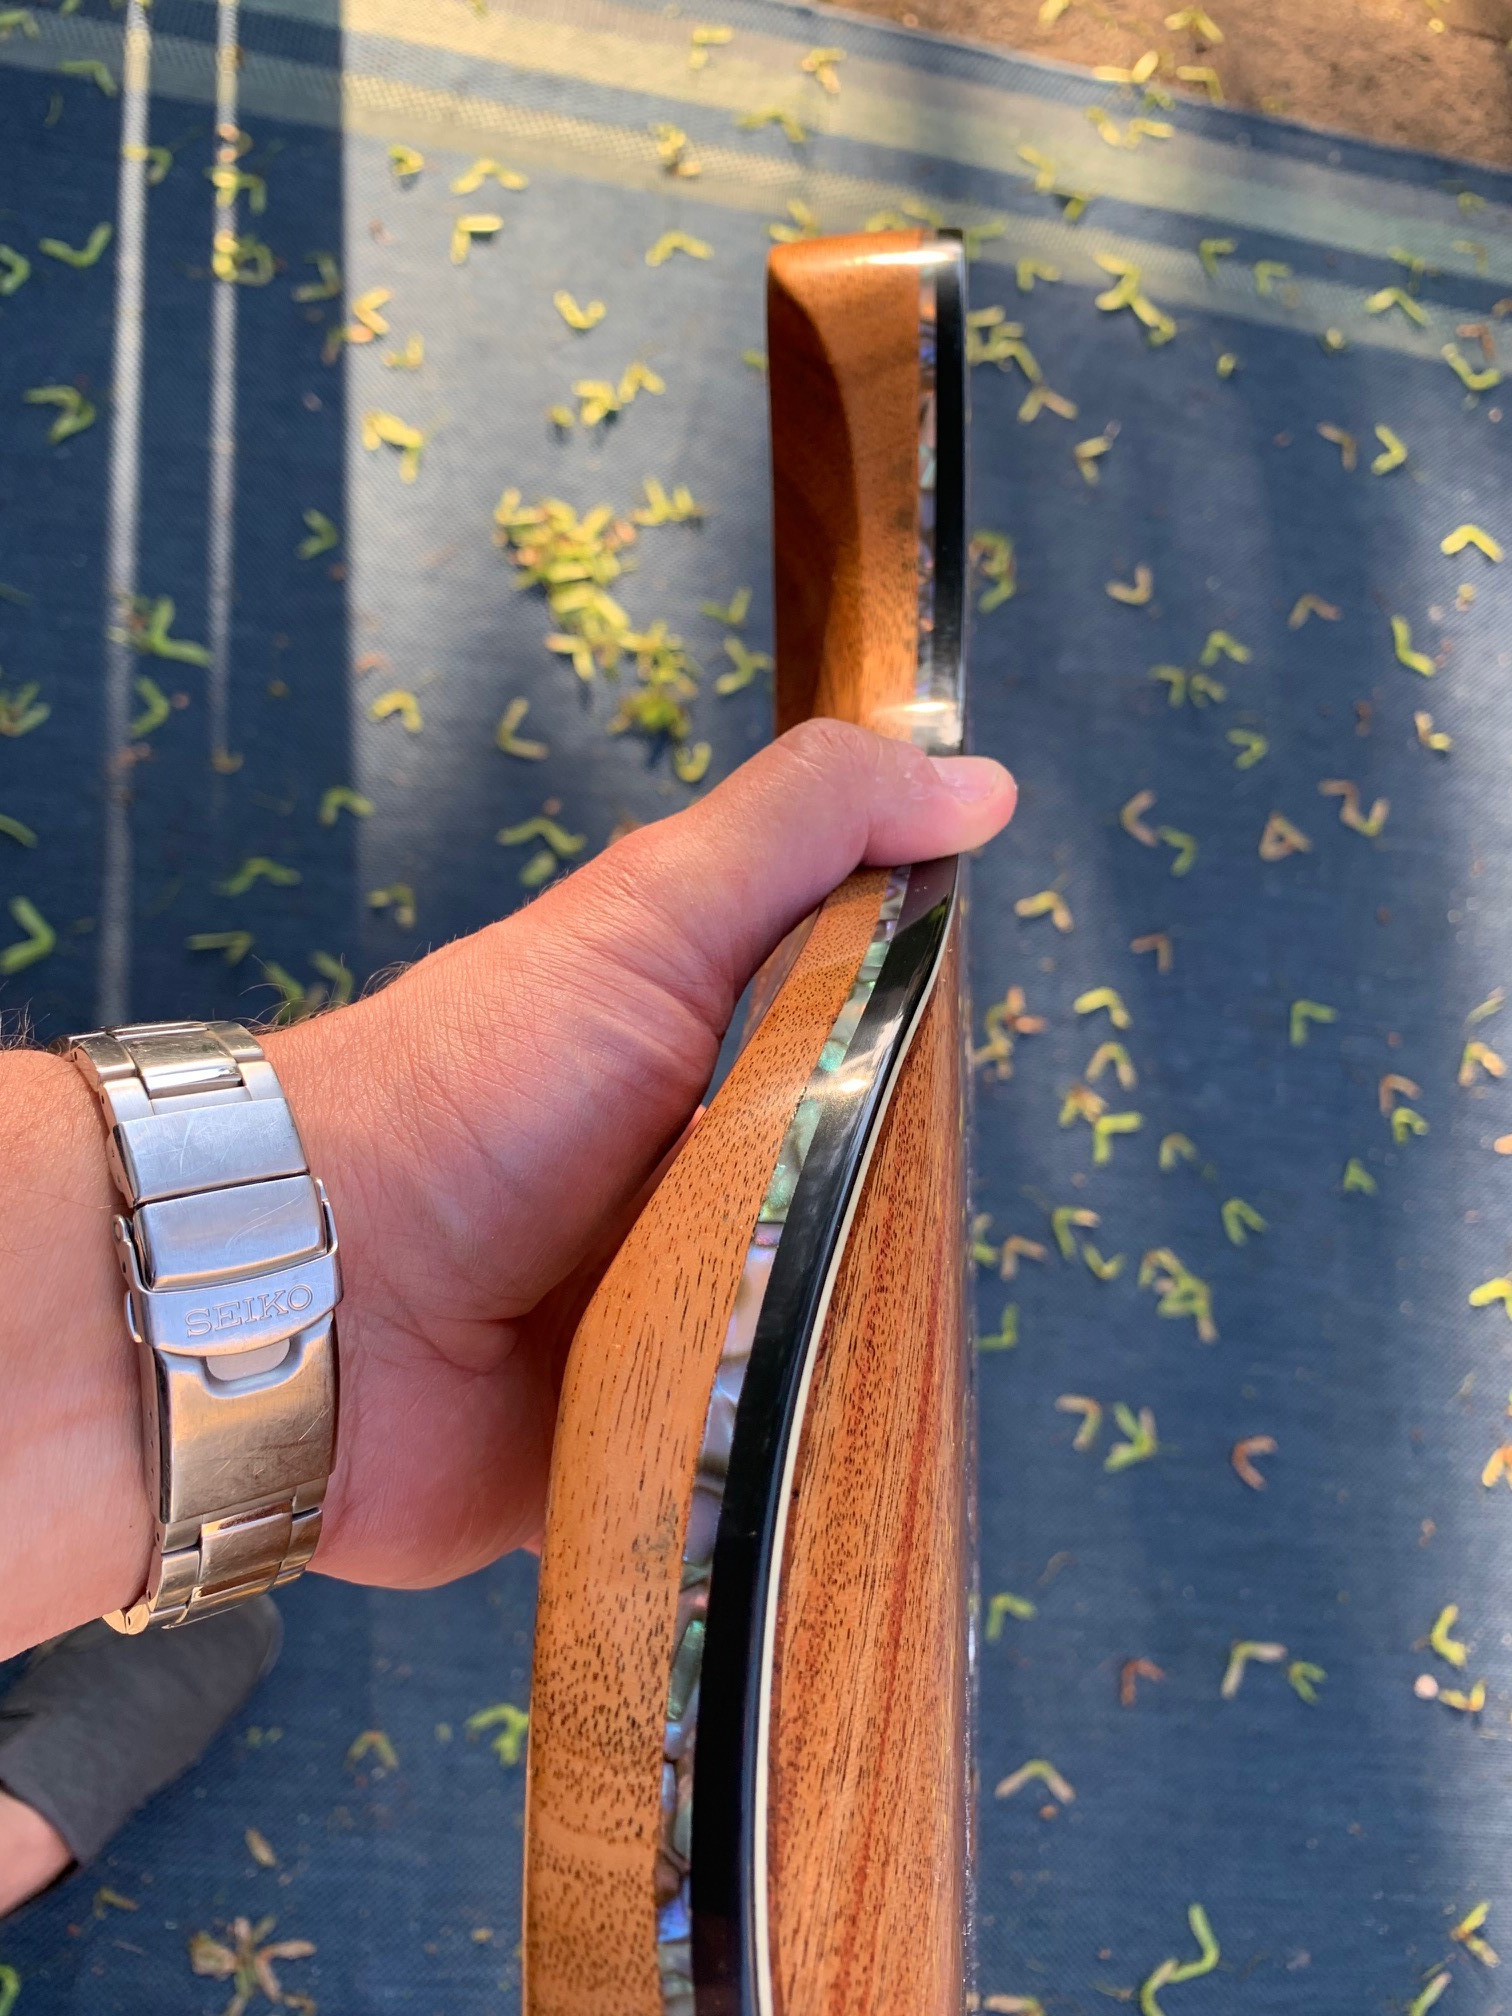
And a side shot showing the plastic abalone strip ....
ALMOST at the point of finally getting to the finish. Hoping to have the binding related done by the end of the week.
This is my 3rd Warmoth partscaster and for this one, wanted to take it a little further. I bought an all mahogany Velocity body to be mated with a roasted maple / ebony Tiltback Strat 24.75" conversion neck. And.....
The body as it came from Warmoth...
Body with the neck...
Modified neck heel (still needs to be cleaned up)
And now the fun begins...
I wanted to put binding on the guitar and some form of inlay. I easily spent as much on tools and supplies as I did on the guitar itself. StewMac saw a lot of use of my credit card. They truly have some great tools, among them, high quality Dremel accessories. Also picked up a Makita router.
In the below pic, I started off making a channel for the abalone strip (from StewMac and this is great stuff, makes application easy), then realized I wanted something "more". Bought ebony and coco bolo w/ white binding strips from StewMac, and then routed around the original channel made for the abalone. Of course, the depth of the wood is about 1/32 deeper than the abalone, so had to route that much deeper around the original channel. Was very fortunate there was no tear out. Having said that, when I was drilling the vol/tone holes, I used masking tape, and when I pulled the tape off, I did get tear out. Fortunately, the folks on this site provided some great advice on how to fix...
In this pic, the centerline inlaid woods and abalone has been applied, and the wood tear out has been fixed...
And now the centerline inlay has been routed flush to the body and pickup bridge cavities.
For the binding. I saw some vid's on Youtube where a luthier went about backwards engineering the unit that StewMac makes.
https://www.youtube.com/watch?v=sljb3JPa-UQ
I liked this version better, as it would accommodate following the forearm comfort cut better. I bought some CNC racking and a gantry plate, mounted the Makita router to it, bought some StewMac binding channel router bits with the different sized bearings, and a lot of time and patience. The biggest challenge with this was getting the contour of the underside of the plate where the router sits, to float correctly with the guitar body contours. I bought some lexan and tried that (which is what the guy in the video used), but this wasn't working out for me. It requred making threaded holes in the lexan to attach to the gantry plate for the router, and I couldn't get the threads correct. Plan B was getting a strip of oak, sizing it and making the contour. I went through about 3 prototypes for the lexan before calling it quits with the lexan, and about 5 prototypes with the oak. Had it almost perfect, but needed something to provide a different angled contour against what the oak shelf was doing. Wound up perusing Home Depot and Lowes in the plumbing section. Looked at PVC caps (would cut a hole in the cap for the router bit to go through. This almost worked, but not quite. I found what I needed at a plumbing supply store. A simple Delrin ring with angled sides glued to the underside .....worked!
I cut the 1st channel, and all went well. Then figured, wow that was easy and started thinking of more elaborate designs. Decided to go back and a deeper route into the body and make a multiple binding layer (closest thing I can of to describe this is, on a Les Paul Custom there are multiple black and white binding layers). All was good until I hit the forearm contour and the router bearing jumped onto the previously routed channel, creating a 3rd depth layer around the forearm contour. Ughhhhhhh. Moral of this story it, start at your most recessed depth and work forward to the side of the body from their. Not start at the outer depth and then go back and route a deeper channel. For the fix, StewMac sells a teflon binding strip that is used to fill a purfling channel clear while the binding is applied. Some pics....
1st layer of binding. I used more the teflon strip to apply pressure to the bottom area of the binding. The binding was glued in used very thin viscosity CA Glue (Superglue). The CA glue doesn't stick to the teflon strip, but I used a bit much of the glue and stripping back afterwards was a lot of time and work
After (you can see the teflon stip against the inside of cream binding layer in the forearm contour, this will be filled in with mahogany sawdust and glue)...
And now, the 2nd (outer black strip) and 3rd layer of binding (plastic abalone strip that sits under the black binding strip)
All taped up...
And where I am now. Currently in the process of "scraping" the binding strip to be flush with the body...
And a side shot showing the plastic abalone strip ....
ALMOST at the point of finally getting to the finish. Hoping to have the binding related done by the end of the week.

")