The Mystical Mahogany Build...

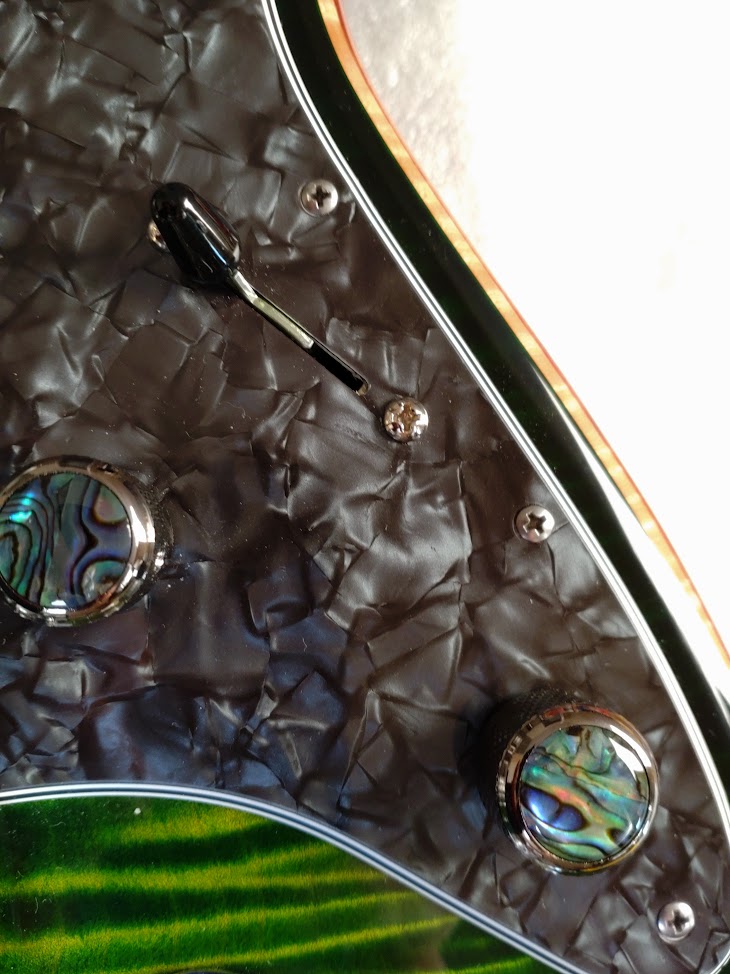
Now the strings are on with some tension I loosened a turn or two the neck screws, which then allows me to nudge the neck slightly so the outer E strings are aligned correctly.

Then the screws are retightened...

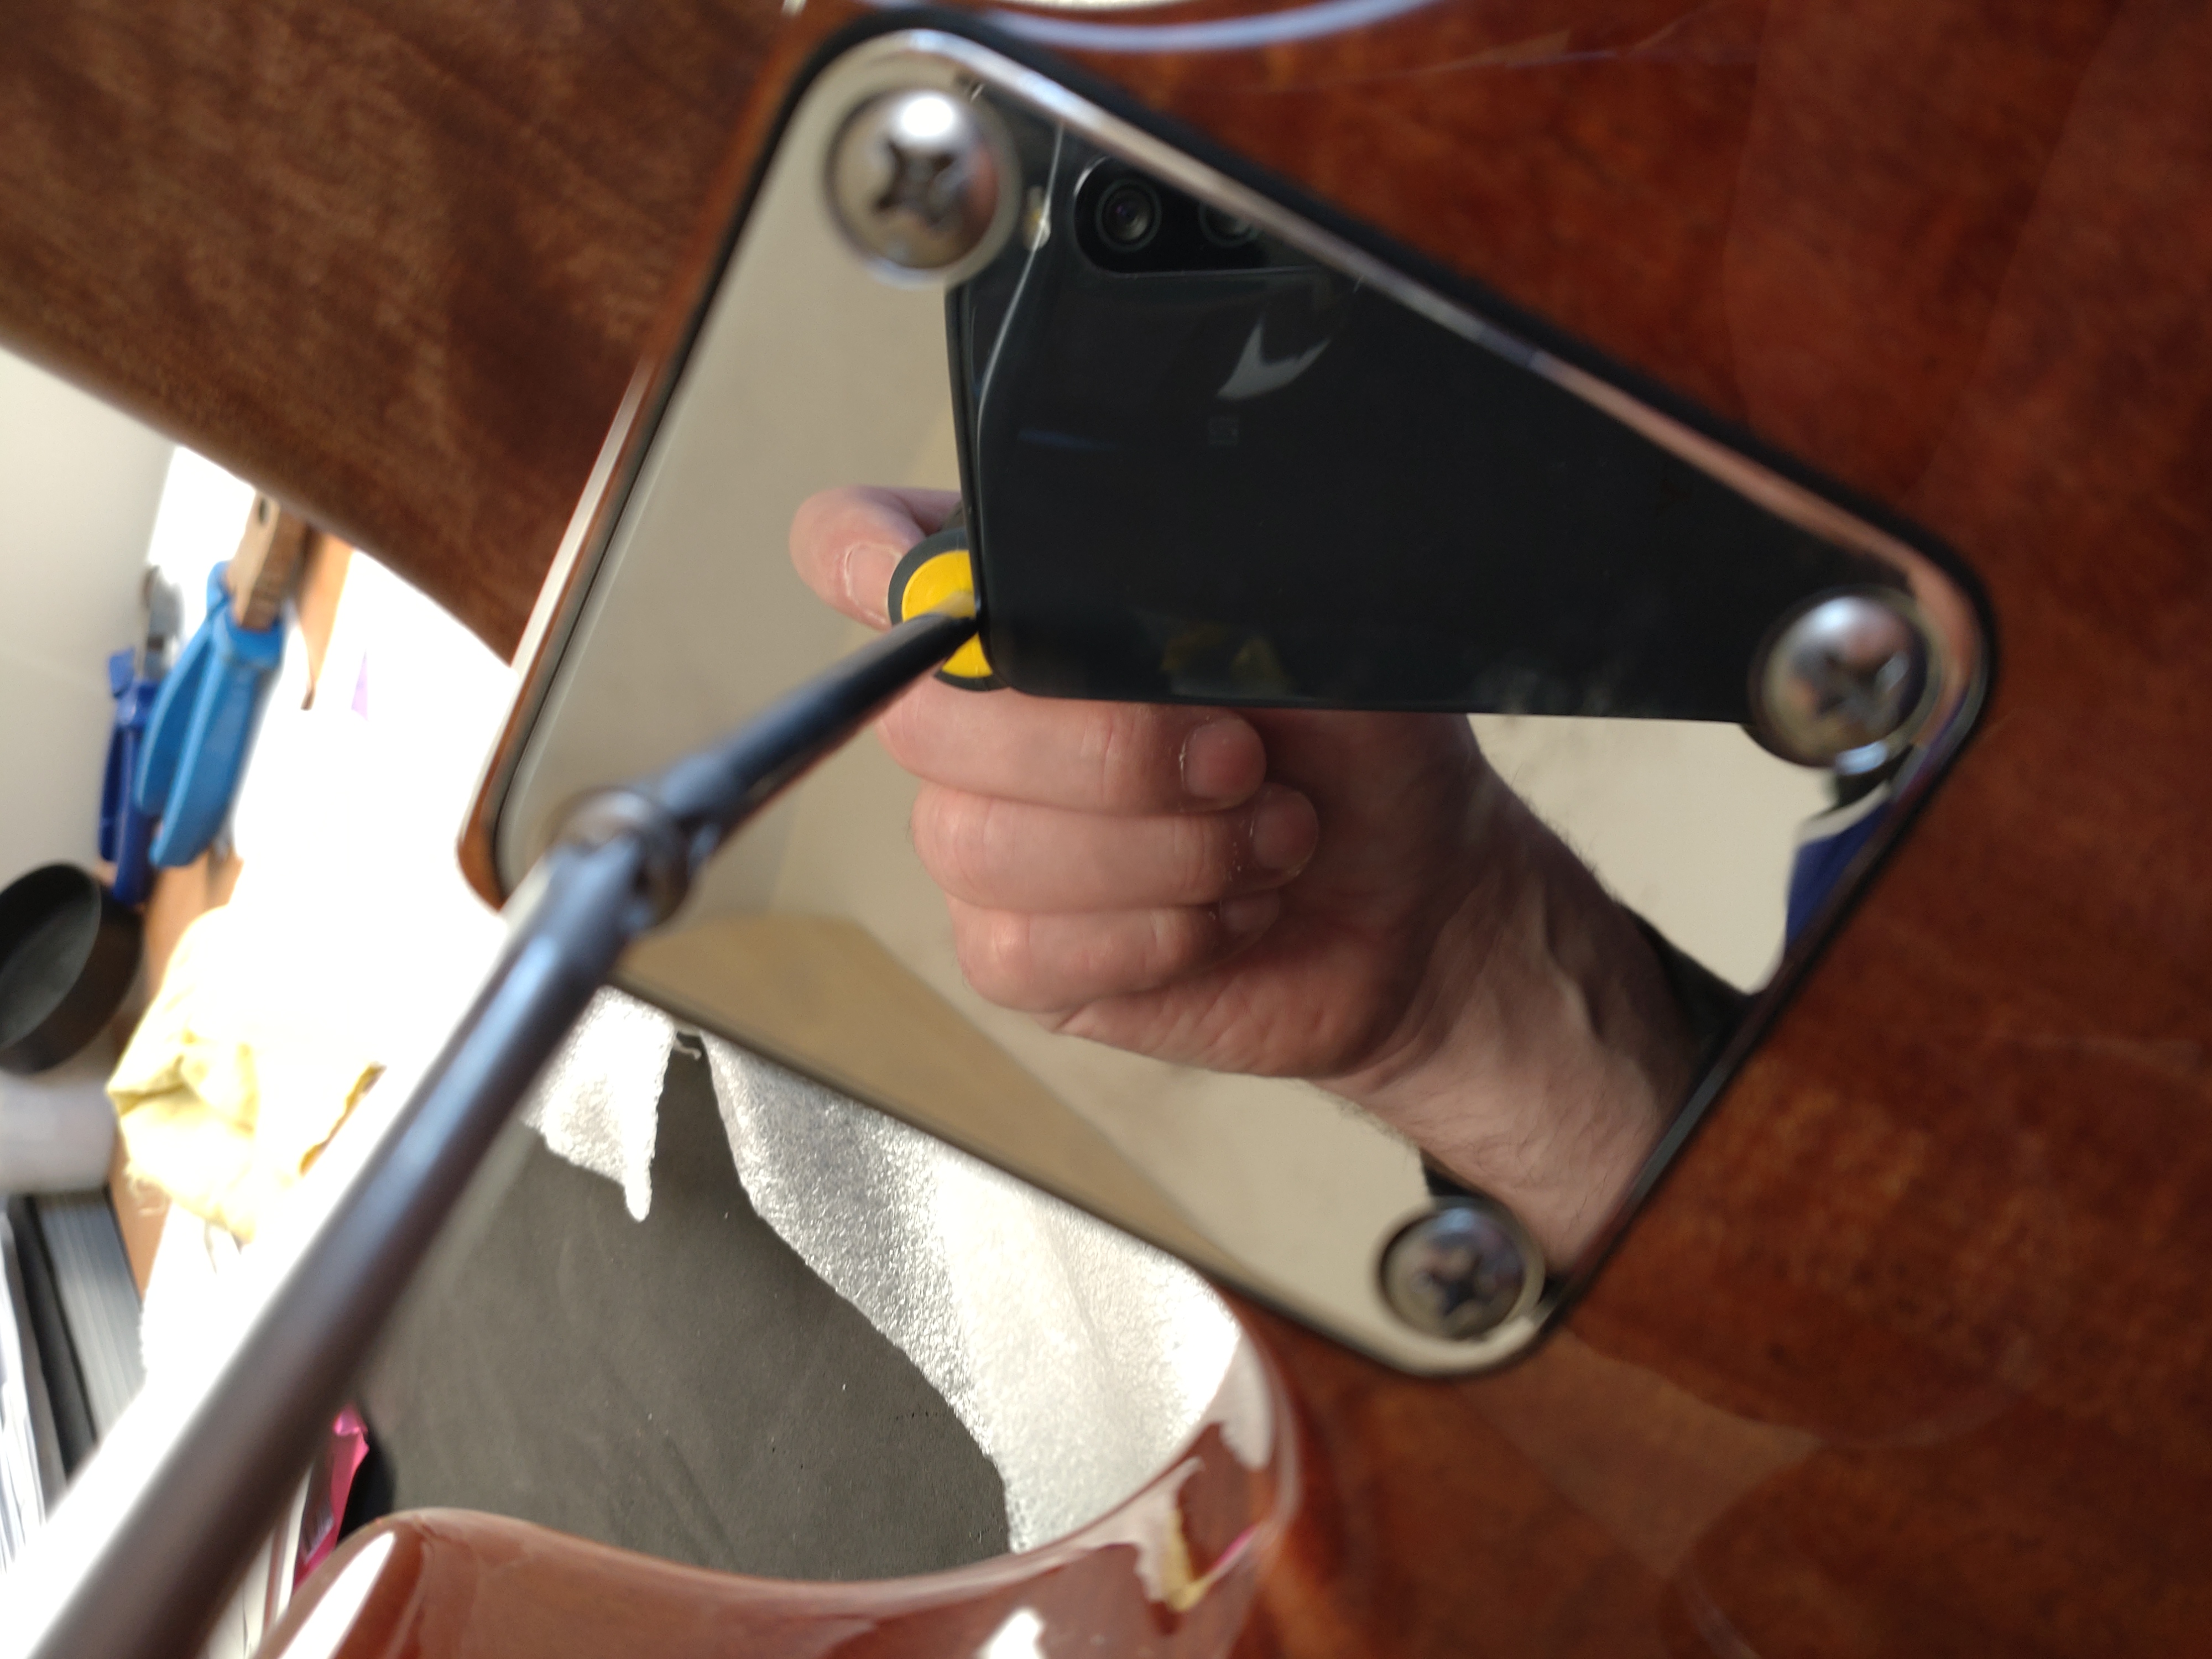
NeckAlignment by stratamania, on Flickr

The alignment is then done. Though it is difficult to show in a photo due to the various angles etc. It doesn't help that neck position Seymour Duncan mini humbuckers have polepieces slightly wider than the string spread but it is what it is...

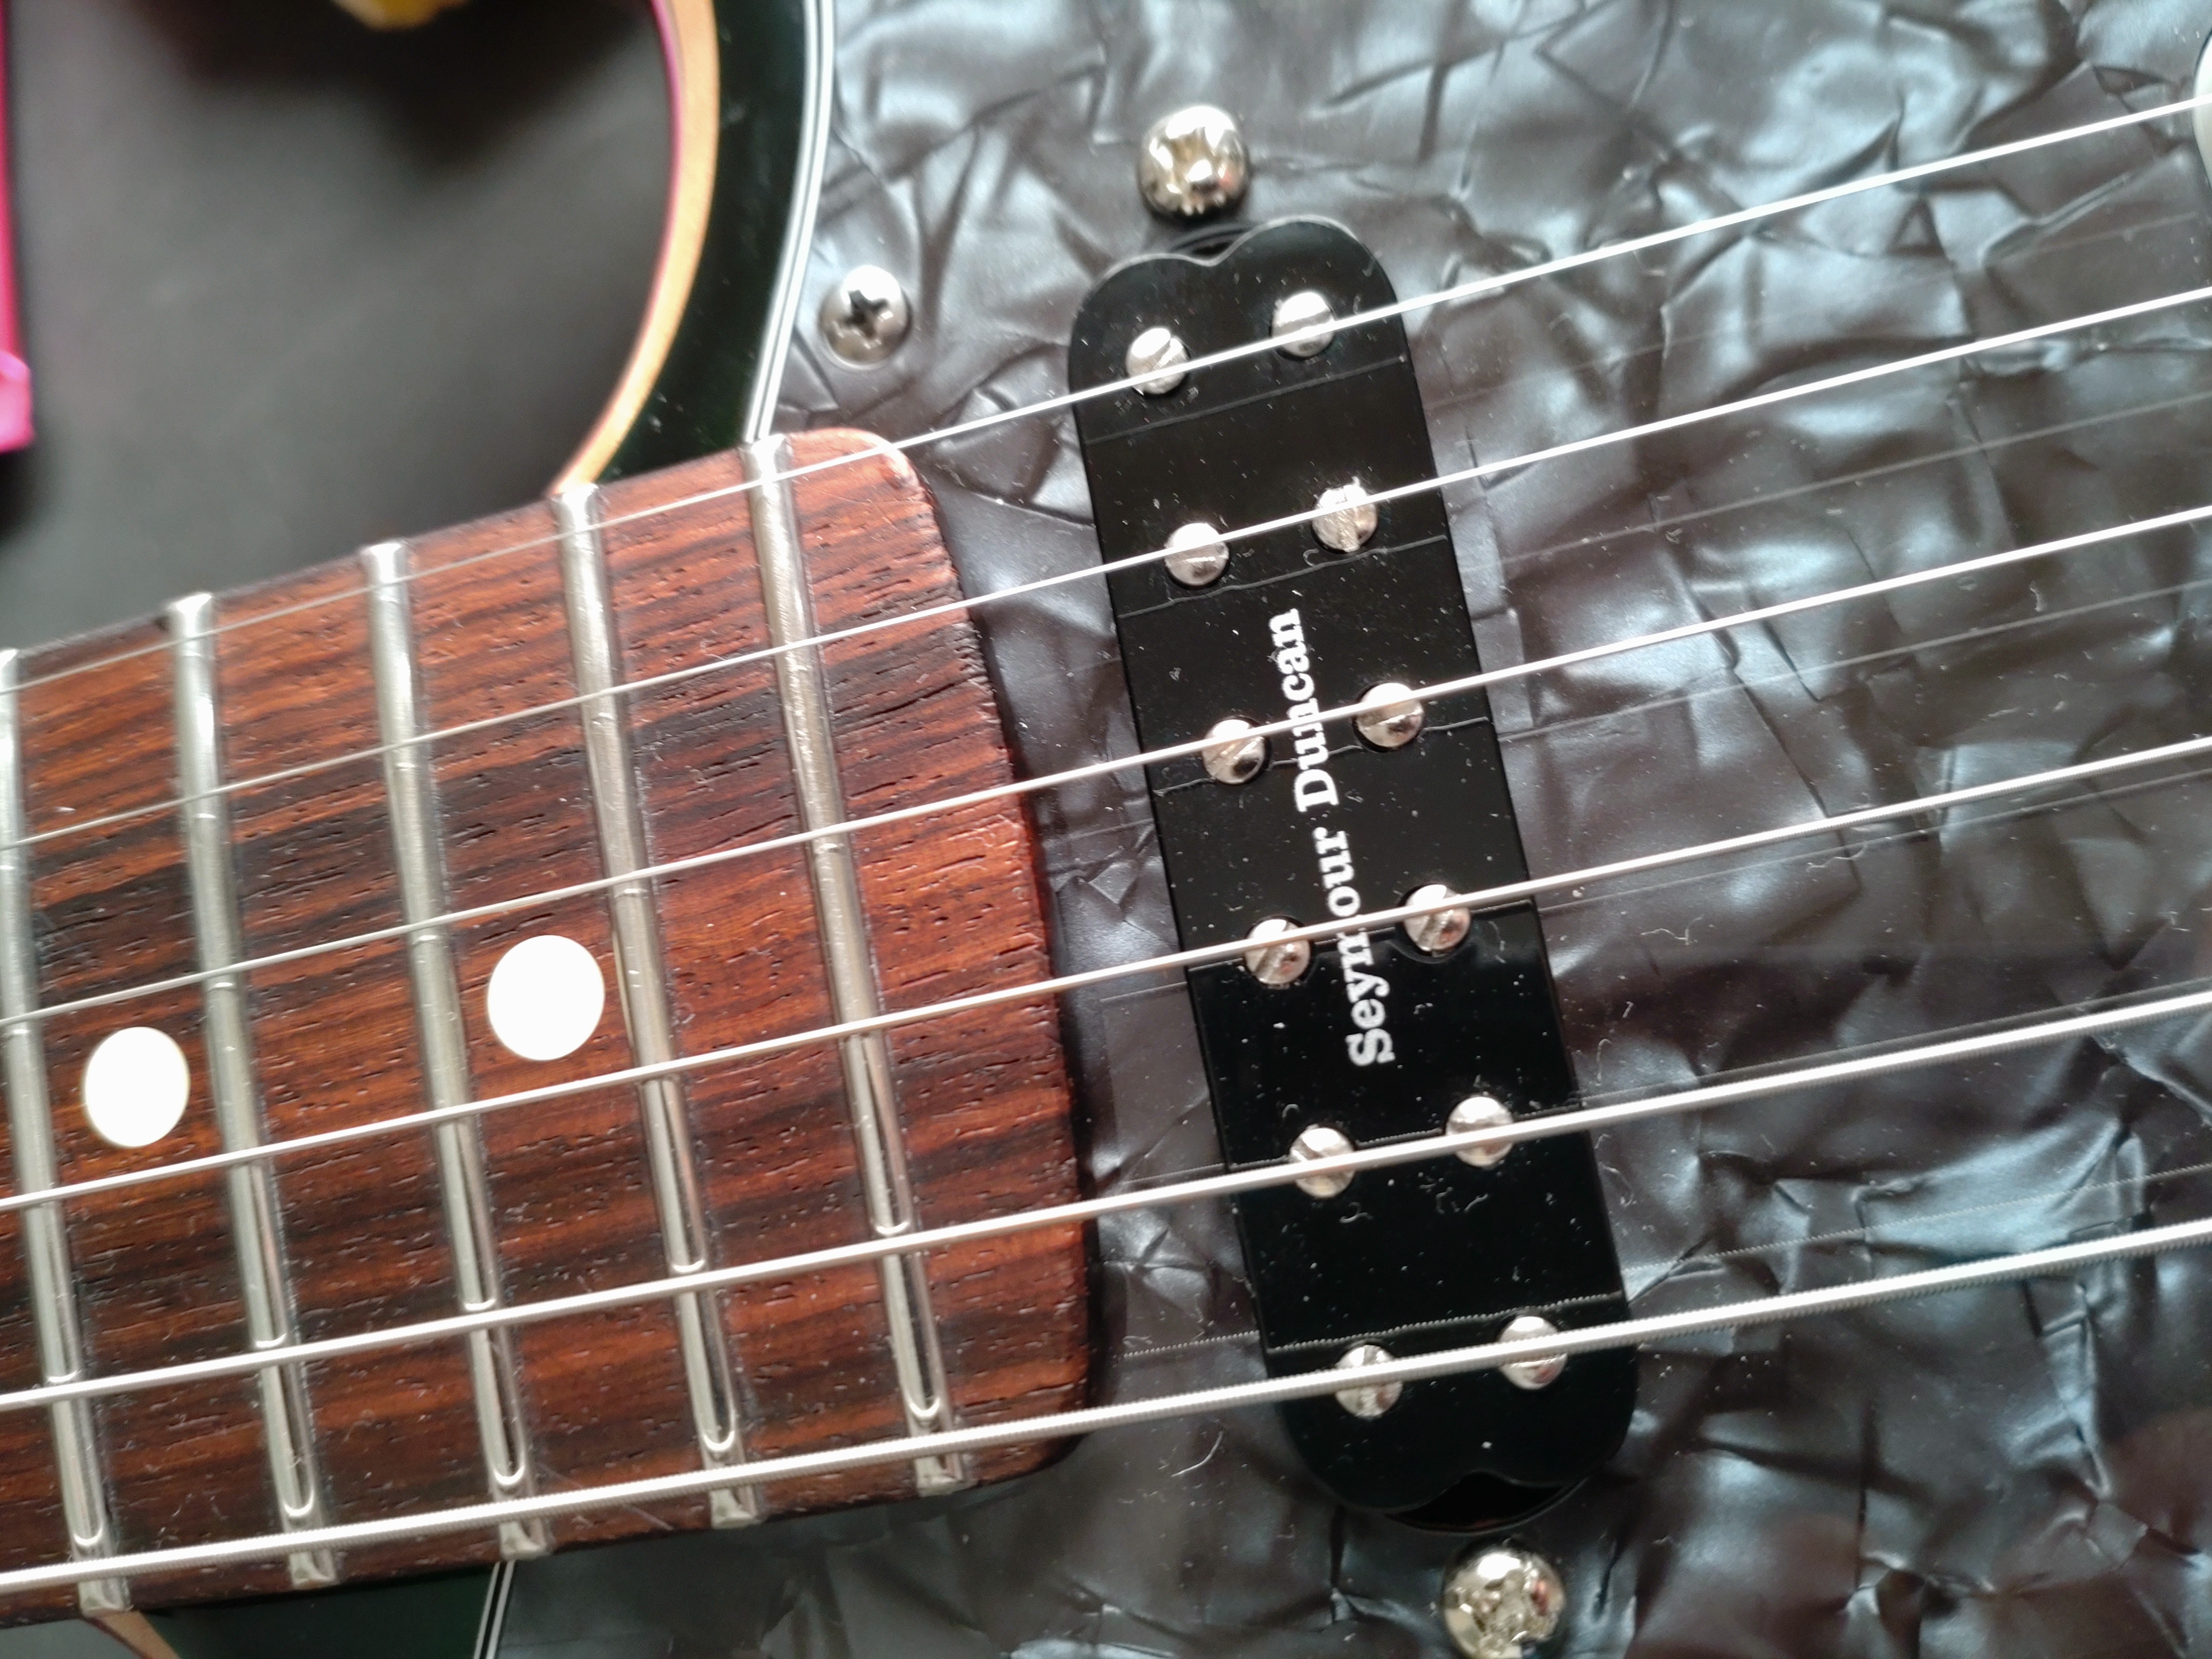
Aligned by stratamania, on Flickr

And that brings us up to date for today. I will probably wait a couple of days to let the guitar settle with the string tension and then do further set up and final bits and pieces of assembly. So stay tuned as they say...
 
PhilHill said:
Great job Sir. Good luck with the final adjustments........... :headbang:

Thanks Phil, appreciate it.

When I get to this stage I often think well we are getting there but also a feeling of now I need a new project :)
 
If you were setting the trem up as dive only, and keeping it 'decked' against the top of the body, would there still be a need to raise the insert posts at all?

Great build.
 
justsomeguy1 said:
If you were setting the trem up as dive only, and keeping it 'decked' against the top of the body, would there still be a need to raise the insert posts at all?

Great build.

Thanks for the feedback.

Per your question. I personally prefer tremolos that float though I understand some prefer dive only. That would depend on the geometry overall of a particular guitar, the type of tremolo, range of available saddle adjustment etc. but it is possible dependent on those types of variables.
 
No pictures today as not much to show but the guitar has been sitting under string tension for about two weeks now. Nothing seems to have moved in terms of the neck etc. which is not unexpected with it being a modern construction which are very stable.

I blocked the bridge so it would stay in its float position, put something under the strings near the nut and loosened the strings so I could remove the nut and do any final adjustments for width prior to gluing in place. I used a couple of very small drops of Titebond* and put the nut in place. I then placed the strings back in position brought them up close to pitch to act as a clamp for the nut and then I will leave it for a day or so before continuing.

* Note: As this is a bone nut I am using Titebond, for other nut materials such as Tusq I am just as likely to use cyanoacrylate (super glue).
 
stratamania said:
.

* Note: As this is a bone nut I am using Titebond, for other nut materials such as Tusq I am just as likely to use cyanoacrylate (super glue).


Why not use CA glue with a bone nut, if you don't mind sharing your wisdom there? 


Thanks
ian
 
Bagman67 said:
stratamania said:
.

* Note: As this is a bone nut I am using Titebond, for other nut materials such as Tusq I am just as likely to use cyanoacrylate (super glue).


Why not use CA glue with a bone nut, if you don't mind sharing your wisdom there? 


Thanks
ian

Sure Ian, superglue could just as easily be used. My reasoning for TiteBond is that bone is a natural substance as is wood and that day TiteBond felt the way to go and it happened to be close to hand. Perhaps hide glue or fish glue might have been a more vintage purist way to do it in some circles.

It is also worth noting of course for the benefit of anyone else who may read this in the future that whatever glue is used only a small couple of drops is needed to hold a nut in place. Remember at some point someone may have to replace it.
 
Final build items...

Using masking tape to mark the lines where the trem cavity edges are to aid in positioning  and aligning the trem cover.

AM-JKLUEuXMwBg-6MAiIhOjjL45ZX1AYvgdwmSu8pJpXOPIitkiM88FFvTBHgUK5PN50rMvMlgOe7VyMzVUrz_Bv6mW12xW0ZGxLv4THo_bE26vGX8tkfoMfiFiBGo3rX6L1DxPG0DtR7UIS2WNiAV_fi3cS=w731-h974-no


After drilling the holes, removing the masking tape and countersinking to avoid finish pops.

AM-JKLVYRGuqbICnKLyIFI0dSfhs-BnCL-LVHUFcQripWK85jaivcSQy13Ehjl2iZg7vJTYMiir8w-kOyq4dPZp1zPCBChV1gi6sGcKtvOm59uc9mqeoeHf5-revj603b4d_nvxqJdo6vCK8-zlDuxUt2w8l=w731-h974-no


And the trem cover fitted...

AM-JKLXsNmcX05VsxBXH0bZUpyVA63FKHynp0j9TzsfL2DEOc3o4_dTSmRcQtLbcVPu97X4rHp4WpZiHhXAHWPDbatbvw8-Zo_TWJc9G7FPm3qzldT__0h67-hfexlANwwfWT1nYuYkh2BZP6qAdzSOfavIA=w731-h974-no


Finally the switch tip and volume and tone knobs fitted.

AM-JKLWTmC1lpQXRSLqeM4PRINtF3PnhGex6yuUmUeTJVj2MG6IYiPv0_BF5iuFQiPqcV5ojZ-dENlK_oYYhbul_0L9gRiQEiEl7DGYizcoa3lc6KEBD46T8hyCzoxjlNJpeRV9TdEa6kTqoxsyyYHjPwkT1=w731-h974-no


And I am calling this build done...thanks for looking etc... :icon_thumright:

I need to get some shots of the now finished guitar which I will post in the gallery in the coming days.
 
Here is a link to the Gallery to view the completed Guitar...


Thanks for looking...
 
Last edited:
That came out very nice. Lotta bling on that one for sure!
 
Awesome build. I think I saw the pics you posted on the Gear Page (or somewhere else) the other day.
 
AleForce1 said:
Awesome build. I think I saw the pics you posted on the Gear Page (or somewhere else) the other day.

Many thanks and yes I posted the same photos to the Gear Page also. It has had excellent feedback on TGP.

PhilHill said:
Outstanding job Sir. My congrat's on it............... :icon_thumright:

Many thanks Phil, appreciated.
 
Back
Top