Leaderboard

Olive Drab Meadowhawk w/Gotoh 510

Scab Pickens

Senior Member
Messages
369
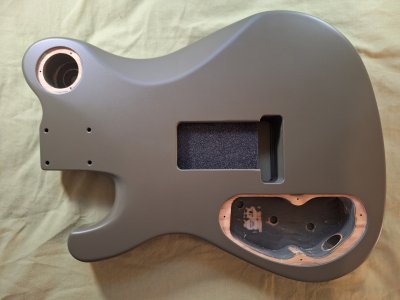
Work has begun on my first tremolo equipped guitar in over 25 years. The last one I owned was an American Standard Strat around maybe 1995. Anyway ...

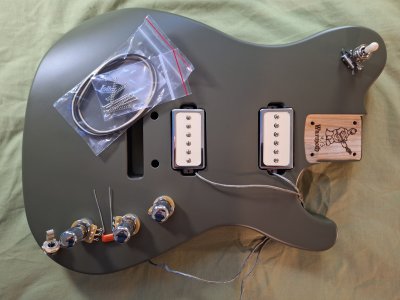
Parts are starting to trickle in. Lollar Novel 90 pickups chrome with cream tops - they look killer! (y)

500k long shaft pots, output jack, black and white wire, .022 cap, and 3-way toggle were also supplied from Lollar.

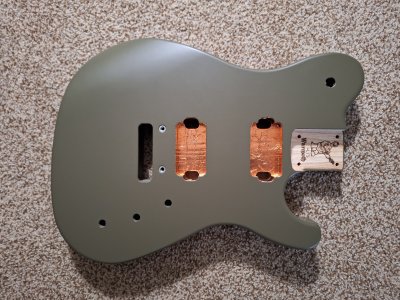
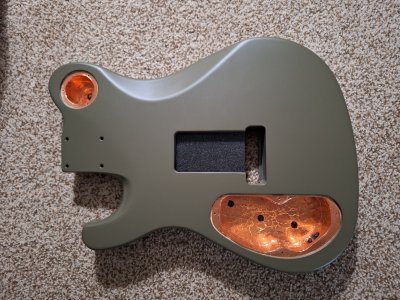
I took some time yesterday to clean up the cover plate mounting surfaces and control routes to prepare for my first copper shielding job. Time will tell how that goes. I figured that it would be worth it, especially with the single coil pickups. And it can't hurt, right?

I double side taped a piece of thin foam from the Lollar packaging in the tremolo cavity to give it a more finished look. Might also act as a spring calming device?

The future will involve, obviously, a Gotoh 510 trem. I'm leaning towards the EV510TS-BS ...


Also, I think I will try some Gotoh locking tuners instead of the Schallers I have used for my last four builds ...


The neck will be a Warmoth Warhead. There are a few subjects currently in the showcase. I want maple shaft, maybe roasted, but definitely a dark board with cream dots.

We'll see how things progress from here ...
1725843226874.jpeg

1725843276211.jpeg
 
This looks like a great build, I’ll be eager to see your progress as it unfolds. I’m not sure the EV510 will fit the trem route for a standard 510. Maybe check that before ordering?
 
I’m not sure the EV510 will fit the trem route for a standard 510. Maybe check that before ordering?

I checked as much as I could. I "think" it should work. Only time will tell :p . I'll probably be making the bridge/tuner (and copper shielding) order later next week.
 
I checked as much as I could. I "think" it should work. Only time will tell :p . I'll probably be making the bridge/tuner (and copper shielding) order later next week.

It should fit but check the dimensions at the link below. Each model has a diagram with measurements so you can compare that model to the one that Warmoth sells, for example.

 
I took another look at the 510 models and I think the concern only applies to a recessed route, as the EV has a larger plate. That probably won’t matter with it mounted above the body, sorry for the false alarm based on my spotty memory.
 
Curious, where did you get the body? Is that the EVH branded body, from Warmoth, other?
 
Also, I think I will try some Gotoh locking tuners instead of the Schallers I have used for my last four builds ...
I have used both Schallers and the Gotoh SDS510 HAPM w/ C.A.R.D.. They’re both fantastic, but the Schaller installation is just such a breeze and I’ve developed a preference for them.
 
Curious, where did you get the body? Is that the EVH branded body, from Warmoth, other?


There was only three, and they went away quickly.
 
A little more progress on this project ...

The copper shielding job is complete. It was an interesting adventure, for sure. I struggled at first but got my technique down better towards the end. Used 12"x10" sheet and 2" tape from Philadelphia Luthier (conductive adhesive).

Also pressed in the bridge studs. This was one of my biggest fears, as I had never done it before. It went amazingly well. Used a 3/16"x1-1/2" dowel pin in a drill press. Straight and smooth! (y)

1727023622203.jpeg
1727024279004.jpeg

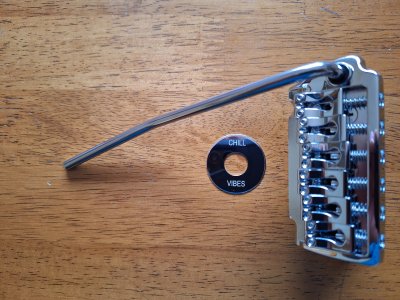
The bridge looks great, as well. Very massive and solid feeling. I decided to go for a little custom "bling" with the toggle switch ring (also from Philadelphia Luthier).

1727024582112.jpeg

Time to start wiring up the toggle switch ...
 
Looking good. Did you make a continuous ground between the various cavities or will you be bridging that another way?
 
Looking good. Did you make a continuous ground between the various cavities or will you be bridging that another way?

It's funny you should bring that up ... I have spent the past two weeks researching everything I can find about shielding and grounding. My head is about to explode! :confused:

I can't find anything exactly replicating this setup. I don't think I need to "connect" the switch cavity grounding to anything else because the toggle is connected to the shielding (tested with a multimeter for continuity between the switch ground lug and the shielding). I plan to run ground connections from each pickup cavity shielding to the main control cavity shielding. Then I add to the mix single conductor braided pickup wires, which I plan on shrink wrapping to keep away from touching the shielding on their way to the main cavity. From there, it's a (somewhat internet educated) guessing game! :ROFLMAO:

The one thing I see in forums I disagree with is the need to avoid ground loops in guitar circuits. Some people paint the channels or put conductive shielding in the holes between cavities and test with a multimeter so that the shielding only requires a single connection soldered to the back of the pot. The biggest benefit is that any unshielded area can act as an antenna, but to your point - shielded wiring exists for a reason!
 
Looking good so far!

Pro tip: be sure to get a switchcraft 3-way switch with the "recess" nut, and use it. It will make the build look much more "pro". One of my pet peeves is 3-ways that stand too proud off the body.
 
Looking good so far!

Pro tip: be sure to get a switchcraft 3-way switch with the "recess" nut, and use it. It will make the build look much more "pro". One of my pet peeves is 3-ways that stand too proud off the body.
Interesting, can you show pics to demonstrate what you're talking about? I'm always on the lookout for a new detail to obsess over, and sadly I'm not kidding.
 
Interesting, can you show pics to demonstrate what you're talking about? I'm always on the lookout for a new detail to obsess over, and sadly I'm not kidding.

As luck would have it, I am at this very moment in the middle of shooting a video called "Top 5 Small Things That Make Your Build Look Pro", and this is one of them.

I'll try and take some pics and post them here. The vid probably won't hit for a few weeks yet....

However, I know that I did cover this as an aside in some previous video.....but I can't remember which one. One of the "Black Gold" videos, I think.
 
Looking good so far!

Thanks! :)

Pro tip: be sure to get a switchcraft 3-way switch with the "recess" nut, and use it. It will make the build look much more "pro". One of my pet peeves is 3-ways that stand too proud off the body.

The switch didn't come with the recessed nut. But ... I just made a StewMac order for a few things and added three of them to the cart. I used the recessed nut on my Diamondback and agree that it allows for a "less erect" look (o_O).

1727150442472.jpeg
 
As luck would have it, I am at this very moment in the middle of shooting a video called "Top 5 Small Things That Make Your Build Look Pro", and this is one of them.

I'll try and take some pics and post them here. The vid probably won't hit for a few weeks yet....

However, I know that I did cover this as an aside in some previous video.....but I can't remember which one. One of the "Black Gold" videos, I think.
Excellent, looking forward to it!
 
Back
Top