Leaderboard

New tele build

JD0x0

Junior Member
Messages
82
:occasion14:

New build in the works. First thinline tele since my first guitar ever. I'm building this one into a real high performance tele.

So far, I've got a boatneck contour 10-16'' Quartersawn Bloodwood/Bloodwood, earvana nut, SS 6105 frets. Padouk on Mahogany thinline, contoured heel.

Likely going to try a Babicz full contact tele bridge, with Wilde Alnico Microcoils. 5 way superswitch, with series/parallel/HOoP and a 9 way tone switching system using 2, 3 way toggles, to get 9 different levels of capacitance for the tone control. 680pf 1.8nf, 2.7nf, 3.6nf, 4.5nf, 5.6nf, 6.3nf, 7.6nF, 9.2nf


This will also be the first body I'm finishing myself. Likely going to use something that'll rub on and keep most of the natural color of the wood.
 
Sounds cool, I'll look forward to seeing your progress! I'm interested to see how that capacitance circuit comes together and how it works for you in the finished product.
 
Verne Bunsen said:
Sounds cool, I'll look forward to seeing your progress! I'm interested to see how that capacitance circuit comes together and how it works for you in the finished product.
Thanks, I've had similar, though simpler, filters on other guitars with lower inductance pickups, and have found the results to be pretty good. I think having the selectable capacitances will help even more, as on my other guitars, I use one cap, and have to make a compromise to get the resonant frequencies of the neck, bridge and middle positions into usable spots.

This will be wired on a 'no load' tone pot with a 680pF always in the circuit, to ground. The two on-on-on switches will be wired in parallel, with the 680pF cap to ground, so each switch will have two different cap values and one position which adds no capacitance. I was originally thinking a rotary switch, but this setup will get me more variances in capacitance, with a relatively simple setup, and I'm also thinking the toggles will be a bit more ergonomic than a clunky rotary selector.
 
Very interesting, thanks for the detailed response. So kind of a Varitone without the inductor, but with the added benefit of being able to dial it in with the pot? I'm intrigued, I'd love to hear some samples of what that actualy sounds like in application.
 
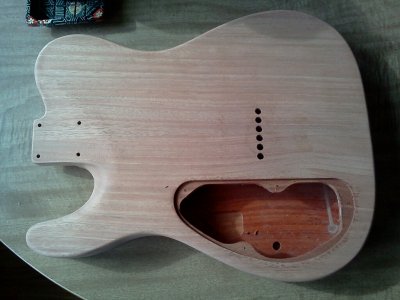
Seconds after grain filling.. How'd I do? This is my first ever body I'm finishing..
 

Attachments

  • IMG098.jpg
    IMG098.jpg
    260.8 KB · Views: 48
looks good, but you really can't tell from a picture. If that's Ash or Mahogany, don't be afraid to hit it twice. It'll almost certainly need it.
 
Thanks. It's mahogany. How would I know if I need to fill again? If I run my fingers over the 'pores' it feels pretty smooth, even if I go opposite or diagonal to the grain. I worked the filler in pretty good and used 400 grit paper to wet sand when applying the filler with the grain.

I'm still unsure what to do with the Padauk top. Filling the pores is probably not too critical, as I am not going for I high gloss finish in the end, but I dont want it to look crappy. I read on reddit one user suggesting wet sanding with Danish oil
 
I don't know. You could wipe it down with naphtha and look at it in an oblique light to see what the reflection looks like. When it comes to those two woods, I just always assume the worst because when I don't, I'm disappointed. One more pass with the filler isn't going to hurt anything, while simply hoping for the best could result in a less-than-satisfying result.

Finishing is slow work that requires a lotta patience. It's alway a LOT faster/easier/better to make sure something is right now  than to fix it after the fact.

Also, 400 grit is getting a bit fine for a base sanding. You wanna leave it just a little rough so whatever finish you apply can get a grip. I usually go with 320, but most tutorials will have you using something in the mid 200s. Just be careful with the lower grits as they can cut pretty fast. It's easy to put waves in the surface that won't show up until you buff it out in the end when it's too late to do anything about it. You are  using a sanding block, right?
 
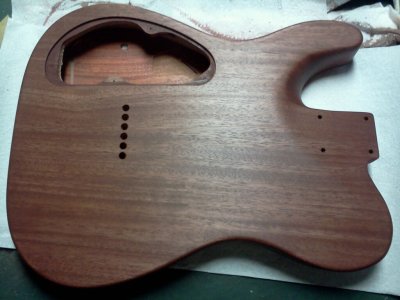
Sedona red stain. My decade old cell camera makes it look more brown than it is..

I've decided to attempt 'tung oil' wet sand for the remainder of the grain filling followed by lacquer
 

Attachments

  • IMG099.jpg
    IMG099.jpg
    246.4 KB · Views: 29
Cagey said:
Finishing is slow work that requires a lotta patience. It's alway a LOT faster/easier/better to make sure something is right now  than to fix it after the fact.

One of my old bosses would always tell me, "There's never enough time to do the job right, but there's always enough time to do the job over."  Kinda stuck with me through the years...
Good luck & be sure to post some pics!
 
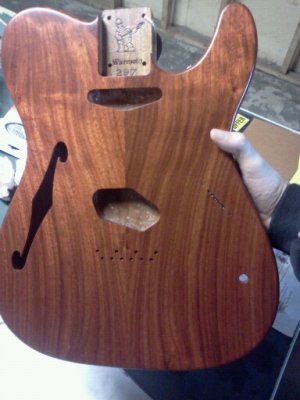
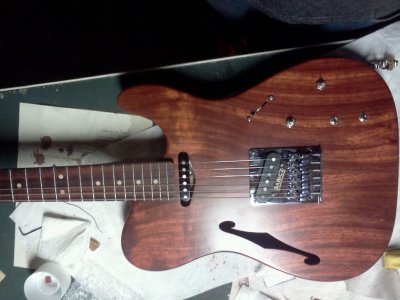
Finished finishing. Now, on to more fun things...
 

Attachments

  • IMG104.jpg
    IMG104.jpg
    73.9 KB · Views: 34
Back
Top