New Amp Day - Kinda

mayfly

Epic Member
Messages
8,734
Gentlemen,

For my upcoming birthday, I decided that I should give myself a present.  I decided that this should be a little guitar amp that I could use on the front porch just to practice stuff.  Nothing fancy, just amplify the signal with good tone.

For those who know me, you'll know this is a bit of a departure as I sold all my amps several years ago when I got into the AxeFX thing.  For those who really know me, you'll know that before that I had a tube guitar amplifier business in which I marketed and sold amps that I designed and built from scratch.
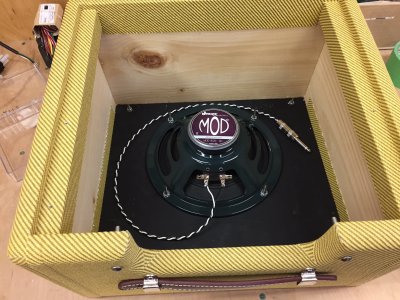
So I decided to build my own.  :)  Now, I know how much effort it is to design an amp from scratch, and I didn't want to do that.  I also didn't want to be bothered collecting together all the parts.  So my options now were kits - but which kit?  I didn't want a weber kit, as I didn't want to replace half the parts, I didn't want anyone who used a fish paper eyelette board (I'll reserve my rant against vintage fenders with fish paper boards and how the humidity absorbed into these things starts to conduct over the decades causing all kinds of issues with your vintage fender).  I also didn't want a marshall type: too big, even the 18 watters.  So this left me with the TubeDepot.  Specifically the 'fender champ' kit.

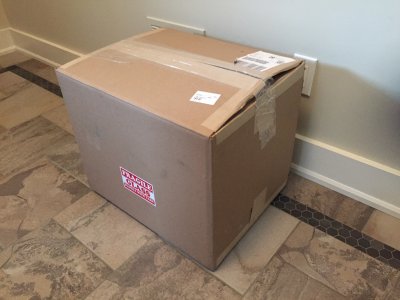
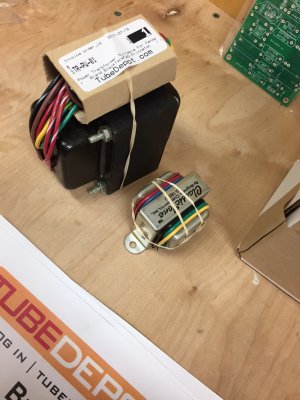
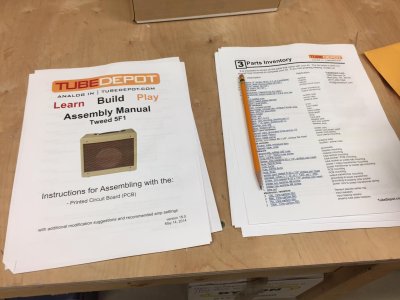
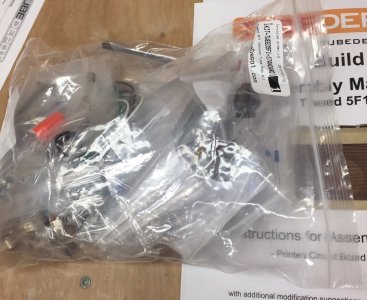
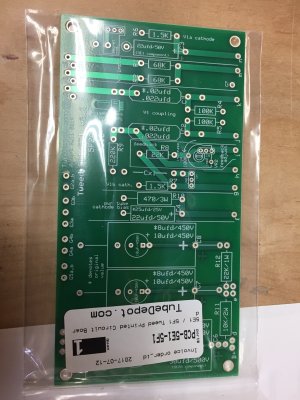
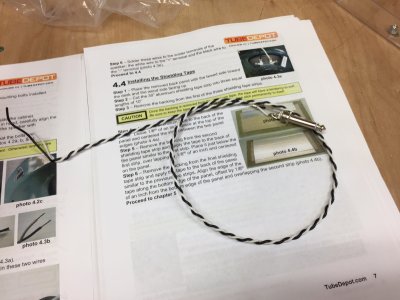
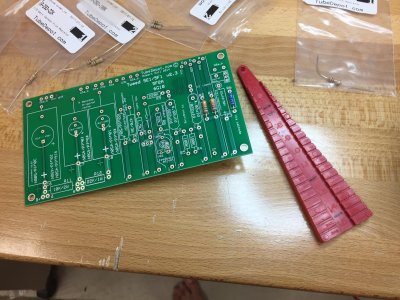
The shipment just arrived:  It's a pretty big box for a champ! 

index.php
 

Attachments

  • IMG_3990.JPG
    IMG_3990.JPG
    614.4 KB · Views: 425
Well, open that sucker up. We're seriously ready to follow this. Well, at least I am. :icon_biggrin:
 
ok gentlemen,

Here's the stuff in the kit!  From the Jensen speaker to the JJ tubes it looks like a pretty good selection.  BTW, the 6V6 looks huge because my helper was holding it.  I need to trim the nails on that boy!

index.php


index.php


index.php


index.php
 

Attachments

  • IMG_3997.JPG
    IMG_3997.JPG
    791 KB · Views: 386
  • IMG_3993.JPG
    IMG_3993.JPG
    488.7 KB · Views: 383
  • IMG_3996.JPG
    IMG_3996.JPG
    562.5 KB · Views: 373
  • IMG_3999.JPG
    IMG_3999.JPG
    625 KB · Views: 384
And now the real reason why I chose the TubeDepot:  The attention to detail.  The TubeDepot guys have more of a 'hifi' bent to them that the other do-it-yourself tube kit shops.  As a result they are obsessive about the quality of the kits.  They want these things to turn out well for the builder.  Here's some examples

First, there are the instructions.  They are extremely detailed step by step directions, laid out 'Heathkit' style.  The instructions are very detailed with safety warnings, tips, and all kinds of stuff in there.  It's about 50 pages long, double sided.  As a bonus, the kit was provided with the instructions PRINTED OUT!!  Yep, no note saying 'please download the instructions from page x of site y'.  Contrast this to, say, Weber.

index.php


Then there are the parts.  Each and every part was in it's own container and labeled.  Attention to detail like this is great and hopefully speeds up the build process.

index.php
 

Attachments

  • IMG_3998.JPG
    IMG_3998.JPG
    179.8 KB · Views: 392
  • IMG_4003.JPG
    IMG_4003.JPG
    390.9 KB · Views: 391
And here's the reason why I bought this kit:  It uses a PCB instead of a fishpaper eyelet board:

index.php


A lot of tube amp guys don't like PCBs because it's not the way things were done originally.  I personally don't have an issue with them.  If they are done right, IMHO they are superior.  This one appears to be done right:  It's a double sided board with a couple of different ground plains, it uses through plated holes, and the copper looks heavy.  Also they didn't do stupid stuff like try to mount a tube socket directly to the board.  I think that this is one of the biggest failing points of modern mass-production tube amps:  a tube socket with it's only mechanical mounting being its leads to the PCB.  This is a bad idea.  The socket will get rocked back and forth when tubes are installed/changed, and they are also suspect to vibration.  A PCB solder joint is not set up to take that kind of physical strain and the solder will crack with time, causing an intermittent connection.  I don't like this.

Fortunately the tube depot guys avoided this completely with this PCB.  It's a win in my book and vastly superior to a fish-paper eyelet board.
 

Attachments

  • IMG_4001.JPG
    IMG_4001.JPG
    696 KB · Views: 402
That's a good-looking board.

Something I haven't seen for a long time, and maybe this is just me being out of touch with modern PC Board construction, but there used to be a lot more copper left on the board. Rather than etch everything away that's not absolutely necessary, they just etched enough away to separate the circuit runs. Where possible, large plated areas were connected to ground to perform as rudimentary shielding, but if they couldn't be, they were still left large because why not? Saves on ferric chloride.
 
That's a good looking kit for sure. I have watched some of Tube Depot's videos but its good to see this being reviewed and built on the forum as it were.
 
The difference is these days folks use PCB Cad tools to design the boards.  This means that you concentrate on putting traces down rather than removing copper.
 
Thanks for the pics. That looks like a fun project. Look what you have when you're done, too. Nice.
 
Started in on this amp.  The instructions indicated to wire up the speaker and install it into the cab.  This involved twisting together two 18 gauge wires after soldering them to the speakers, and after that soldering the wires to the jack.  I decided to do it differently:  I soldered and crimped them to the phone jack, then used a drill with the phone jack in the chuck to twist the wires together.  Then I soldered the wires to the speaker.  Worked out great!

index.php


index.php


index.php


oh yea - the cabinet appears to be made out of solid pine.  Tweed is straight with no loose bits or bumps or anything strange.  A better job than I could do!
 

Attachments

  • IMG_4009.JPG
    IMG_4009.JPG
    782.3 KB · Views: 336
  • IMG_4008.JPG
    IMG_4008.JPG
    501.7 KB · Views: 353
  • IMG_4007.JPG
    IMG_4007.JPG
    691 KB · Views: 350
Now the PCB.  I've got everything I need:  a box of parts, strippers, cutters, solder sucker, solder, instructions, and the iron (off screen, but you can see the plug...)

index.php


The best tools for any kind of board construction are these lead forming jigs.  They are essential for forming the component leads so they fit flush to the boards.  Makes for a nice look as well.  Check out the individually bagged and labeled components.  I tested each resistor as I installed it;  I know from experience that in these small shops mistakes are easy to make.  I didn't find any wrong components though - full marks for the level of detail and quality from the Tube Depot!

index.php


Components are on.  For these boards with through-plated holes you need to make sure that the solder wicks into the hole at least 70%.  I usually shoot for a little coming out the top side.  You've got good 'penetration' (as the welding guys say  :))

index.php


The instructions said to attach the leads and trim each to a specific length.  Back in the Mayfly days I had a jig just for this sort of thing.  For this amp I whipped one up using cardboard  :).  The lines show the lengths to trim the leads.

index.php


Leads attached.

index.php


Attachments

  • IMG_4011.JPG
    IMG_4011.JPG
    279.5 KB · Views: 327
  • IMG_4012.JPG
    IMG_4012.JPG
    314.2 KB · Views: 310
  • IMG_4013.JPG
    IMG_4013.JPG
    273 KB · Views: 321
  • IMG_4015.JPG
    IMG_4015.JPG
    686.3 KB · Views: 305
  • IMG_4016.JPG
    IMG_4016.JPG
    632.6 KB · Views: 302
:icon_thumright: Looks good. It reminds me of building radio gear for my airplane. Fun projects.
 
Mayfly said:
The best tools for any kind of board construction are these lead forming jigs.  They are essential for forming the component leads so they fit flush to the boards.  Makes for a nice look as well.  Check out the individually bagged and labeled components.  I tested each resistor as I installed it;  I know from experience that in these small shops mistakes are easy to make.  I didn't find any wrong components though - full marks for the level of detail and quality from the Tube Depot!

index.php

How did I not know these existed!?!? 10000 youtube videos of instructions and no one mentioned this! Did you violate the oath of the guild to mention these?
 
Are you talking about TubeDepot kits or his lead-bending jig? If it's the kit, I don't know how you could have missed hearing about them. If it's the bender, I'm not surprised. Unless you've been around for quite a while and have had some exposure to production electronics shops, you'd never see such a thing. Since most electronic production has been happening in the backwaters of 3rd world countries for the last 20-30 years...

Plus, he's in Canada, where all the best benders come from. There's fretwire benders, lead benders, string benders, B-benders... not to mention snot-slingin' drunken booze benders - they have the best titty bars in the world there :laughing7:
 
Back
Top