

Hey all So I'm gonna give a detailed description of my build this far... with photos
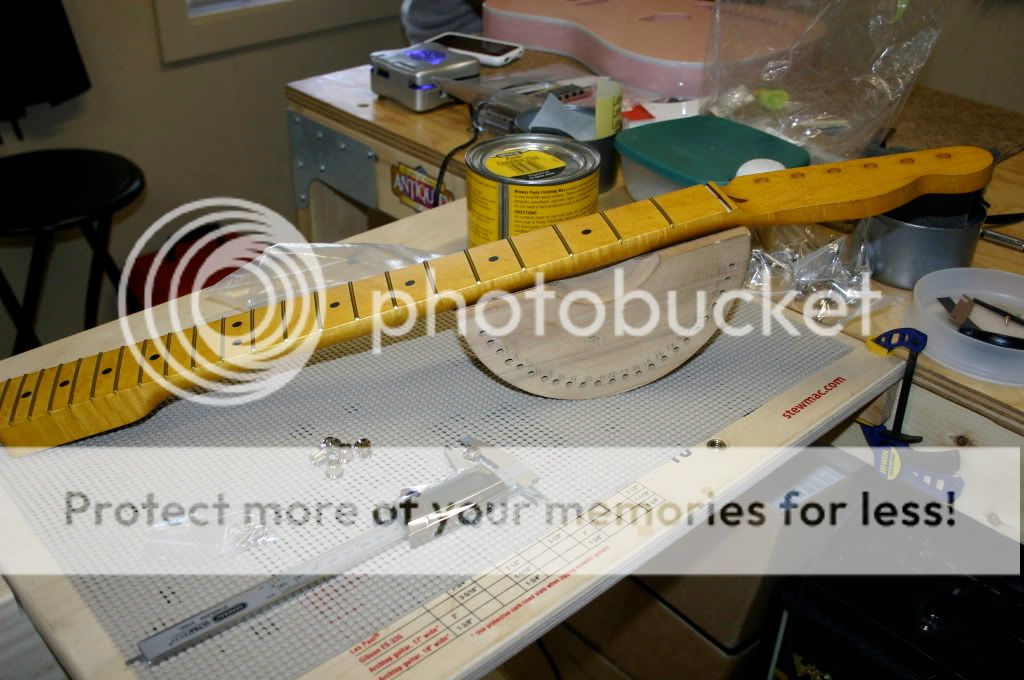
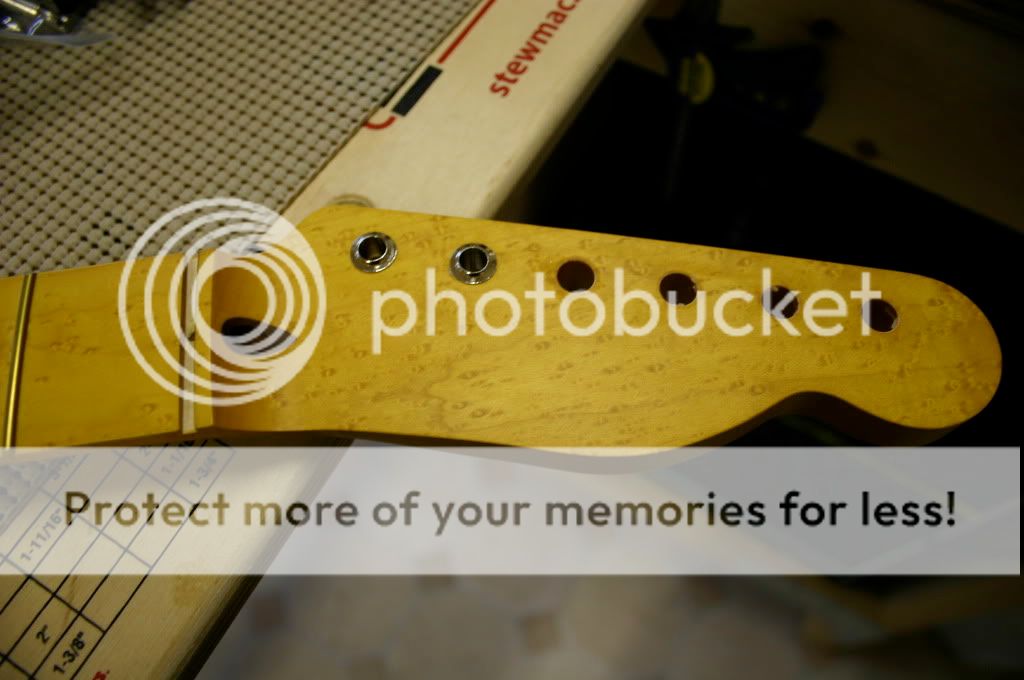
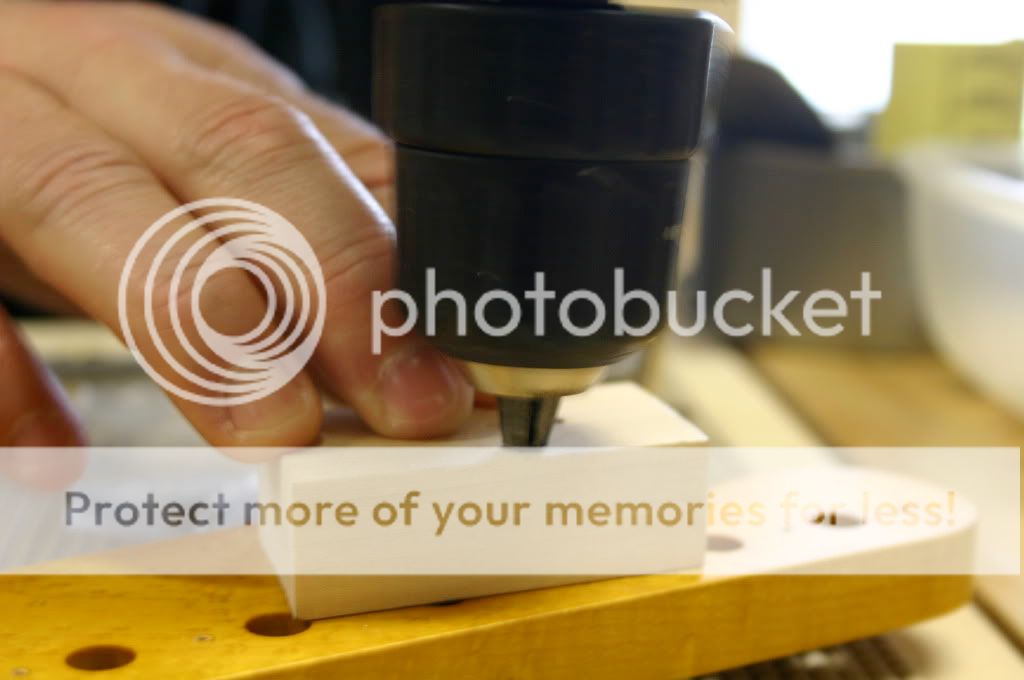
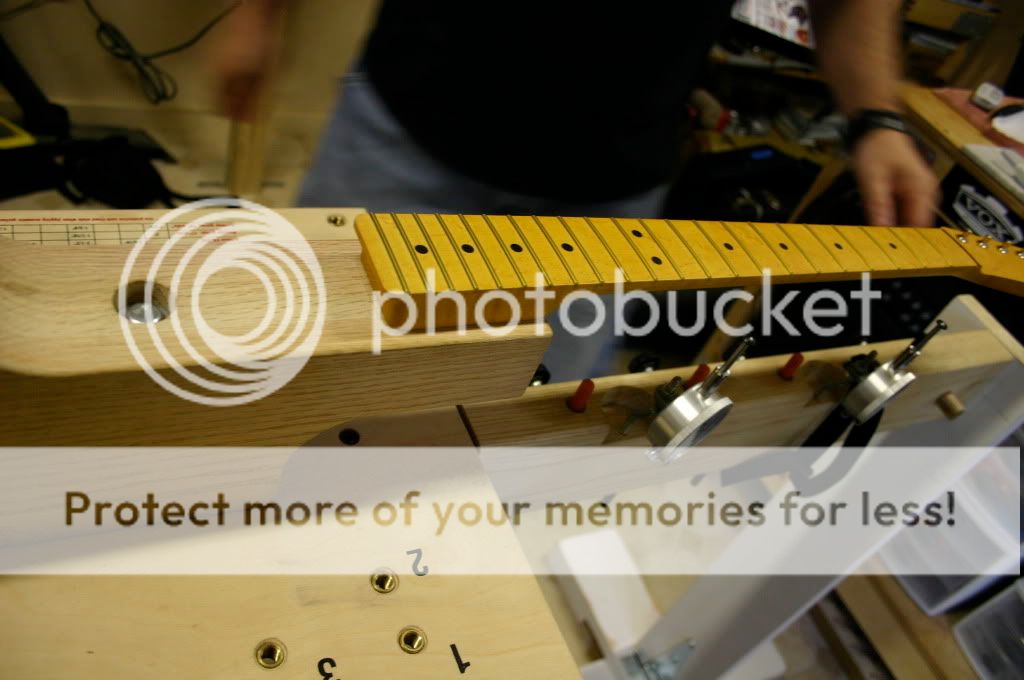
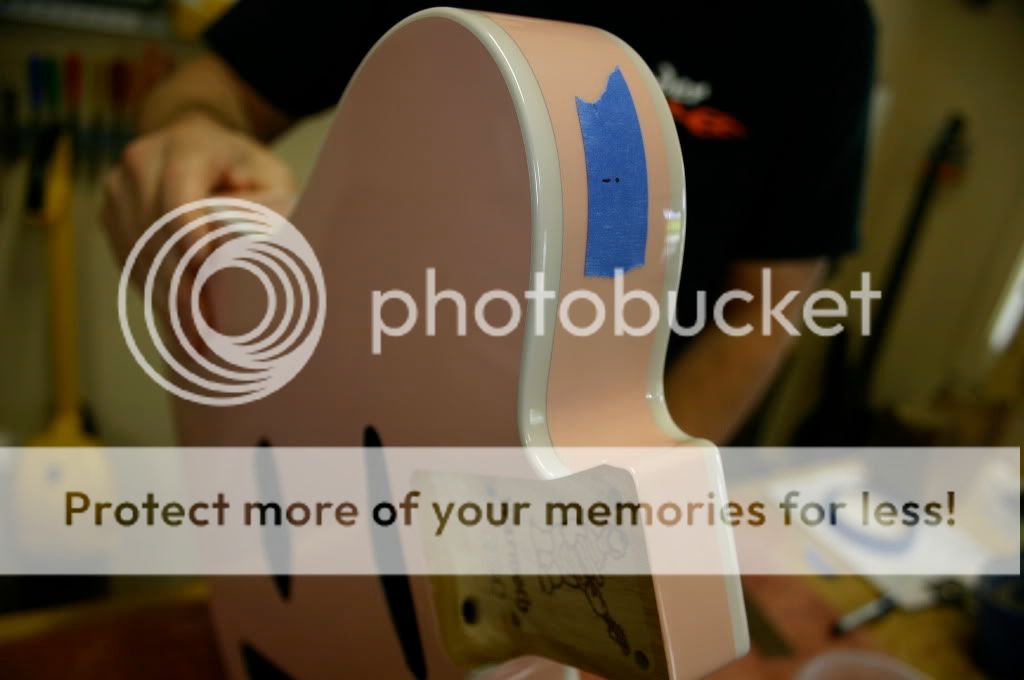
This is the neck before I started any work on it. The first step this day was putting in the vintage style gotoh tuners!
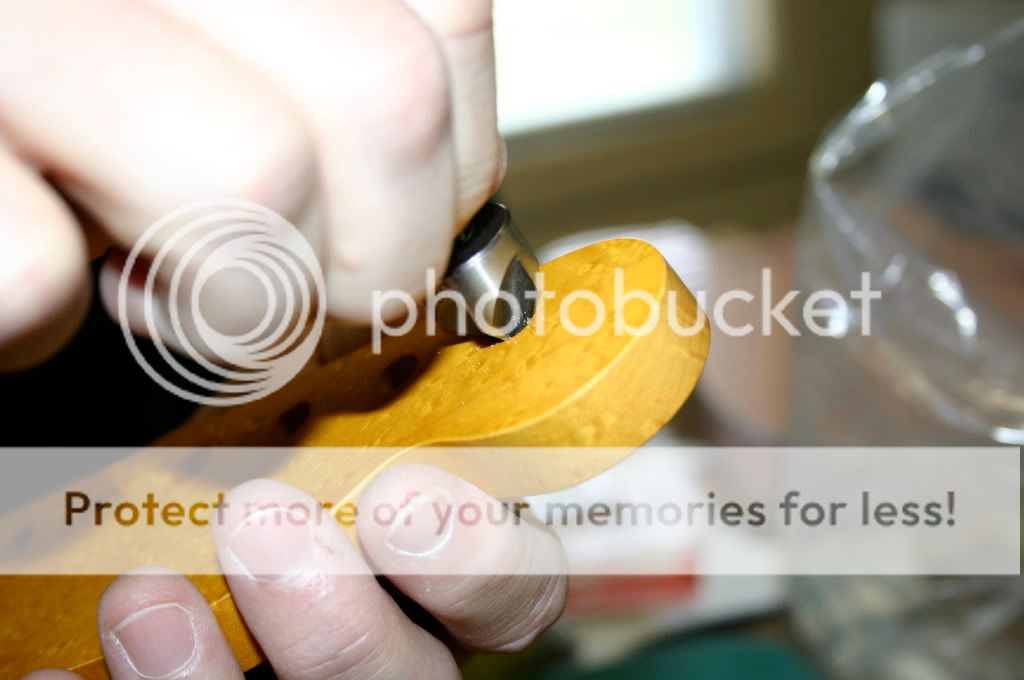
Before we could start installing the tuners we needed to clean out the extra finish from the hole. We took alot off steps that sometimes seemed pointless, but I really wanted to take my time and do everything "Right" So we are using a countersink bit to break up the laquer on the top of the hole so that when we used a drill bit we would not crack any finish. This step also helps in keeping the bushings where we wanted them before we clamped them in.
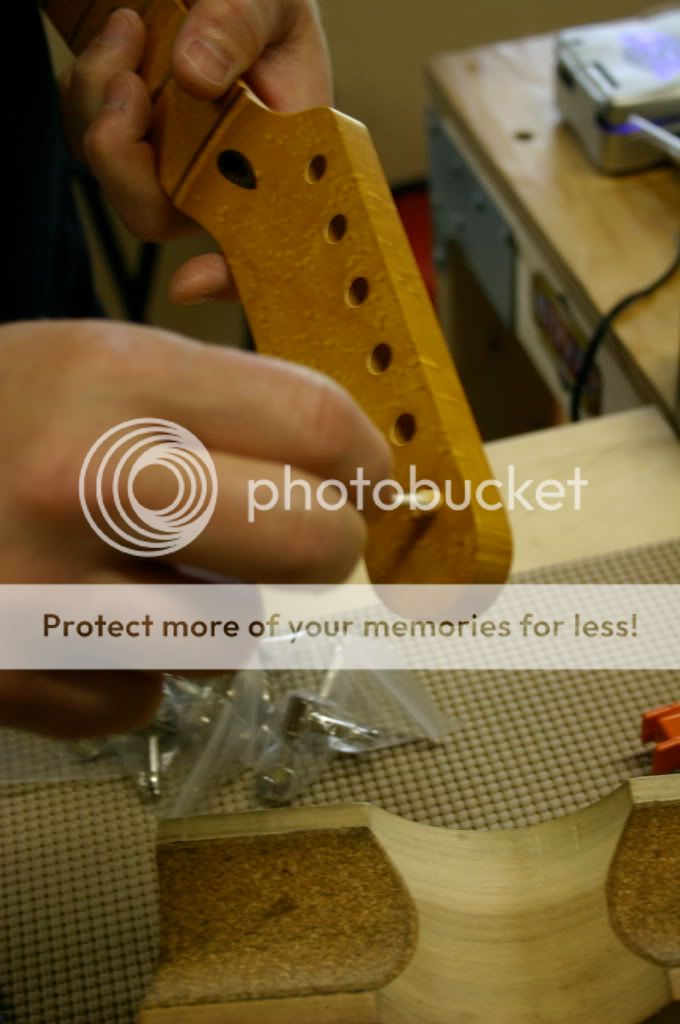
This is how the holes should look after your done... notice the slight ring around the the top. there is a missing photo graph of us using a slightly-smaller-than-the-hole drill bit. DO THIS STEP BY HAND DO NOT USE A POWER TOOL...these should be be slight movements with little delicate pressure. (you dont want to make the hole bigger ...you just want to make it clean of any finish. We used this process on the body when it came time to drill othher holes.

we then waxed up the holes using this stuff

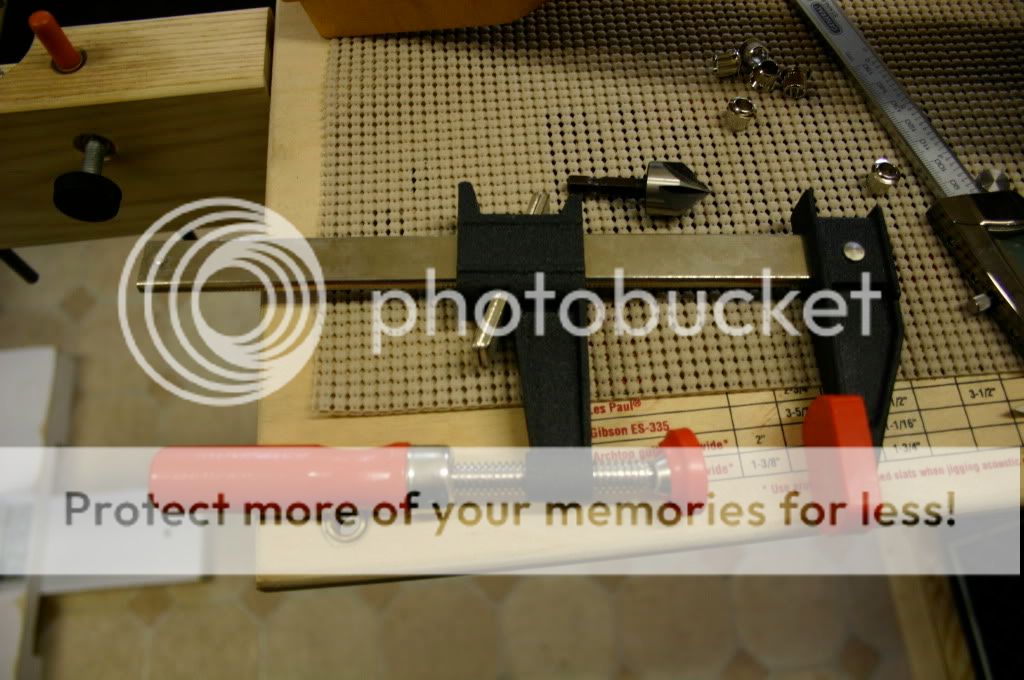
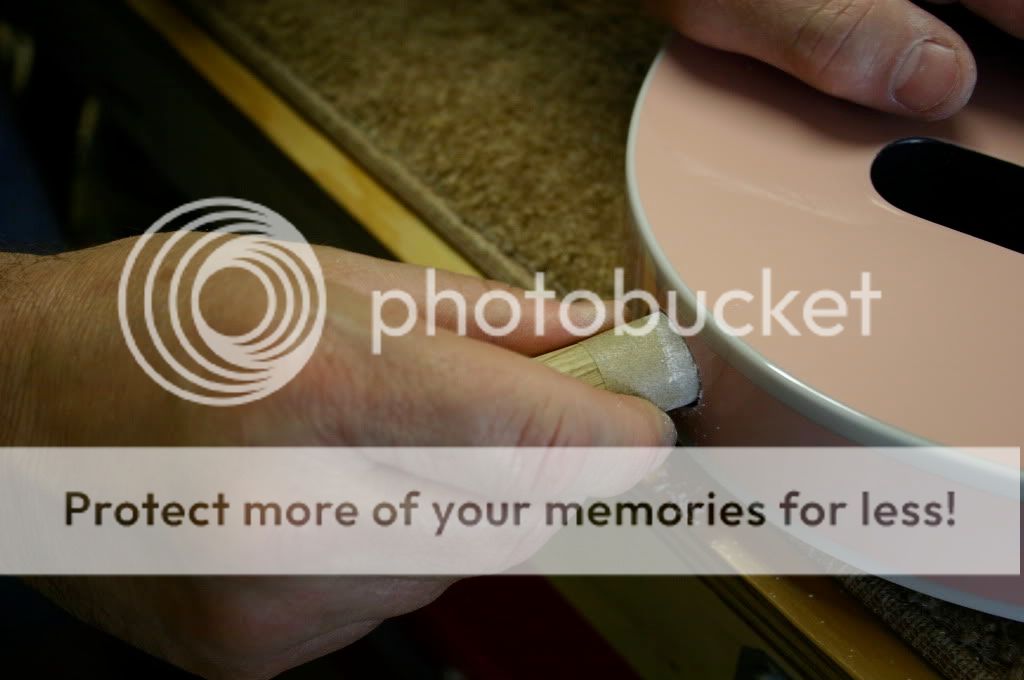
This is the tool I used to clamp in the bushings.. It works great because it is slow and helps you keep the bushing level as it drops down into the hole.You use the flat side on the back of the headstock and the threaded part on the top.
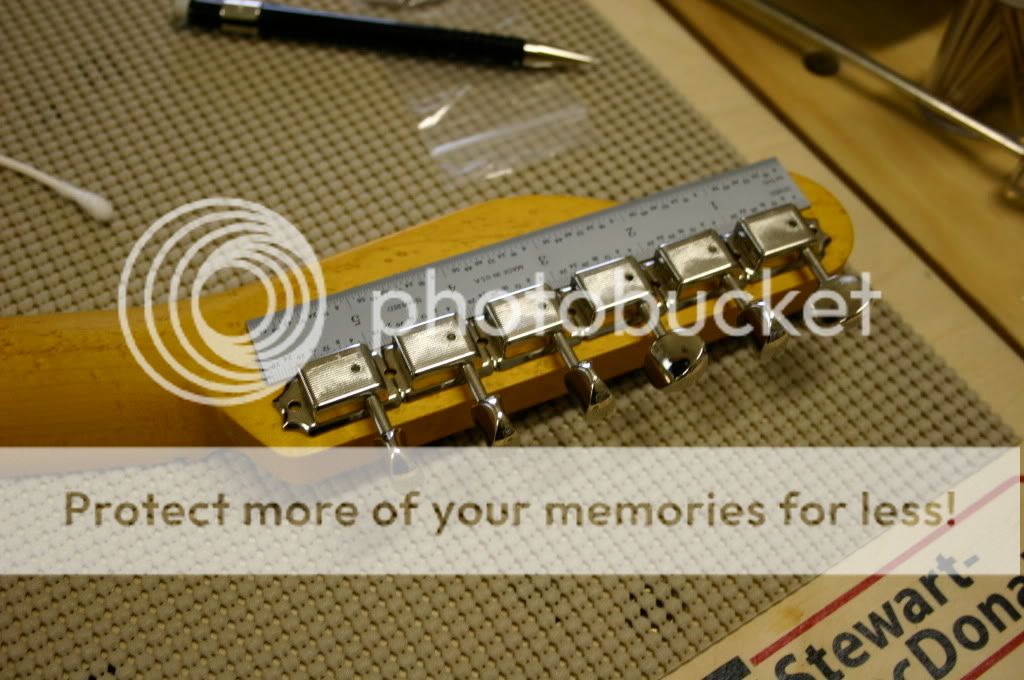
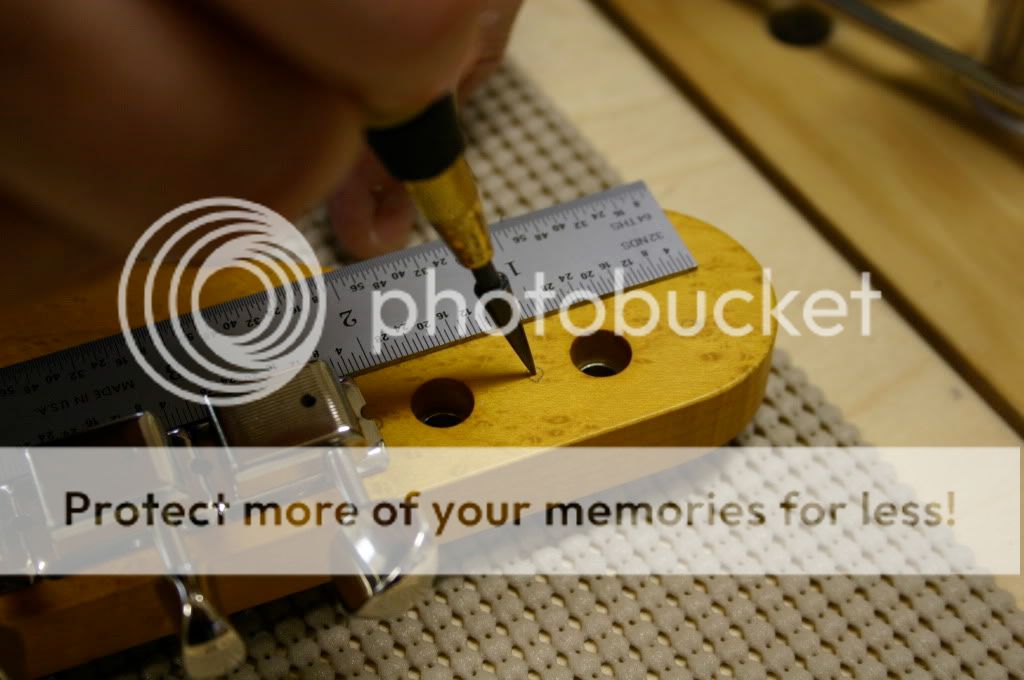
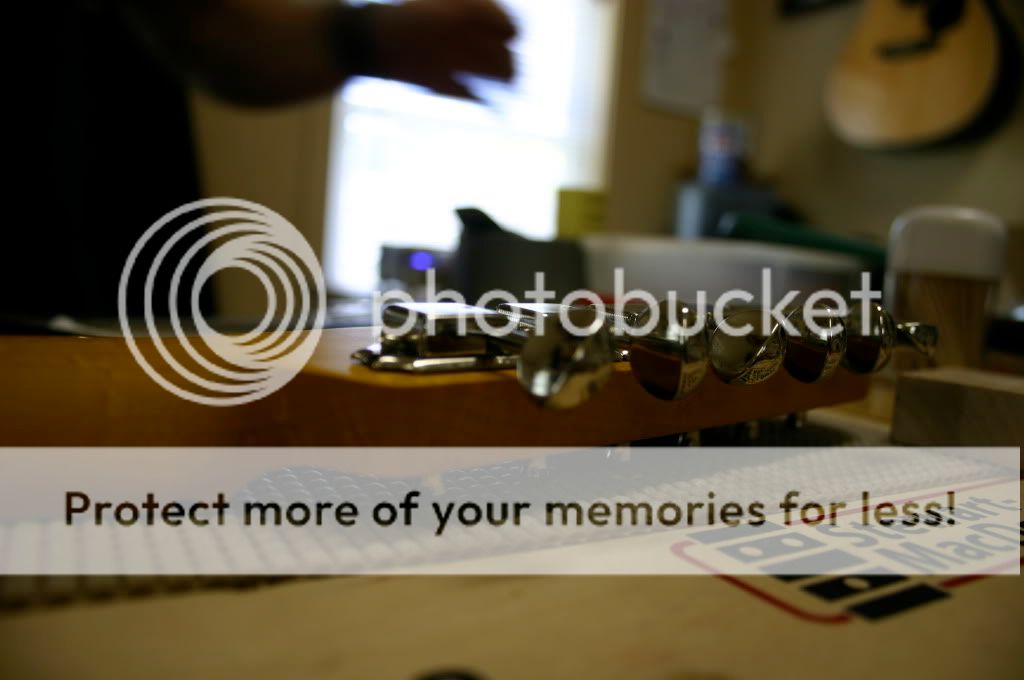
After you install all 6 then you flip the neck over and work on the tuning keys. After you put them in use a straight edge to make sure they are in a perfect straight line while you mark the holes with a mechanical pencil. (our ruler had painters tape on one side so that the metal would not make contact with the finish.
After you've marked the holes remove the tuningkeys and use a punch to get the center of the little circles you just drew,
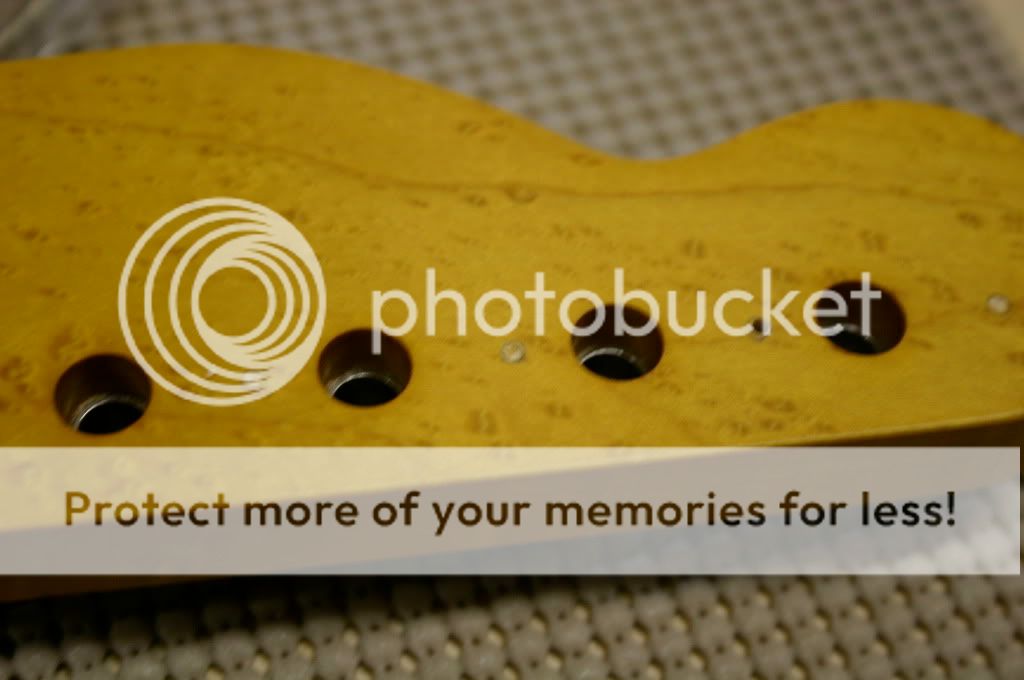
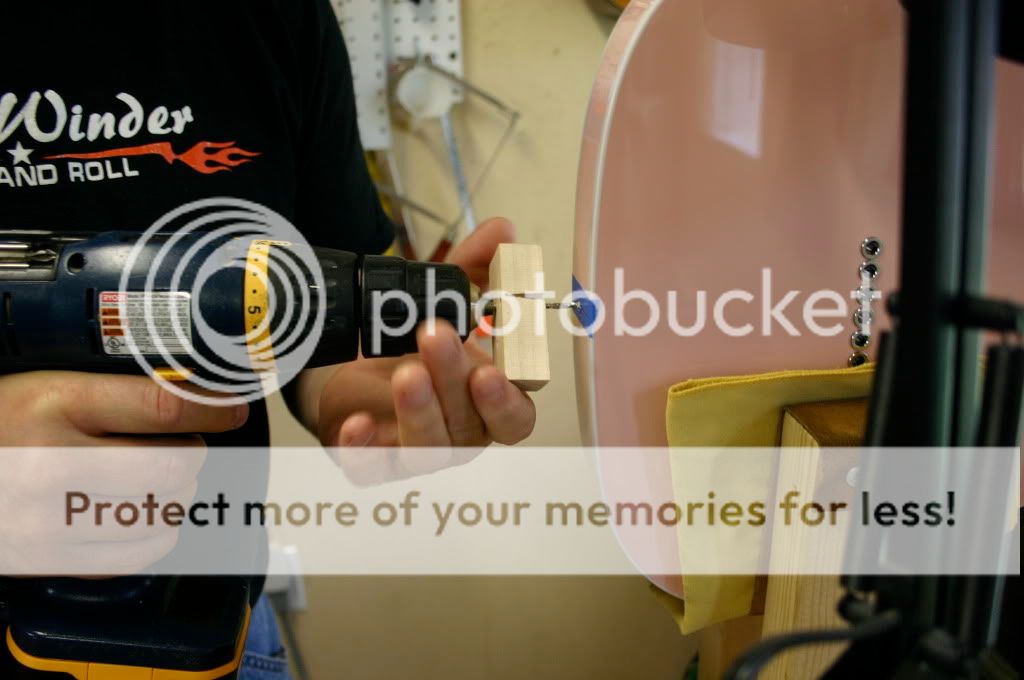
You want to now take your drill and run the bit in reverse just to start the hole so that the drill doesnt run away from you when you start drilling ... In the picture youll notice one completed hole (right) and a lighter colored backwards drilled hole that is waiting to be completed (left)
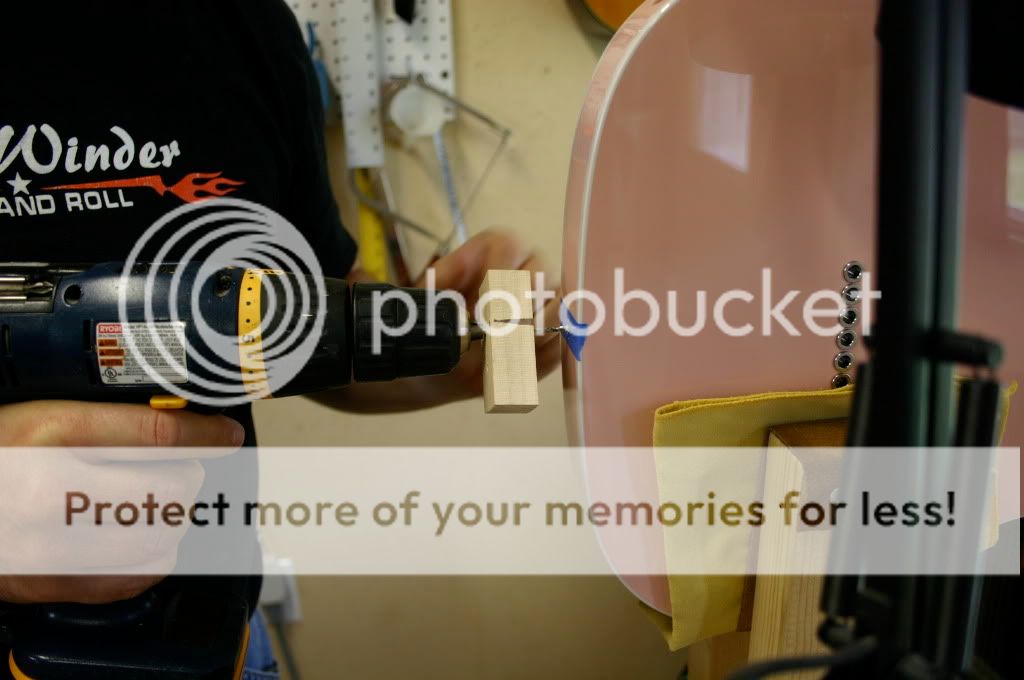
we used a handmade tool to make sure that these holes were drilled at a 90 degree angle. We used the same tool to mark the depth. This is a great little tool that we kept coming back too when it was time to drill any holes. I personally don't think it is a good idea to just "eye up" when you are drilling... You will get better results if you take your time....
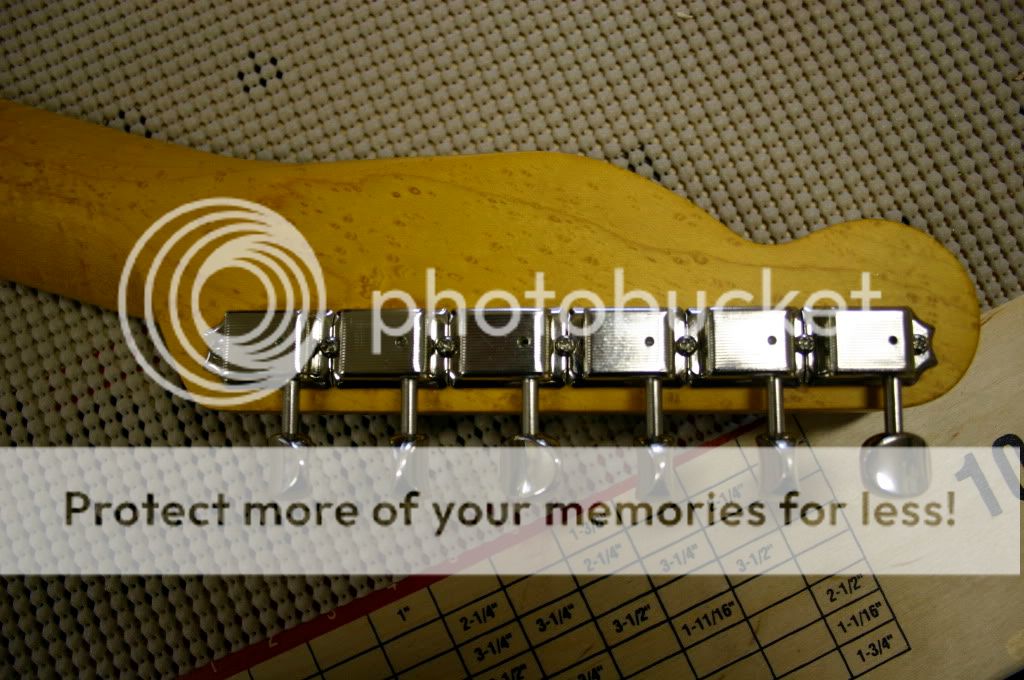
After you've drilled all the holes put the keys back and and look and see how you've done... if the holes don't match up then you might have some problem solving to do... if you have taken your time though you will most likely not have made a mistake. If they look good, wax up the holes and insert the screws and tighten them up but don't drive them home.(you still want a little wiggle room......Then take your ruler and hold it flush against the side again. Hold onto the ruler while you drive the screw home. You're done!!! now step back and realize how awesome a task you've just completed


**************************************************************UPDATE***************************************************************
I'm glad some of you guys are finding my experience useful.
so today I'll post some new stuff
Okay so first things first String Ferrules!!!!! I looked at numerous ways to do this. I even answered someones question about how to install. I said that I watched a video with a master luthier who said that you should use a soldering iron to heat the ferrule and then press it into the body... I decided later that this was risky business..if I were to slip off the ferrule or drop the iron or heat them up too much... I was too freaked out about it so I decided to take a cold method.
this method is very similar to the last.
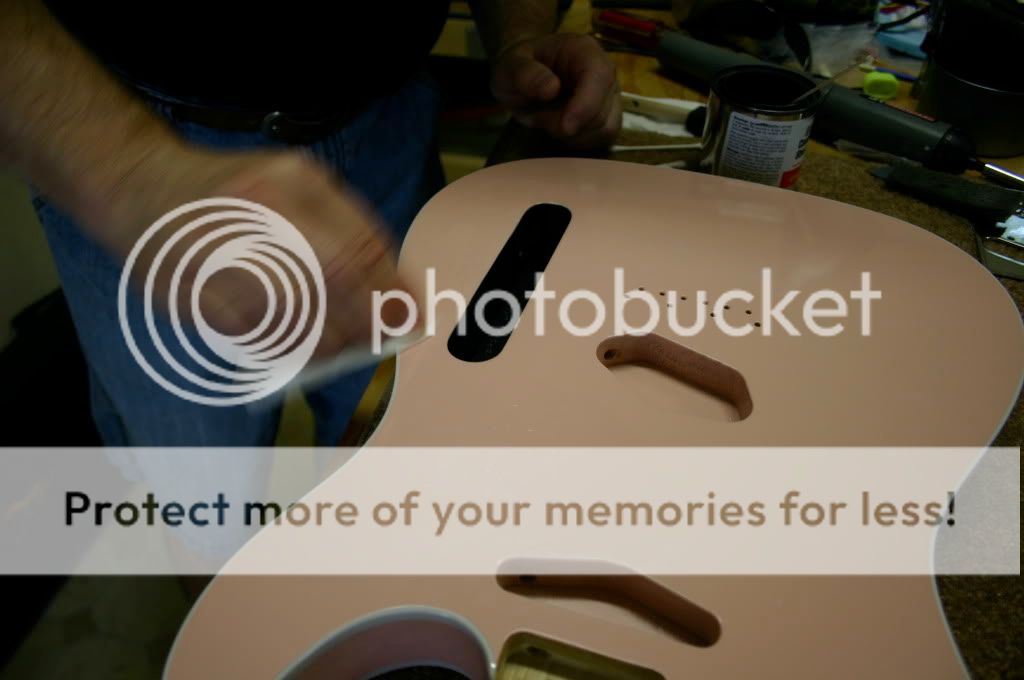
we need to clear out all the extra paint on the body.
First you "break the seal" around the hole with a countersink bit and your hand. Go slow and eventually you will get through the color and the primer and then see a little circle of wood. Again the reason we do this is that paint dries hard and could easily crack if you don't take your time to clear the paint between what you want and don't.


The next step has no pictures (Sorry)
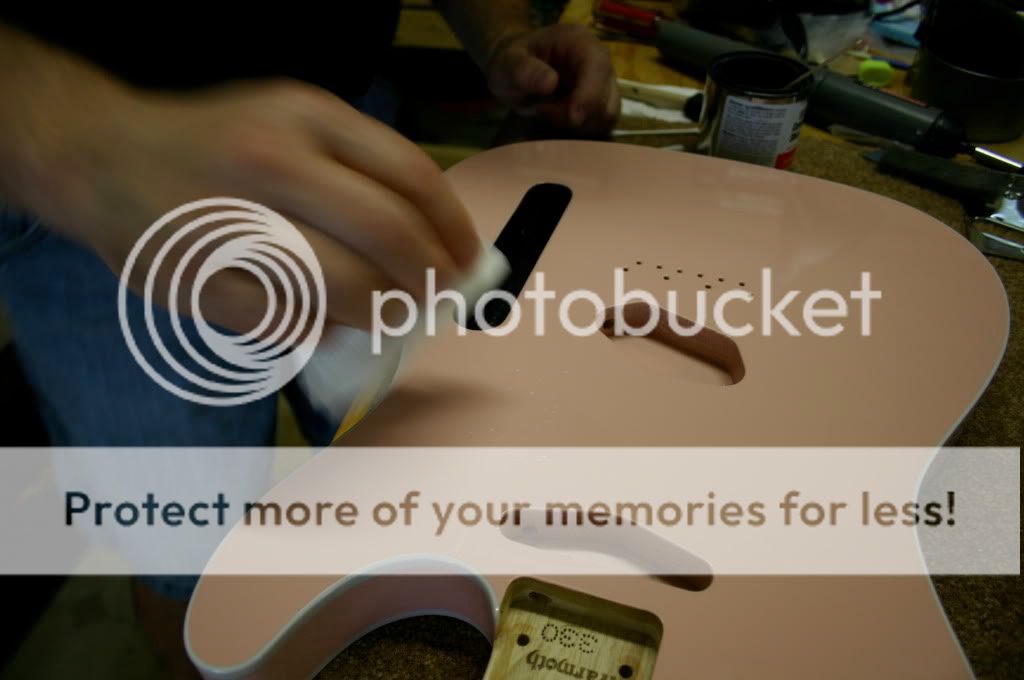
Basically I used three different sized bits to clear the rest of the paint ... this is cause you only want to remove a little paint at a time. So again use your hand power for this one.. Start with the smallest bit and move to the largest. As long as your bit is sharp this will go fast...just a couple turns each.
***YOU ONLY WANT TO REMOVE PAINT...NOT WOOD***
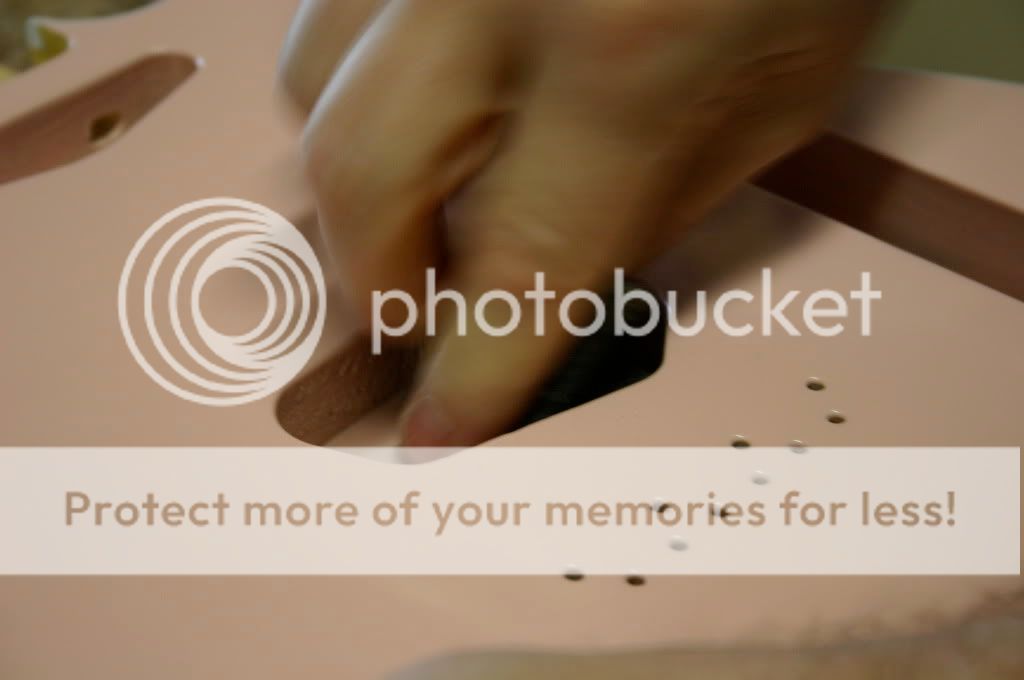
Once it is clear of all paint wax up the holes and use a small hammer to Tap in the ferrules. I used a nylon tip. Also while your tapping be sure that the ferrule is going in at approx. 90degrees
This is what it will look like after your done... if you have taken your time.. I will show a picture of what it could look like if you dont take your time

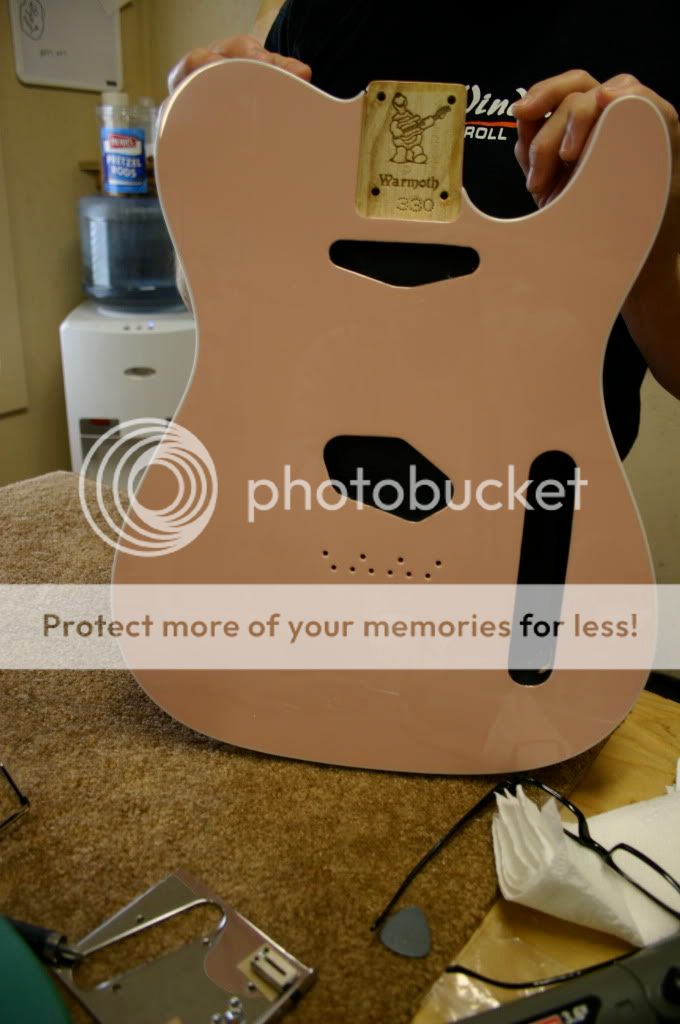
and Just because I feel like it Here is a picture of a mock up of what she will look like when she's done.

**********************UPDATE*************************************UPDATE********************************************
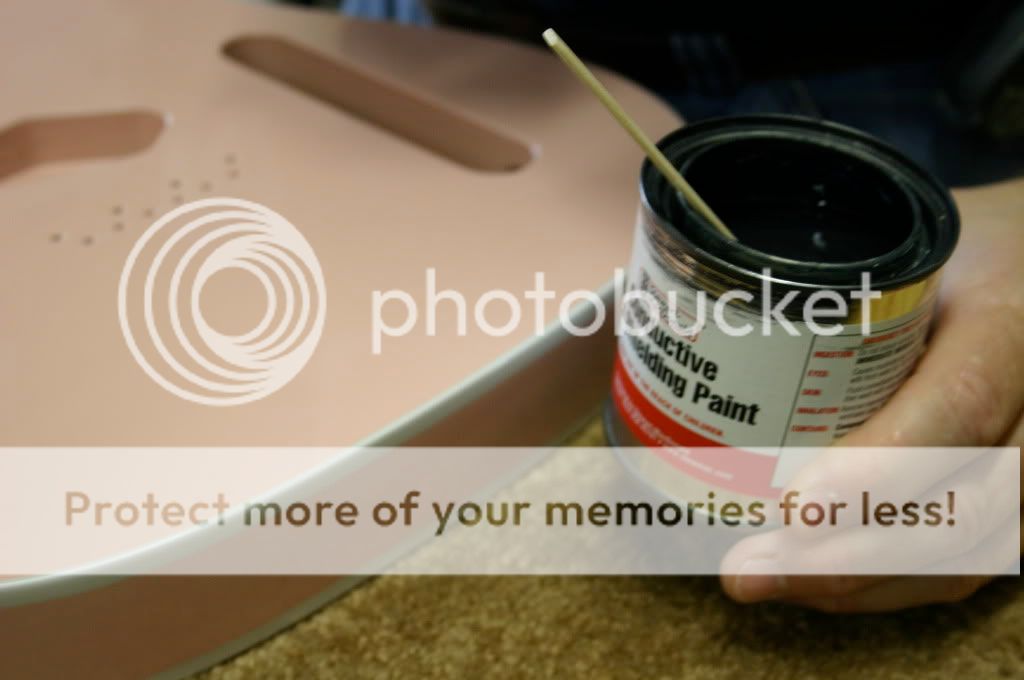
This is How you put conducting paint on
Step one:
Score the surfaces of where you are putting the paint. This is important because the conducting paint will not stick properly unless you do this. We used a scoring pad for this.
Step two
Once you have scored all surfaces clean them out , then get out your paint open it up and stir it. If you have a choice USE WATER BASED PAINT !!
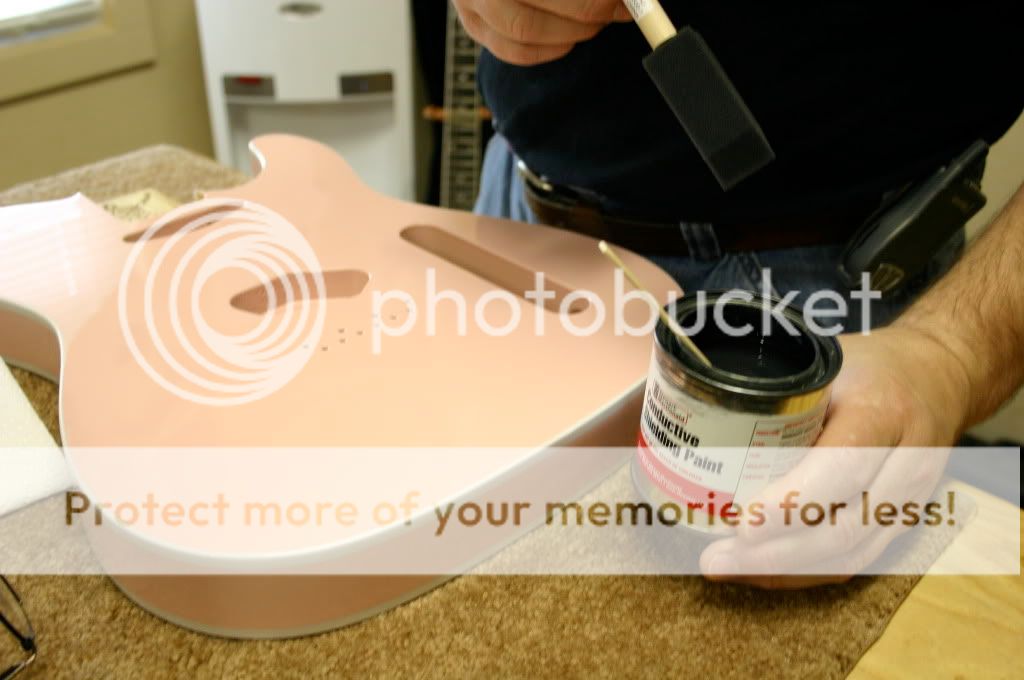
Step three :
start applying paint. Do one cavity at a time with this step. Don't worry if you spil a little I'll explain in the next step.
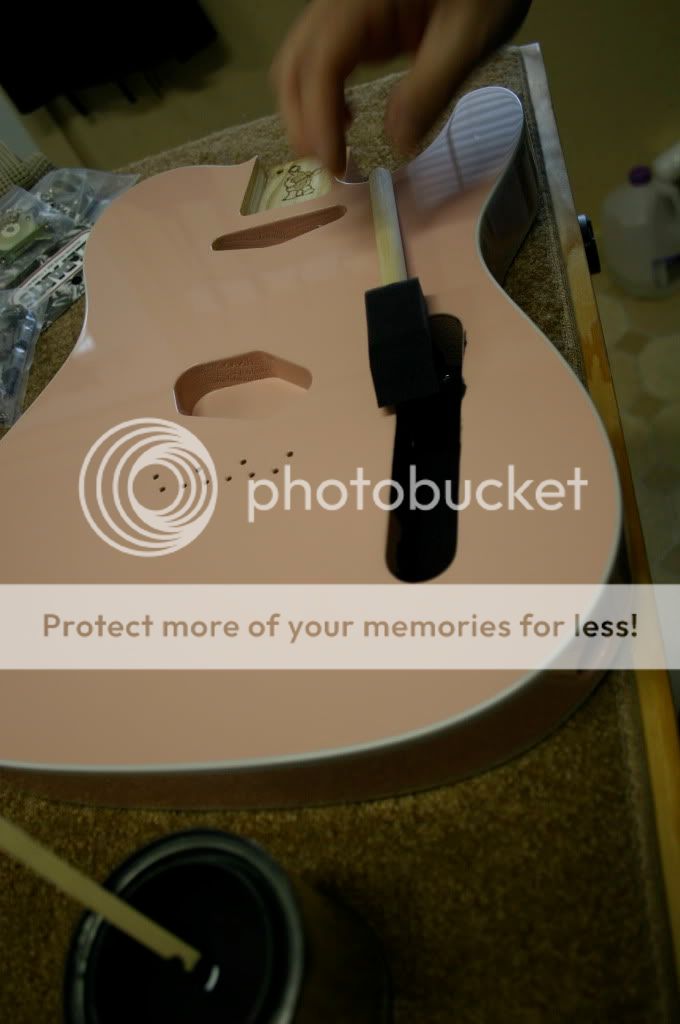
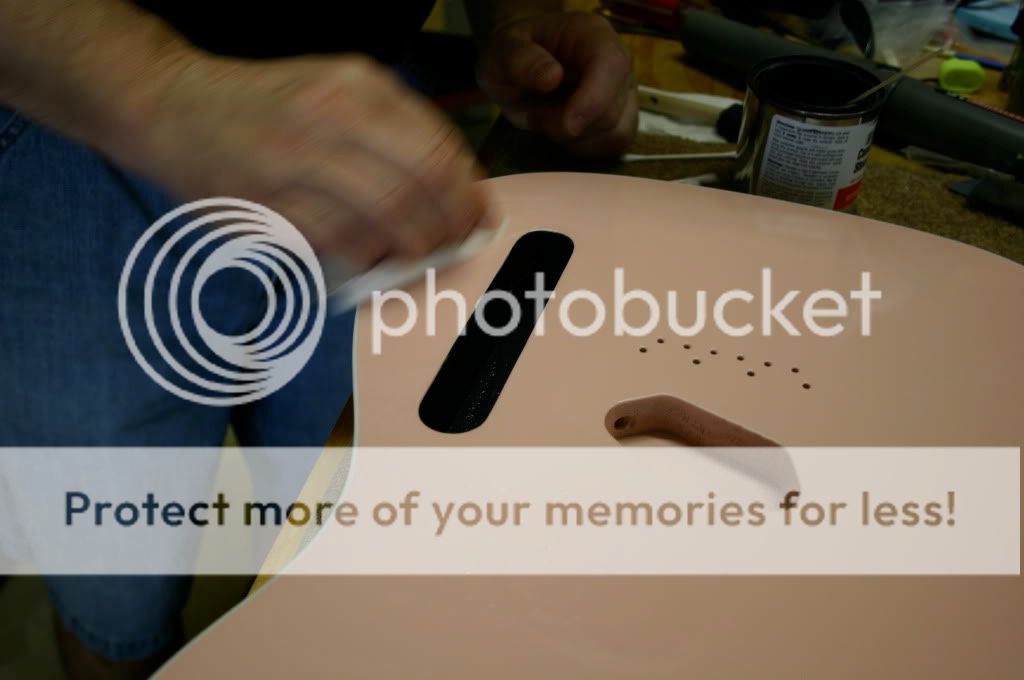
Step Four: Clean up your mess!
You're using water based paint (HOPEFULLY) so if you've dropped a little paint on your finish don't worry it will wipe up. USE A WARM DAMP CLOTH!!! if you just use a dry one you will scratch your finish...remember this conducting paint is basically metal mixed with water. Also we used some warm damp q-tips to go along the edges and clean them up. Take your time. And even when you think the body is clean go over it again and you will most likely be surprised at how much conducting paint was left on the finish without your knowledge.
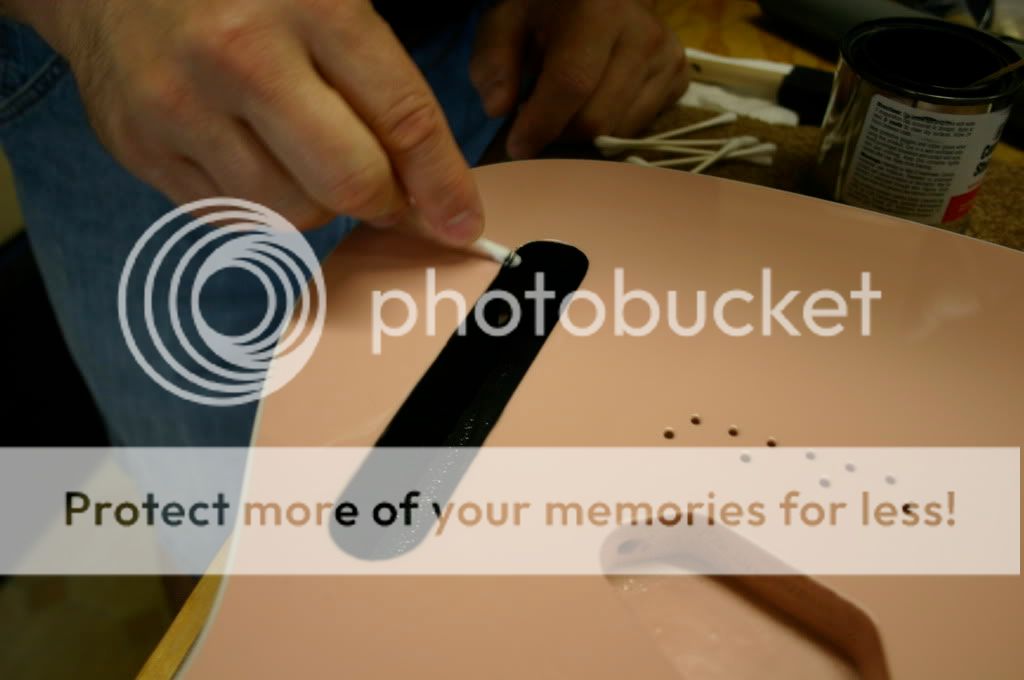
Repaet the steps until all the cavities are done then wait twenty four hours and apply a second coat. It will look like this after the first coat:
**************************************NECK STUFF********************************NECK STUFF************************************
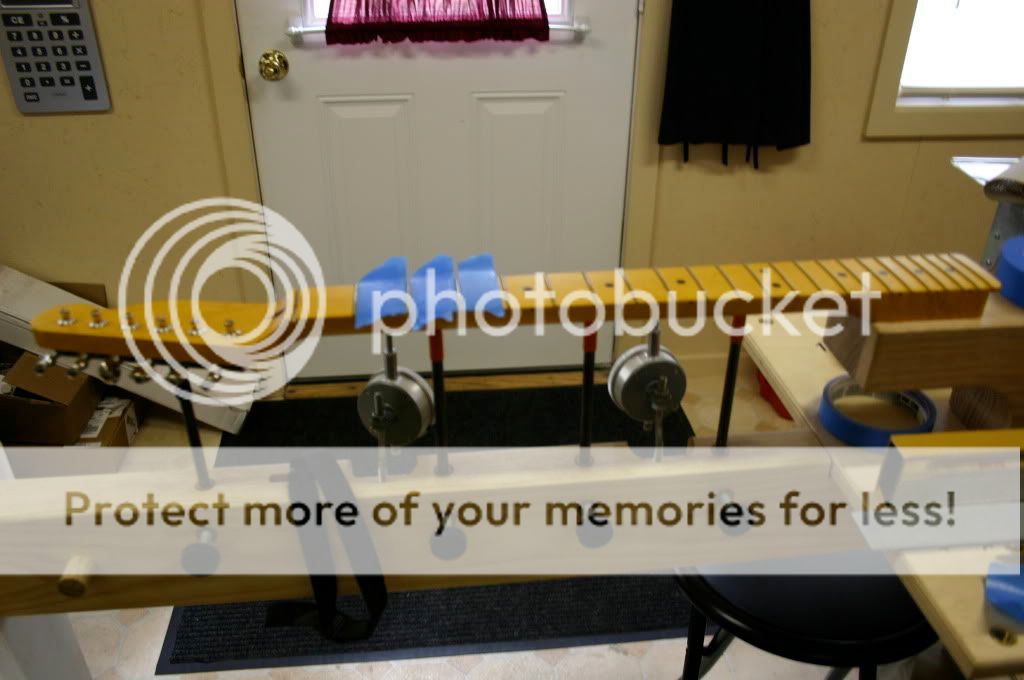
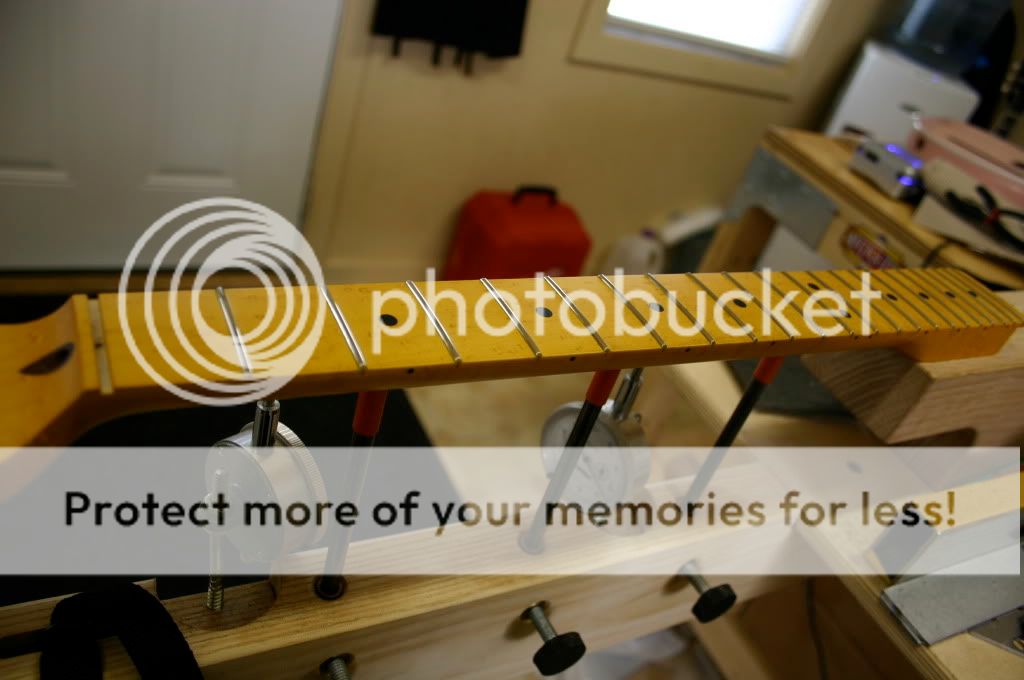
This section will be about the tedius dredded cleaning-the-finish-off-the-frets.
I used a neck jig because I had one at my disposal.... most of you probably don't so the important thing is that the net is supported through this step and that it doesnt move. (IMPROVISE!)
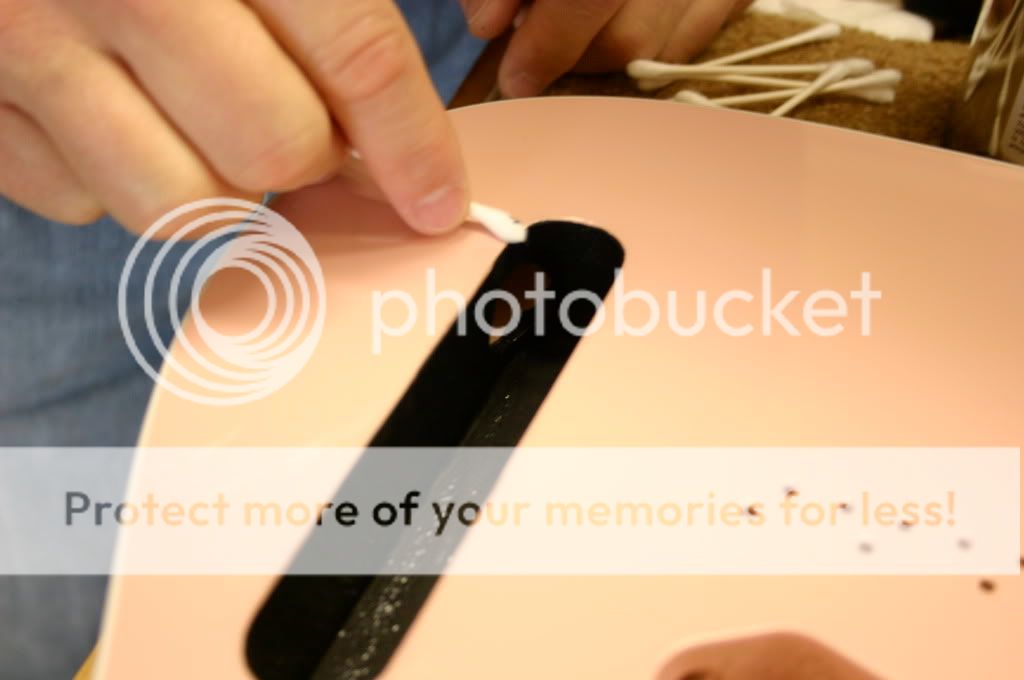
first I taped off the neck so that only the frets were exposed. There is alot of sanding and scoring that goes along with this and your finish WILL get ruined if you skip this step. Use the blue tape with the longest days on it I used 60 days. This just means the glue on the tape will be delicate on your finish.
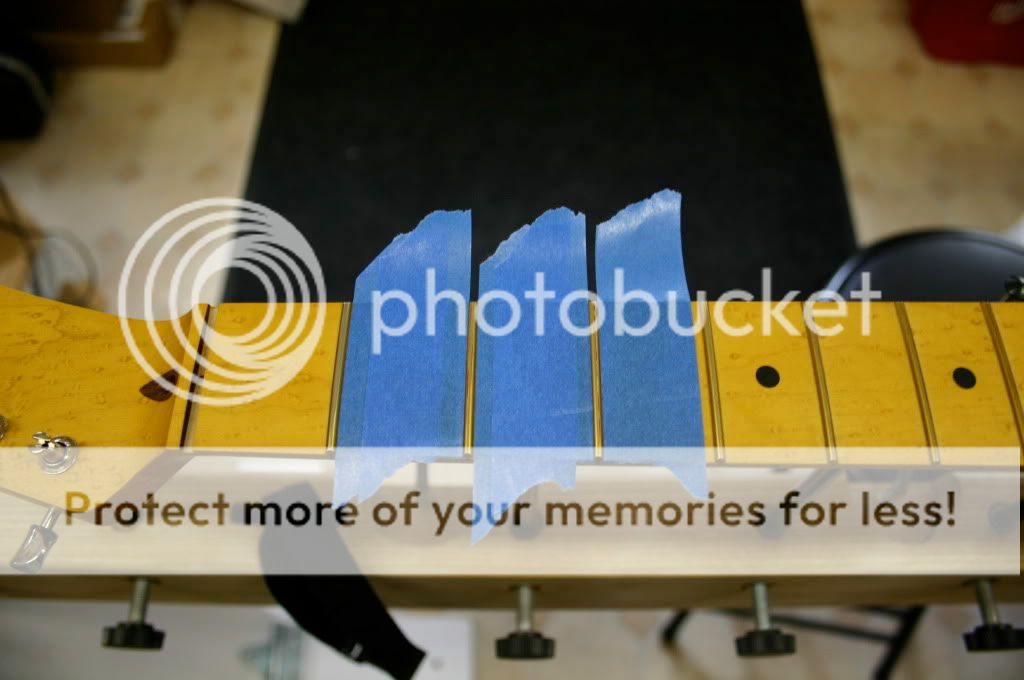
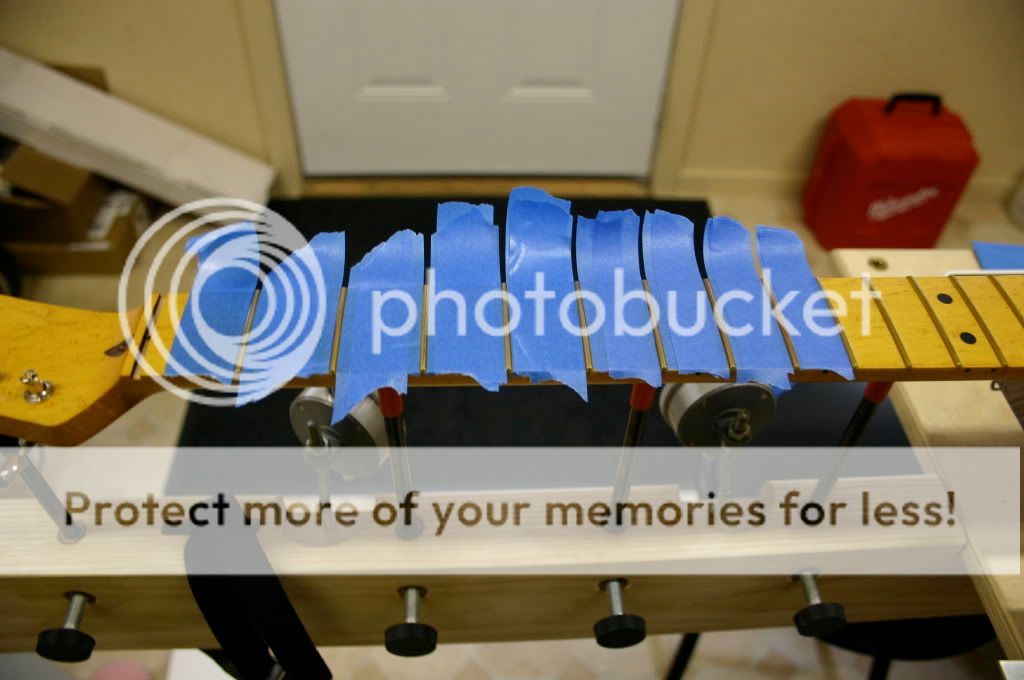

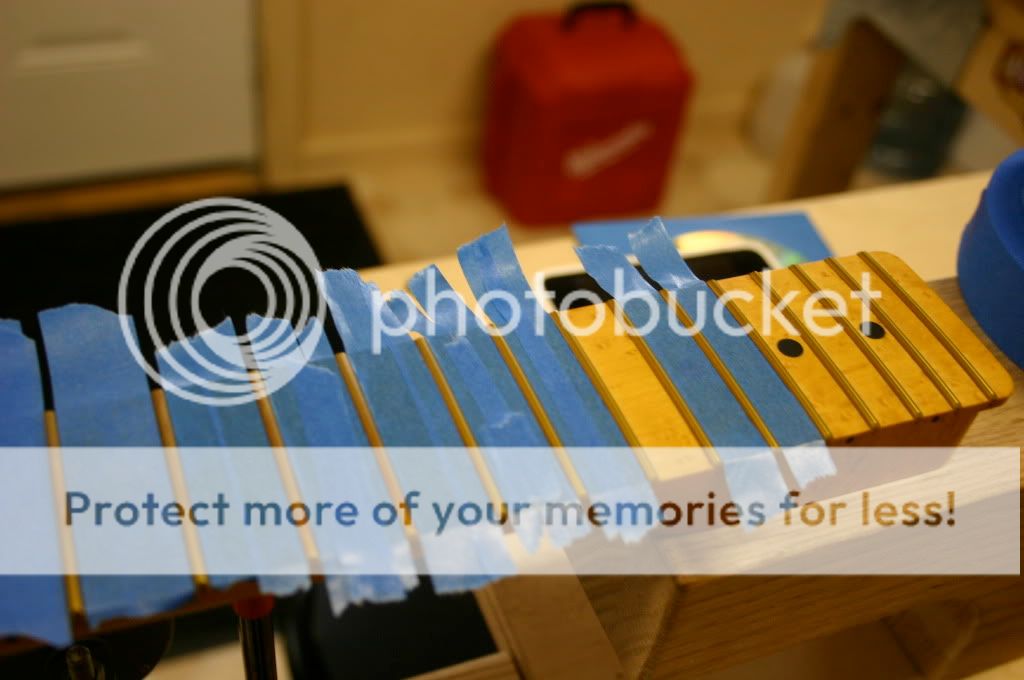
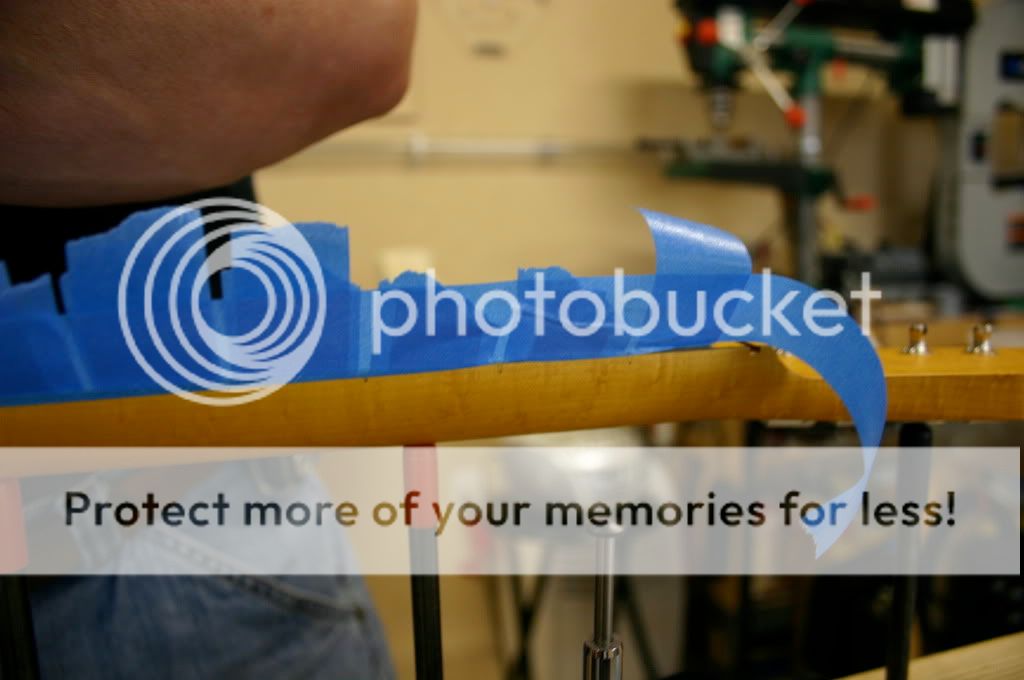
You'll notice that I've been leaving about an inch of tape on one side of the neck and that is so you can do this:
You put a long strip of tape down the whole length of the neck sticky side to sticky side.
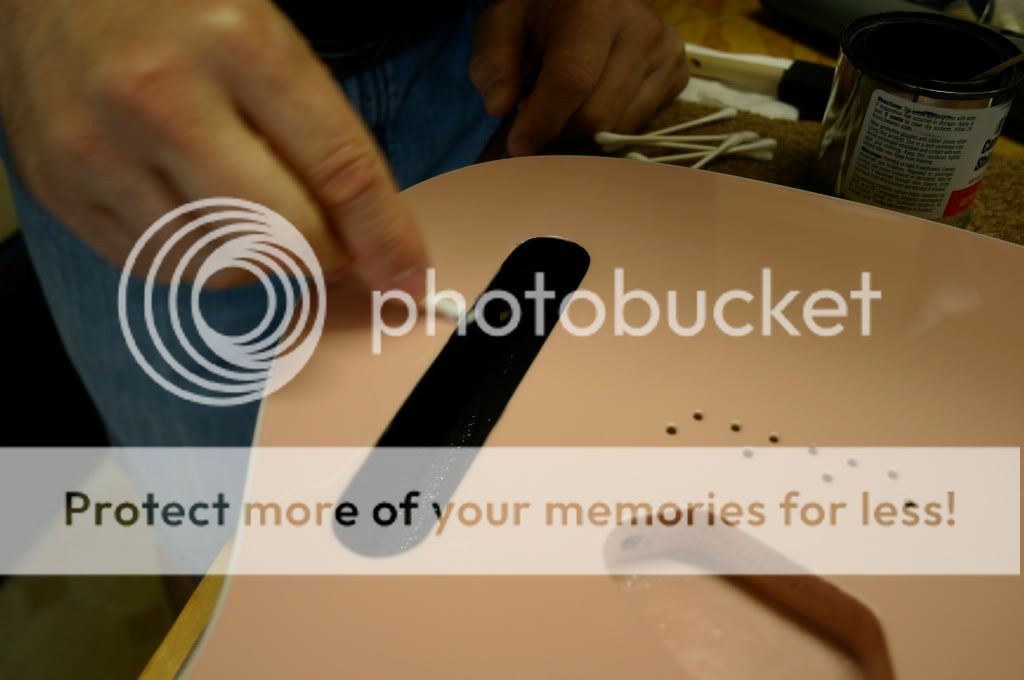
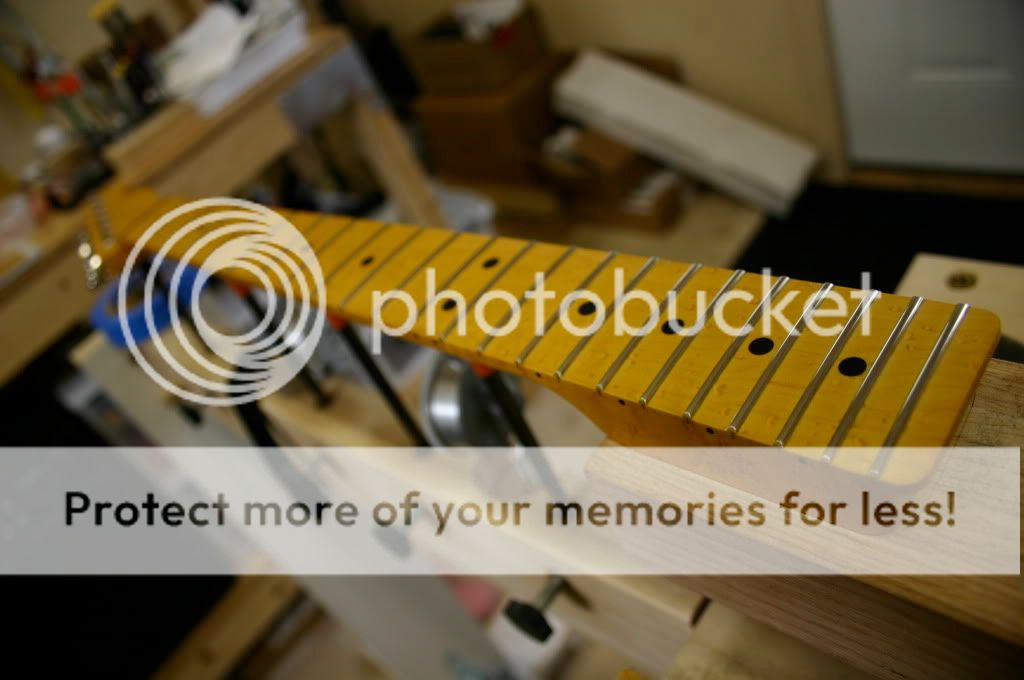
then you start sanding away. I used these cool sanding sticks that were made for this. I used two different grits of sandpaper I think they were 400 and 320. Don't be discouraged if this doesnt take off a lot of finish...it won't...think of it as getting the frets ready for the next step
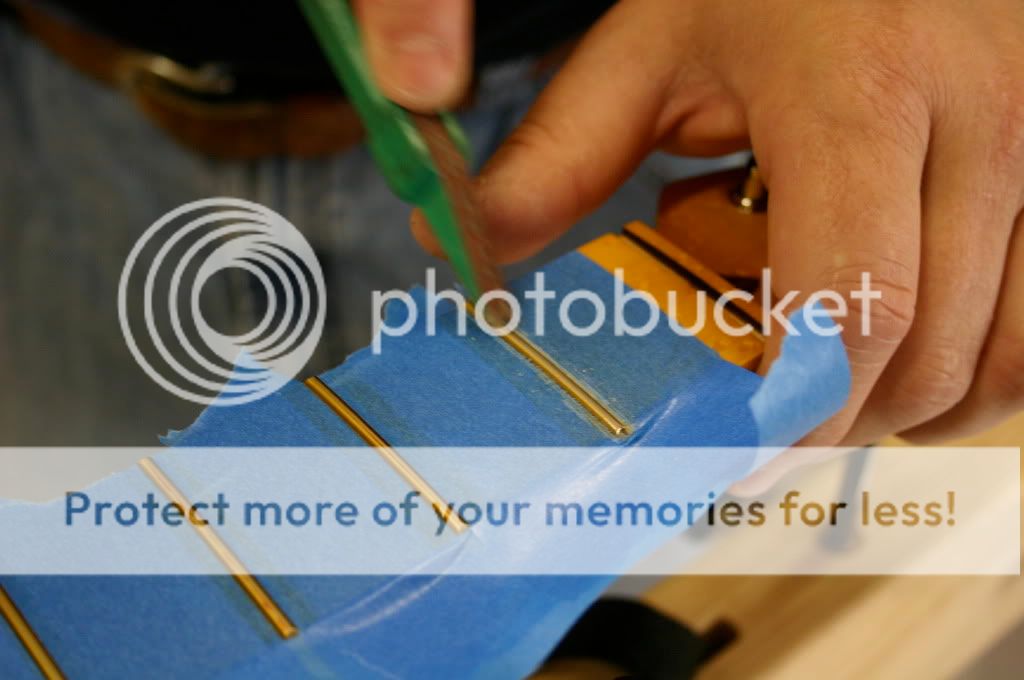
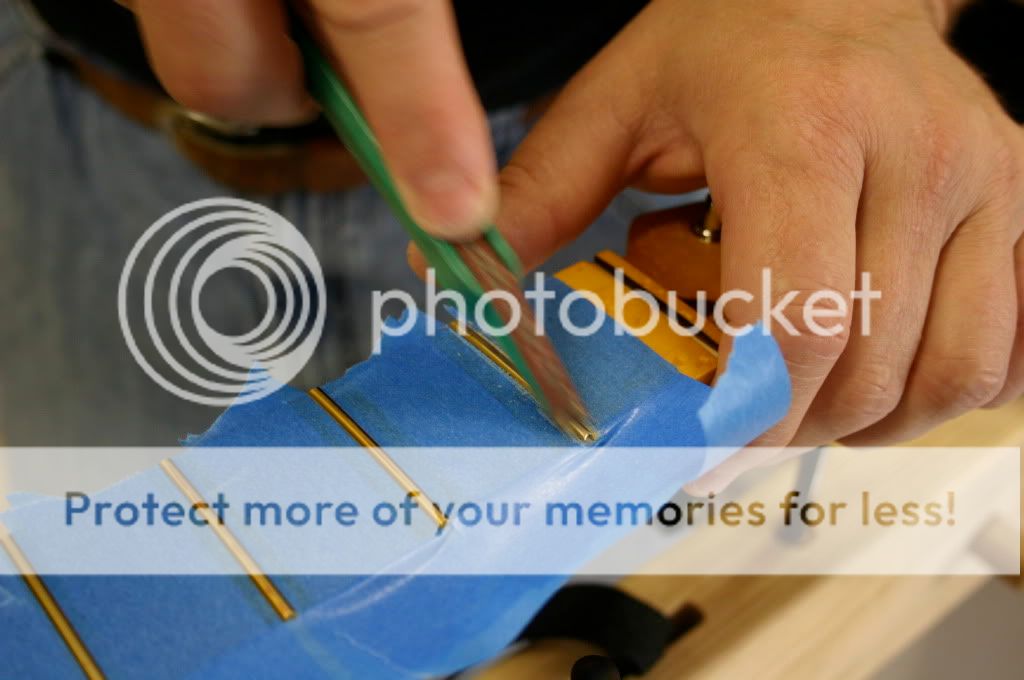
now for the big guns. Use steel wool to take of the remaining finish. use your thumb nail to get as close to the fret as you can

once that is done you can leave the tape on and polish the frets with sanding sticks. (I took the tape off because we had another special tool that protected the frets while we polished them)
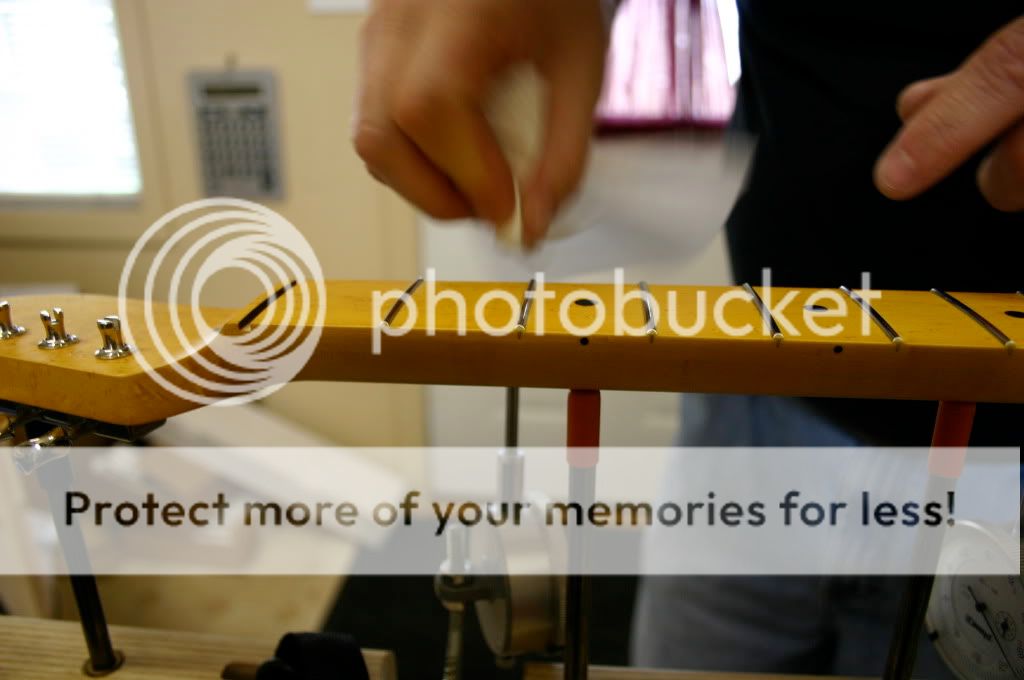
this is us cleaning the neck and the fret board after all the work is done. We used an all natural chemical whose name escapes me at the moment.
*******************UPDATE 7/27/09 *******************************************************************
Okay so this is the process for installing the strap buttons.....
So first step is to mark where the holes for the strap buttons will go.. we put some blue delicate painters tape on the body about where we though it would land and then messured and marked on the tape .... This keeps you from drawing on the body... which is a good thing
the hole closest to the bridge is in the center of the body the neck pocket is a good place to find the center. Then center it on the sides and mark your hole.
We eyed up the hole closest to the neck using another tele and then centered it on the sides of the body.

Again we use the block to drill our holes and mark the depth. drill right through the tape


Again we use the countersink bit to clean up the edges of the hole so we dont crack any of the finish.


We were getting closer so we started to do alot of smaller things. All the big projects were done..
This is how we cleaned out the hole for the input jack...pretty straight forward.. You just use a dowel with some sandpaper and clean out the overspray of finish.

This is the neck before I started any work on it. The first step this day was putting in the vintage style gotoh tuners!
Before we could start installing the tuners we needed to clean out the extra finish from the hole. We took alot off steps that sometimes seemed pointless, but I really wanted to take my time and do everything "Right" So we are using a countersink bit to break up the laquer on the top of the hole so that when we used a drill bit we would not crack any finish. This step also helps in keeping the bushings where we wanted them before we clamped them in.
This is how the holes should look after your done... notice the slight ring around the the top. there is a missing photo graph of us using a slightly-smaller-than-the-hole drill bit. DO THIS STEP BY HAND DO NOT USE A POWER TOOL...these should be be slight movements with little delicate pressure. (you dont want to make the hole bigger ...you just want to make it clean of any finish. We used this process on the body when it came time to drill othher holes.
we then waxed up the holes using this stuff
This is the tool I used to clamp in the bushings.. It works great because it is slow and helps you keep the bushing level as it drops down into the hole.You use the flat side on the back of the headstock and the threaded part on the top.
After you install all 6 then you flip the neck over and work on the tuning keys. After you put them in use a straight edge to make sure they are in a perfect straight line while you mark the holes with a mechanical pencil. (our ruler had painters tape on one side so that the metal would not make contact with the finish.
After you've marked the holes remove the tuningkeys and use a punch to get the center of the little circles you just drew,
You want to now take your drill and run the bit in reverse just to start the hole so that the drill doesnt run away from you when you start drilling ... In the picture youll notice one completed hole (right) and a lighter colored backwards drilled hole that is waiting to be completed (left)
we used a handmade tool to make sure that these holes were drilled at a 90 degree angle. We used the same tool to mark the depth. This is a great little tool that we kept coming back too when it was time to drill any holes. I personally don't think it is a good idea to just "eye up" when you are drilling... You will get better results if you take your time....
After you've drilled all the holes put the keys back and and look and see how you've done... if the holes don't match up then you might have some problem solving to do... if you have taken your time though you will most likely not have made a mistake. If they look good, wax up the holes and insert the screws and tighten them up but don't drive them home.(you still want a little wiggle room......Then take your ruler and hold it flush against the side again. Hold onto the ruler while you drive the screw home. You're done!!! now step back and realize how awesome a task you've just completed
**************************************************************UPDATE***************************************************************
I'm glad some of you guys are finding my experience useful.
so today I'll post some new stuff
Okay so first things first String Ferrules!!!!! I looked at numerous ways to do this. I even answered someones question about how to install. I said that I watched a video with a master luthier who said that you should use a soldering iron to heat the ferrule and then press it into the body... I decided later that this was risky business..if I were to slip off the ferrule or drop the iron or heat them up too much... I was too freaked out about it so I decided to take a cold method.
this method is very similar to the last.
we need to clear out all the extra paint on the body.
First you "break the seal" around the hole with a countersink bit and your hand. Go slow and eventually you will get through the color and the primer and then see a little circle of wood. Again the reason we do this is that paint dries hard and could easily crack if you don't take your time to clear the paint between what you want and don't.
The next step has no pictures (Sorry)
Basically I used three different sized bits to clear the rest of the paint ... this is cause you only want to remove a little paint at a time. So again use your hand power for this one.. Start with the smallest bit and move to the largest. As long as your bit is sharp this will go fast...just a couple turns each.
***YOU ONLY WANT TO REMOVE PAINT...NOT WOOD***
Once it is clear of all paint wax up the holes and use a small hammer to Tap in the ferrules. I used a nylon tip. Also while your tapping be sure that the ferrule is going in at approx. 90degrees
This is what it will look like after your done... if you have taken your time.. I will show a picture of what it could look like if you dont take your time
and Just because I feel like it Here is a picture of a mock up of what she will look like when she's done.
**********************UPDATE*************************************UPDATE********************************************
This is How you put conducting paint on
Step one:
Score the surfaces of where you are putting the paint. This is important because the conducting paint will not stick properly unless you do this. We used a scoring pad for this.
Step two
Once you have scored all surfaces clean them out , then get out your paint open it up and stir it. If you have a choice USE WATER BASED PAINT !!
Step three :
start applying paint. Do one cavity at a time with this step. Don't worry if you spil a little I'll explain in the next step.
Step Four: Clean up your mess!
You're using water based paint (HOPEFULLY) so if you've dropped a little paint on your finish don't worry it will wipe up. USE A WARM DAMP CLOTH!!! if you just use a dry one you will scratch your finish...remember this conducting paint is basically metal mixed with water. Also we used some warm damp q-tips to go along the edges and clean them up. Take your time. And even when you think the body is clean go over it again and you will most likely be surprised at how much conducting paint was left on the finish without your knowledge.
Repaet the steps until all the cavities are done then wait twenty four hours and apply a second coat. It will look like this after the first coat:
**************************************NECK STUFF********************************NECK STUFF************************************
This section will be about the tedius dredded cleaning-the-finish-off-the-frets.
I used a neck jig because I had one at my disposal.... most of you probably don't so the important thing is that the net is supported through this step and that it doesnt move. (IMPROVISE!)
first I taped off the neck so that only the frets were exposed. There is alot of sanding and scoring that goes along with this and your finish WILL get ruined if you skip this step. Use the blue tape with the longest days on it I used 60 days. This just means the glue on the tape will be delicate on your finish.
You'll notice that I've been leaving about an inch of tape on one side of the neck and that is so you can do this:
You put a long strip of tape down the whole length of the neck sticky side to sticky side.
then you start sanding away. I used these cool sanding sticks that were made for this. I used two different grits of sandpaper I think they were 400 and 320. Don't be discouraged if this doesnt take off a lot of finish...it won't...think of it as getting the frets ready for the next step
now for the big guns. Use steel wool to take of the remaining finish. use your thumb nail to get as close to the fret as you can
once that is done you can leave the tape on and polish the frets with sanding sticks. (I took the tape off because we had another special tool that protected the frets while we polished them)
this is us cleaning the neck and the fret board after all the work is done. We used an all natural chemical whose name escapes me at the moment.
*******************UPDATE 7/27/09 *******************************************************************
Okay so this is the process for installing the strap buttons.....
So first step is to mark where the holes for the strap buttons will go.. we put some blue delicate painters tape on the body about where we though it would land and then messured and marked on the tape .... This keeps you from drawing on the body... which is a good thing
the hole closest to the bridge is in the center of the body the neck pocket is a good place to find the center. Then center it on the sides and mark your hole.
We eyed up the hole closest to the neck using another tele and then centered it on the sides of the body.
Again we use the block to drill our holes and mark the depth. drill right through the tape
Again we use the countersink bit to clean up the edges of the hole so we dont crack any of the finish.
We were getting closer so we started to do alot of smaller things. All the big projects were done..
This is how we cleaned out the hole for the input jack...pretty straight forward.. You just use a dowel with some sandpaper and clean out the overspray of finish.