Leaderboard

My first refret - please help!

Not sure if this helps, but.....

I'm doing my 1st fret install on my 1st electric guitar....1975 Les Paul Deluxe routed for humbuckers. The construction of Les Pauls during this period (IIRC, the era is called Nolin?), as the body has 2 planks of mahogany glued together, but the big thing is the neck shaft is made from 3 pieces of maple and the neck has a volute. I watched this guitar fall out of a cheap cardboard case and bounce down a flight of metal stairs on the top edge of the headstock, and aside from chips in the finish, the guitar was fine. Conversely, the other LP I own is a '92 LPC with the traditional construction of a 1 piece mahogany neck with no volute, and I've had 3 separate headstock breakages.

I beat the snot out of this guitar as a teenager, the treble side of the neck has a large gouge in the binding around the 9th fret, the bridge pickup cuts in/out, and half the control knobs don't work. This project includes replacing the binding on the treble side of the neck (already done), full fret install (in the works) and an overhaul of the electronics (yet to be done).

I learned, leaving the soldering iron on the fret LONGER is better than too short

Binding being installed....
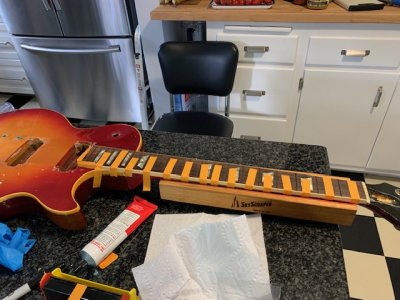
IMG_2028.jpg

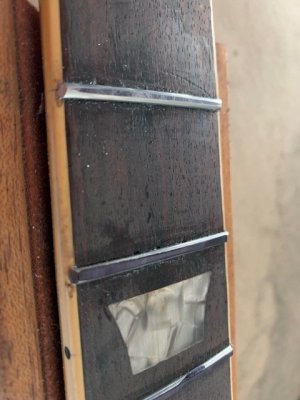
Binding installed. You can see where the gouge was around the 9th fret, as the binding kind of fills this area.
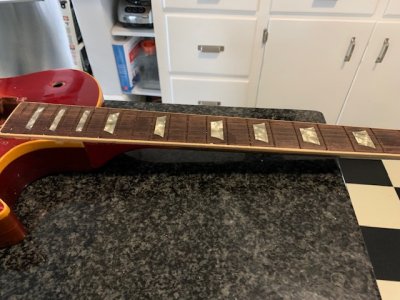
IMG_2029.jpg

Radius sanding block ...getting the fretboard perfectly radiused. The guitar is literally 50 years old. I wasn't surprised that the fretboard wasn't radiused as it should be.
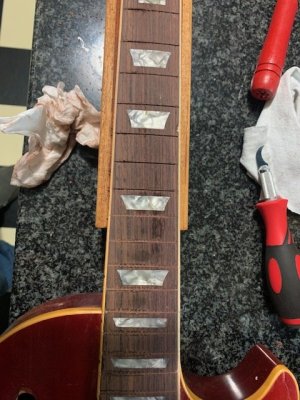
IMG_2033.jpg

Frets installed - A word of advice, when bending the frets for the radius, definitely bend them to a tighter radius than your neck. I had to recut a few frets since the radius on the fret bender wasn't tight enough. Also, I used SuperGlue to hold in the frets. Left a bit of a mess on the fretboard. This will be corrected with a lot of patience
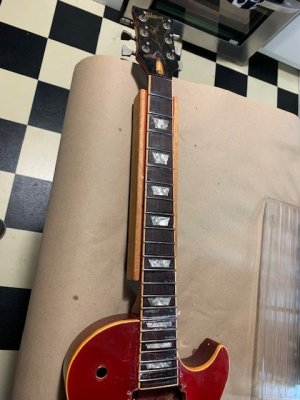
IMG_2035.jpg

Fret beveling - I used the Music Nomad beveling block for this process. Great tool. Couldn't get this done quick enough, since I sliced my hand 3x with the sharp fret ends
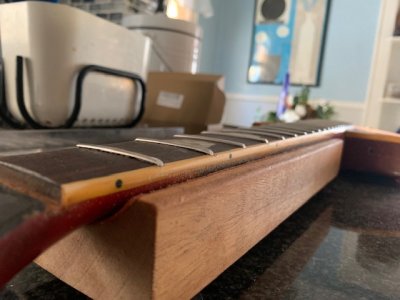
IMG_2036.jpg

Crowning the frets with the tool from Fret Guru
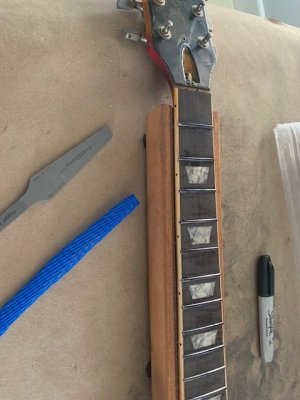
IMG_2037.jpg
IMG_2038.jpg

And now in the process of finishing the fret ends. Once that's done, then have to cleanup the fretboard and polish out the scratches.

Don't worry about SS frets. You will be fine working on them. Also, while Stewmac has great tools, there are a few other options that come in at a better value proposition. I went with some tools from Music Nomad and Guryxxxxx (can't remember the name, but it starts with Gur), all purchased from Amazon.

Also, consider a radiussed sanding black. I found this very helpful for making sure the fretboard itself was consistently radiussed, as well as leveling the frets.
 
Last edited:
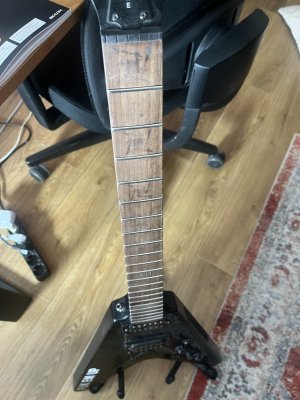
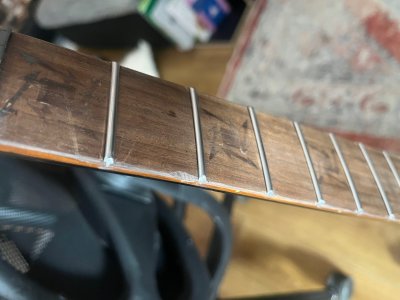
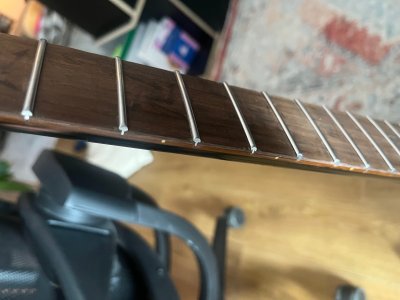
OK - I did it on my retired neck-thru Epiphone Gothic V. In a nutshell: huge improvement if you close your eyes (feel is actually great, I'm kinda proud). But man, i put in so many mini dents into the neck, thank God the guitar was already pretty worn out (relic'd lol) before.

I have four questions to the experienced re-fretters here:
  1. how the hell do you create super round and smooth fret emds (especially without slightly damaging the fretboard on the side?) - I guess this is called beveling+dressing, right?
  2. do you always level the entire fretboard or do you restrict yourselves to just a few frets in the vicinity of the non-level fret?
  3. is there any way to spot level a single fret without leveling a bunch of other frets?
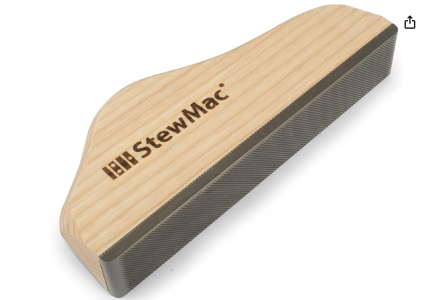
  4. is the below a good tool for leveling or should i get a proper beam?
1737980655086.png
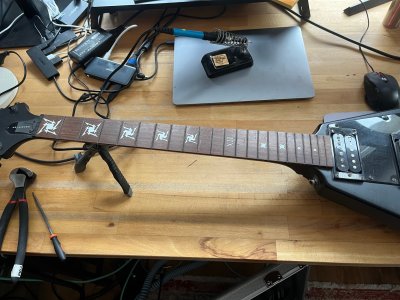
Here are some pics:

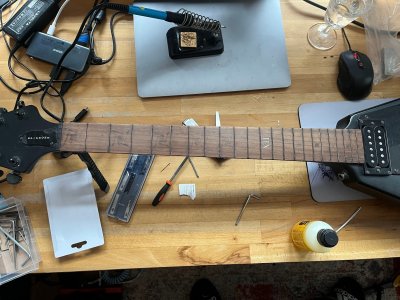
frets off:
frets off.jpg
after removing inlay-replacement stickers:
after sand.jpg
final result:
result.jpg

cut off a whole chunk with my fret trimmer:
chipped off.jpg

the beveling/dressing process brought me to my knees - it's OK round but not nearly on the level of CS or Suhr:
bevels.jpg
 
Last edited:
Finished Maple or bare Rosewood or similar fretboard? Same radius end to end or compound radius? Watch as many tutorials as you canā€¦a bare rosewood single radius neck is way easier than a finished maple compound radius fretboard.
 
For the fret ends, get some fretboard guards. I've also used Stew Mac's orange tape, but the file will burn through this quickly. The fretboard guards get me a little frustrated in using them, but they do protect the fingerboard well.

For the filing, I generally use Stew Mac's triangle fret dressing file, but really, any good file will do. Since you're not dealing with binding, this process should work a tad easier. Go slow and be conscious of the direction of the stroke in your filing. Helps to get a "safe edge" file on the one side.

Also be conscious of not removing the top area of fret, or rather, reducing the surface area of the top of the fret, as this will reduce your playable area on the fret. Hope I'm explaining that right.
 
Thanks @rauchman that makes total sense. I have the triangle file but I guess I just need some more practice. Good advice on the top surface area - hadn't thought about this but makes total sense.
 
Thanks @rauchman that makes total sense. I have the triangle file but I guess I just need some more practice. Good advice on the top surface area - hadn't thought about this but makes total sense.

Forgot to mention......

Regarding the radius, if it's a consistent 10", 12" radius, I use a correctly sized radius sanding block to radius both the fretboard and frets. Again, this is the 1st I'm doing this, so take it for what it is.

If you have a compound radius, I've had good success using the same leveling block that you show in the pic from StewMac. Try to be conscious of staying in the line of where the string would be on the fretboard and level. The D,G string should see much variation in the radius, however, the further you go out towards the edge of the fretboard, the more the compound radius will show it's effect. I'd guess others here who are more experienced with this, will give better pointers for leveling a compound radius neck, but as mentioned, this method has worked for me.
 
Regarding the radius, if it's a consistent 10", 12" radius, I use a correctly sized radius sanding block to radius both the fretboard and frets. Again, this is the 1st I'm doing this, so take it for what it is.
I was wondering if that's really a necessary step. It's not mentioned in the video posted by Stratamania. I mean, if I use a straight sanding block in between removing frets and installing frets (because that's when you use it, right?), will it really affect the radius of the board that much?
@alexreinhold You don't "cut" frets flush with the board, you use a file. Look at the videos I posted in the thread. Most of what you ask is in them.
Every video says something different about that. I first didn't cut frets flush and filed for a long time. Then, I decided to cut almost to the board and then file (like in the StewMac video I posted above)
 
I was wondering if that's really a necessary step. It's not mentioned in the video posted by Stratamania. I mean, if I use a straight sanding block in between removing frets and installing frets (because that's when you use it, right?), will it really affect the radius of the board that much?

Every video says something different about that. I first didn't cut frets flush and filed for a long time. Then, I decided to cut almost to the board and then file (like in the StewMac video I posted above)

Sometimes when re-fretting a board can benefit from cleaning up the board, sandpaper is used to clean up / prepare the board. The one you have practised on could have benefitted from such a step. Using a radius block depends on the grits of sandpaper and what you are looking at. It is not done in the videos I provided, as that is a finished maple board in reasonable condition. Doing so on a finished maple board if it were required would involve a refinish.

If you cut the frets close to the length needed before installing, you would avoid a lot of filing. If any cutting is needed once installed, you need to avoid getting so close that you end up taking chunks out of the wood. Then you use files.

The thing with most arts and crafts it requires knowledge of techniques but also applying judgement of what to use when, which builds experience. And of course, sometimes there is sometimes more than one way to skin a cat. Please note, you could also install some in some scrap wood to practice your techniques.
re sanding the fret board: thanks for confirming my suspicion. I did sand but just to get the gunk off. Afterwards, the board felt nice and smooth enough and I didn't feel like it needed any more extra sanding. That said, I am 99.9% sure I didn't mess with the radius when I sanded.

re cutting frets: again, thanks for confirming :-) In German we say "Lehrgeld", which means learning money. I just paid learning money.

re knowledge/techniques: yup, 10k hour rule. Though, I can already say that I have learned a ton with this project. Really looking forward to the next 2 necks
 
Back
Top