Leaderboard

Lake Placid Blue Competition Mustang (Now with sounds!)

Verne Bunsen

Hero Member
Messages
2,472
So a couple of months ago a buddy of mine asked what I thought about doing him up a Mustang in the spirit of Kurt Cobain's Blue Competition Mustang. I thought it was a smashing idea, and this thread is about that guitar. A lot of this initial post is kind of repeating what was in the "Just Out Of The Box" thread, but hey, it's necessary background information upon which the whole rest of this thread will be built!

Just a note, these pics are stored in my Dropbox and occasionally fail to load properly. Refreshing the page seems to fix it.

The wooden parts arrived from Warmoth yesterday and they are phenomenal. The body is Alder, LPB with a Daphne Blue competition stripe. It's routed for the Mustang trem and TOM bridge.
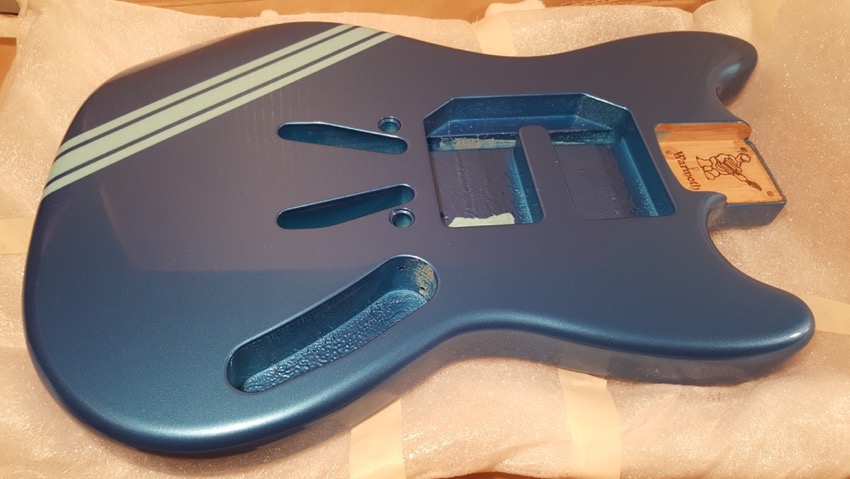
20151001_183557.small.jpeg


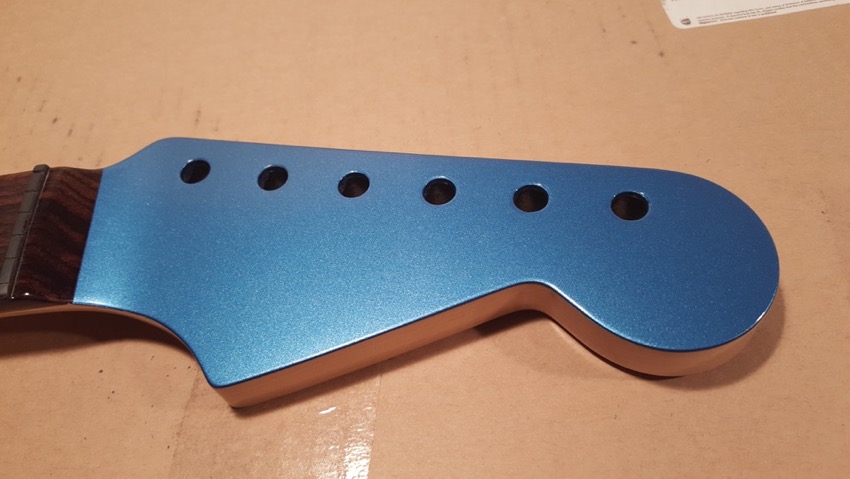
The neck is Maple with Indian Rosewood fingerboard and Abalone dots. The peg face is painted to match the body.
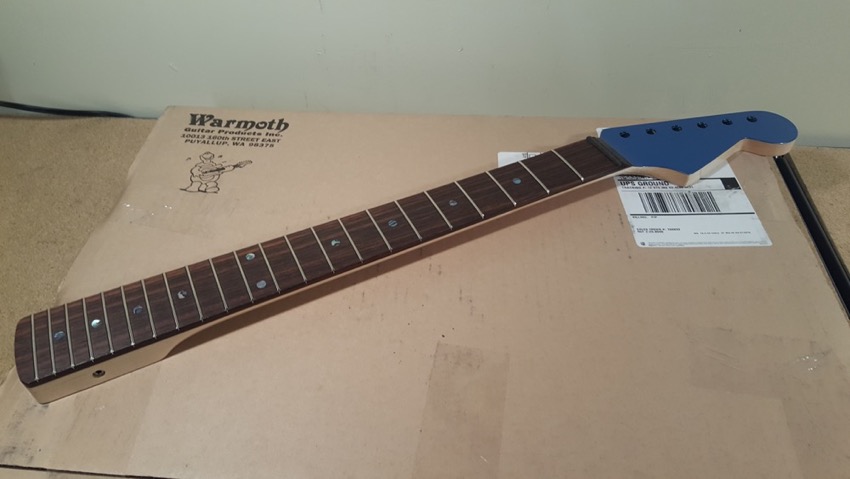
20151001_183105.small.jpeg


20151001_183141.small.jpeg


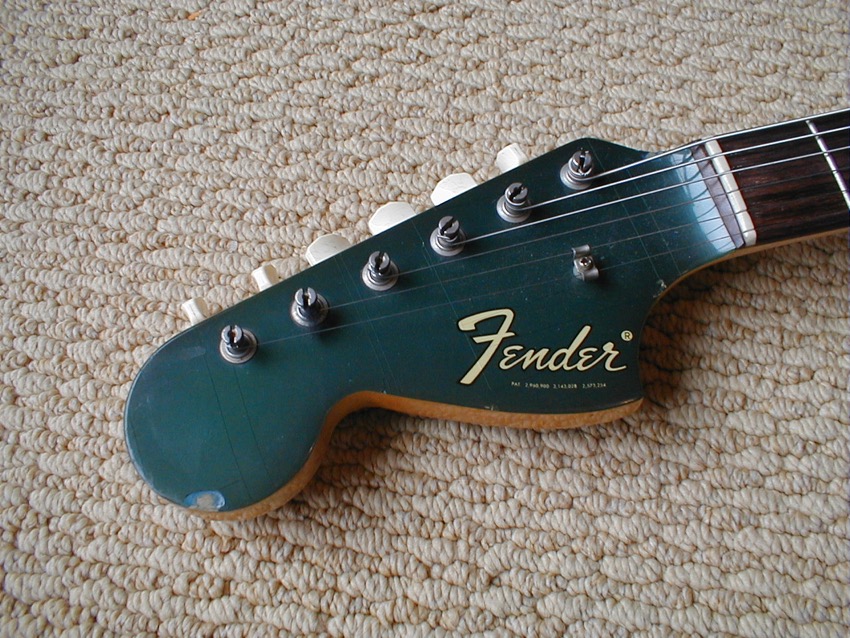
I'm leaving town in a few days and want to have the headstock decal finished so it can cure while I'm gone, so that was job 1. The whole headstock situation on the Cobain signature model was a sticking point for my friend. It wasn't painted and the decal looked wrong. We had to get the headstock right. Here is Cobain's actual headstock:
KDC%20Headstock.small.jpeg


And the signature model:

DV016_Jpg_Large_H78838.001.001_lake_placid_blue_rw.jpg


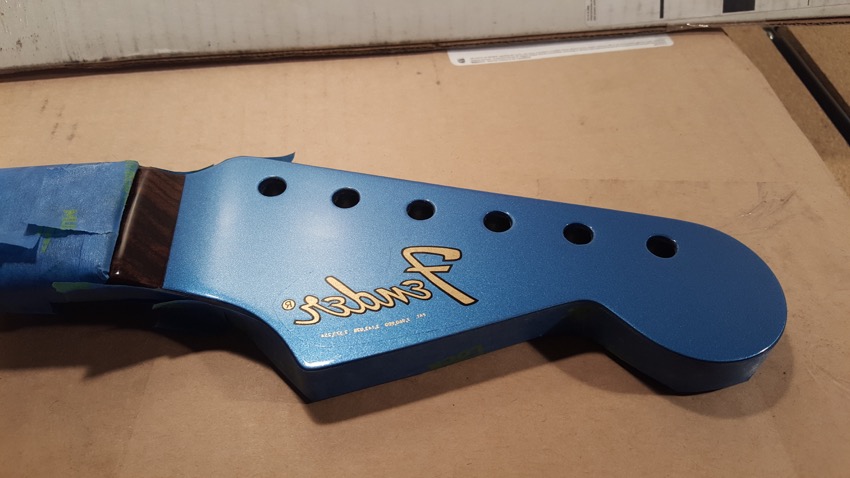
Clearly Cobain's lefty headstock wears it's decal differently from a righty headstock, so we had to figure out how to capture the lefty aesthetic on a righty headstock. I think we came up with a pretty awesome plan! I've never used licensed logo decals on my builds in the past, and technically I'm not sure if that's true any more after this one... Here it is just after sliding it on. I give you: rebneF!
20151001_203929.small.jpeg


I'm now off to the paint booth (aka my back yard) to start spraying lacquer.
 
The poor, misunderstood Mustang trem is to be blocked for this guitar. There are a couple of ways to do this, I opted to remove the spring posts completely and replace them with bolts.

[edit: although we ultimately decided to put the trem back together and keep it operational, I did a test fit of this assembly and found that the large washers underneath the trem plate, between the bolt head and the plate, were too wide to to fit in the trem cavity. If you're going to block your trem in this way, I suggest losing the big washers.]

Here is the underside of the trem before:

Bridge%201.small.jpeg


And after:

Bridge%202.small.jpeg


This pulls the stop-bar fast against the plate, which is a problem since on a Mustang the strings pass backwards through the stop-bar and then wrap underneath. Often the stop bar will be flipped around after doing this, so that the strings pass straight through from the back. I foresaw break angle issues with that configuration, and also it looked weird with the trem arm hole being on top. So I opted to raise the bar up far enough to allow the strings to wrap around underneath comfortably and shimmed it up with washers.

Bridge%203.small.jpeg


And remember, use only genuine Fender washers!  :toothy12:

Bridge%204.small.jpeg
 
Wow, I love that mustang bridge mod...I have always had a closet need for a Mustang, and that makes it even worse.


God, I love Lake Placid Blue, can't wait to see this together.
 
Between you, me and the guy who get's the guitar when it's done, that makes at least three of us!  :toothy10:
 
Alright. Pickups. Kurt Cobain had a whole stable of Mustangs, and most of them had the Seymour Duncan JB in the bridge. The Competition Blue Mustang was an exception though, it sported a Seymour Duncan Hot Rails. This is another thing the signature model got wrong. So, Seymour Duncan Hot Rails: Check.

Hot%20Rails.small.jpeg


For the neck, I decided to wind a built-for-purpose pickup. A Mustang pickup is very similar to a Strat pickup, the key differences being that the pole pieces are flush with the top of the bobbin (hence the closed cover) and, traditionally, they are wound with a few hundred less turns. The things I was taking into account when spec'ing this pickup out were:

  • The bridge pickup is going to be way hotter than the neck, unavoidably.
  • Mustangs (Short scale guitars in general...) tend a bit toward the darker side tonally.
  • I intend to use 500k pots

I wanted to wind it closer to hot Strat specs than to the cooler Mustang specs, but I also wanted to avoid getting too dark tonally, since the guitar will likely tend that way inherently. To help brighten the pickup a bit, I decided to make the bobbin a bit taller than usual, which will allow more room for extra wraps without increasing the width of the coil. The 500k pots will also help preserve the top end. I used longer than usual magnets to get the gauss up a bit, but since the pole pieces must be flush along the top of the bobbin, the excess magnet is underneath. The magnets are A5, and the wire is 43AWG Plain Enamel.

Picture barrage incoming:

Pickup%201.small.jpeg


Pickup%202.small.jpeg


Pickup%203.small.jpeg


Pickup%204.small.jpeg


Pickup%205.small.jpeg


Pickup%206.small.jpeg


Pickup%207.small.jpeg


Pickup%208.small.jpeg


Pickup%209.small.jpeg
 
I'm a fan of fairly light wax potting, just enough to stabilize the coil. This pickup got 2 minutes in the pot.

Wax%20Pot.small.jpeg


Magnets polarized South Up. (North on the charging magnet charges the pole pieces South)

South%20Up.small.jpeg


gauss.small.jpeg


She measured 8.89k Ohms resistance and 3.0H inductance. Not a facemelter by any stretch, but no sissy either.

Pickups.small.jpeg
 
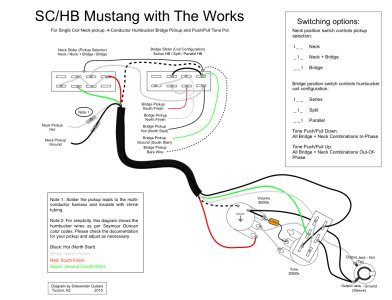
We discussed what kind of wiring/switching options he was interested in and ended up with something that I think is fairly unique. The idea is to use the neck position slider as a pickup selector (Neck / Neck + Bridge / Bridge), the bridge position slider as a coil configurator for the Hot Rails (Series / Split / Parallel), and a push/pull on the tone pot to reverse the phase of the neck pickup to allow for out-of-phase on any of the Neck + Bridge combinations. When you're trying to work out a wiring scheme for a Mustang, and you don't actually have a ready-for-service Mustang on hand, you have to get a bit... creative...  :tard:

Experiment.small.jpeg


It appears the premise is sound, so now to actually do it... The wire channel between the pickup / switch cavity and the control cavity is pretty small, so I wired the whole thing to a single 4-conductor cable. With the push/pull in there, it never would have accommodated that many runs of cloth push-back wire. It ended up working out pretty slick. I must say though, I've done my share of trick wirings, but this one I think takes the cake. Perhaps the most challenging I've attempted. I really, really hope it works... :o

After mounting the switches in the pickguard, I got the bright idea to test the switch connections in the different positions and found the pickguard slots were cut a bit short and were not allowing the switch to travel fully, resulting in failure to make contact. I had to file the slots a bit and now it's all better. I am SO happy that I identified that before wiring it up, as it would have been a frustrating thing to troubleshoot once all the wires and jumpers were in there.

Pickguard%201.small.jpeg


Pickguard%202.small.jpeg


Pickguard%203.small.jpeg


Control%201.small.jpeg


Control%202.small.jpeg


Control%203.small.jpeg


For anyone who's interested, I'll attach my wiring diagram here. I would recommend sticking it out with this build thread until I can confirm that it works though, haha!

[update: it works! it really, really works!]
 

Attachments

  • Mustang with Everythang.jpg
    Mustang with Everythang.jpg
    298.7 KB · Views: 12
I anticipated a project with the bridge bushing installation, and I was not disappointed. Accumulation of that beautiful Lake Placid Blue finish had taken a good size bite out of my internal diameter.

Bushings%201.small.jpeg


This looks like a job for (cue super hero music): dowel rod and sand paper!

Bushings%202.small.jpeg


A much more comfortable fit. But the reprieve was brief as I identified the next hurdle. The TOM route includes a relief to allow the bushing flange to set in flush with the finish, but again, it wasn't as big as it used to be. Back to the dowel and sand paper...

Bushings%203.small.jpeg


Looking much better!

Bushings%205.small.jpeg


After what felt like 2 hours (it really was 2 hours), my efforts were rewarded with:

Bushings%206.small.jpeg


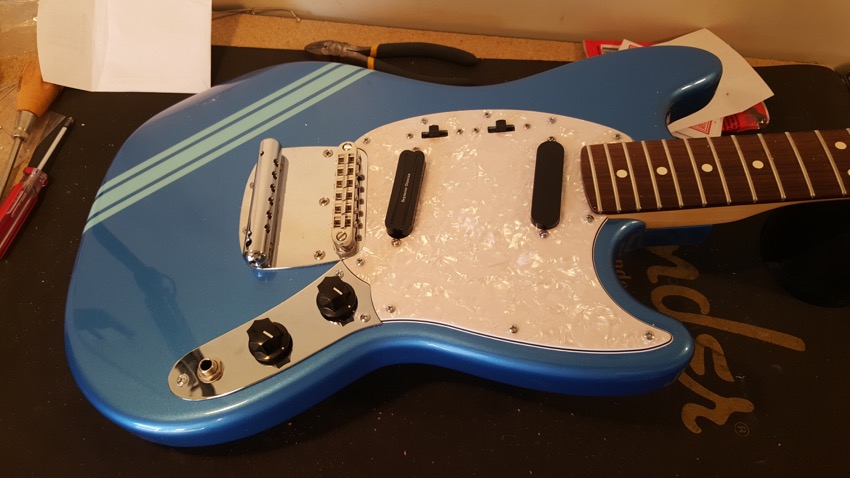
A perfect fit! I am most pleased. By the by, the hardware is not gold, it's chrome. Funky lighting. With that done, the trem plate installation should be pretty straightforward. But for now I'm going to quit while I'm ahead and call it a day.

Bushings%207.small.jpeg
 
Ok, so it's time to start drilling holes. As it turns out, I'm rather glad I didn't install the trem plate the other day as my friend, the future owner of this axe, decided he wants to see if we can keep it active and make it actually work. I'm convinced that we can. Or at least I'm convinced that we can give it the old college try. So I un-modified the trem and will be ordering up a TonePros roller TOM to assist us in our quest.

So, installing the trem. I'm afraid I may be showing my Telecaster roots with that ground wire...  :laughing7:

Assy%201.small.jpeg


Assy%202.small.jpeg


With the trem in place, the next thing was positioning the pickguard. My dad had a spare Strat neck laying around, which he graciously (and bravely) lent to me, so I bolted that on to help with alignment on the neck side. On the trem side, I had troubles. There wasn't enough clearance in the pickup/switch route for the pickguard to get into position.

Assy%203.small.jpeg


I was confident of the trem plate placement, as I had the bridge bushings as a rather concrete landmark when I was positioning it, so I'm thinking that our old friend "accumulation of finish" was visiting again, throwing off the tolerance ever so slightly. I called in a bigger gun for this one: DAS ROUTER. The router used to terrify me, but now, well, no, it still terrifies me. But it sure can be useful! I wanted to take off about 1/16". For straight edge duty, I recruited my Strat trem cavity template.

Assy%204.small.jpeg


Two passes later:

Assy%205.small.jpeg


Assy%206.small.jpeg


I dig.

Although I'm questioning the white pickguard. It's a bit... "pristine"... I'm going to order up an "Aged Pearl" and try that. An "Aged Pearl" pickguard from Warmoth, specifically. I ordered one from WD Music a couple of weeks ago because I wanted to see if Warmoth really meant it when they said their Mustang bodies and pickguards are only meant for each other. For anyone else who has wondered: they mean it. I should have taken a picture, but I didn't. The pickup and switch routes are different and the neck pocket cutout is too. I could make the rest of it work, but the neck pocket cutout would still be weird. So, I'll get the right one coming. I think it'll look gooder.
 
Back
Top