Leaderboard

illuminated color changing Band Sign build thread

clearerphish

Hero Member
Messages
541
OK, so I guess Off Topic is as good a place as any for this thread. It'll be a little involved. I know you guys like that.

So we keep bending our heads around low cost high impact things to add to the stage and do to up our game so to speak. I had the idea to make us a kind of lit up sign. This idea started out kind of amorphous and I had the idea to use El-wire. At the very least, I thought I could make a small sign to put on a guitar stand on the stage lip to help ppl remember who we were.

I started looking on ebay for el wire and non-traditional lighting options. One day the heavens opened up and I stumbled on a link for these:

$(KGrHqJ,!pQE8WqwJUdyBPGjYEUMB!~~60_12.JPG


And right off the rip the idea evolved. This is RGB LED strip lighting that color mixes. It even has adhesive backing. Ideas started FLYING now. I placed my order and started drawing plans.

I wanted the sign to be as large as possible, but I also wanted to be able to transport it in my car without having to buy a pickup or hatchback. I decided on the dimensions of 5' x 1.5' and to make it simply our band's name (Gnomonaut, by the way, stream our music at gnomonaut.com) in our "signature font". I manage a construction printing shop, so I made a blueprint:
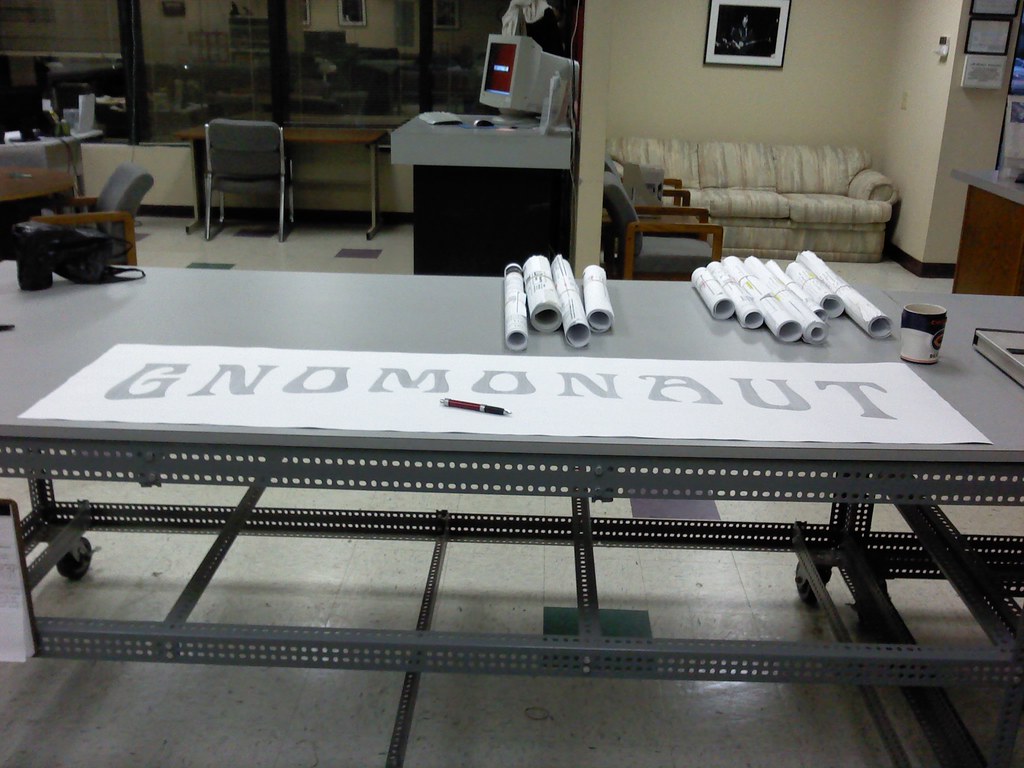
6768561889_91f65090c4_b.jpg


At this point I had a general idea in the direction I wanted to go, so I headed to home depot. Got some 1x2s and found a nice piece of bathroom wall board for the background. Had to buy a set of tin snips to cut the wall board into manageable chunks in the parking lot of home depot. Then home to cut two pieces at 60"x18" and cut the pine 1x2s with a jigsaw to make the frame. Here's a mockup:
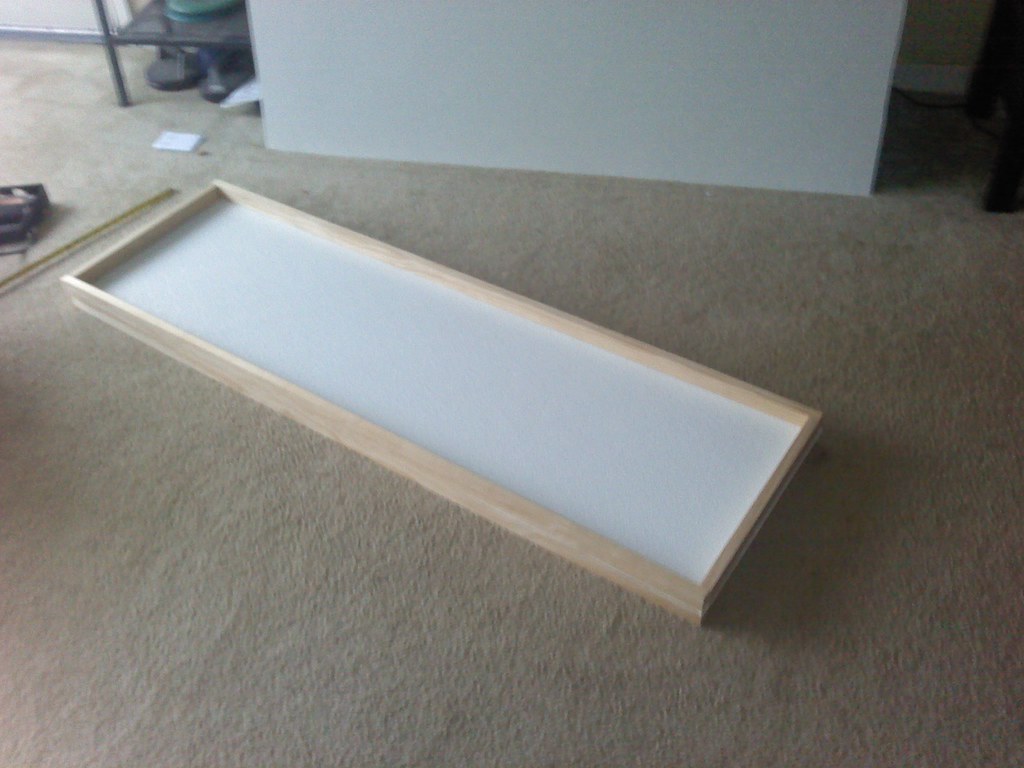
6768561955_5555b896fc_b.jpg


I selected the background material because it was thick, rigid, and lustrous without being reflective. You see, my idea is to create a glow with the LEDs so the background needs to diffuse the light. You can see how perfect this material is for this:
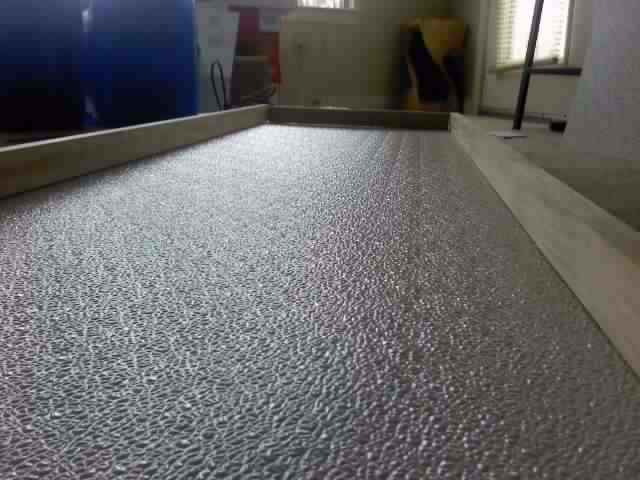
6768561997_931873e2f3_z.jpg


more to come...
 
Now that I had the background mocked up, the time came to start thinking about letters. I knew I wanted to cut them out of some material that I could work without a scroll saw but that would be quite rigid. I racked my brain trying to come up with materials and wandered the aisles of home depot, lowes and Michael's like a blissed out zombie, just coming up with ideas. I started mocking up the letters:

6768562087_b30a2b1b00_b.jpg


6768562171_41c2513880_b.jpg


Here we go! Also, at this point, I feel that since my workplace is in every one of these pictures, it is important that I mention we have been really slow in the past couple weeks and I only did this on down time.  :evil4:

Eventually I decided that the material I was going to make the letters out of...was the same material I made the background out of. It was a true labor of love, but I traced the outline of the letters in reverse on the flat rear side of the material, rough cut the letter out of the material with a cutting wheel on a dremel, then used a sanding stone on the dremel to sand away until there was no black outline left on the letter. This took forever, and covered my work under a layer of white dust that would have made scarface himself quite proud and my doctor SO angry.

First letter done!:

6768562207_0f5f953e0a_z.jpg


And a couple of cashed lungs later:

6768562281_c8838b1259_b.jpg


you can see the dust on the table and that's after we cleaned up...twice!

I read some finishing remarks on this board and went out and bought some duplicolor primer and some trusty rustoleum flat black. Here we go:

6768562353_7d2ec3b173_b.jpg


mockup with the frame and background to make sure we're still on target:

6768562459_b9181f02f8_b.jpg


prime and paint our frames after sinking two eyebolts in each for mounting/hanging:

6768561825_8a22b4391a_z.jpg


And then I had to stop and wait...

and wait...
 
:blob7: LIGHTS ARE HERE  :blob7:

The great thing about these LED strips is that you can cut the strip every three LEDs and solder them together with lead wire. Now that the LEDs were in, I could affix them to the rear of the letters so I can see where they WONT be and drill the mounting holes into the letters. The idea is to levitate the letters 1" above the background, allowing the glow from the LEDs to seep out from underneath the opaque letters without actually seeing the lights. Here we are:

6768562523_9d36708acd_b.jpg


and some seriously intricate soldering work (I got better as I went along)

6768562579_6f13c56155_b.jpg


...
 
Once I had the circuit path soldered for each letter, I tacked a long pigtail wire onto each letter to connect them together. Then I started back at work on the background.

I printed another blueprint of the sign in a mirror image and affixed it to the back of the background. I laid each letter on it's corresponding part of the blueprint and marked where the screw holes were, then drilled the background. I used a larger diameter bit as I am levitating the letters on aluminum threaded screwposts used for bindery.

6768562607_0ce8b7d393_z.jpg


6768562629_9519be4af8_z.jpg


speaking of screwposts, I put the screwposts in the holes I drilled, then I placed the other sheet of background material behind that one, keeping the screwposts fully pressed into the background. I drilled bigger holes in each letter to run the pigtail wires through making sure they would be obscured by the letters:

6768562709_e28ac93479_b.jpg


...
 
:blob7: :blob7: :blob7: :blob7: :blob7: :blob7: :blob7: :blob7: :blob7: :blob7: :blob7: :blob7: :blob7:

And now the "payoff" starts dribbling in:

Here's a mockup of the sign, no lights, all paint and priming done. This is basically how it will look:

6768561803_d08d6c726e_z.jpg


And now for something that I only saw in my head until today:

6768561671_4c1d1d4968_b.jpg


almost there...

6768561773_b8b02a4435_b.jpg


...
 
swarfrat said:

LOL. It's really similar, actually.

OK, I just finished this beastie with the exception of skinning the front in plexiglas but I have to go to a plastics shop and find some non-glare 1/4" plexi.

6771496893_8c689a64e2_b.jpg


6771496311_a8f0f54724_b.jpg


6771498673_5c1838308f_b.jpg


I'm EXTREMELY pleased with it.

Final stats:
under 15 lb.
I think 22 watts total power draw
$80 before plexiglas in materials
probably 35-40 man hours as I fabricated almost everything

Sign will:
- cycle through 20 preset colors
- stay any color and allow me to program custom colors
- fade through 3 colors with variable speed controlled by remote
- fade through 7 different colors with variable speed
- jump through 3 colors with variable speed
- jump through 7 colors with variable speed
- strobe white with variable speed
- adjustable brightness in any scene

From my brainstem through my rectum to your eyeholes in under 1 month. Sure wish my playing sounded as good as this looks.

It's ok, you don't have to say it. I'll make my own signature image for band sign of the month Jan 2012.  :cool01:

:redflag:
 
That is just a stunning job!

Can you imagine what it would cost to have something like that made for you? I can't. All I know is it would represent many, many cases of beer.
 
This is very cool.

I'm surprised at how inexpensive the LED kits are. I might have to buy one and decorate something. :blob7:
 
I can put this thing on top of my egnater renegade head and even though all my solder points are unshielded and whatnot there is no electrical noise at all. Line6man, you should do a google search for "Total Control Lighting". In essence, each LED becomes a pixel and you can do amazing things with a computer...
 
clearerphish said:
I can put this thing on top of my egnater renegade head and even though all my solder points are unshielded and whatnot there is no electrical noise at all. Line6man, you should do a google search for "Total Control Lighting". In essence, each LED becomes a pixel and you can do amazing things with a computer...

Yep, unlike neon lights, LEDs run on low voltage direct current. Even if the output has a ton of ripple, you won't get any noticeable RFI/EMI. That's the beauty of it.
 
clearerphis that is a great high  impact sign & great detailed work.
I listened to "Bekajamir" while i read your thread Great stuff. :cool01:
 
Thank you leo! Thanks for listening!

Here's a little video. I just took it with a point and shoot digital camera so it's terrible quality. Also, the LEDs look extremely flickery in the video, that's not how it looks in real life at all. It's MUCH smoother and it doesn't flicker.

http://www.youtube.com/embed/SxYdNfTx2C0
 
That thing really works well! Hard to believe you built that for what you did. I know there was a lotta labor in it, but still. If you could figure out how to get rid of a lot of that time, you could probably sell those things all day long.
 
It would really have to be priced out on a case by case basis. It was easy enough to conceive of this plan, I think anyone can do something like this for their band if they sit down, plan everything out, mock as you go, and have some general imagination.

I went to a lighting store yesterday to grab some safety hangs to put through the eyebolts, and they were working on a circuit to control these via DMX as I walked in. that means when we upgrade our rig we'll be able to colormatch lighting hues exactly with this sign and the stage lighting.

*shakes head*

technology, man.

We're now talking about making an 18" stonehenge piece for the top of one of our amps, and I'm already working on a merch sign in plexiglas.
 
clearerphish said:
We're now talking about making an 18" stonehenge piece for the top of one of our amps...

nigel+framed.jpg


Don't touch it. Don't even look at it.
 
Back
Top