Grandson #2 Telecaster Build - Finished Product

Dano

Junior Member
Messages
105
I have two grandsons and I decided to build them each a guitar.  I just finished them, so I am going to post a few pics and descriptions of what I did along the way, as best I recall.

The first post was Grandson #1 Telecaster Build – Finished Product.  It was my first attempt at an owner finished guitar (other than oil) and it includes some lessons learned in my first attempt.  This is the link:

https://www.unofficialwarmoth.com/index.php?topic=30970.0

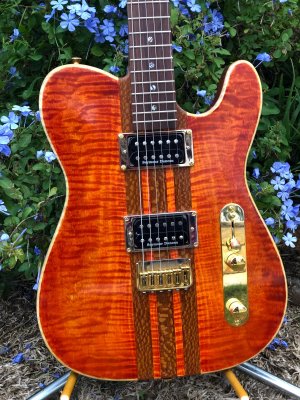
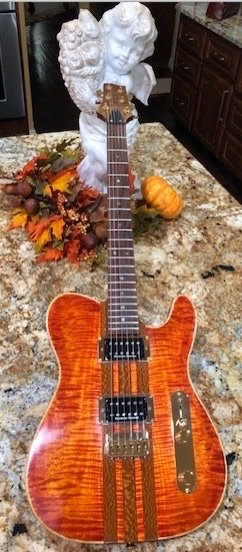
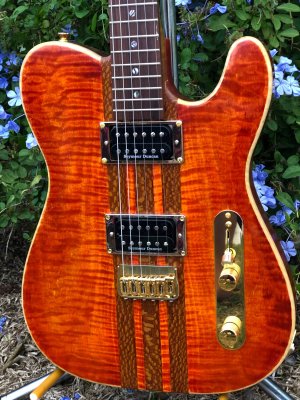
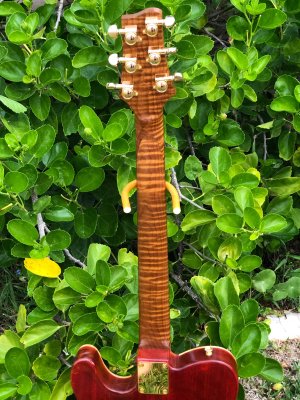
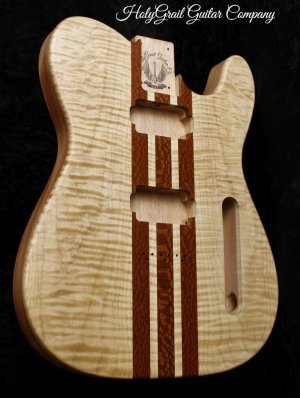
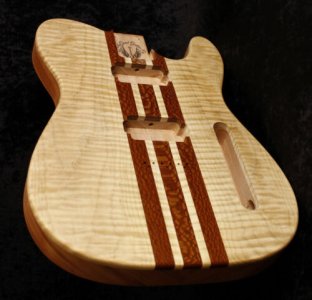
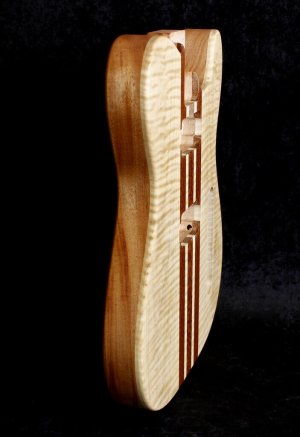
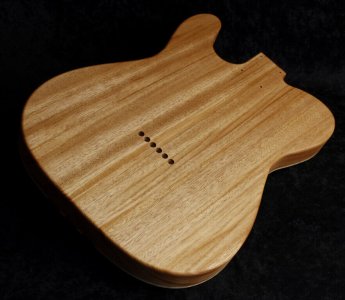
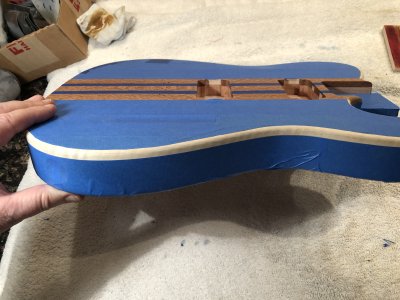
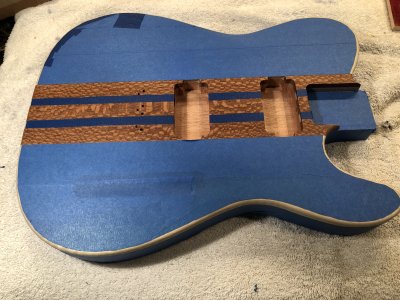
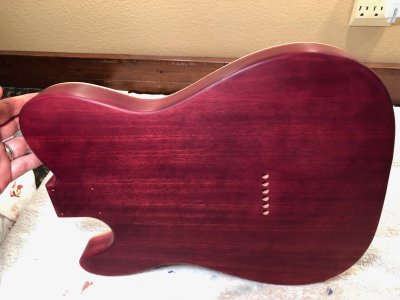
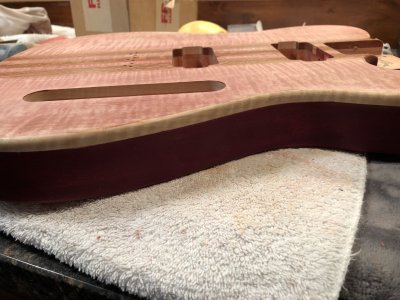
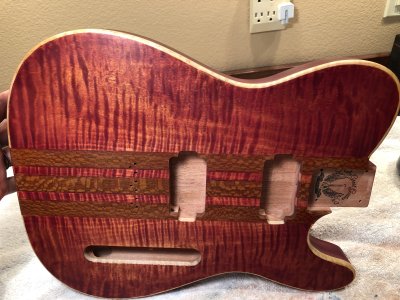
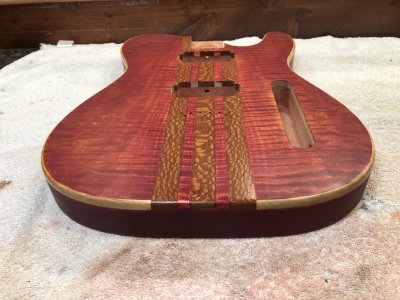
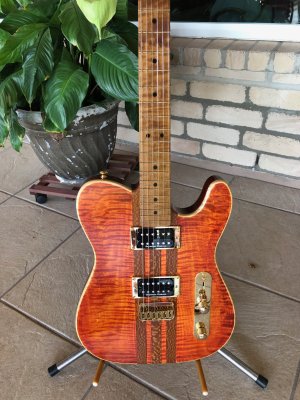
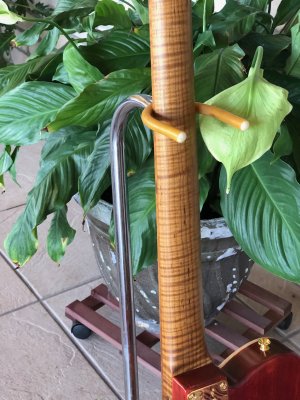
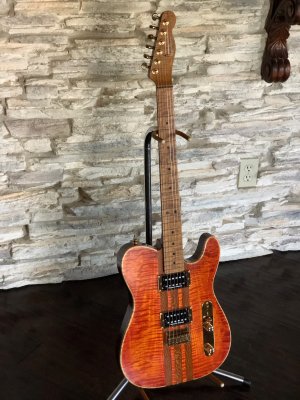
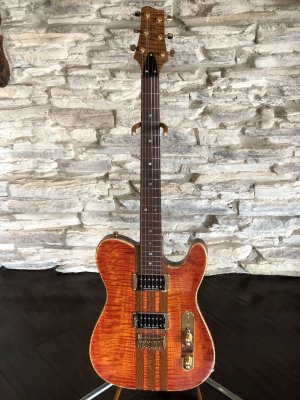
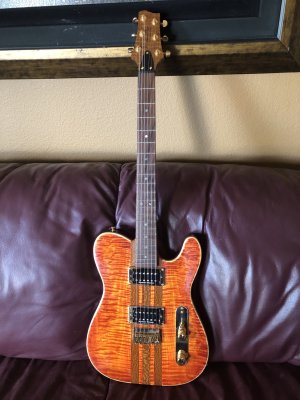
Now on to the Tele for my other grandson.  This body was purchased on eBay and it was approximately 3/8” Flame Maple lamtop on Mahogany.  The maple top had some stripes of Leopard Wood running longitudinally through the top.  My intent was to pick a color and a pattern that complimented the dark Leopard wood stripes and the Roasted Flame Maple neck.

Here are a few pictures of the guitar body as I received it.
 

Attachments

  • 1.jpg
    1.jpg
    105.7 KB · Views: 14
  • 2.jpg
    2.jpg
    42 KB · Views: 9
  • 3.jpg
    3.jpg
    83.6 KB · Views: 6
  • 4.jpg
    4.jpg
    116.7 KB · Views: 7
I sanded the body using a random orbital sander with 220 and 320 grit to check out the grain and set out to come up with a plan to finish it.

I decided that I would try to incorporate a feature that Warmoth does a fantastic job of and one that makes a guitar very appealing visually.  I am talking about a faux binding, or what Warmoth calls a natural masked binding.  I don’t know how this is “supposed” to be done.  I looked pretty hard on the internet  but could not find much on the topic.  The following is how I approached it. 

I planned to apply Sanding Sealer on the edge of the Flame Maple laminate top so that dye would not soak into the wood on the edge and it would show the natural light color of the maple.  I also planned to do the same thing on the Leopard Wood stripes that traversed the top of the body.  I wanted these to be untouched by stain that would go on the body.  I taped everything on the body except those areas.  I then sprayed the edge of the Flame Maple and the Leopard Wood stripes with StewMac Sanding Sealer. 

I put several light coats on the sealer on the edges and the Leopard wood stripes.

Here are some pics of the taped off body sprayed with Sanding Sealer:
 

Attachments

  • 5.jpg
    5.jpg
    2 MB · Views: 13
  • 6.jpg
    6.jpg
    3 MB · Views: 14
I then removed the tape on the sides and back of the body, and I taped up the faux binding to protect it from dye that was to be applied to the back and sides.  Sorry I don’t have a pic of this part, but it is not hard to imagine. 

I used Angelus Red Mahogany dye on the back and sides.  I poured the dye directly on pieces of cut up T-shirts.  I put on a few coats until it looked the right color to my liking.

Here is a pic showing the Red Mahogany dye on the back and sides:
 

Attachments

  • 9.jpg
    9.jpg
    1.8 MB · Views: 10
I allowed the back and sides to dry overnight and then I masked off all but the remaining Flame Maple on the top of the guitar that was to be stained.  Here is a pic of the body taped off and ready to stain the Flame Maple top:
 

Attachments

  • 7.jpg
    7.jpg
    2.3 MB · Views: 9
I planned on using Angelus Leather dye on the top, as shown on several YouTube videos by “Big D Guitars”.  I tried several different combinations of the dyes on scrap maple and came up with the following procedure.

First I put down a dark layer of Red Mahogany leather dye.  I applied the dye by pouring it directly on cut up T-shirt patches.  I removed the masking tape and sanded the body back with 220 and 320 grit sandpaper on a random orbital sander.  This resulted in a 3D look that changed as you tilt the guitar body.    The dark dye stayed visible in the low lying grain.  The grain that was raised by the moisture in the water based dye was sanded off.  That raised portion of the body was pretty much sanded back to wood with a light hue of the Red Mahogany dye remaining. 

Here are some pictures of the body in that step of the process:
 

Attachments

  • 11.jpg
    11.jpg
    1.9 MB · Views: 6
  • 10.jpg
    10.jpg
    2.4 MB · Views: 15
I then taped back over the Leopard wood and faux binding to protect it in the second step of the staining process.  I had experimented with several different combinations and it turned out that I liked the Red Mahogany base with a topcoat of Angelus Yellow Leather Dye.  That sounded like a strange combination to my untrained sense of what “should work”.  It turned out to be the one I liked the most and that shows the value of trying several permutations of dyes on scrap wood.  Some of the other dyes I tried on top of the Red Mahogany were Amber, Honey, Red, and Orange.  I suppose there are just about an infinite number of different combinations you can try, but what I ended up with on this project was a base coat of Red Mahogany followed by Yellow.  Here is what the final product looked like after a couple of coats of Yellow dye worked into the base coat of Red Mahogany.
 

Attachments

  • 12.jpg
    12.jpg
    2.5 MB · Views: 17
  • 12.jpg
    12.jpg
    2.5 MB · Views: 7
  • 13.jpg
    13.jpg
    2.3 MB · Views: 11
At this point, I was happy with the color scheme and it was time to finish it with a top coat of StewMac Colortone Sanding Sealer followed up with Colortone Guitar Lacquer.  I used a home made device to hold the guitar and allow rotation while spraying.  This was made from items collected in my garage and just put together to make life easier.  I know that items like this are professionally made and marketed but they cost quite a bit and I had this stuff lying around.  You can refer to the Grandson #1 Telecaster build for more details on the construction of this tool to hold and rotate the guitar while spraying.
 

Attachments

  • 14.jpg
    14.jpg
    73.8 KB · Views: 11
I sprayed very thin coats of Sanding Sealer at first and progressively increased the thickness.  The directions on the can said to wait 1 - 2 hours between coats, but I believe I waited a minimum of two hours.  I don’t remember exactly how many coats I put on it, but it took a full can of the product.  This was Stewmac’s recommended amount.

I waited a couple of days after the last coat and started spraying coats of StewMac’s Nitrocellulose Clear Guitar Lacquer.  Again, I started with very thin coats and gradually increased the thickness of the coats.  I ended up using 4 cans of Lacquer on the body. 

StewMac recommends waiting about 2 weeks to do final sanding and buffing, but I waited 3 weeks.  I then wet-sanded with 800, 1500, 2000, and 3000 grit sandpaper.  I used a sanding block where I could and sanded back and forth as opposed to in a circular pattern.  Where it was not practical to use a large sanding block, I used a rubber eraser and a small foam block to get into the curves around the neck and horn of the body.  I don’t know if that is how you are supposed to do it, but that is how I chose to proceed. 

I then polished the body with Meguiar’s Ultimate Polish.  I did this where possible with a random orbital sander and a Surbuf Microfingers buffing pad.  In the tight spots I just used microfiber cloth.

Finally, I waxed it with Minwax Paste Finishing Wax.

I finished the neck with several coats of Birchwood Casey Tru-Oil followed by Birchwood Casey Gunstock Wax.  This made the flame in the neck pop really nice.  I really like the feel of the Roasted Maple with the Tru-Oil and Gunstock Wax.  It is really slick and to me is much nicer than a Nitro finish as far as running your hands up and down the neck. 

Unfortunately, I did not take any pictures of the assembly process, but there was really nothing special about any techniques I used to put it together. 

Here are the specs of the guitar and the components I chose for the build.

Body:

Telecaster Style Body by Holy Grail Guitars.
Flame Maple, Top with stripes of Leopard wood running through the center of the top, on Mahogany
Right Handed.
Single Coil rout in neck and bridge position.
No comfort contours in any position.
Top Control Cavity Rout

Warmoth Neck:

Style: Telecaster®
Construction: Modern Construction
Orientation: Right Handed
Neck Wood: Roasted Maple
Fingerboard Wood: Roasted Maple
Nut Width: 1-11/16"
Back Shape: Standard thin
Fret Size: GD6150 (Gold Color)
Tuner Ream: Gotoh/Grover (13/32" 11/32")
Radius: 10-16" Compound
Scale: 25-1/2"
Fret #: 22
Mounting Holes: Standard 4 Bolt
Pre-Cut Installed String Nut: GraphTech Black TUSQ XL - Standard Nut
Inlays: Black Face Dots
Side Dots: Black Side Dots
Finish: Owner finished with several coats of Birchwood Casey Tru-Oil and followed by Birchwood Casey Gunstock Wax.
 
Here are some pics of the final product:
 

Attachments

  • 19.jpg
    19.jpg
    2.3 MB · Views: 18
  • 18.jpg
    18.jpg
    2.5 MB · Views: 23
  • 17.jpg
    17.jpg
    2.4 MB · Views: 11
  • 16.jpg
    16.jpg
    2.4 MB · Views: 9
  • 15.jpg
    15.jpg
    2.4 MB · Views: 22
More Pics
 

Attachments

  • 25.jpg
    25.jpg
    2.8 MB · Views: 3
  • 24.jpg
    24.jpg
    2.7 MB · Views: 2
  • 23.jpg
    23.jpg
    3.2 MB · Views: 10
  • 22.jpg
    22.jpg
    3.2 MB · Views: 10
  • 20.jpg
    20.jpg
    2 MB · Views: 6
Thanks Bagman! 

This process is quite humbling and it showed me once again what a fabulous "deal" it is to have Warmoth finish your bodies for you.  No way I can do it half as well or as cheap as they do.

Having said that, it was fun and I will likely keep doing it until I get decent at it.

Holy Grail Guitar Company built the bodies.  I found them on eBay.
 
That's something anyone would be proud to own!  I hope grandson #2 appreciates the work that went into it.  :yourock:
 
Damn, that does look good. That neck is beautiful. Your grandsons are very lucky boys. Nice work.
 
JPOL007 said:
That is simply beautiful work. The Hot Rails are great for Teles.

Thanks for the vote of confidence!  Both projects were fun and I learned an enormous amount about finish work.  When you start from zero, you tend to do that!

I like the hot rails a lot.  They have about the same output as my SD Pearly Gates in my Les Paul.  Hard to believe for a Tele single coil sized pickup! 

I put 500k pots and a 0.022 uF tone cap and that is about right for these pickups. 

I split the coils in another Tele I built with hot rails and that adds some options if you don't want them so hot.

I put a set of hot rails in a Strat I built for my brother and they SCREAM.  They are hotter than any full sized Humbucker that I have.  They can sound tame enough with the volume rolled off a little though.  By no means a normal Strat tone, but versatile enough.
 
I ended up putting a different neck on the guitar, and here are a few more pics... 

He will get it Thanksgiving when they come down from Austin.  :cool01:
 

Attachments

  • 1.jpg
    1.jpg
    1.1 MB · Views: 7
  • 2.jpg
    2.jpg
    82.4 KB · Views: 14
  • 3.jpg
    3.jpg
    1 MB · Views: 4
  • 4.jpg
    4.jpg
    1.1 MB · Views: 5
Back
Top