Leaderboard

Grandson #1 Telecaster Build – Finished Product

Dano

Junior Member
Messages
105
I have recently become aware of how helpful these build threads can be and promised myself I would post mine to try to be a better part of the community here at Warmoth!  This post is after the fact and I had no idea I would be attempting to document anything from this build.  With that in mind, I hope there is something of use to someone, if nothing other than the fact that it is easy to mess up and difficult to recover!

I have two grandsons and I decided to build them each a guitar.  I just finished them, so I am going to post a few pics and descriptions of what I did along the way, as best I recall.

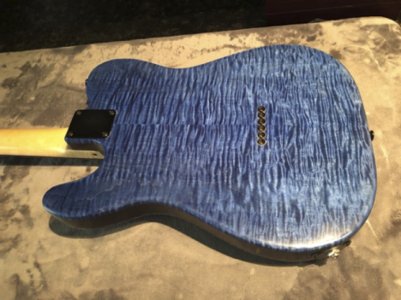
I happened to run across a really nice body on eBay that looked fantastic.  This body is very unusual in that it has a 3/8” Flame Maple laminate on both the top and the back.  It was unfinished and I have very little experience in this area.  I have only done finish work on Rosewood with Tru-Oil.  I had never done a stained guitar and this is what it turned out to be.  It came out nice, but this endeavor turned out to be quite a bit more challenging than my previous projects.

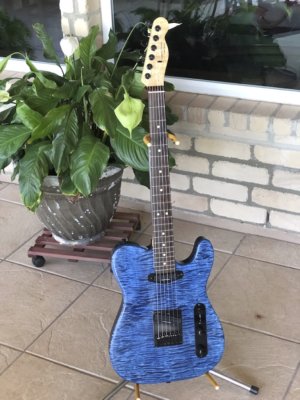
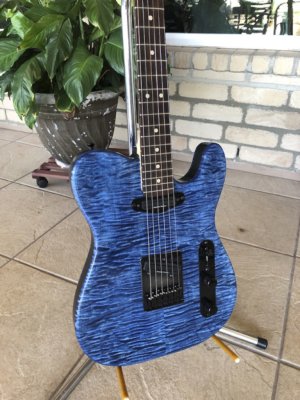
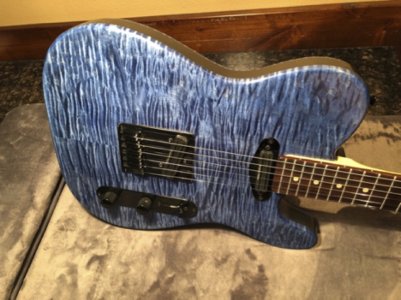
This guitar was intended for my 13 year old grandson and he is fond of really flashy stuff and blue is his favorite color.  It is a beautiful specimen of flame and my objective going in was to show that flame off and try not mess it up too badly.  That objective was ultimately realized, but not without some hurdles to clear in the process.

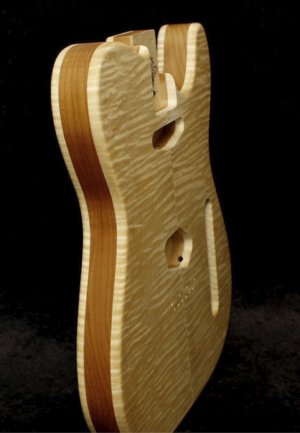
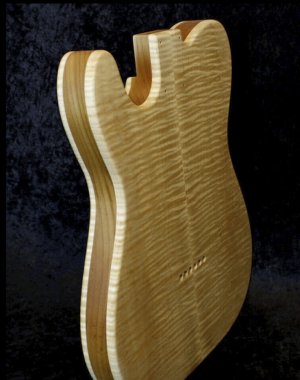
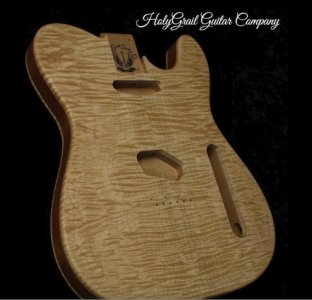
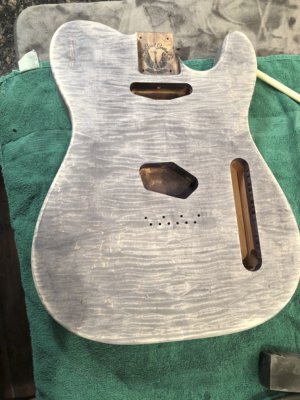
Here are a few pictures of the guitar as I received it:
 
Unfinished Body Pics
 

Attachments

  • 2.jpg
    2.jpg
    110.7 KB · Views: 14
  • 3.jpg
    3.jpg
    172.8 KB · Views: 9
  • 1.jpg
    1.jpg
    187.7 KB · Views: 16
I sanded the body using a random orbital sander with 220 and 340 grit and set out to come up with a plan to finish it.

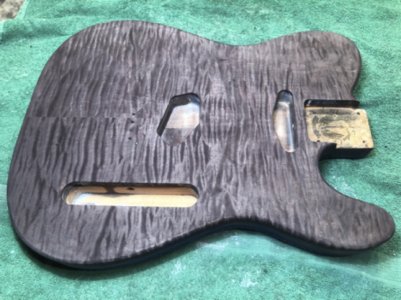
I decided to try to lay down a StewMac Colortone water-based black stain on the front and back Flame Maple, then sand it down to leave the black stripes in the low-lying grain.  The grain that had been raised by the stain would then be sanded off, and the blue could be applied to the sanded parts of the flame. 
 
Here is the body with the black dye on it.  Just the black stain made the flame pop pretty well.
 

Attachments

  • 4.jpg
    4.jpg
    195.4 KB · Views: 19
I then used a random orbital sander and sanded it down with 220 and 340 grit to remove the black dye from the raised grain.

I had absolutely no idea how far to sand it down, but when I got to this point…. I said I looks good to me…
 

Attachments

  • 6.jpg
    6.jpg
    331.7 KB · Views: 16
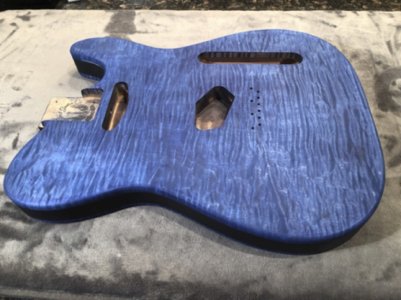
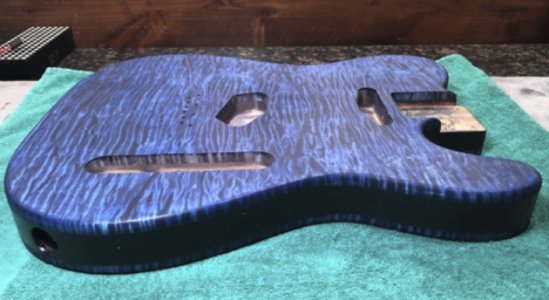
I then used StewMac Colortone Blue Dye to cover both the front and back.  This is what the body looked like after the blue dye was applied.
 

Attachments

  • 7.jpg
    7.jpg
    168.9 KB · Views: 17
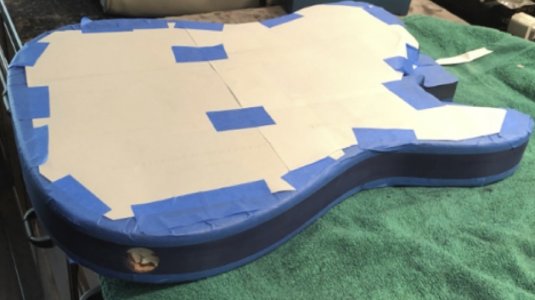
I then masked off the body so that I could stain the sides black.  The stain would not take properly to the end grain of the wood, so I came up with a “Plan B”.  I just used some rattle can gloss black spray paint.  Here is a pic of the body taped off with the sides exposed.
 

Attachments

  • 8.jpg
    8.jpg
    98.8 KB · Views: 14
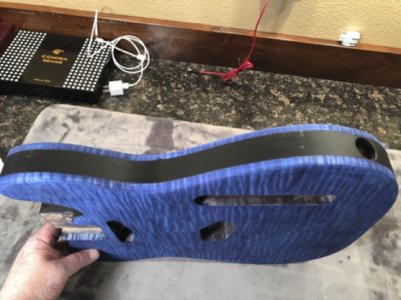
I did a bad job of documenting the process, but I believe I used a random orbital sander and smoothed the body with some 1000 grit sandpaper to get it to the following shape.
 

Attachments

  • 9.jpg
    9.jpg
    165.5 KB · Views: 17
  • 10.jpg
    10.jpg
    138.4 KB · Views: 13
This is where the project went south and almost made me throw in the towel.  I guess this is where a “learning experience” can be gleaned from this post. 

I made an attempt to finish the guitar using Minwax brush-on sanding sealer and Minwax Polyurethane finish.  That turned out to be a disaster.  I did ok with the sanding sealer, but the polyurethane was another story.  I put it on to thick and to compound the problem, I did not let it cure long enough.  The instructions on the can said to wait 24 hours before sanding and buffing.  That is exactly what I did, and the outcome was nasty.    I started with 2000 grit on a random orbital sander and it just smudged the finish.  I did not have a clue what I was doing and the more I tried to fix it, the worse it got.  I ended up sanding right through to the dye and messing it up beyond repair. 

I got some advice from some of the guys on the forum and found out that Polyurethane needs to cure a month before final sanding, polishing and buffing.  The product I was using is intended for floors and was really not the correct application.  This mistake caused me a lot of grief and almost soured me from trying to finish guitars myself. 

I stepped back and read a bunch of forum posts and watched a bunch of YouTube videos.  I ended up sanding it back down to pretty much bare wood and starting over.  I did the staining process all over and was back where I started and ready to do the clear top coat.       
 
The second time I decided to use StewMac spray can products and follow the advice from StewMac and the help all of the forum members gave me.  I sanded the body down to bare wood and started over.  I repeated all of the steps documented above and finished the guitar with Nitrocellulose Lacquer.

I started by spraying the body with sanding sealer.

I started out trying to rest the body on spray can tops and just applying a coat to the top, then waiting an hour and flipping the body to cover the back.  That got old really fast, so I looked around for some way to do it better.

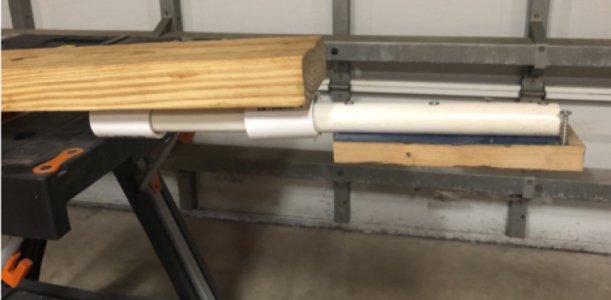
I found a piece of board that fit inside the neck pocket on the body.  I cut that about 8 inches long.  I found a piece of 1” PVC pipe and cut it about 16” long.  I attached it to the plank of wood with three 2” long wood screws.  I drilled holes in the board such that I could attach the assembly to the neck pocket of the guitar body.  It just so happened that the 2” wood screws I had were the perfect diameter to use to attach it to the body without damaging the pre-drilled holes in the body.  I trimmed the length to prevent them from protruding through the guitar body.
 

Attachments

  • 11.jpg
    11.jpg
    61.4 KB · Views: 15
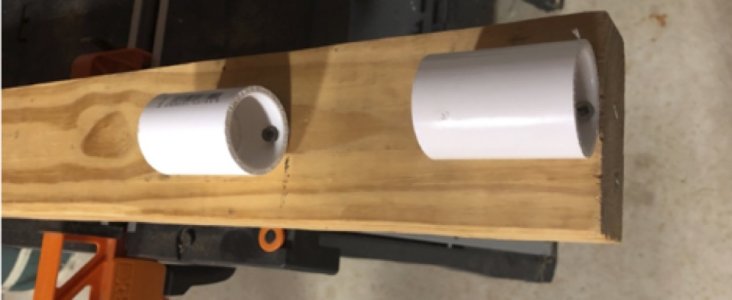
I happened to have some PVC collars that were just right for the PVC pipe on the handling assembly to fit inside and allow the guitar to rotate freely.  I attached them to a 2 x 4 board spaced such that they held the PVC pipe in a stable fashion.
 

Attachments

  • 12.jpg
    12.jpg
    58.5 KB · Views: 8
I held this board with the PVC collars on a work bench with clamps.  I tilted the board such that the guitar would be held at a slight angle and gravity would prevent it from drifting out of the collars while rotating the guitar.  Sorry I don't have a pic with the guitar attached, but you get the idea.

This setup worked great as a means to spray the entire guitar at one time without setting it down or the need to hold it while spraying.

I hope this makes some sense and will be of help to someone who does not want to shell out the big bucks for a fancy retail device that does exactly the same thing.
 

Attachments

  • 13.jpg
    13.jpg
    73.8 KB · Views: 15
I sprayed very thin coats of Sanding Sealer at first and progressively increased the thickness.  The directions on the can said to wait an hour between coats, but I believe I waited a couple of hours.  I don’t remember exactly how many coats I put on it, but I used a full can of the product.  This was Stewmac’s recommended amount.

I waited a couple of days after the last coat and started spraying coats of StewMac’s Nitrocellulose Clear Guitar Lacquer.  Again, I started with very thin coats and gradually increased the thickness of the coats.  I ended up using 4 cans of Lacquer on the body. 

StewMac recommends waiting about 2 weeks to do final sanding and buffing, but I waited 3 weeks.  I then wet-sanded with 800, 1500, 2000, and 3000 grit sandpaper.  I used a sanding block where I could and sanded back and forth as opposed to in a circular pattern.  I don’t know if that is how you are supposed to do it, but that is how I chose to proceed. 

Then I polished the body with Meguiar’s Ultimate Polish.  I did this where possible with a random orbital sander and a Surbuf Microfingers buffing pad.

Finally, I waxed it with Minwax Paste Finishing Wax.

Unfortunately, I did not take any pictures of the assembly process, but there was really nothing special about any techniques I used to put it together. 
 
Here are the specs of the guitar and the components I chose for the build.

Body:

Telecaster Style Body by Holy Grail Guitars.
Flame Maple, Top and Back, on Mahogany
Right Handed.
Single Coil in neck and bridge position.
No comfort contours in any position.
Top Rout

Warmoth Neck:

Style: Telecaster®
Construction: Modern Construction
Orientation: Right Handed
Neck Wood: Flame Maple
Fingerboard Wood: Flame Maple
Nut Width: 1-5/8"
Back Shape: Standard thin
Fret Size: SS6150 (Stainless)
Tuner Ream: Gotoh/Grover (13/32" 11/32")
Radius: 10-16" Compound
Scale: 25-1/2"
Fret #: 22
Mounting Holes: Standard 4 Bolt
Pre-Cut Installed String Nut: GraphTech Black TUSQ XL - Earvana Nut
Inlays: Black Face Dots
Side Dots: Black Side Dots
Finish: No Finish

Hardware and Electronics:

Gotoh Telecaster Bridge, Black
Grover 505BC6 Mini Roto-Grip Inline 18:1 Locking Tuners
Seymour Duncan Hot Rails for Telecaster
500k CTS Volume and Tone Pots
0.022 uF Russian PIO Tone Cap

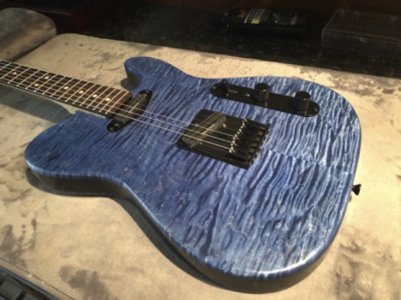
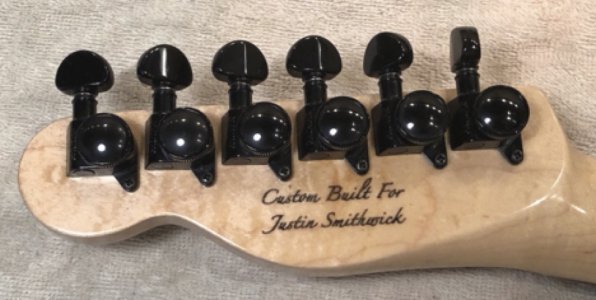
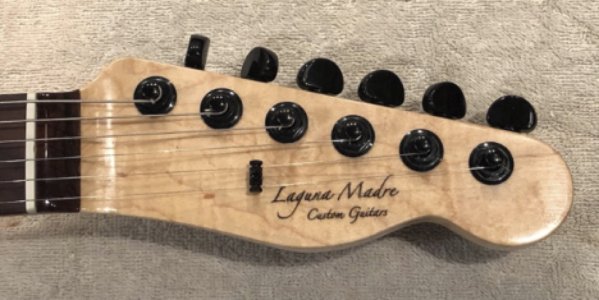
The waterslide decals were made using an 8 ½” x 11” sheet of waterslide decal material purchased off eBay on an inkjet printer.  I sprayed the decal with Nitorcellulose Lacquer to keep the ink from running when immersed in water.  I sprayed several coats of lacquer over the decal and then wet sanded until flush.
 
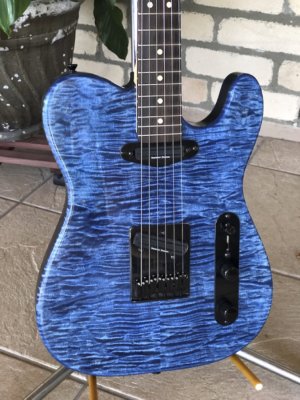
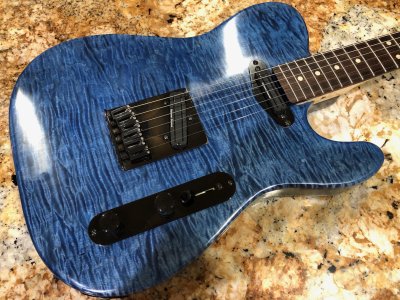
Here are some pics of the final result:
 

Attachments

  • 21.jpg
    21.jpg
    343.1 KB · Views: 20
  • 20.jpg
    20.jpg
    284 KB · Views: 18
  • 19.jpg
    19.jpg
    338.8 KB · Views: 17
  • 18.jpg
    18.jpg
    171.8 KB · Views: 13
  • 17.jpg
    17.jpg
    187.1 KB · Views: 20
  • 16.jpg
    16.jpg
    168 KB · Views: 23
  • 15.jpg
    15.jpg
    118.1 KB · Views: 14
  • 14.jpg
    14.jpg
    131.7 KB · Views: 21
  • IMG_0261.jpg
    IMG_0261.jpg
    1.3 MB · Views: 6
I hope you have enjoyed the review of my first attempt at staining a body and finishing it with a clear coat.  At one point I was pretty close to giving up… thankfully, following the advice of Chief Dan George in “The Outlaw Josey Wales”, I endeavored to persevere!
 
Tremendous work!  Thank you for you very generous exegesis of your process.  Your grandsons are lucky fellas indeed.  Looking forward to seeing Grandson No. 2's axe as well.
 
Beautiful work and excellent documentation. I think you just solved a problem for me concerning the finish on my current project :icon_thumright:
 
Back
Top