

You are using an out of date browser. It may not display this or other websites correctly.
You should upgrade or use an alternative browser.
You should upgrade or use an alternative browser.
First build - tele
- Thread starter jyjvstrat
- Start date

ragamuffin
Hero Member
- Messages
- 1,707
Nice work!
jgarber79
Newbie
- Messages
- 3
Looks really nice. I love the natural dark wood with the silver hardware. When I first saw the pics of the white pick guard I wasn’t a fan so I’m glad you went without it. I appreciate the walk through and description of the challenges you faced. I’m planning to do a first build myself and am looking for any tips from other builders as I dig through the forum here. I have seen those bowl jacks and liked them but given your experience I’m not sure where they are intended to be used. I have a curved square jack plate on an old LP copy that has been a thorn over the years and was hoping I could use something like the bowl. I hope that guitar is as fun to play as it looks. Enjoy!
jim232777
Junior Member
- Messages
- 38
jyjvstrat said:After that I just spent hours and hours playing with the setup
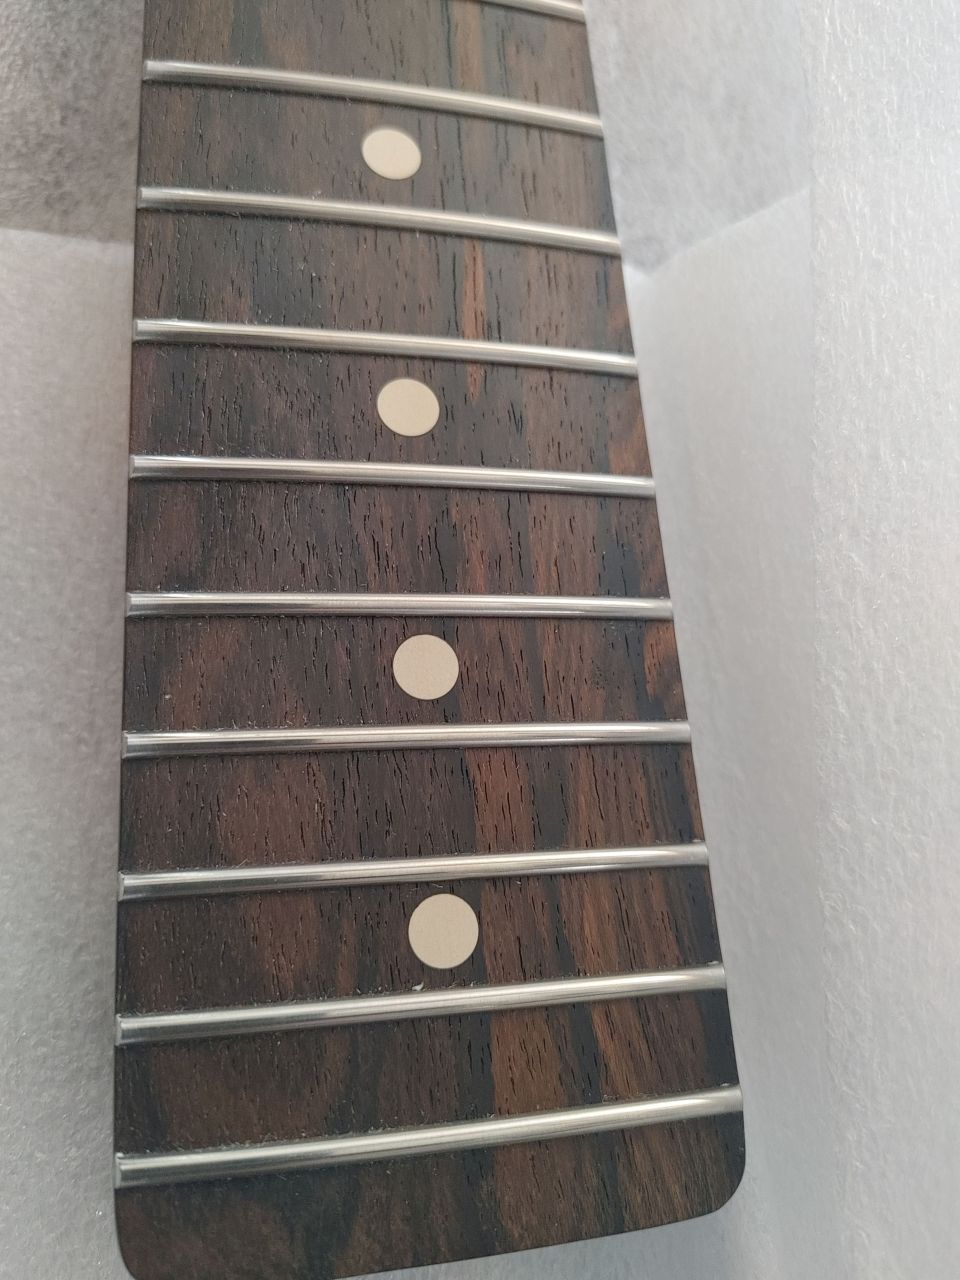
Very pretty wood. I really like that zircote fretboard.
After my one build the the string height, intonation, etc. went very smoothly, but I was tweaking pickup height for several weeks, trying to get the sounds and balance I wanted. Thought I was never going to get it, but finally did.
Don't forget to spend hours *playing* it!
")
jyjvstrat
Newbie
- Messages
- 13
Thanks for all the feedback!! Yes, I am still playing with the pickup height... And as for jumping into a build, my big advice is to expect mistakes and be okay with it being rough around the edges. It's a project, your want perfect, this isn't the way to go. That said, this one turned out pretty well!
jyjvstrat
Newbie
- Messages
- 13
REPOST (1/2) -- the above post seems to have broken images after a system update. Copy pasted into multiple posts below.
---
Hi everyone! Warning - long post. Warning - lots of big pictures. Sorry (?) about that.
So I recently got a promotion, and was thinking of what to do to celebrate. I wanted a new guitar... but after spending lots of time at the local stores, I didn't see myself compromising on such an expensive guitar. I wasn't happy.
So, I thought I'd try my first build.
A shout out to Spike who advised me and suggested changes to my order. His advice was spot on.
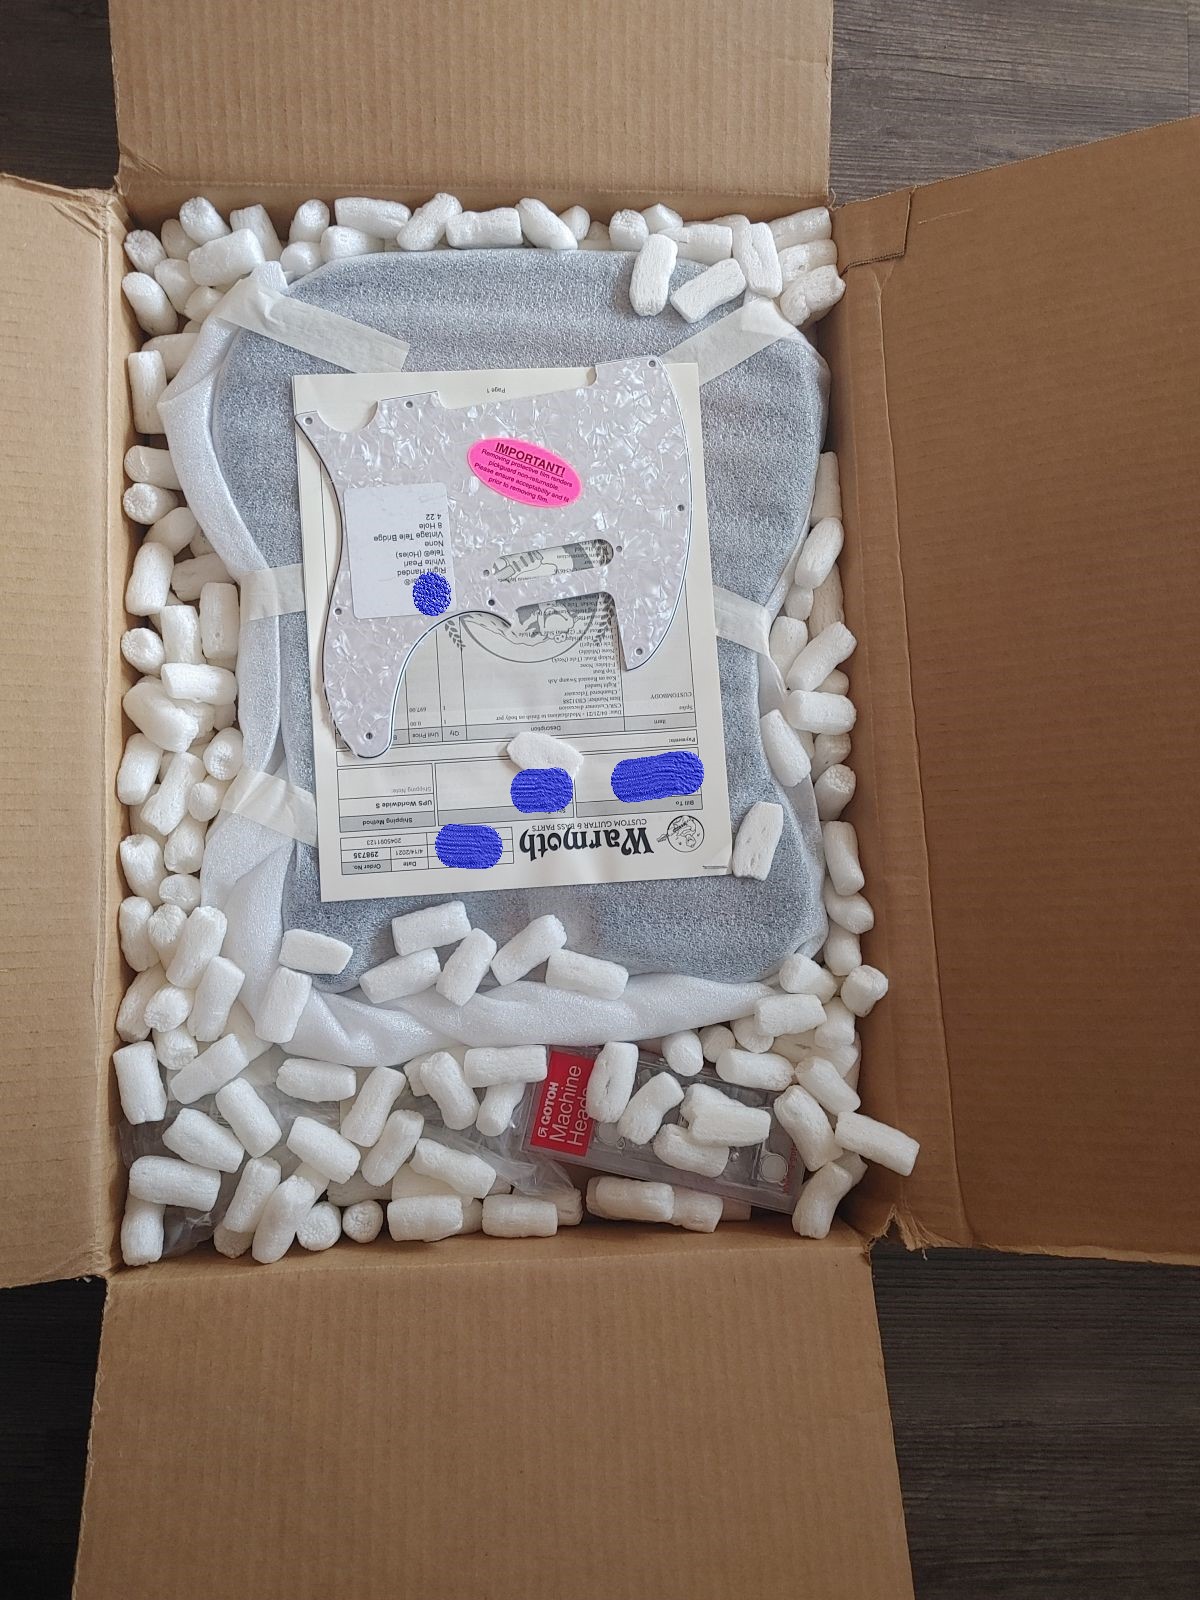
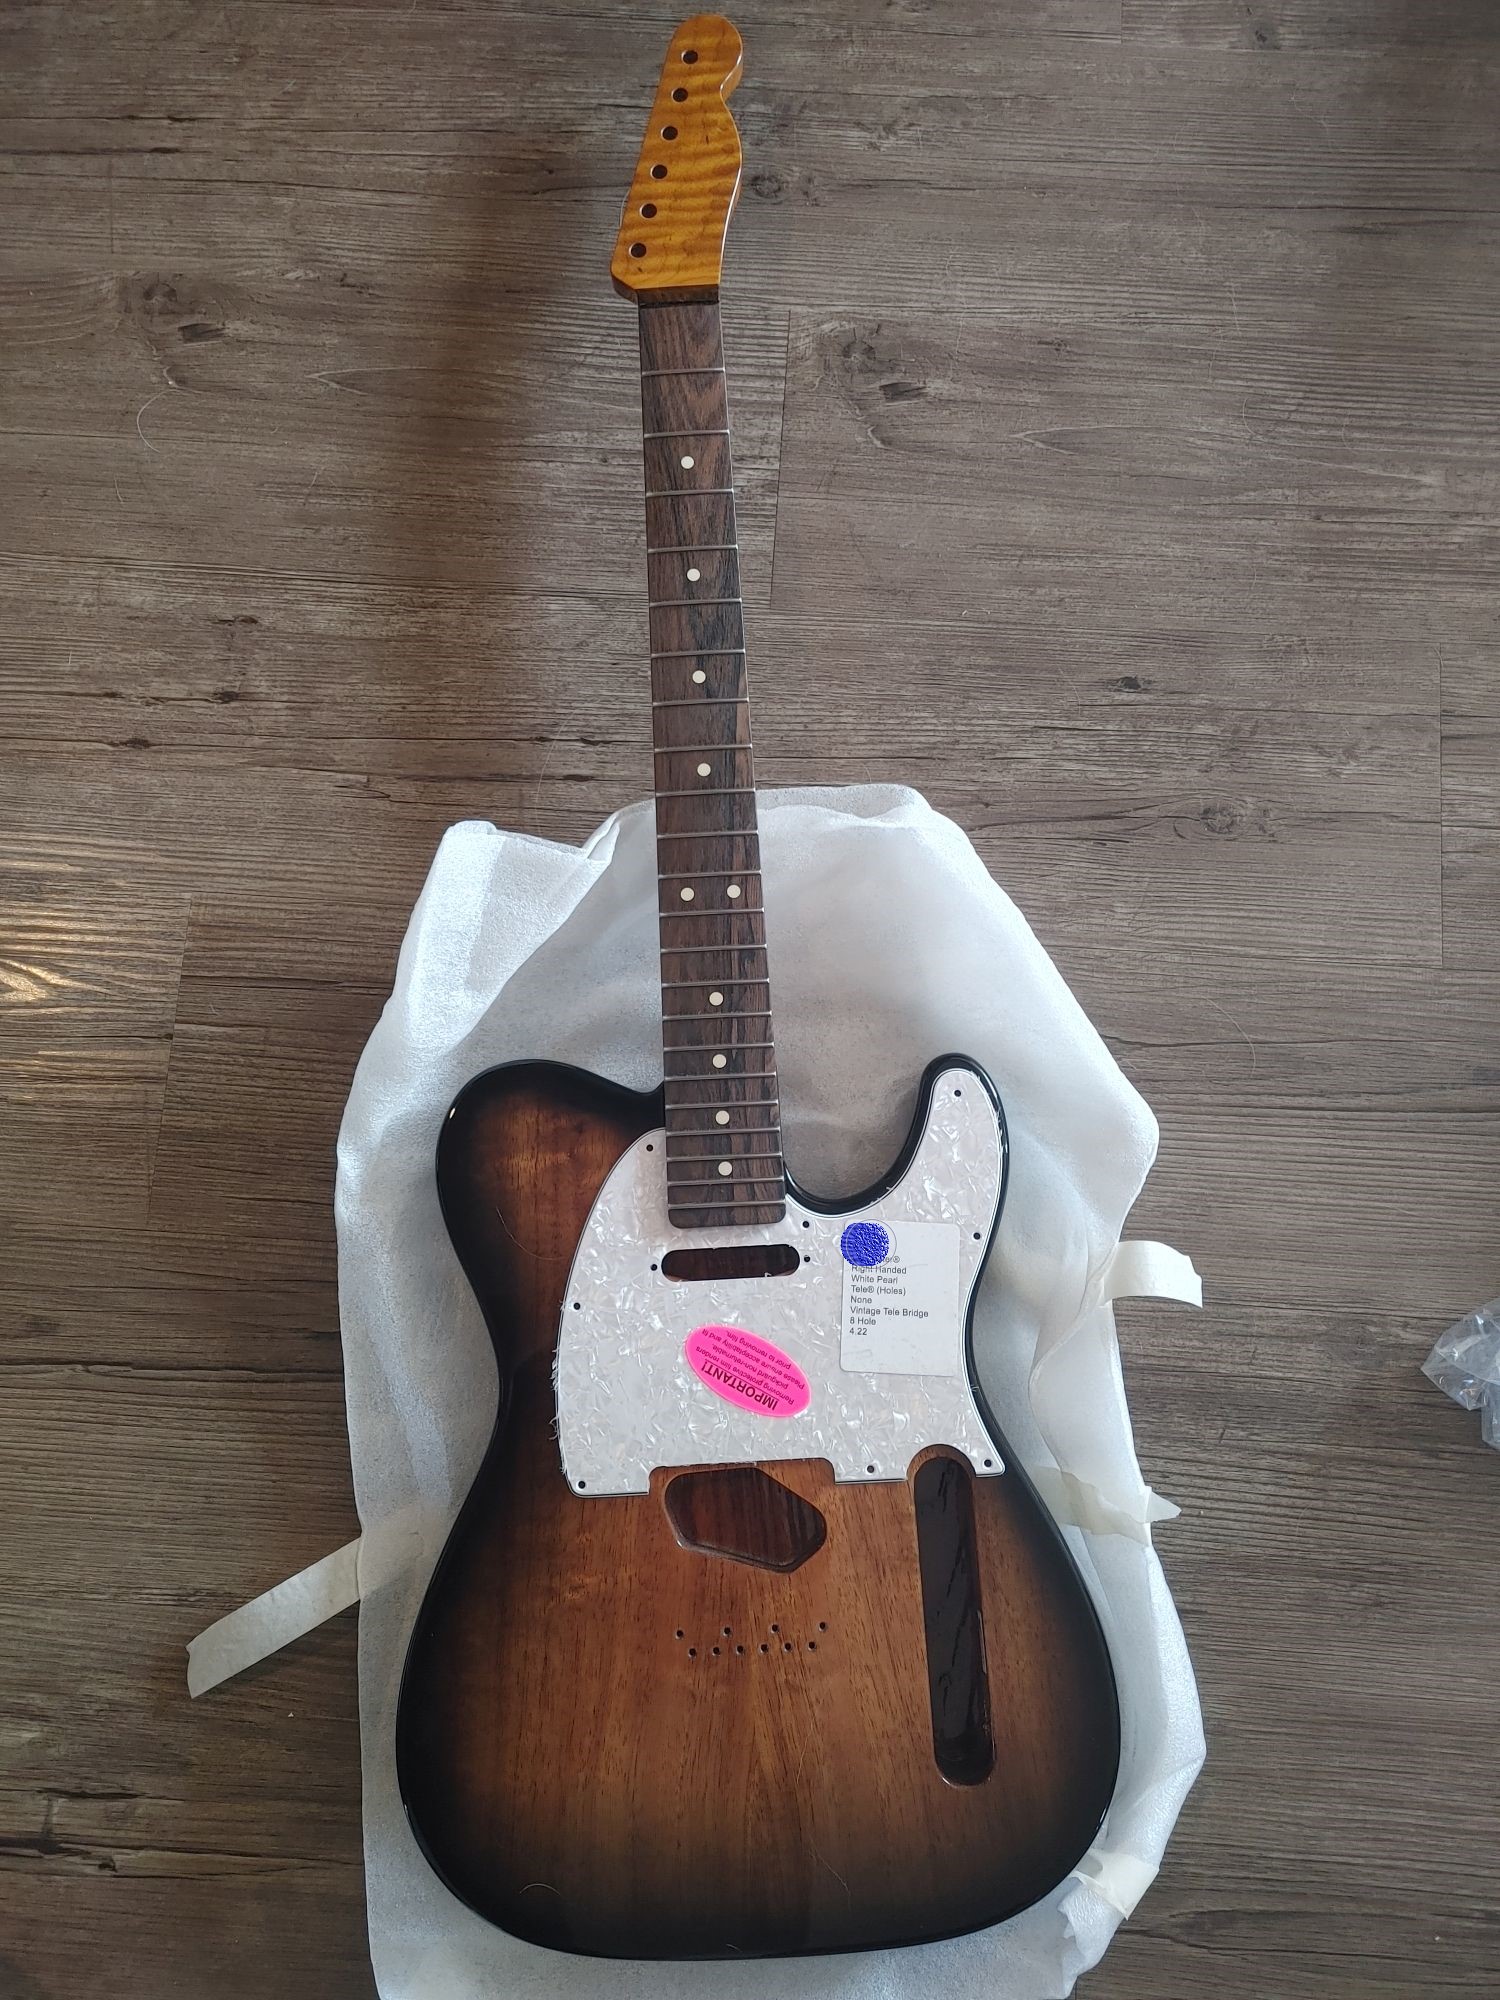
So, this is what showed up in the mail!
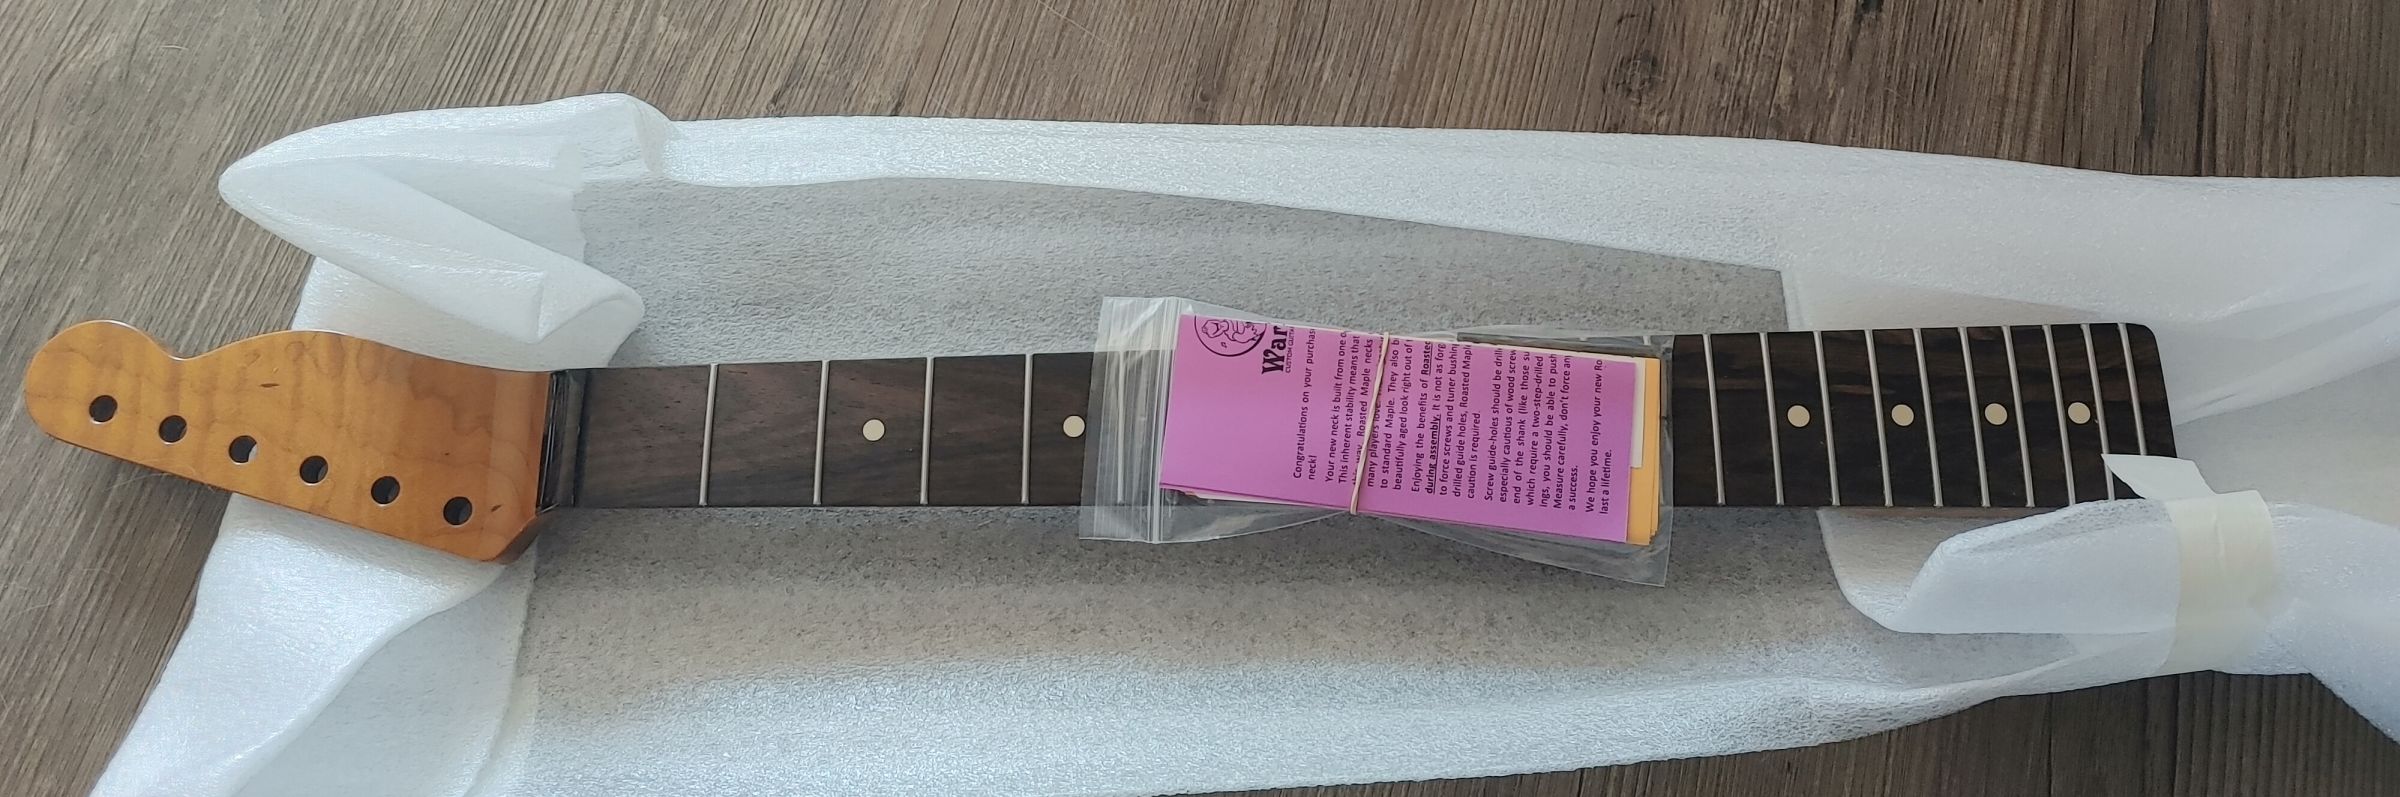
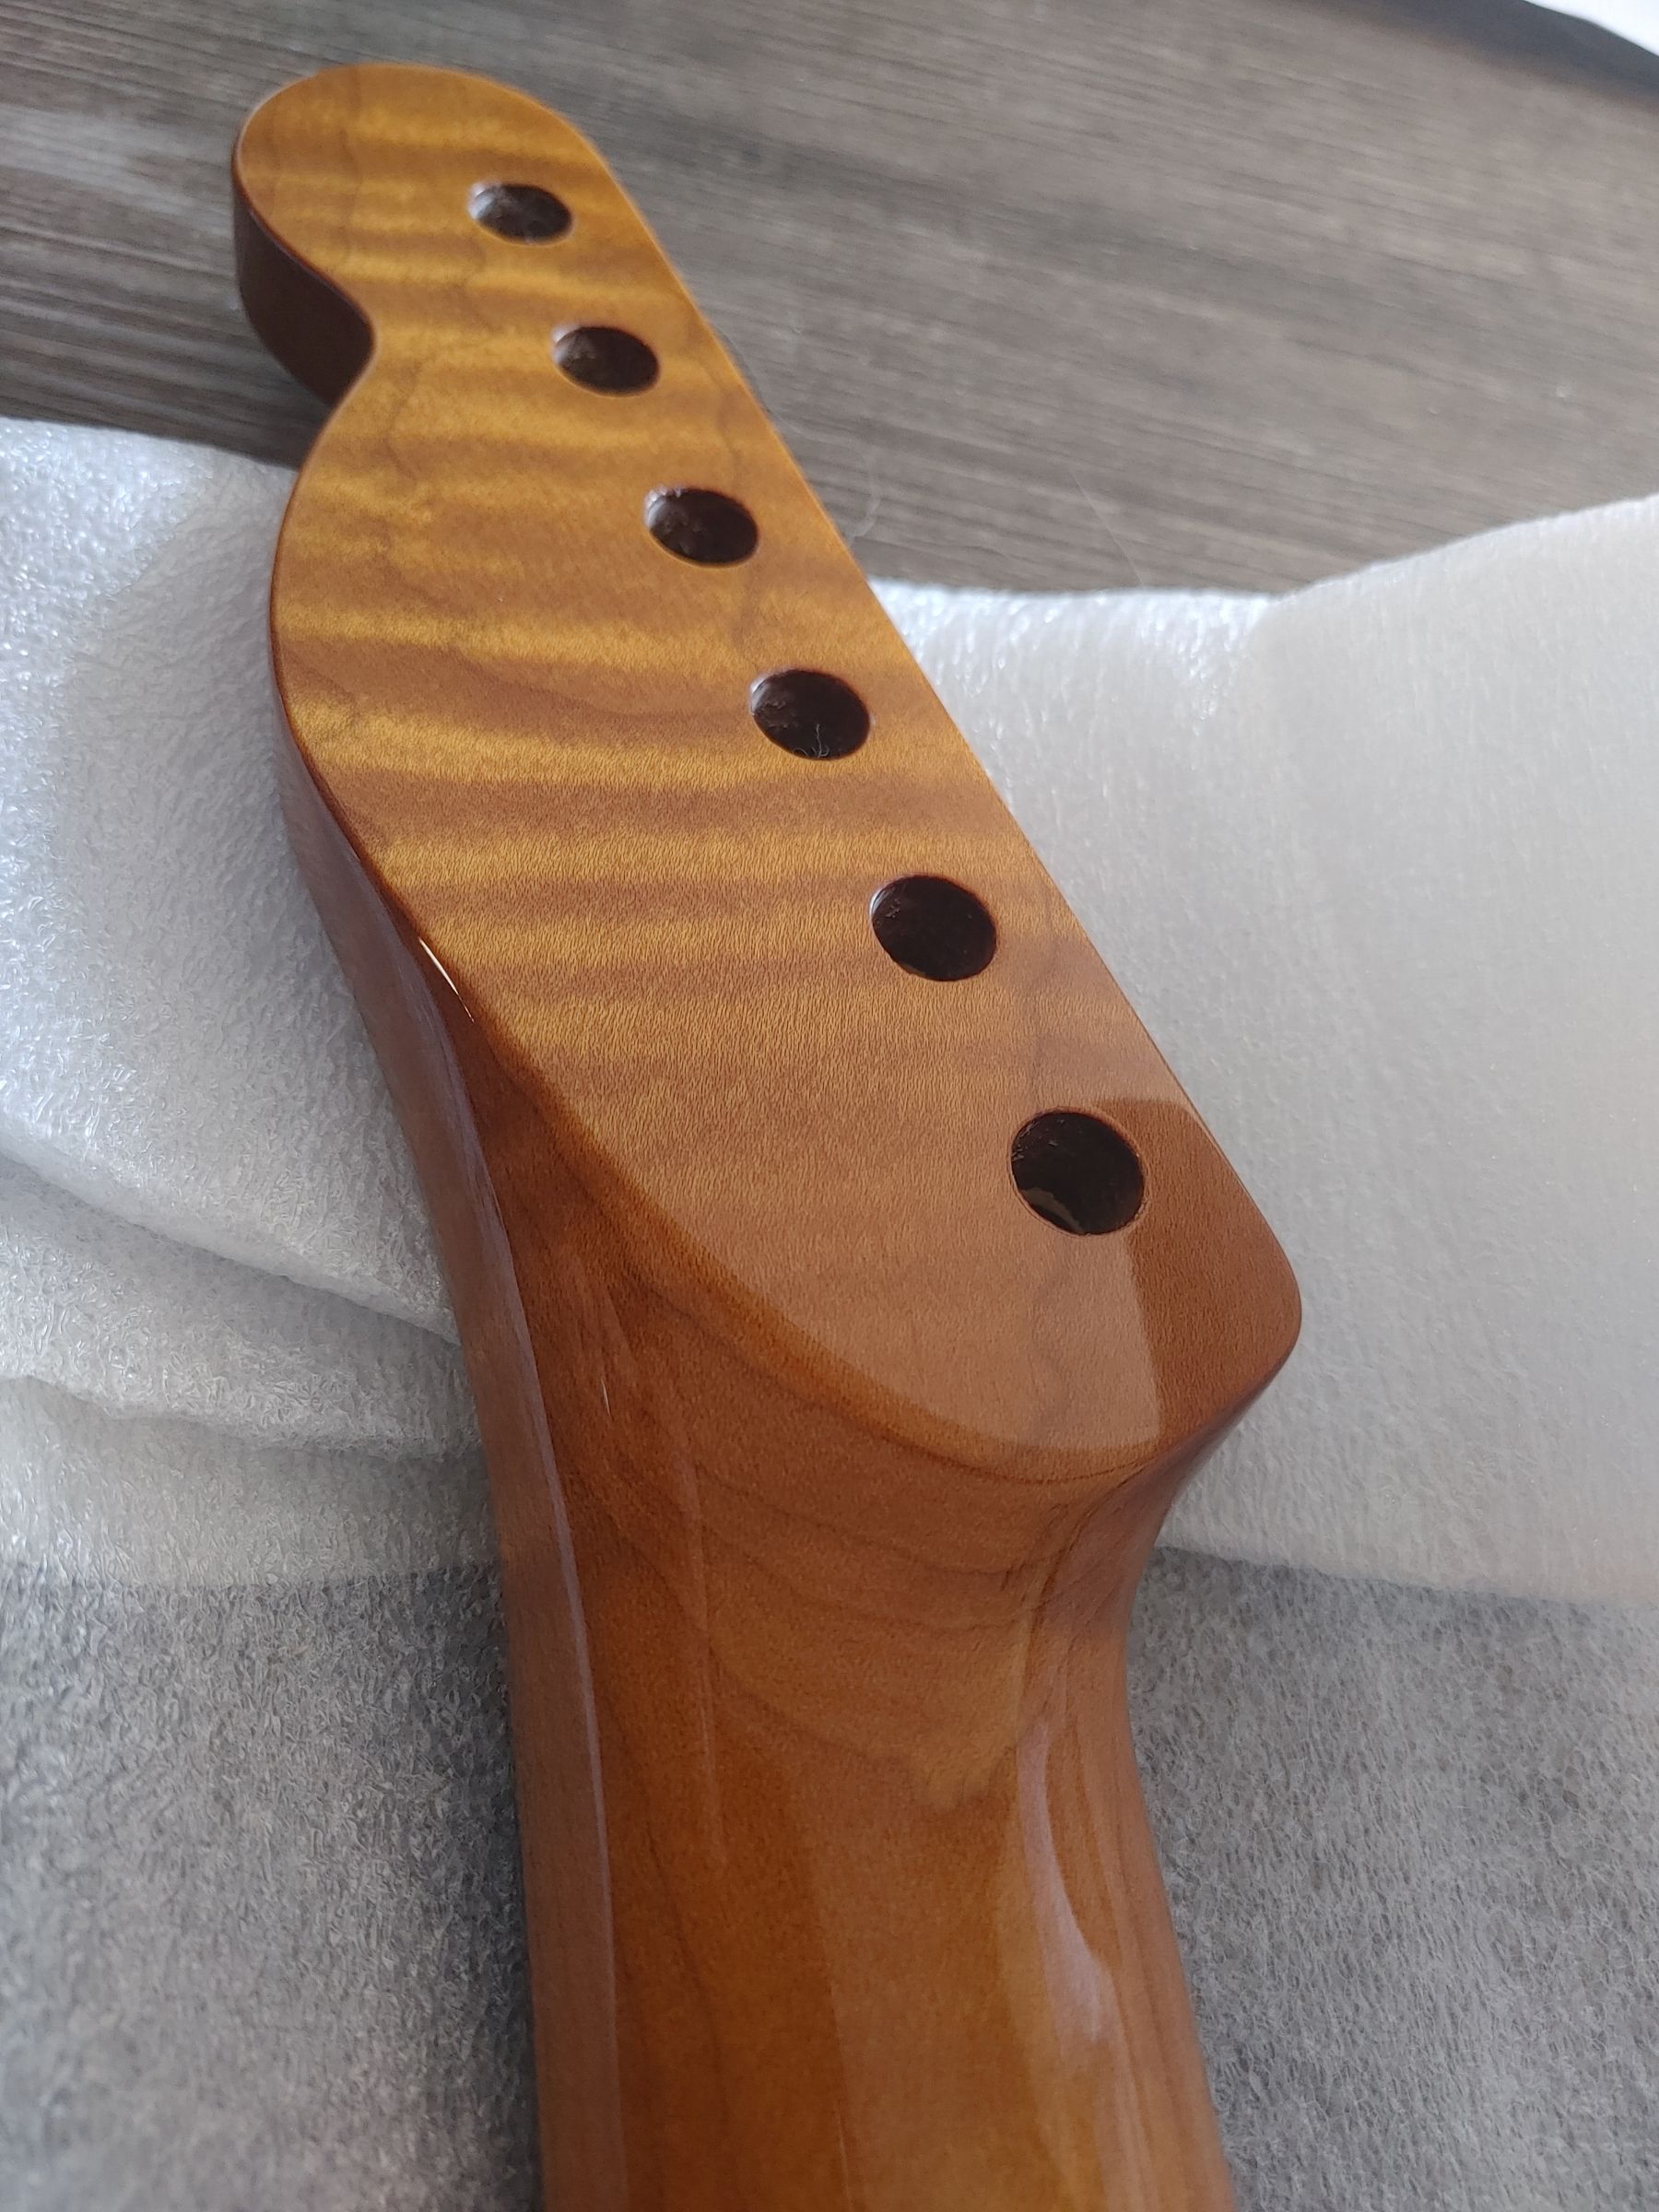
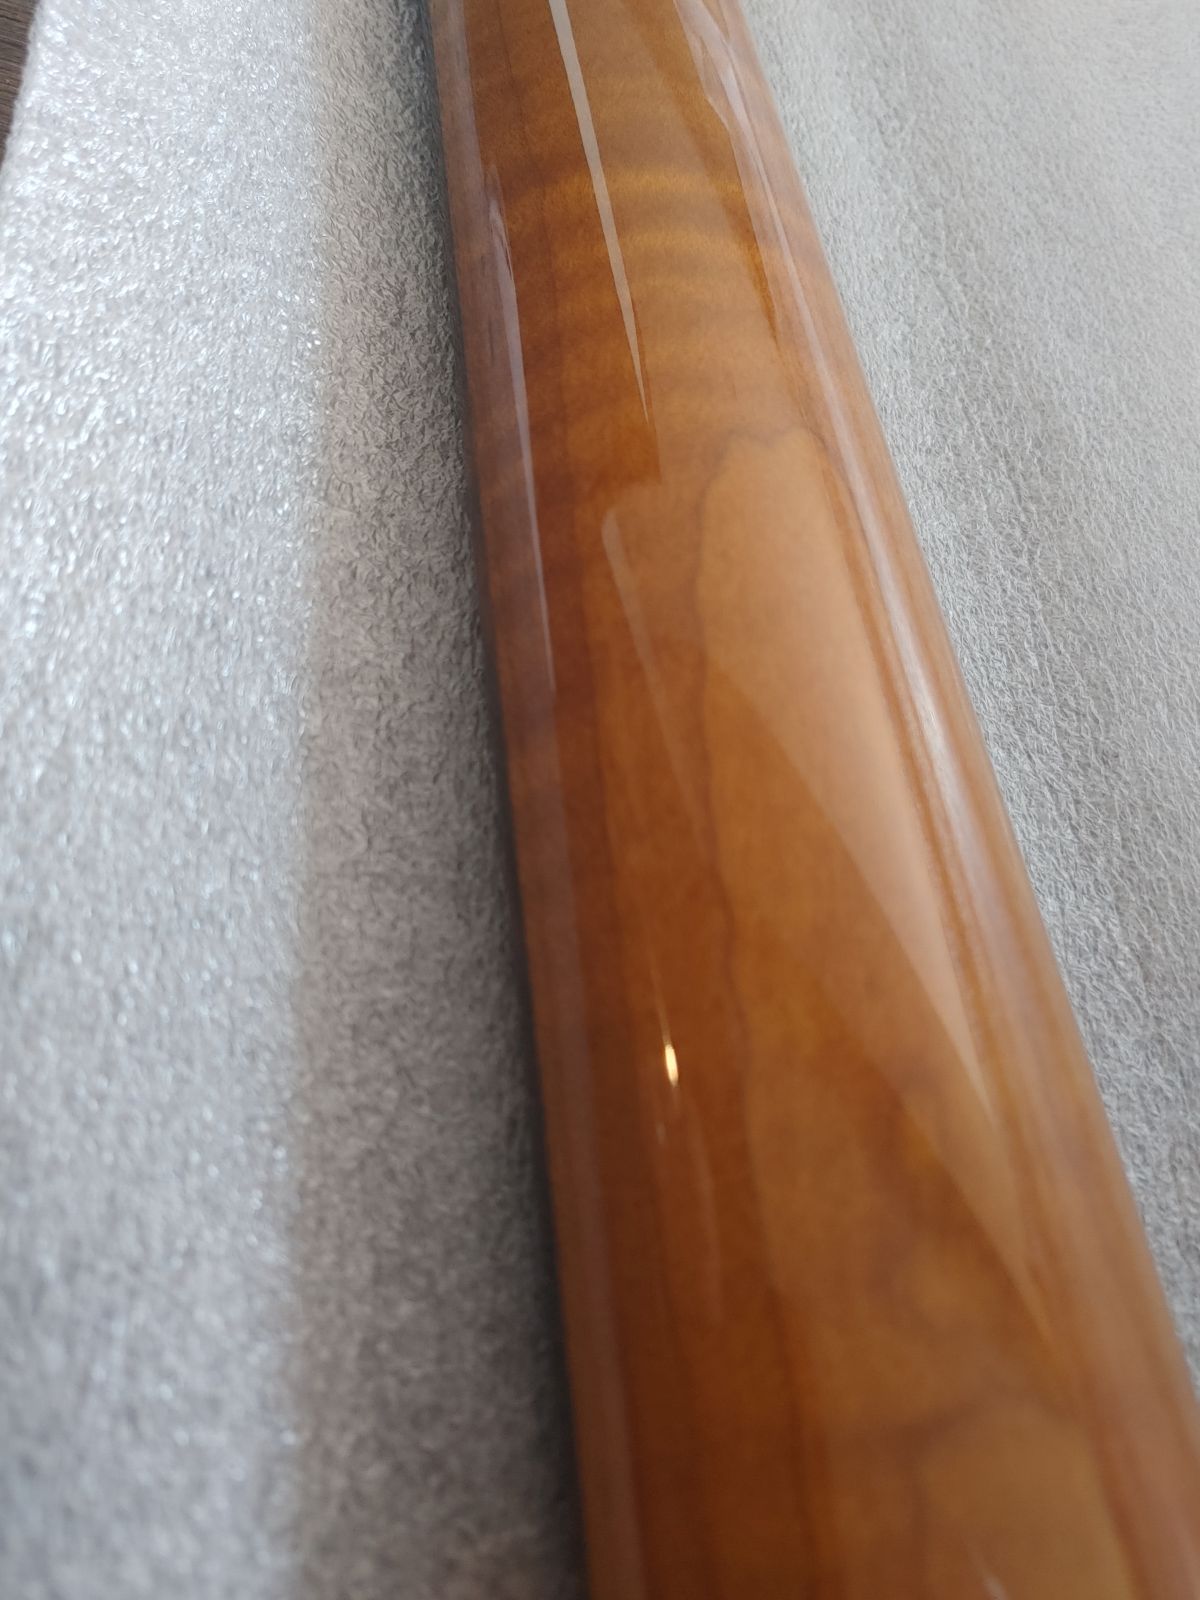
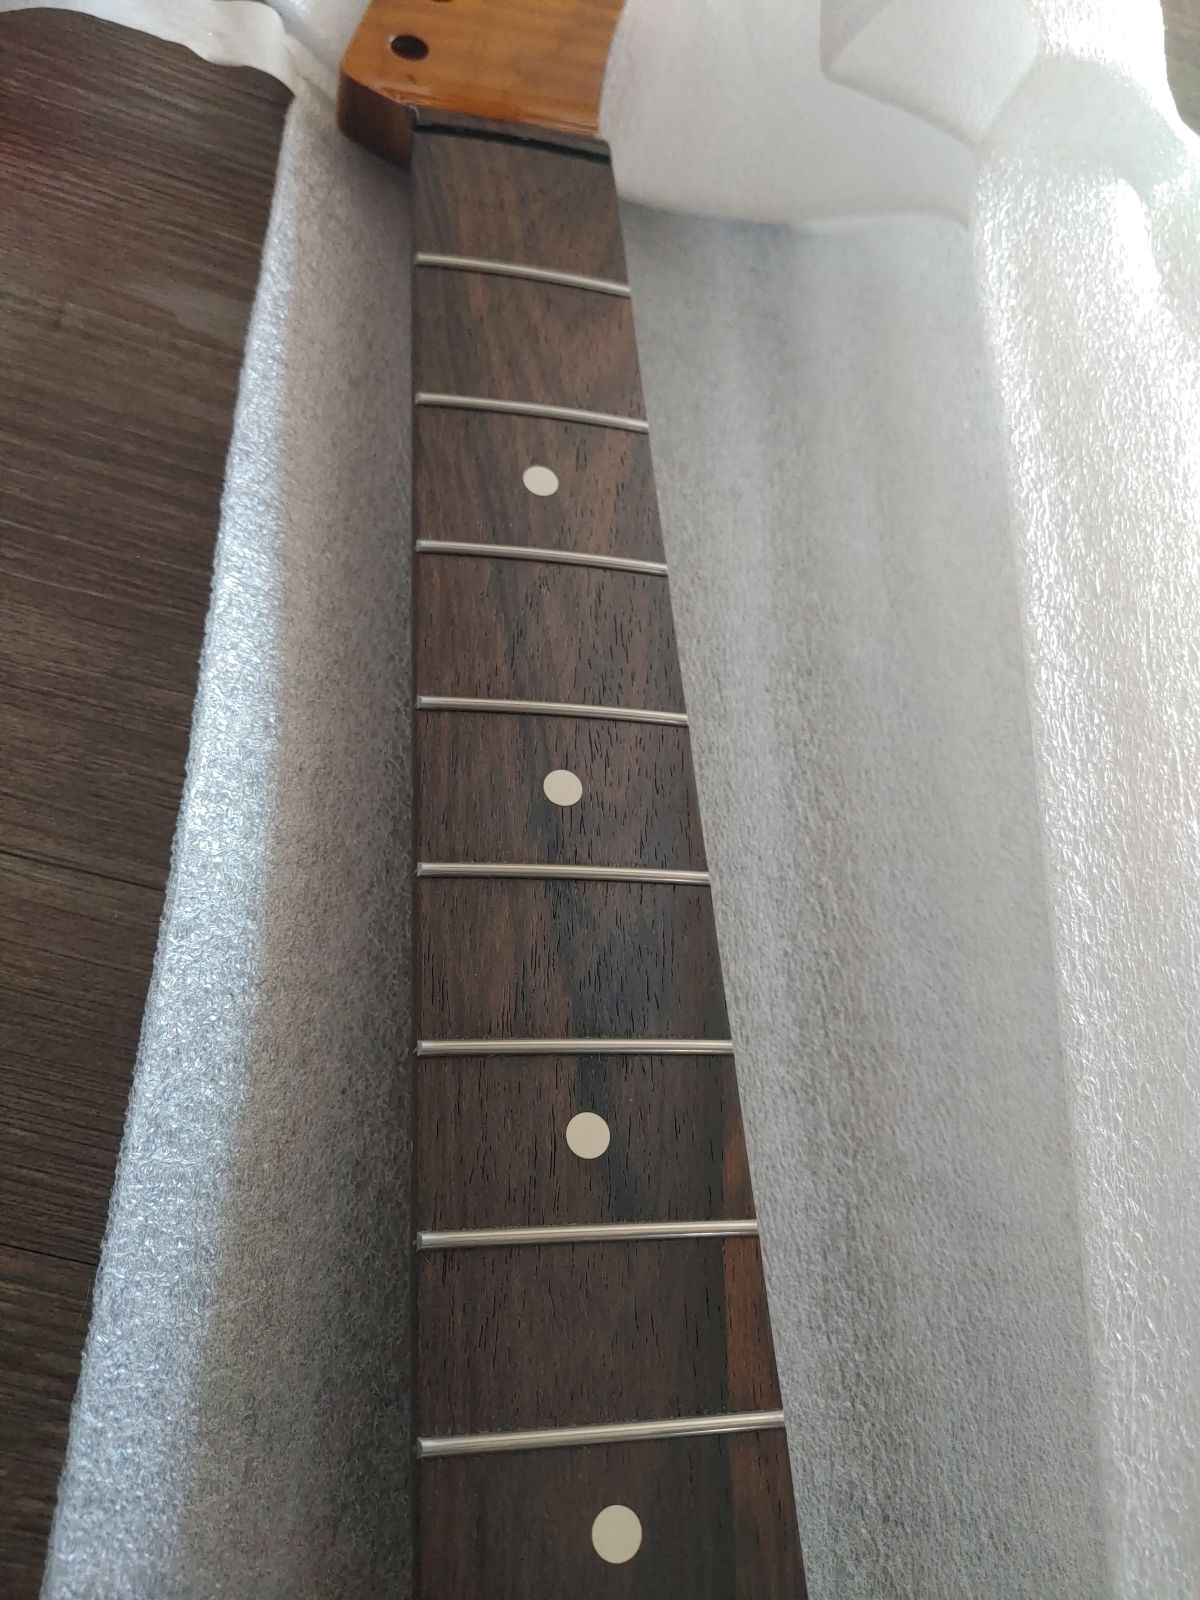
That's a roasted flame maple neck with vintage tint, and a figured zircote board.
Here are the other bits:
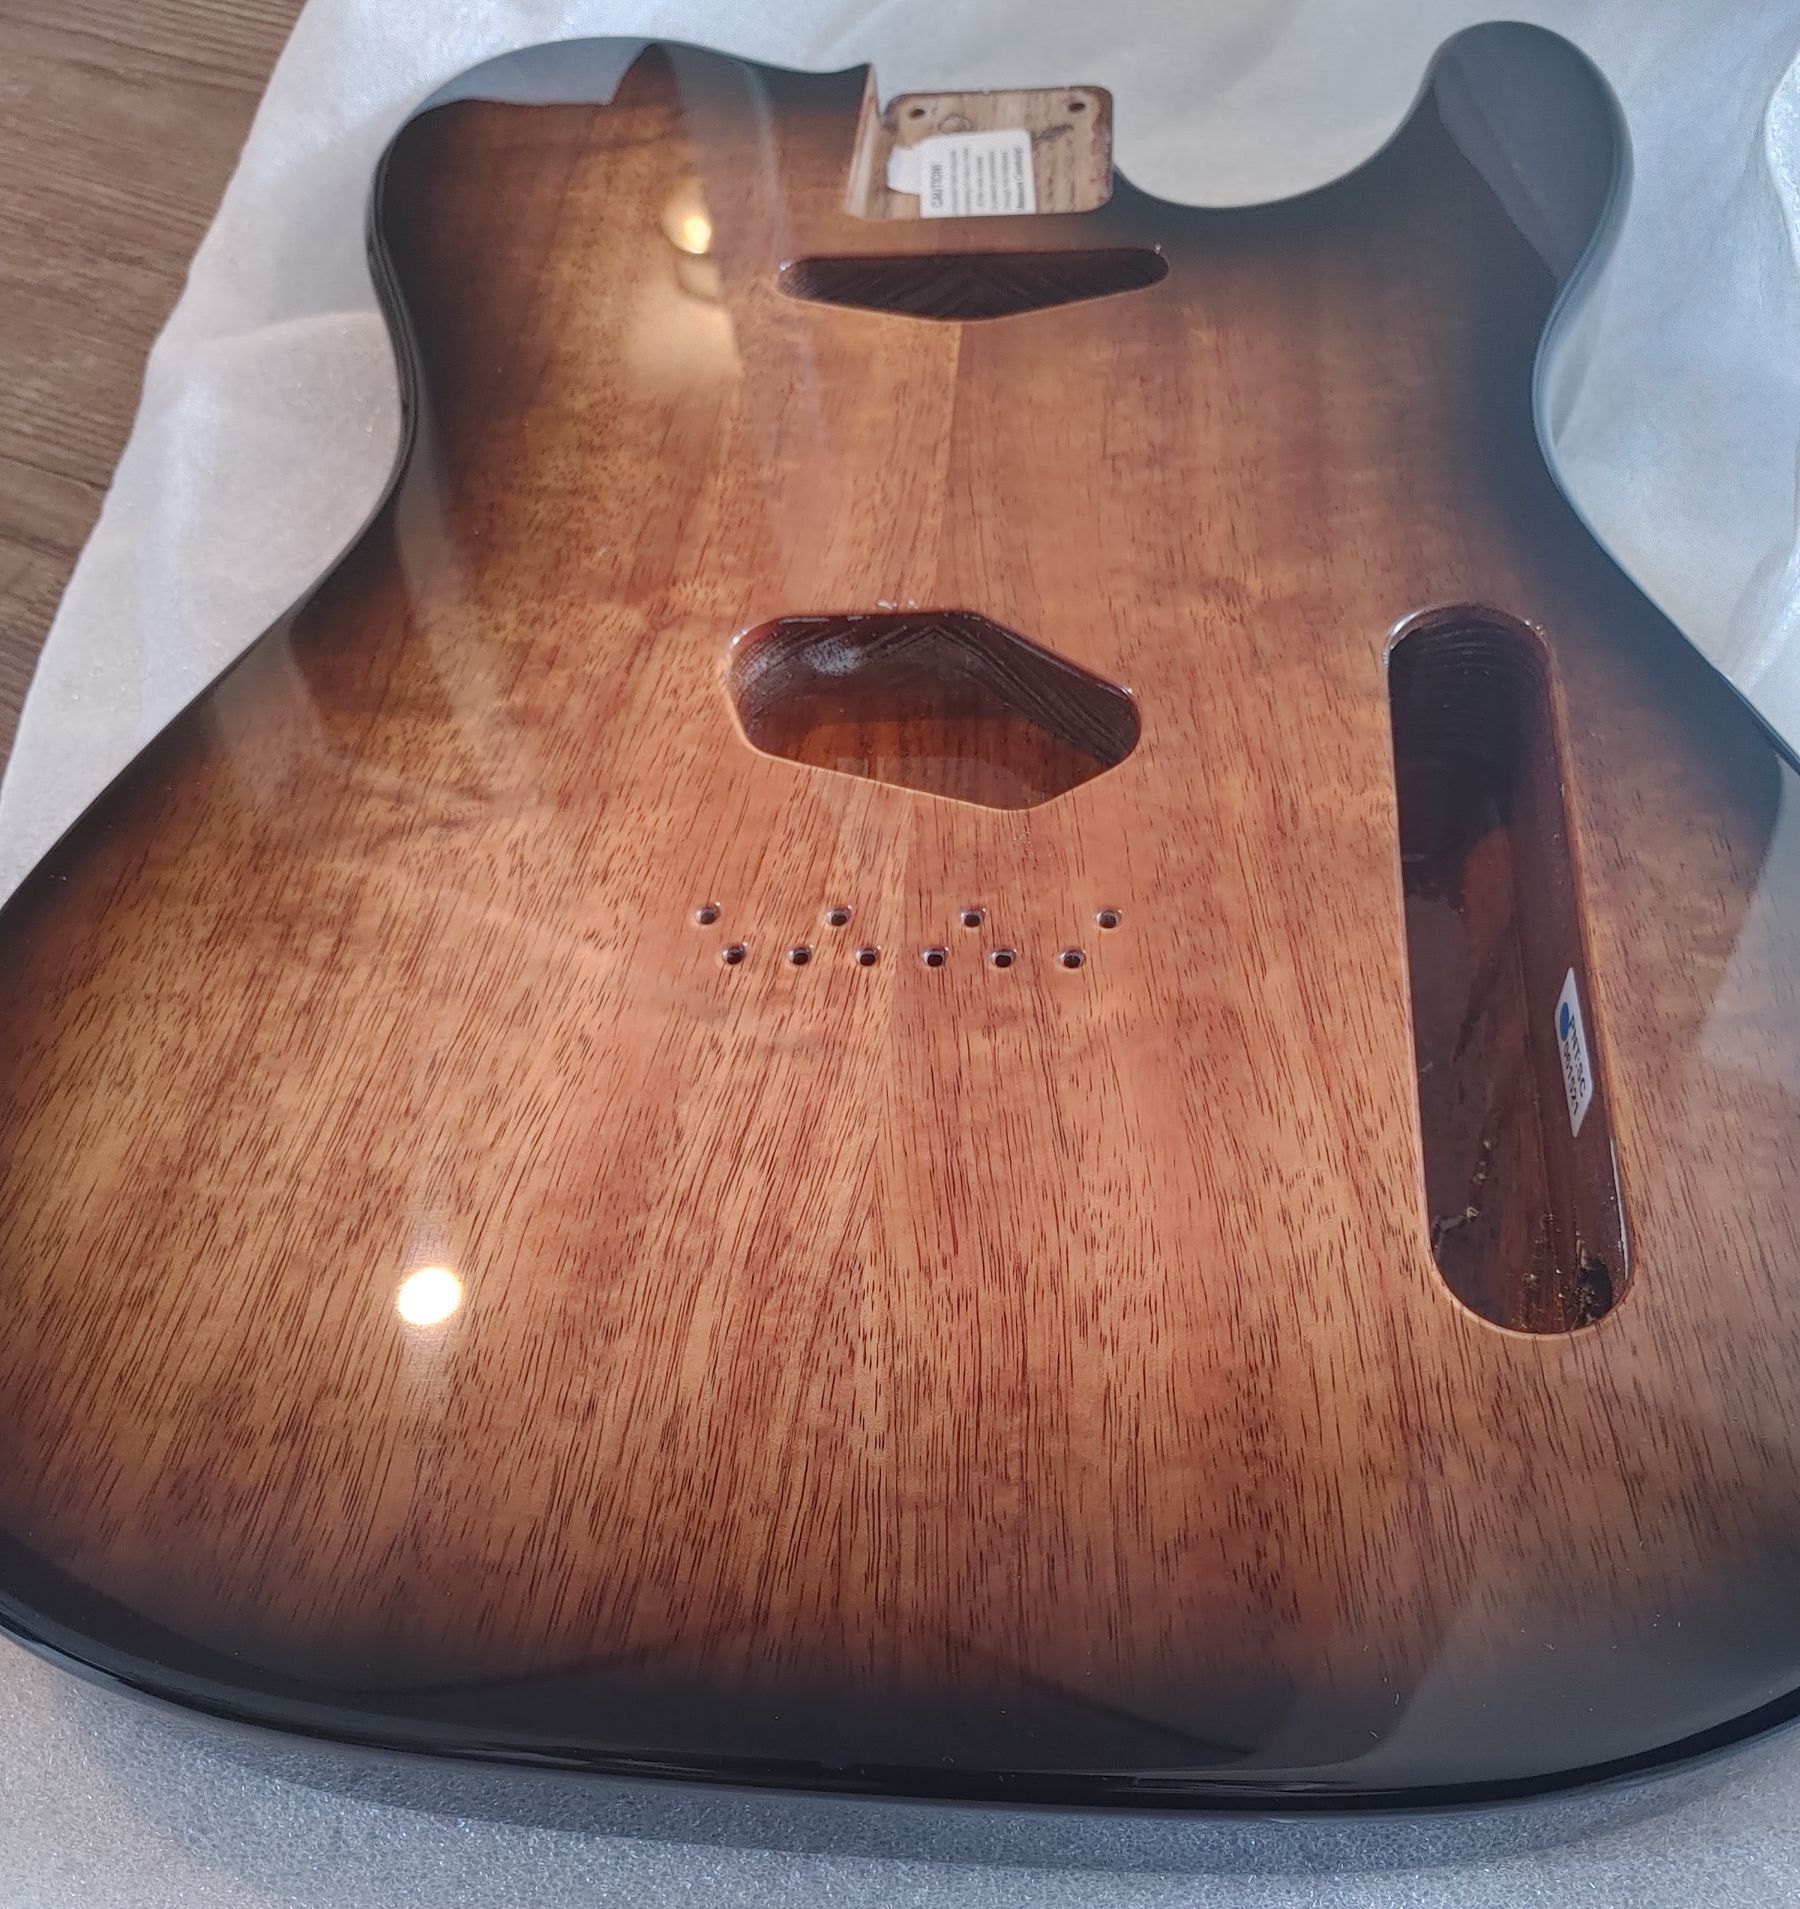
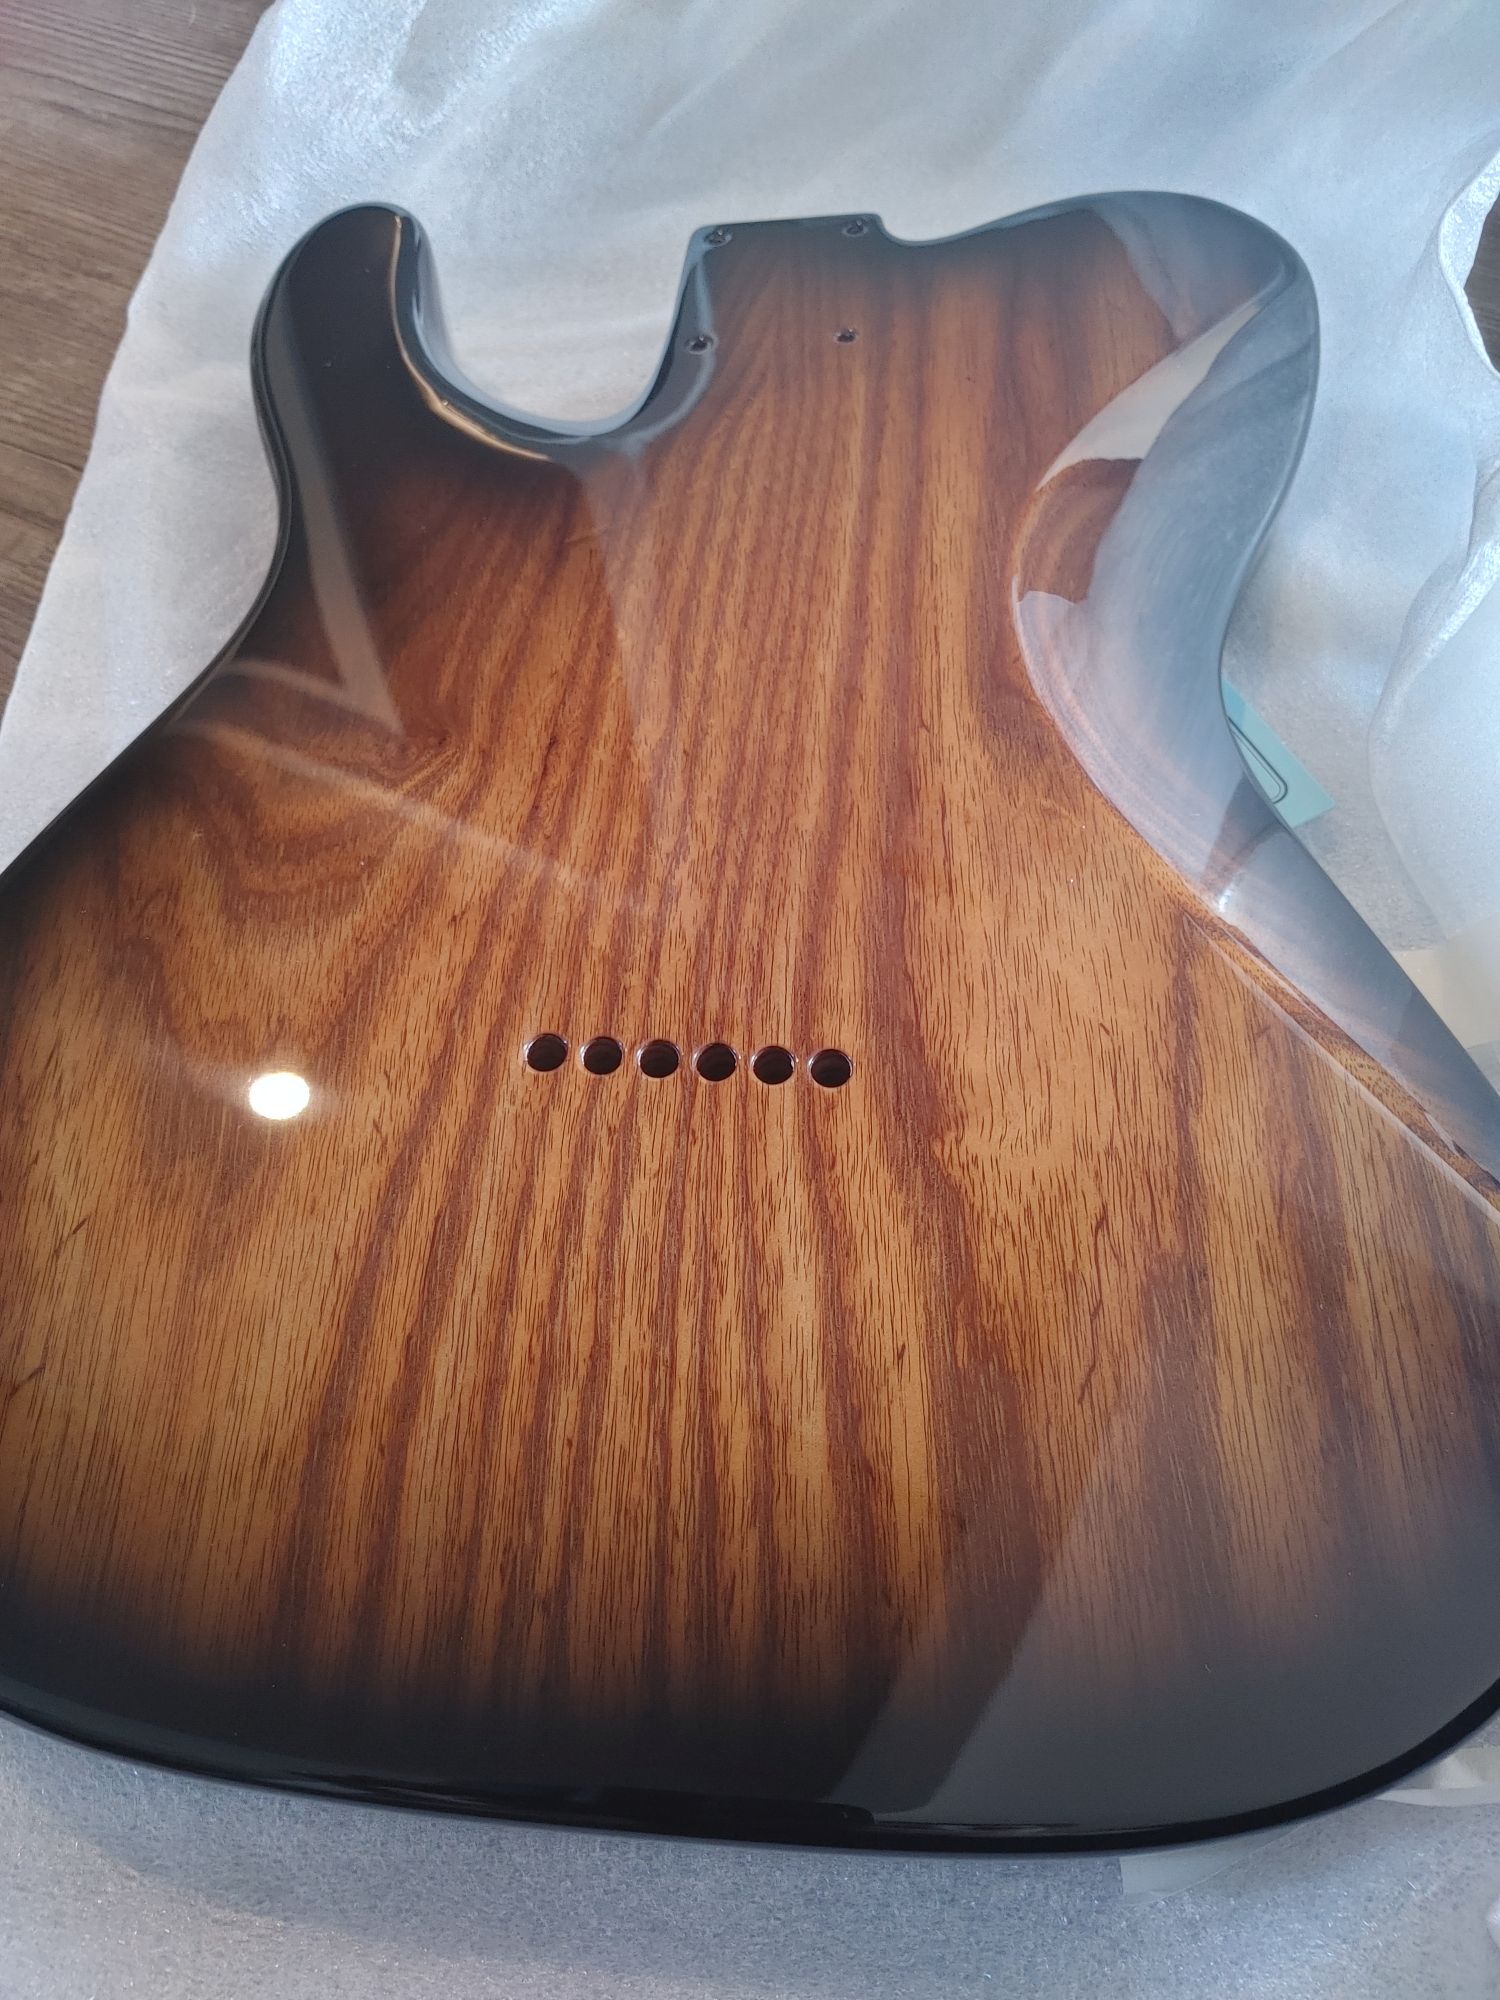
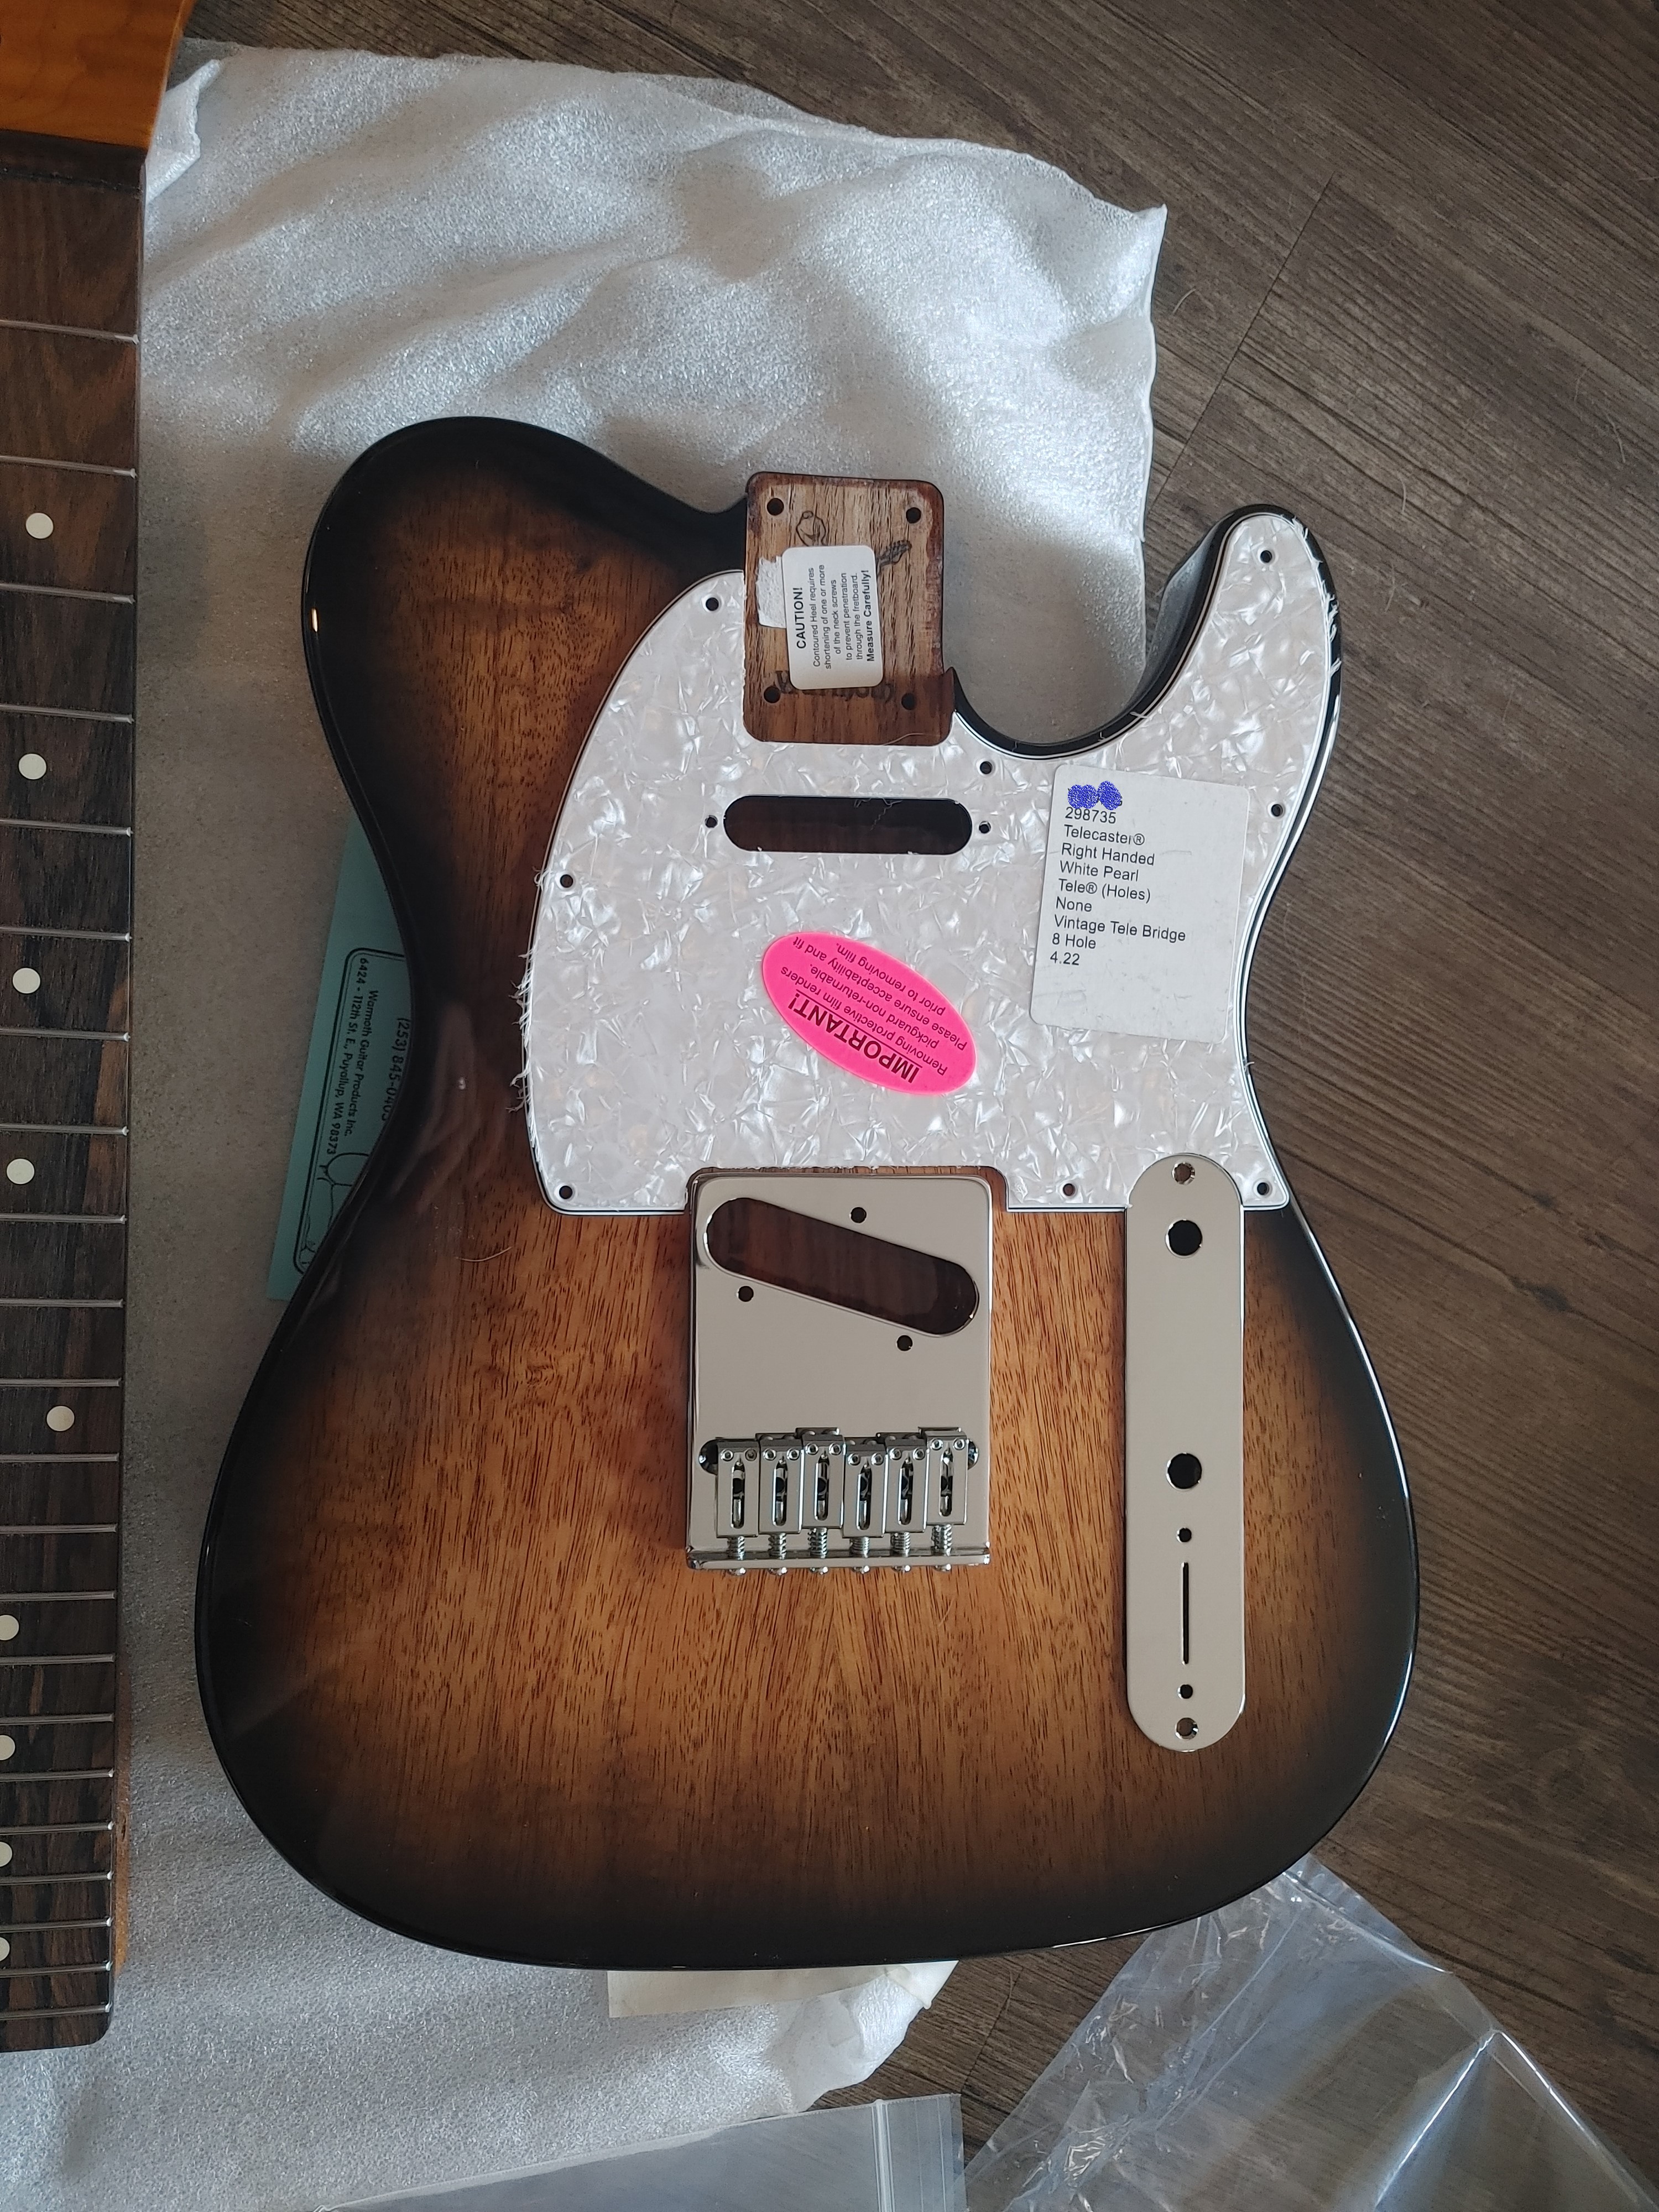
That's a roasted swamp ash body with a koa top. Chambered.
This was the idea:
So! I get to work.
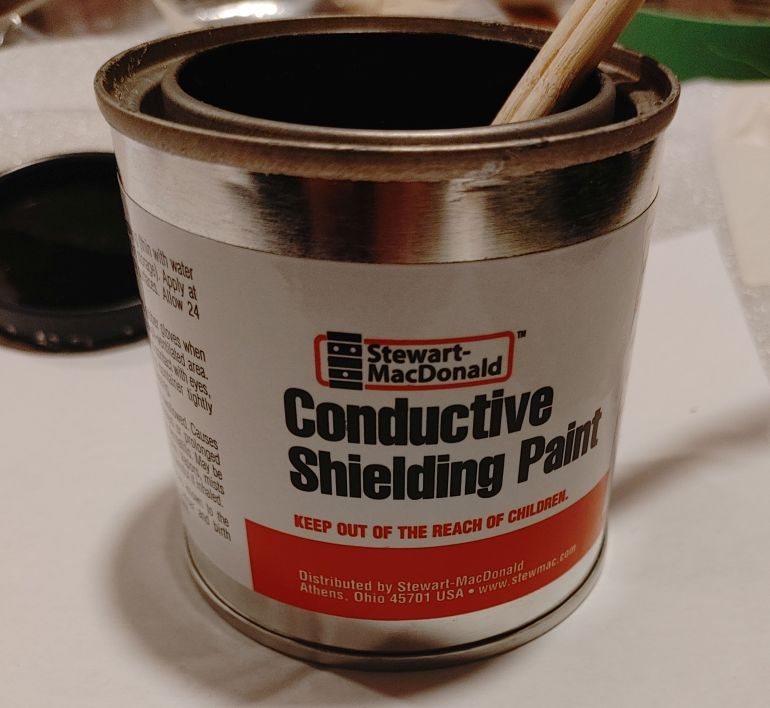
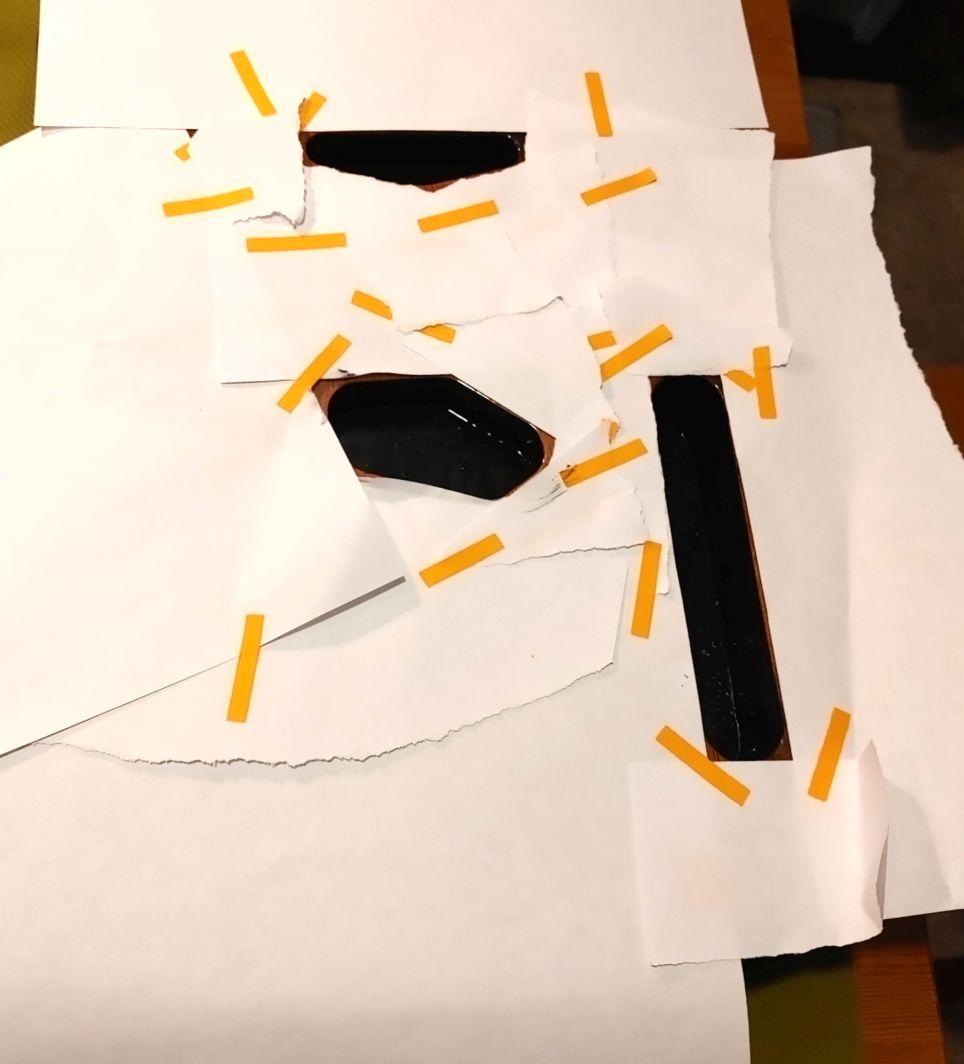
First, I decided to shield the cavities *(EDITOR's note: it's still as noisy as my unshielded strat*). 3 coats.
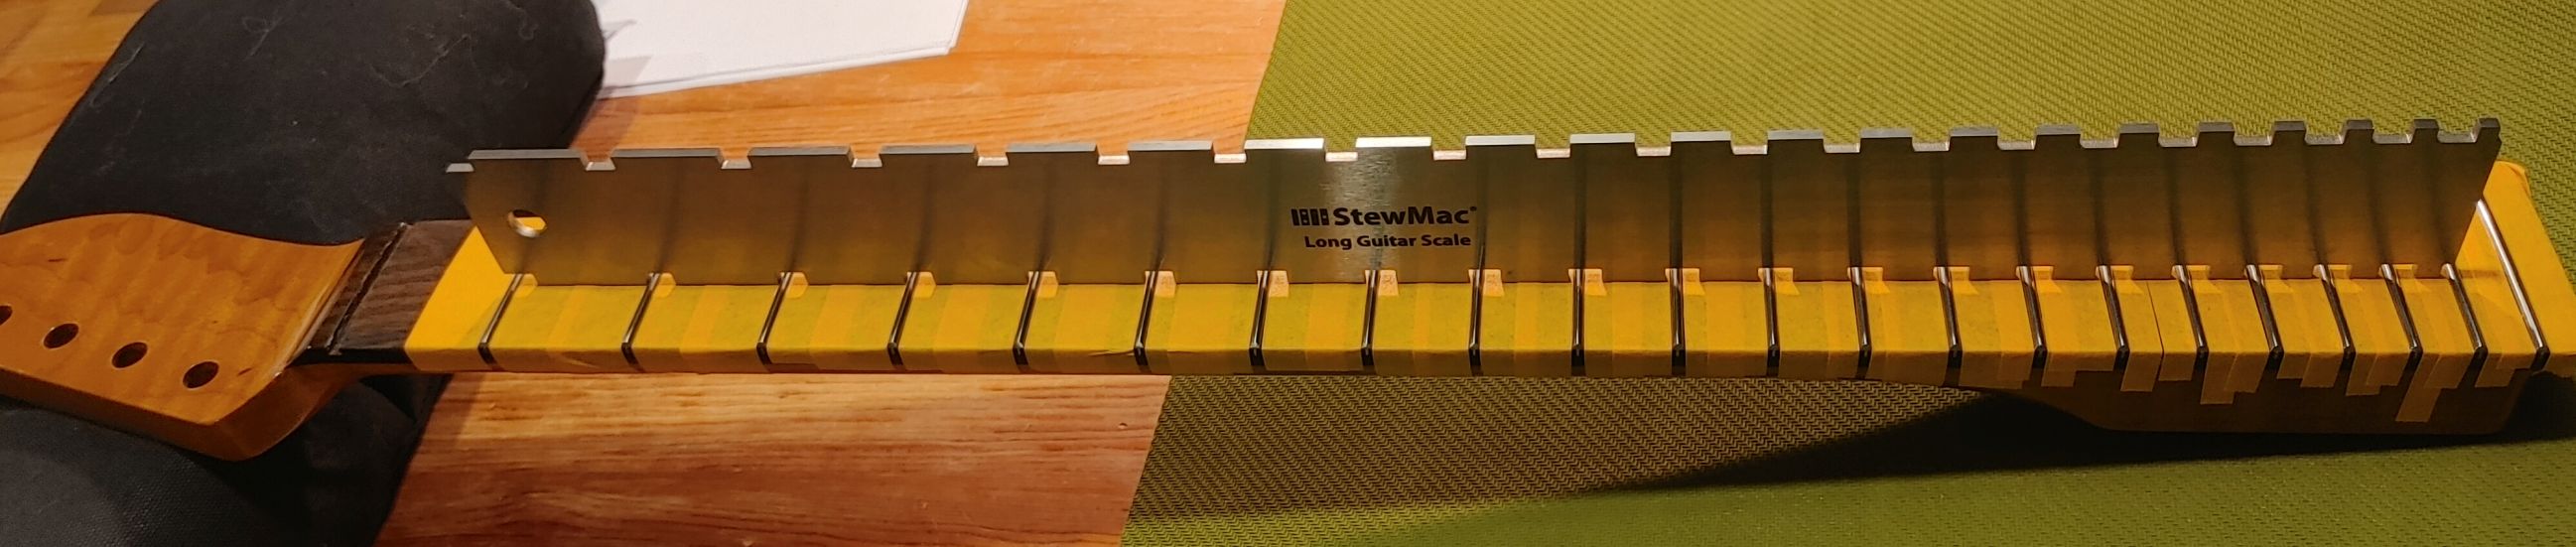
My fret rocker wasn't that happy with the frets, so off I go to do a fret level. Not my first, but certainly the part of the job that gave me the most anxiety.
DISASTER STRIKES
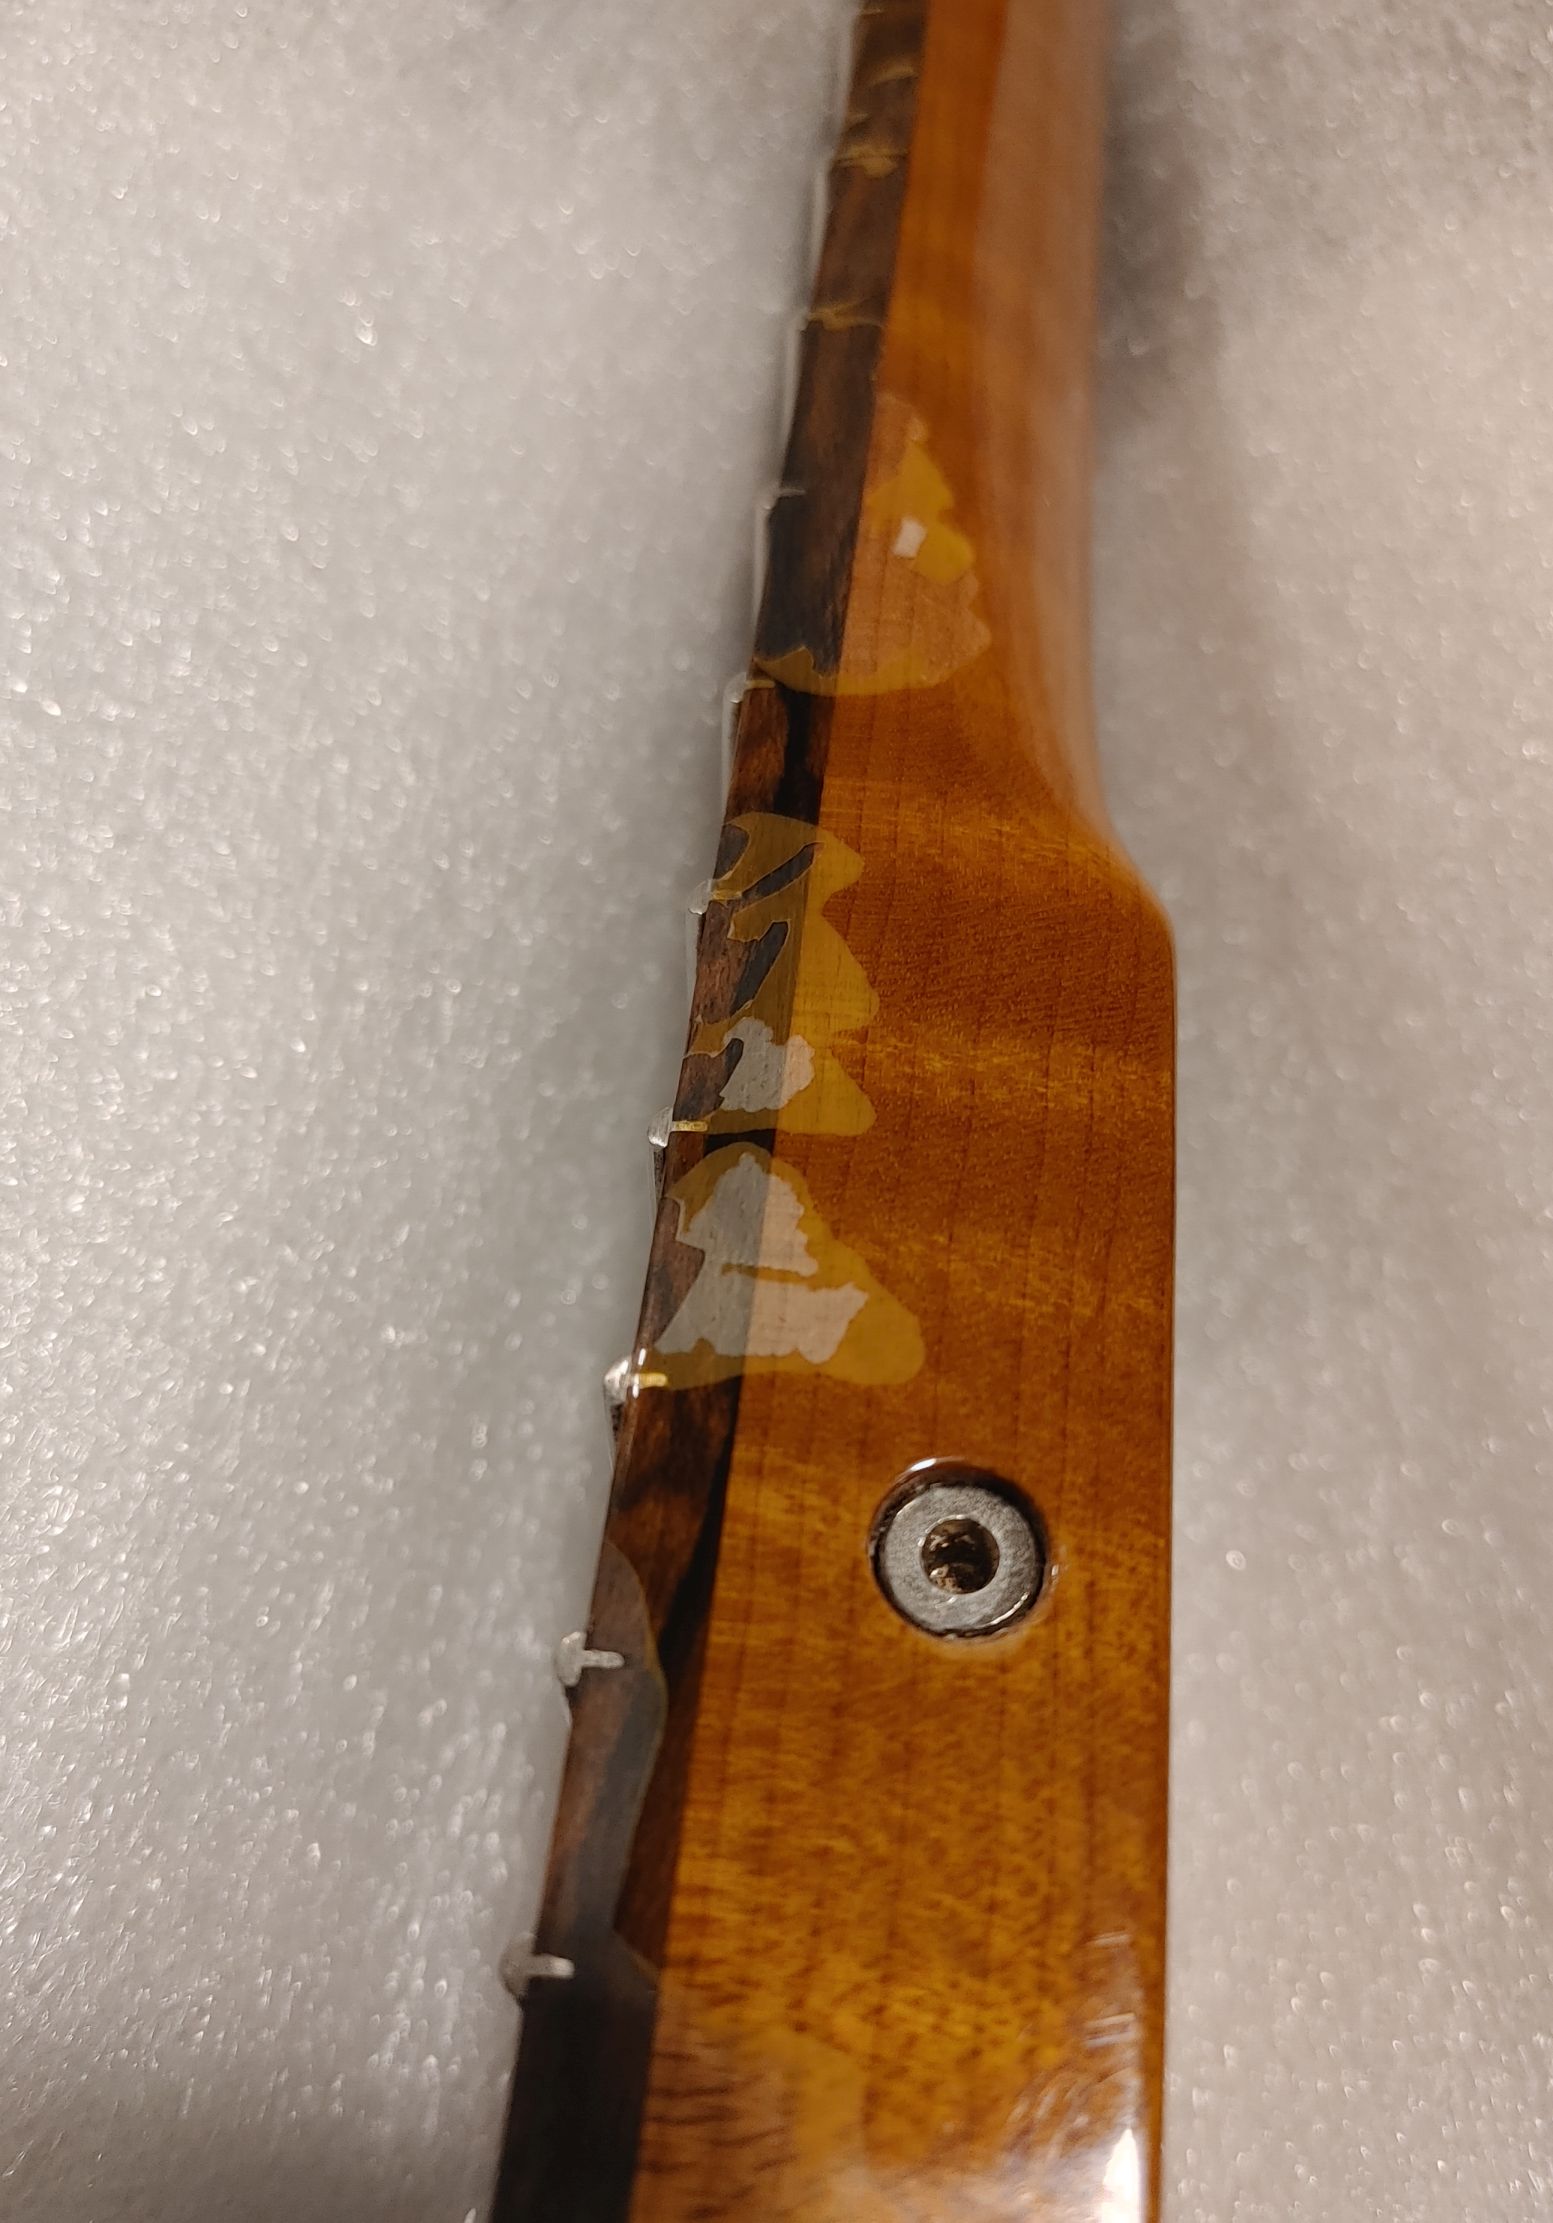
While removing the tape....
I give warmoth a call. Give them all the details. Explain what I did, which tape I used.
I knew that tape can pull finish off, so I removed it very carefully, but the finish basically flaked off! (!!).
Warmoth said to send it back they'll take a look..
drumroll! verdict: rare poor finish adhesion. They'll strip and re-finish the neck, send me a care packet (go warmoth shirts!), extra tape, and they even cleaned up the fret ends for me (I guess they could see that I was an amateur).
Thanks to Spike and Jeff for all the help.
While I wait! I learned to drill the finish. My technique: 1) drill backwards first to scrape finish off without lifting. 2) use a countersink bit by hand to scrape a cone of finish away from the hole. 3) drill. 4) wax the screws before putting them in
Another trick I learned that saved me: don't trust drill bit sizes and screw sizes. I just used my calibers to measure inner and outer diameter of the screw, and the bit, and found a bit in the middle.
I also installed he string knob thingies. They didn't want to go in and I was shy of shattering the finish. I used a small flat file to remove the finish from around the hole and they went in well.

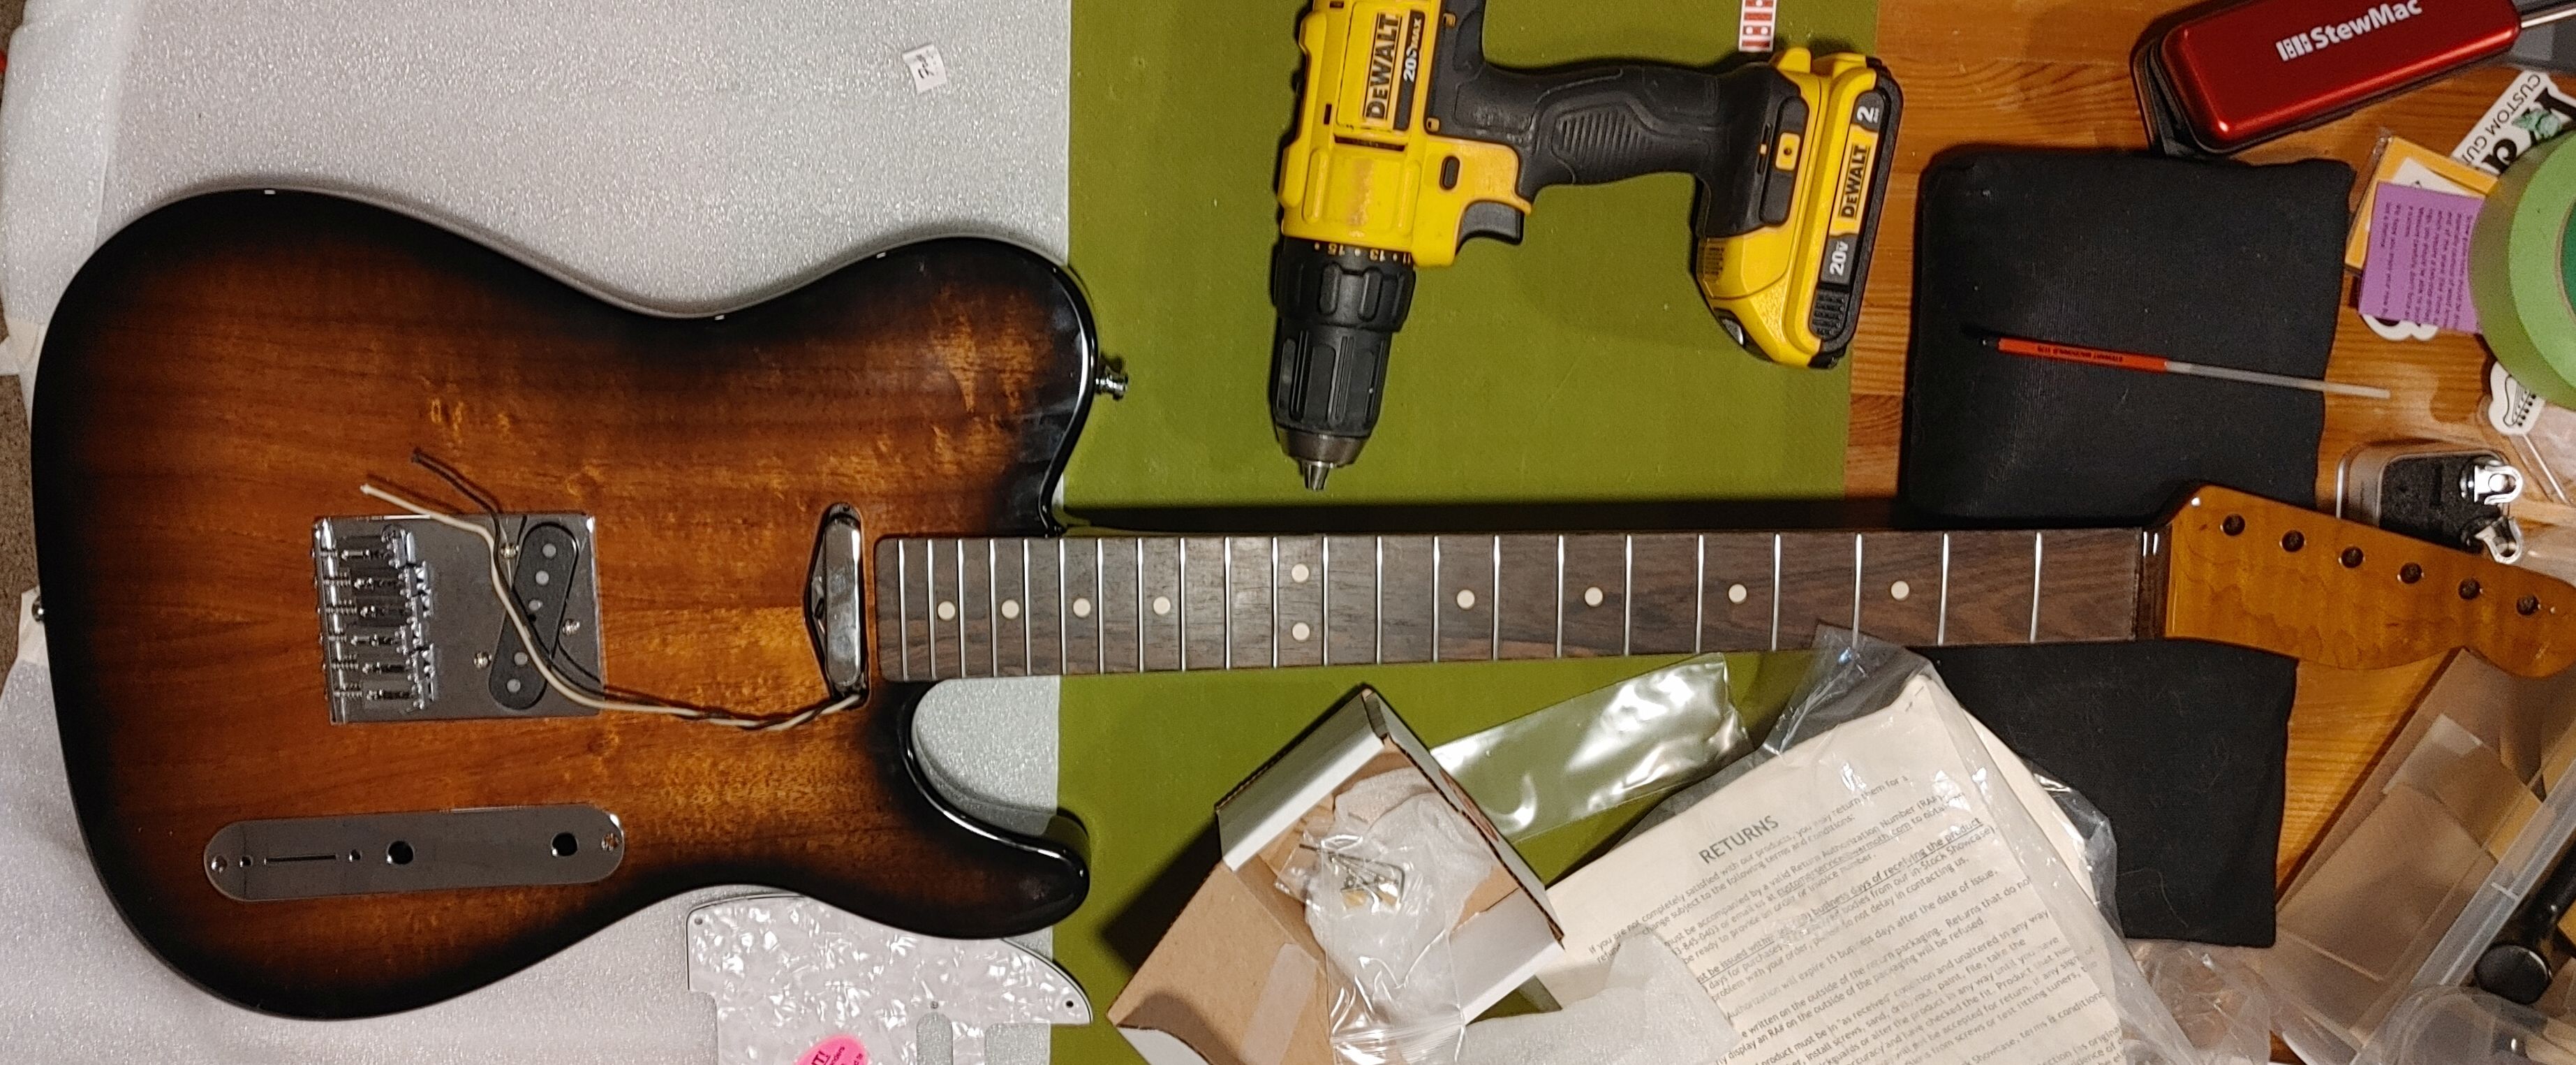
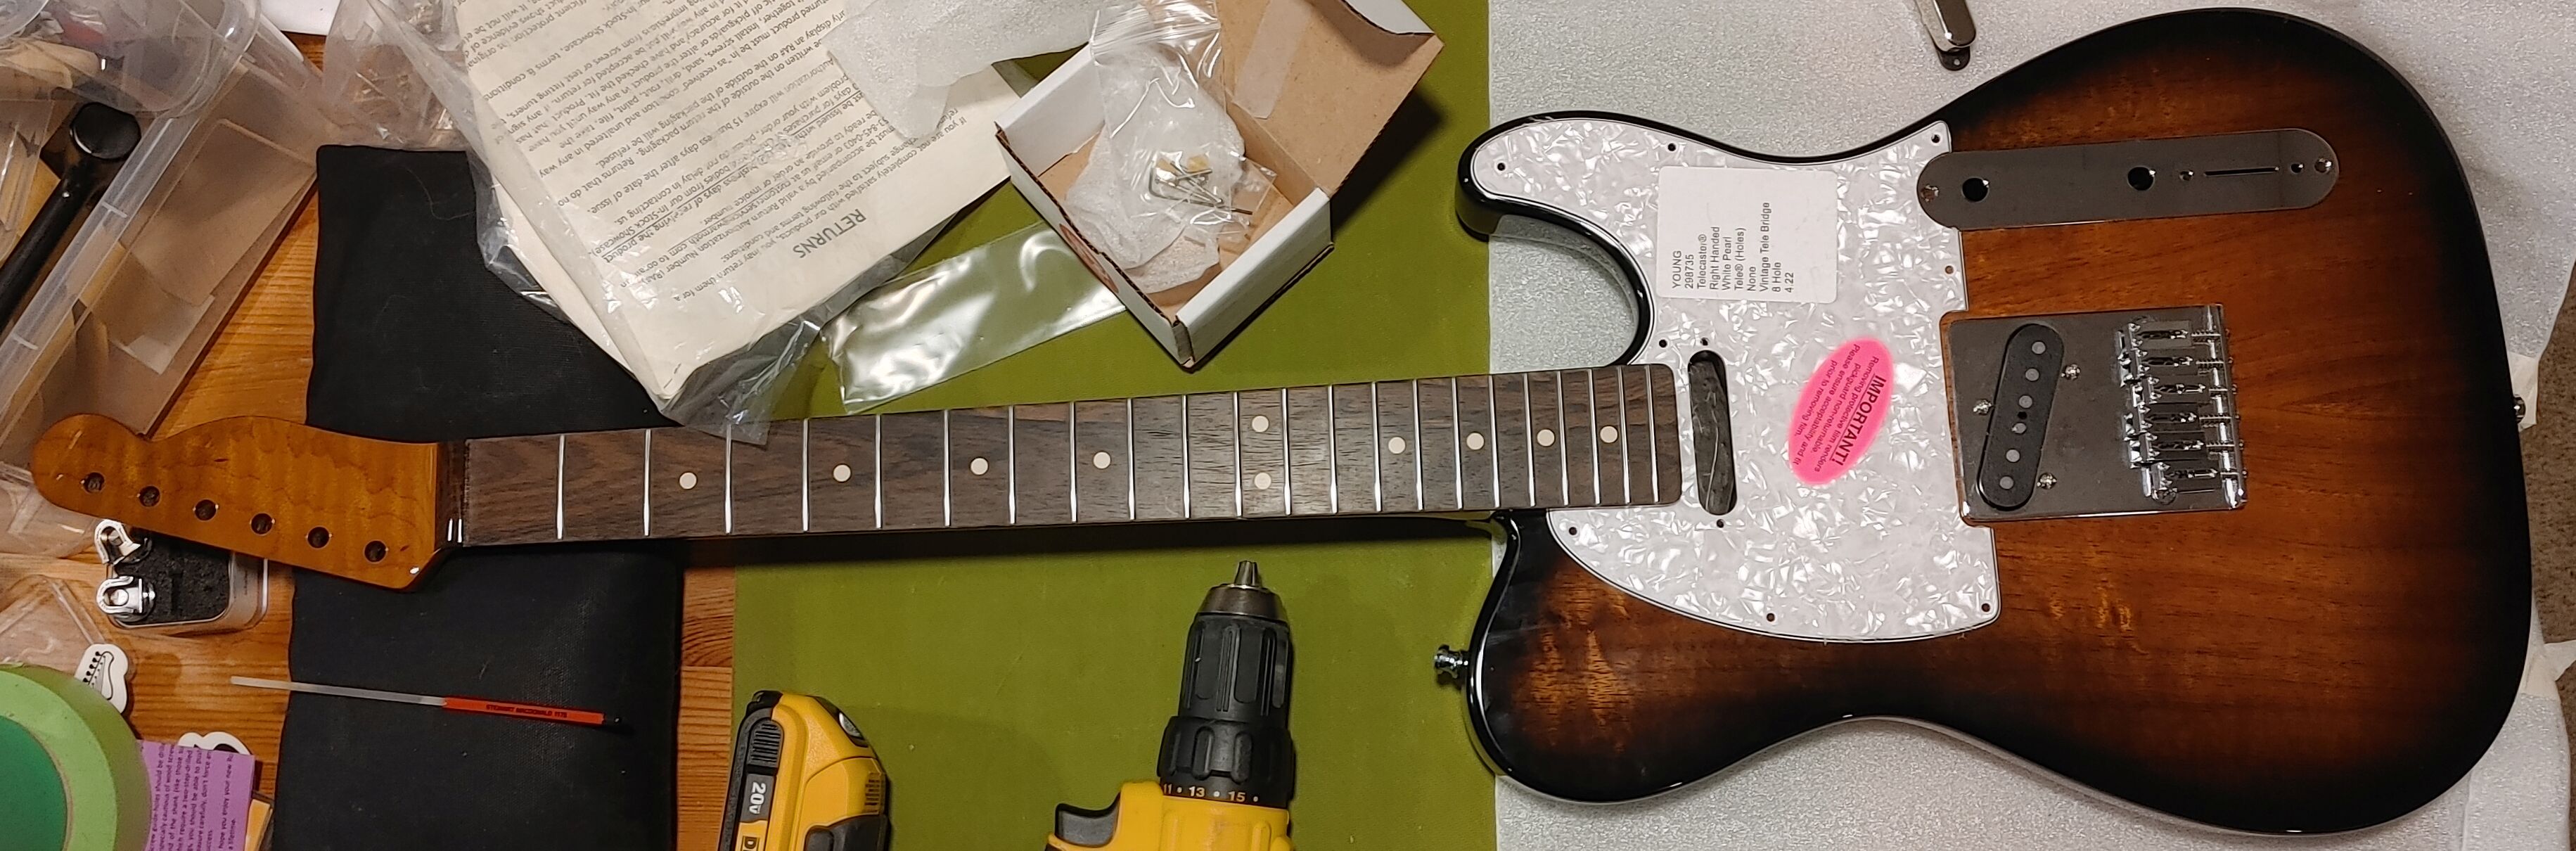
Neck comes back, looks beautiful, ready to rock!
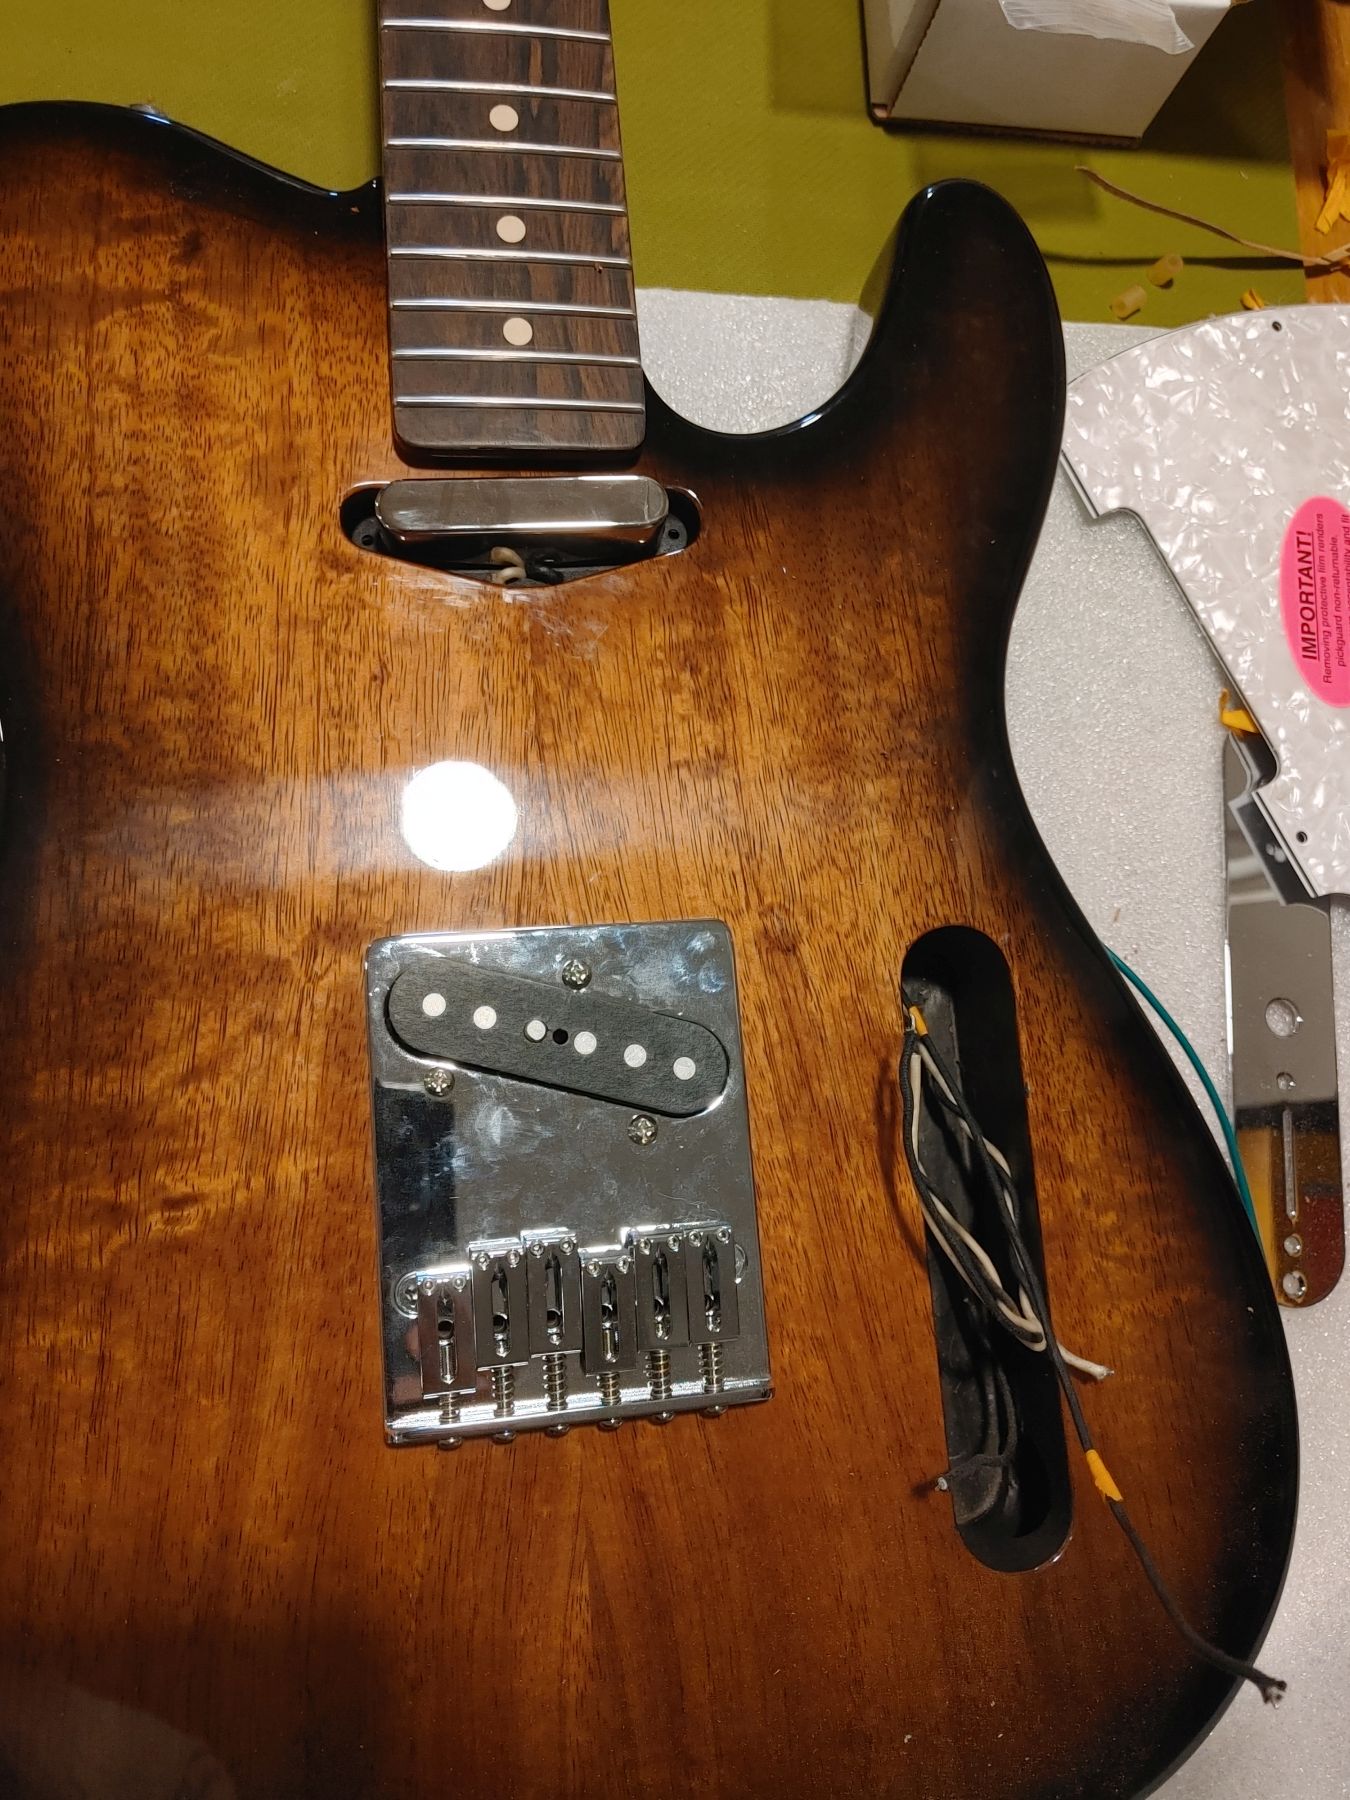
I quickly install the bridge and neck. Again, I cleaned out the holes with my countersink bit and file where needed. I also slightly over-drilled the holes in the neck pocket since it's all roasted and I'm nervous of splitting the wood. *I had to order more screws since its a contoured heel and my screws were too long.
I also added a screw to the body in each cavity, crimped a wire on it, so I can connect it to ground later (star layout).
OK - time to drill out the pick guard.
---
Hi everyone! Warning - long post. Warning - lots of big pictures. Sorry (?) about that.
So I recently got a promotion, and was thinking of what to do to celebrate. I wanted a new guitar... but after spending lots of time at the local stores, I didn't see myself compromising on such an expensive guitar. I wasn't happy.
So, I thought I'd try my first build.
A shout out to Spike who advised me and suggested changes to my order. His advice was spot on.
So, this is what showed up in the mail!
That's a roasted flame maple neck with vintage tint, and a figured zircote board.
Here are the other bits:
That's a roasted swamp ash body with a koa top. Chambered.
This was the idea:
So! I get to work.
First, I decided to shield the cavities *(EDITOR's note: it's still as noisy as my unshielded strat*). 3 coats.
My fret rocker wasn't that happy with the frets, so off I go to do a fret level. Not my first, but certainly the part of the job that gave me the most anxiety.
DISASTER STRIKES
While removing the tape....
I give warmoth a call. Give them all the details. Explain what I did, which tape I used.
I knew that tape can pull finish off, so I removed it very carefully, but the finish basically flaked off! (!!).
Warmoth said to send it back they'll take a look..
drumroll! verdict: rare poor finish adhesion. They'll strip and re-finish the neck, send me a care packet (go warmoth shirts!), extra tape, and they even cleaned up the fret ends for me (I guess they could see that I was an amateur).
Thanks to Spike and Jeff for all the help.
While I wait! I learned to drill the finish. My technique: 1) drill backwards first to scrape finish off without lifting. 2) use a countersink bit by hand to scrape a cone of finish away from the hole. 3) drill. 4) wax the screws before putting them in
Another trick I learned that saved me: don't trust drill bit sizes and screw sizes. I just used my calibers to measure inner and outer diameter of the screw, and the bit, and found a bit in the middle.
I also installed he string knob thingies. They didn't want to go in and I was shy of shattering the finish. I used a small flat file to remove the finish from around the hole and they went in well.
Neck comes back, looks beautiful, ready to rock!
I quickly install the bridge and neck. Again, I cleaned out the holes with my countersink bit and file where needed. I also slightly over-drilled the holes in the neck pocket since it's all roasted and I'm nervous of splitting the wood. *I had to order more screws since its a contoured heel and my screws were too long.
I also added a screw to the body in each cavity, crimped a wire on it, so I can connect it to ground later (star layout).
OK - time to drill out the pick guard.
Last edited:
jyjvstrat
Newbie
- Messages
- 13
REPOST (2/2) -- the above post seems to have broken images after a system update. Copy pasted into multiple posts below.
---
...

I couldn't do it. The wood is too beautiful. I can always add it later.
So I added longer tubing to the neck pickup, and installed it into the body.
I wired up the cavity
*** This was the second hardest part in the whole job. Getting wires from the neck cavity to the control cavity was a REAL problem. Online people suggested buying abrasive cord. Wonderful idea. I got impatient and made my own by using a razer to cut thin strips of sandpaper from a belt sander paper. I fed it through with a wire, and used the sandpaper ever so slowly to open up the cavity. This job sucked. This is the only part where I felt the warmoth quality and workmanship was below par. Seriously. fix that.
I like electronics so this bit was fun. I really like working with pushback wire.
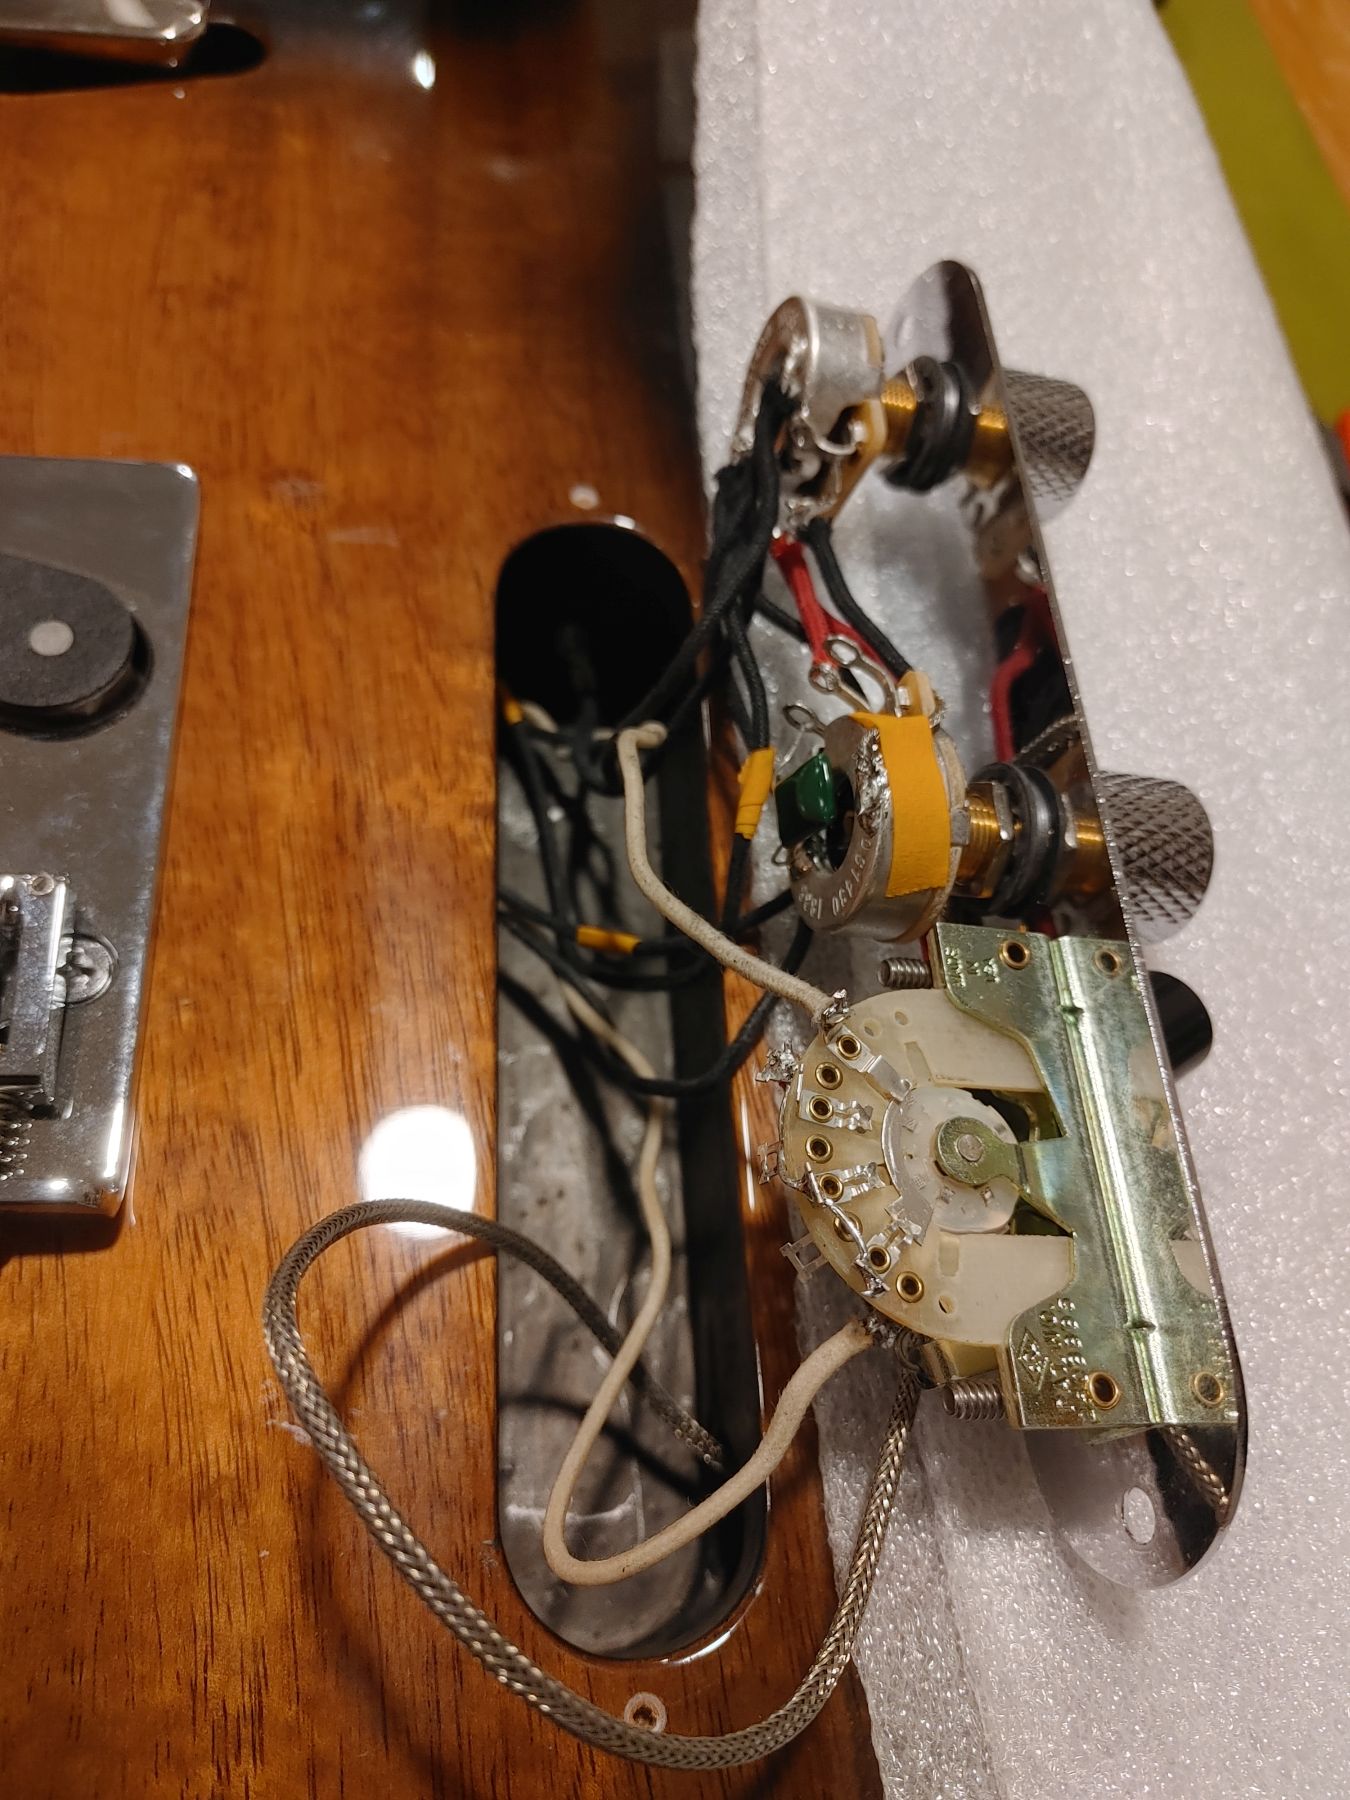
Done! all higher end hardware, switchcraft, etc.
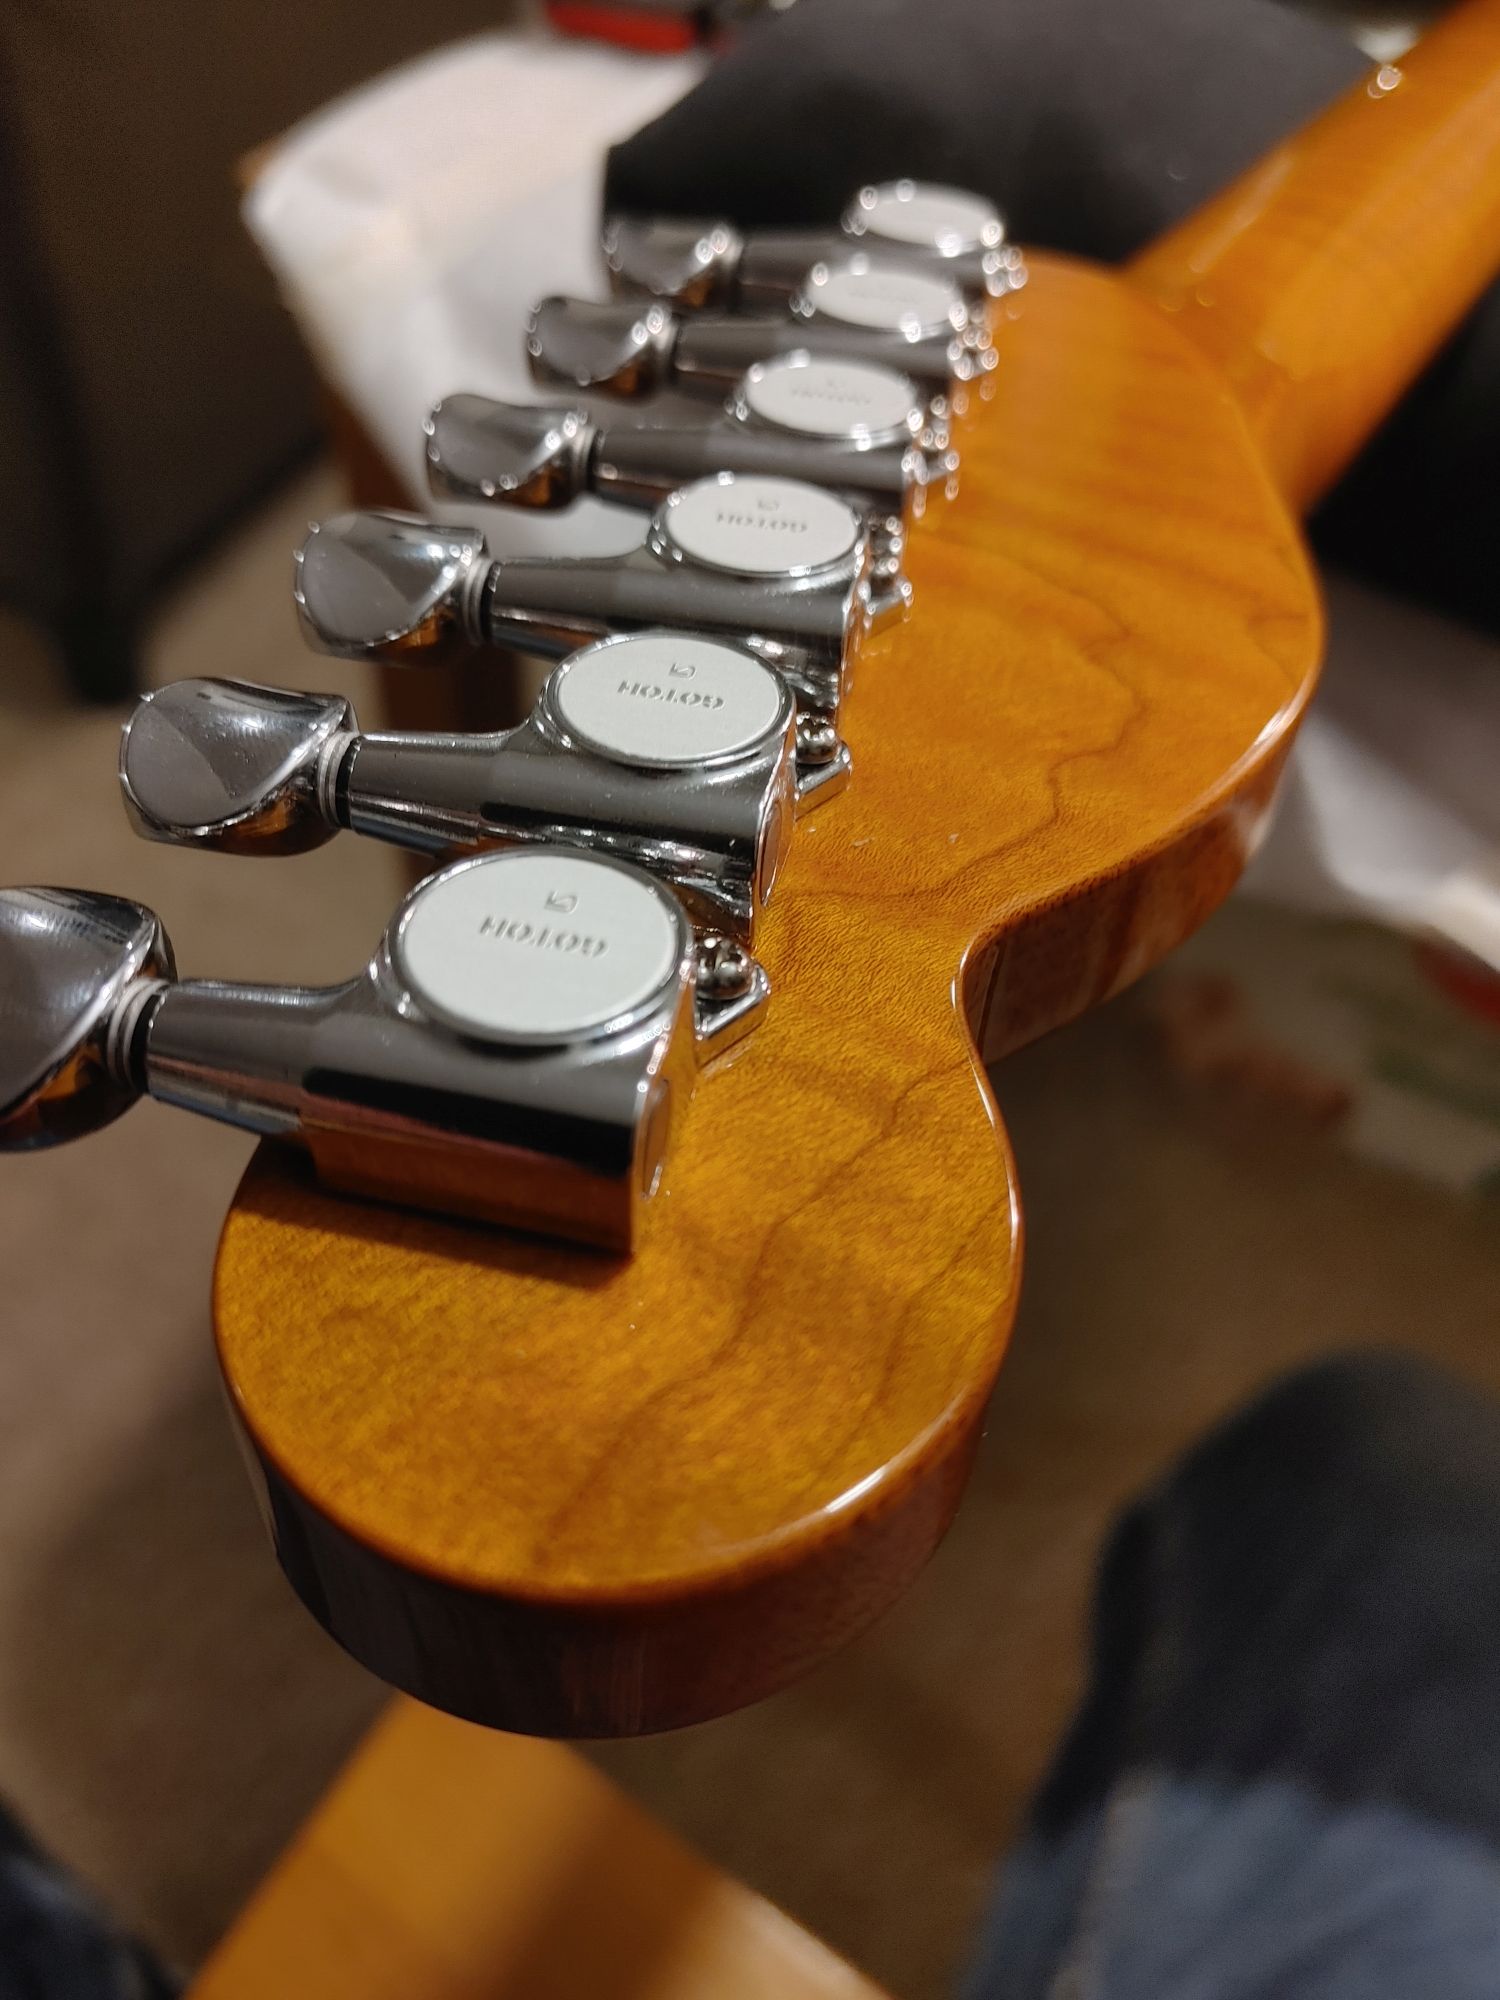
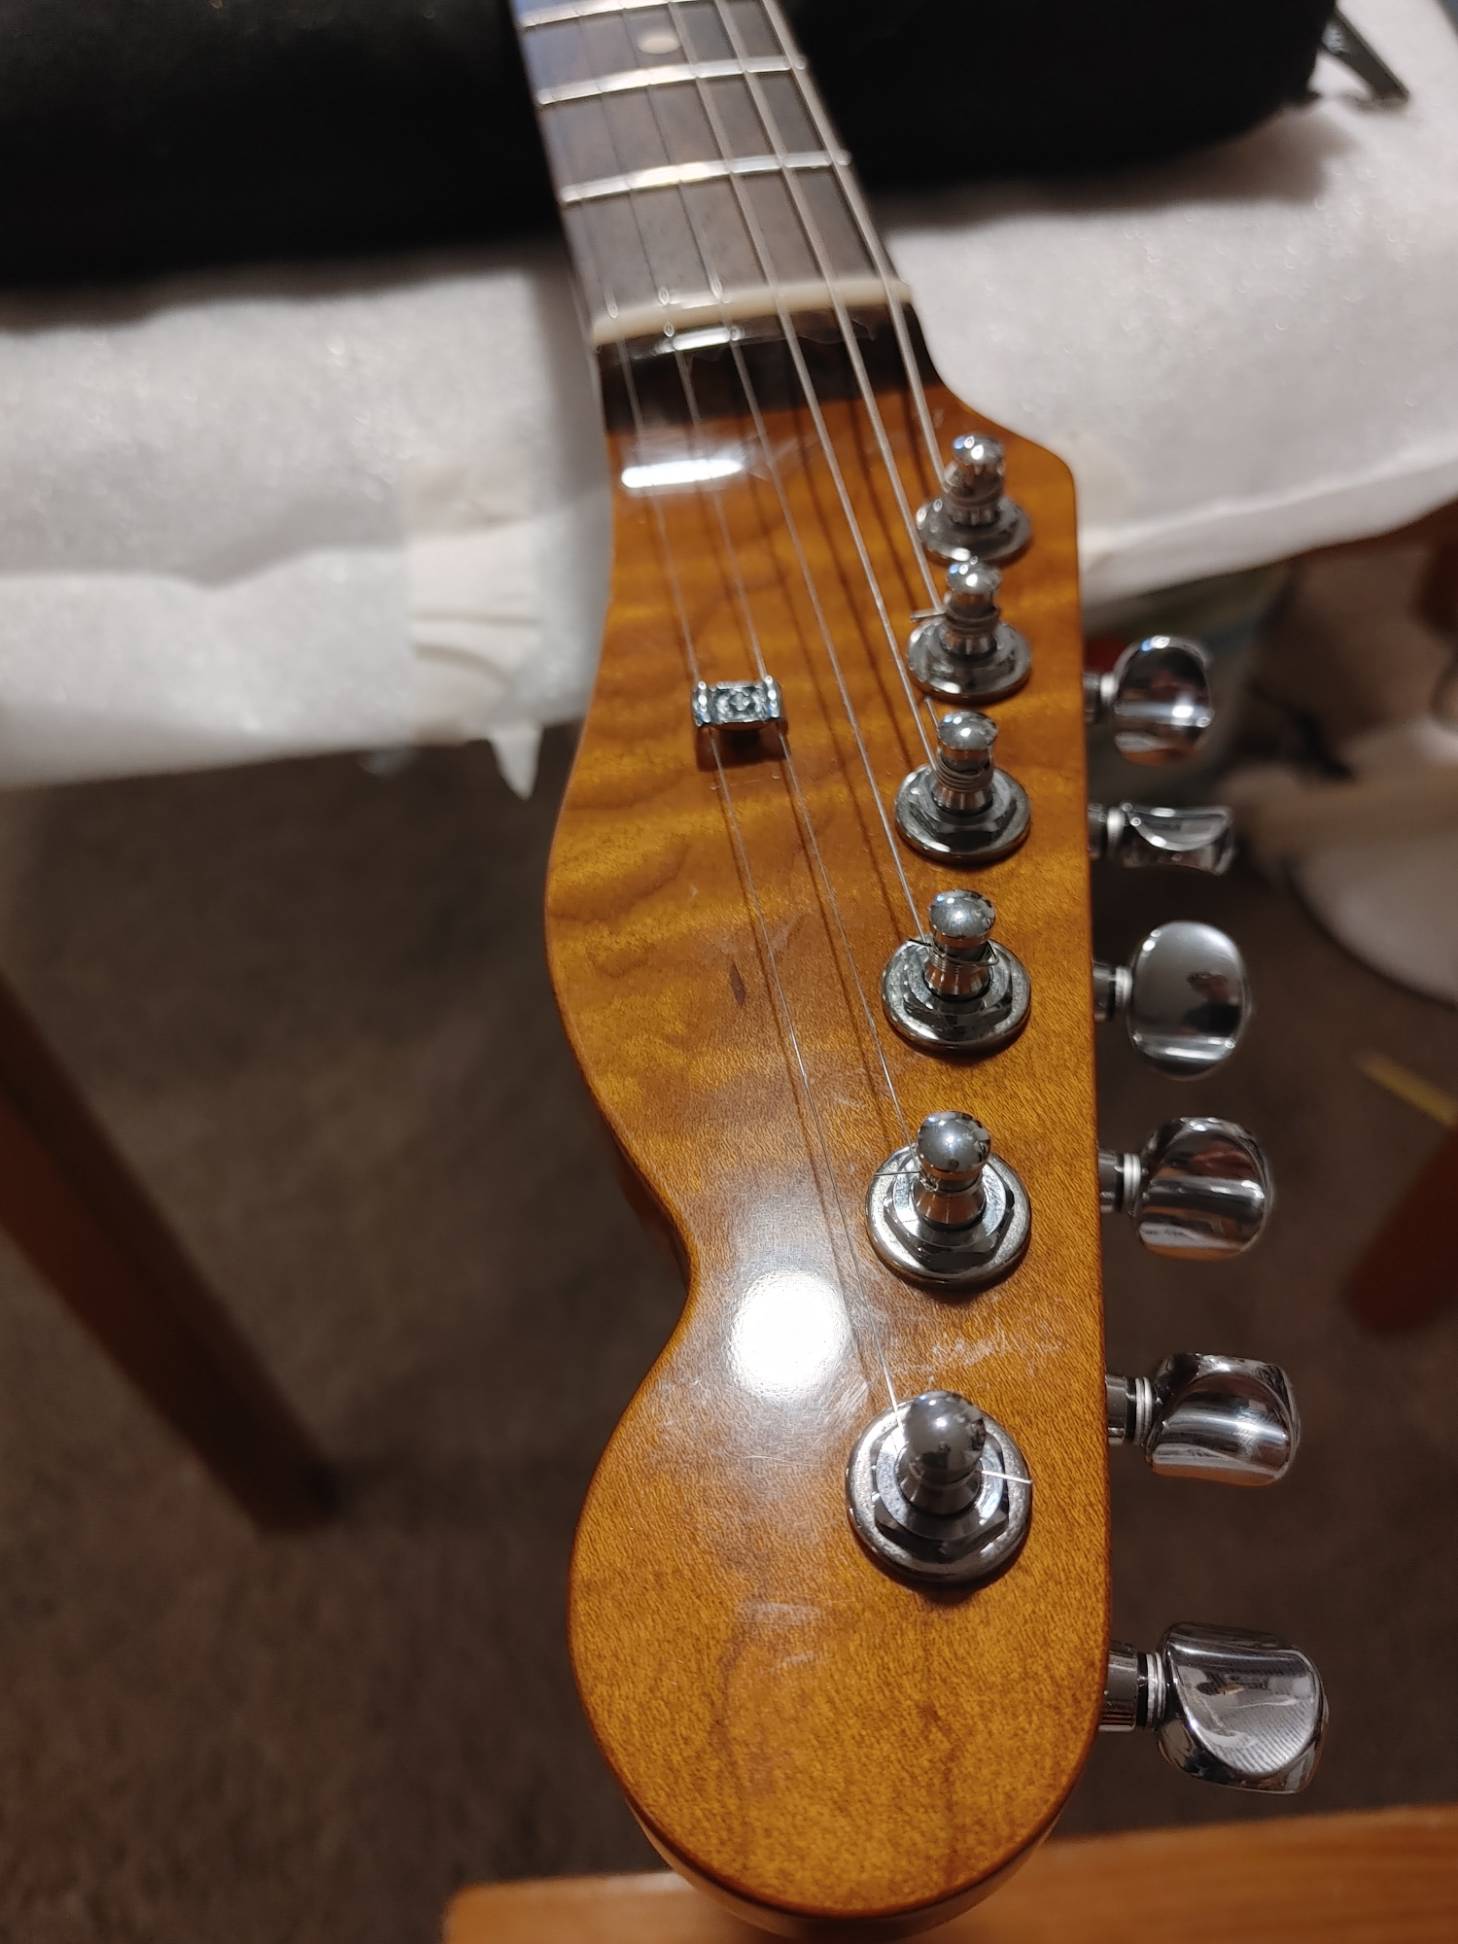
Next, let's put the tuners in. They were a little tight, but I used a straightedge and measured between them to ensure they were straight.
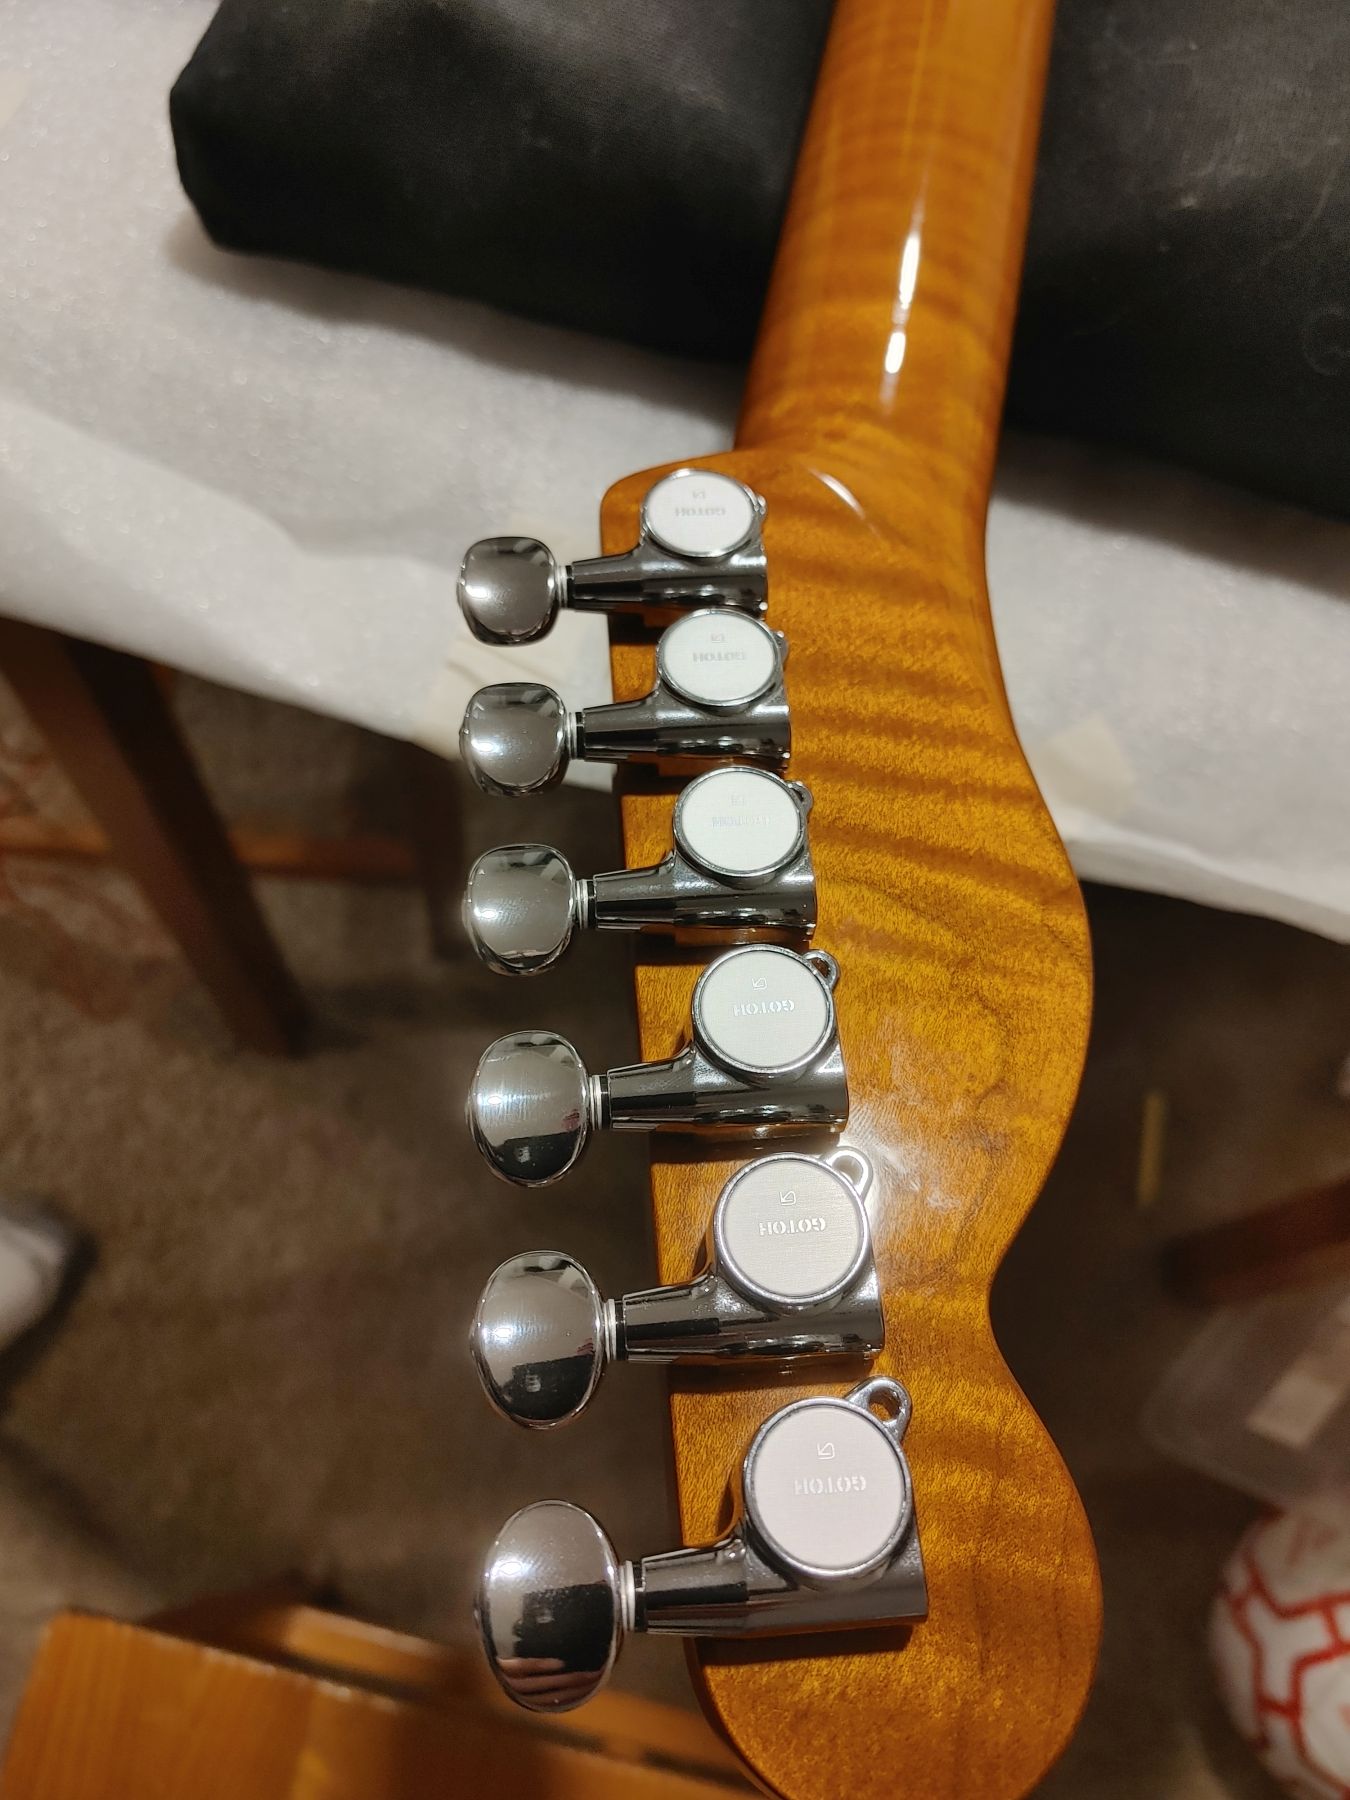
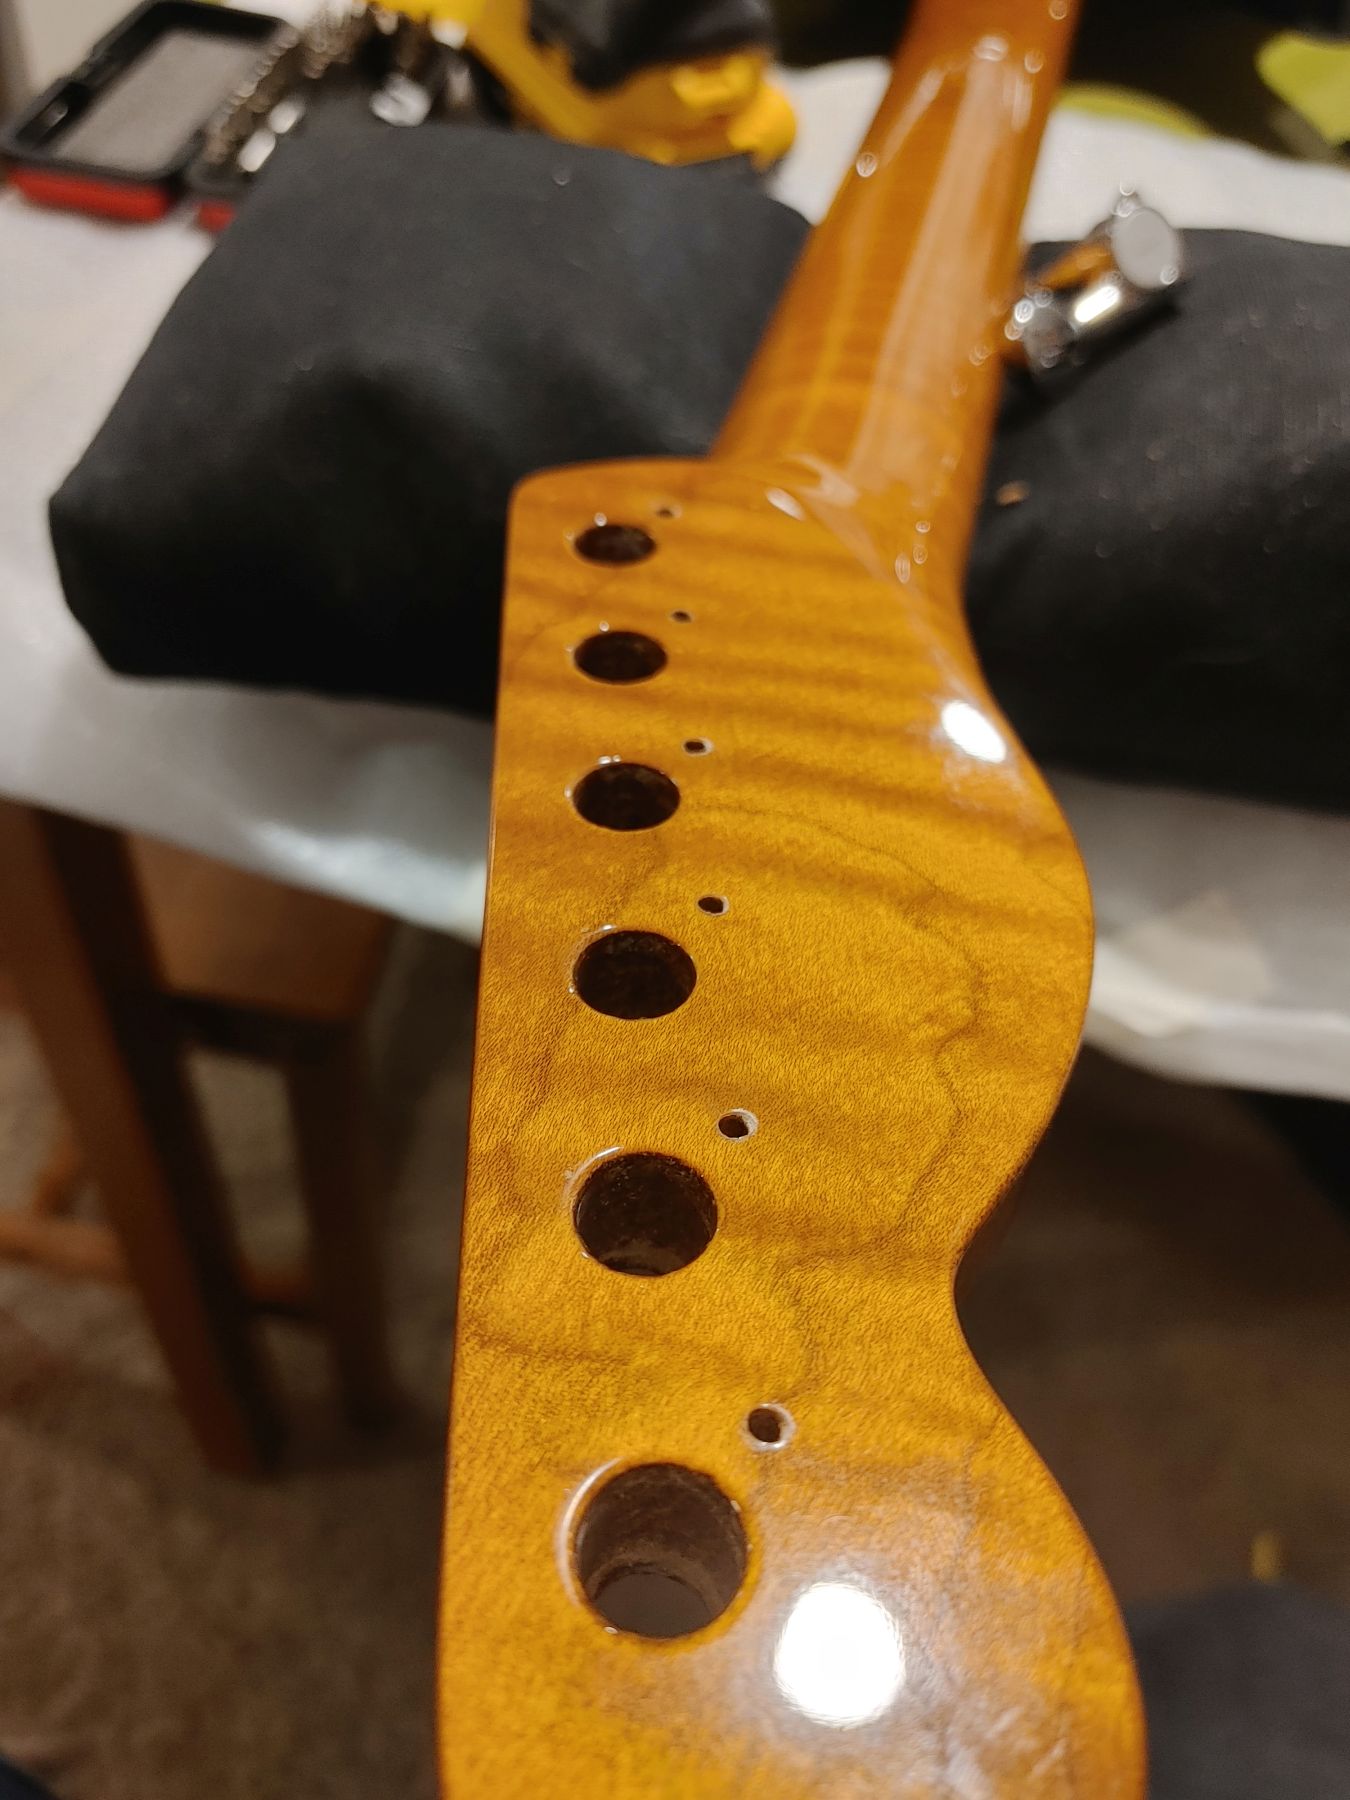
SIGH. They weren't flush when I marked the holes. Once they were in tight, they were crooked :doh:
:doh:
So, let's repair and re-try.
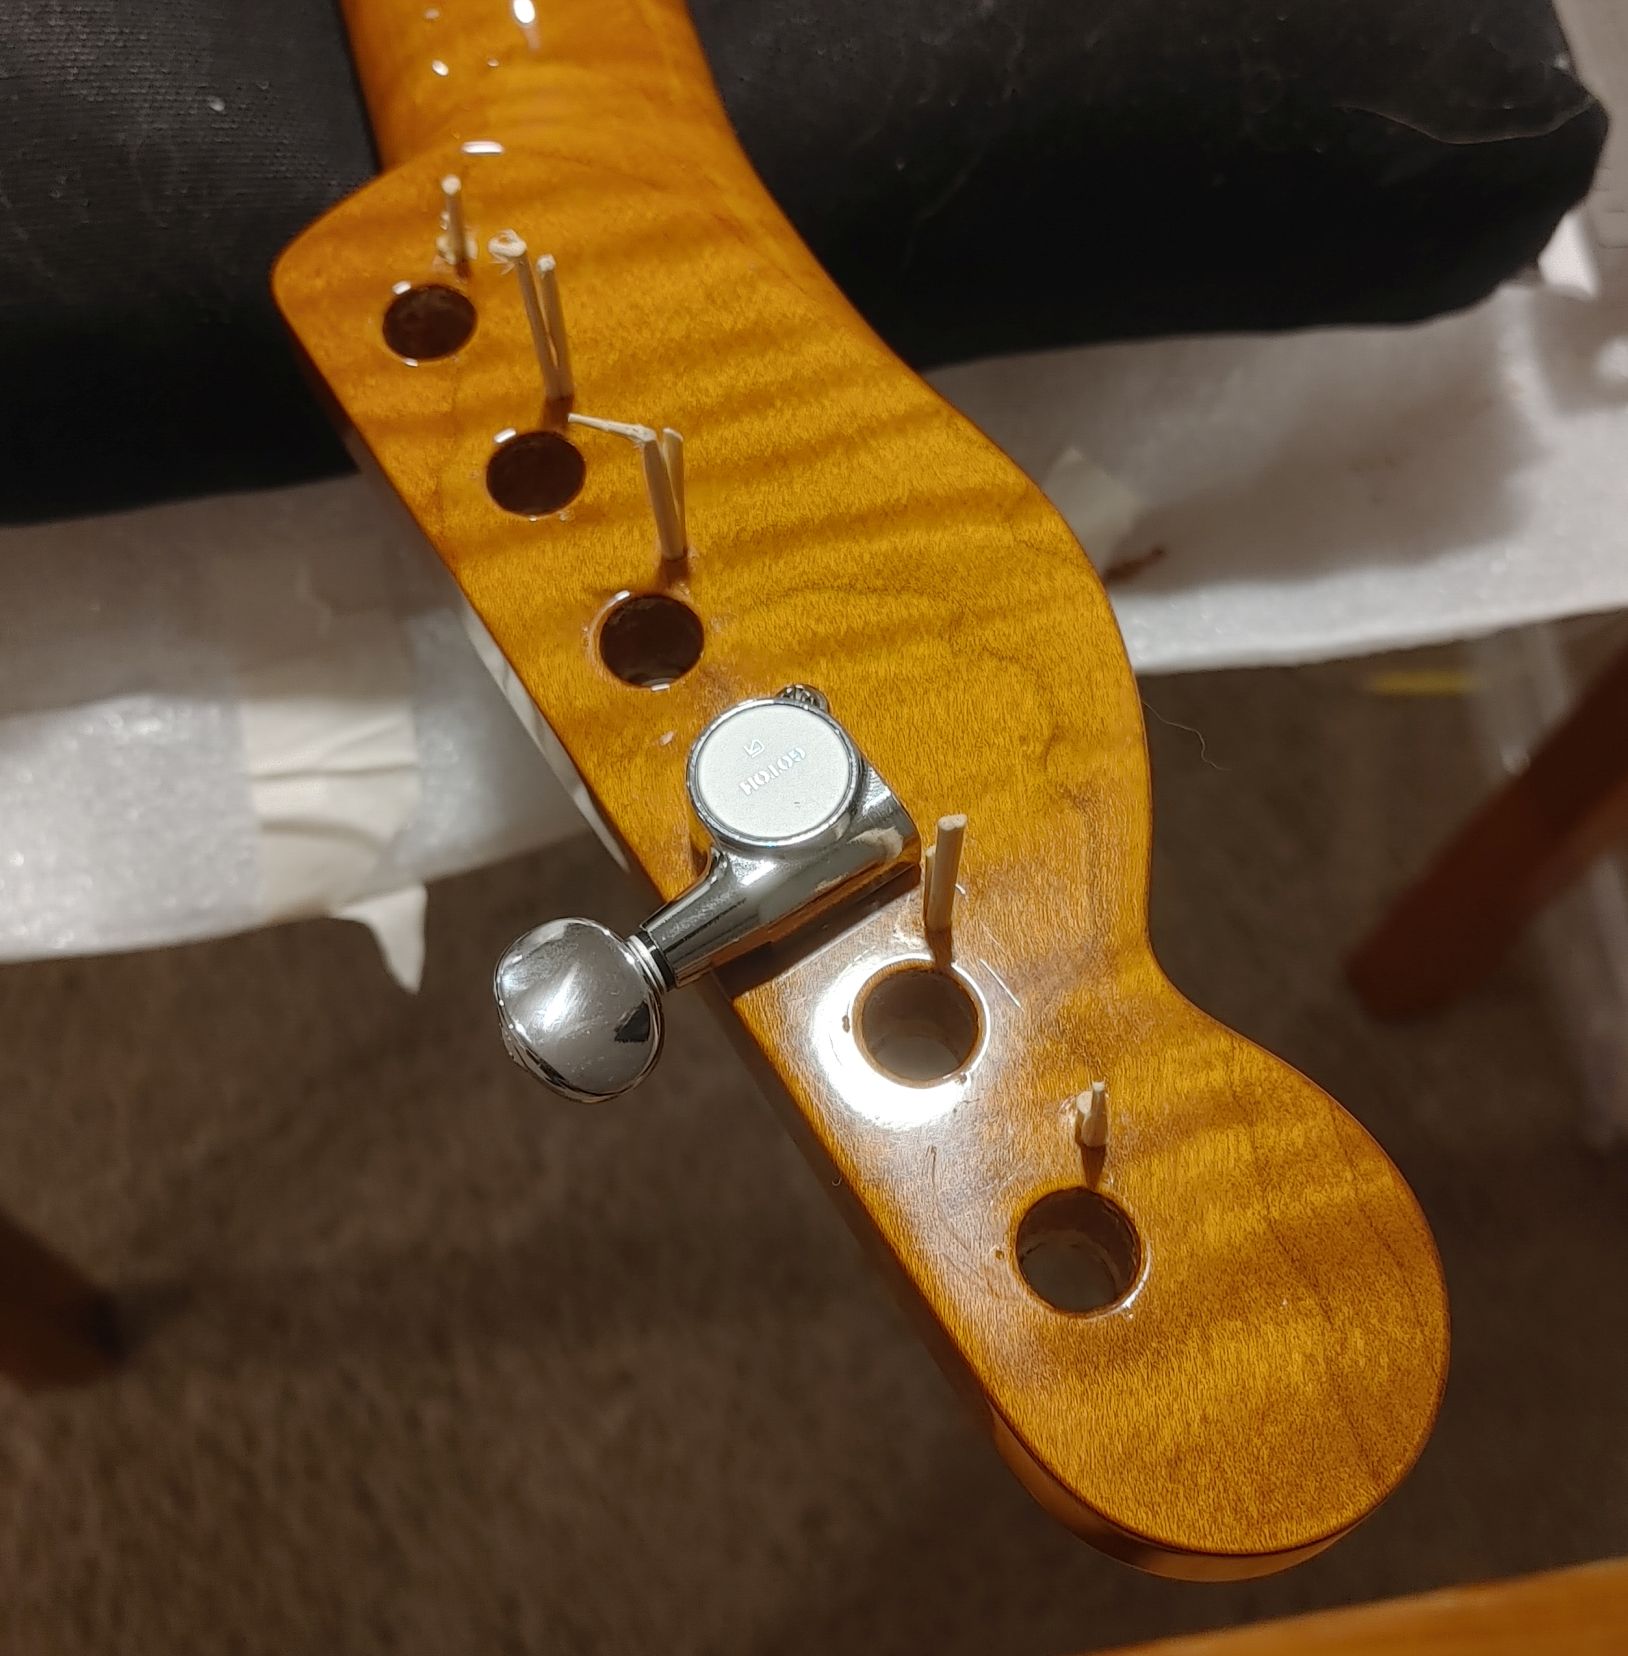
All done! Invisible repair.
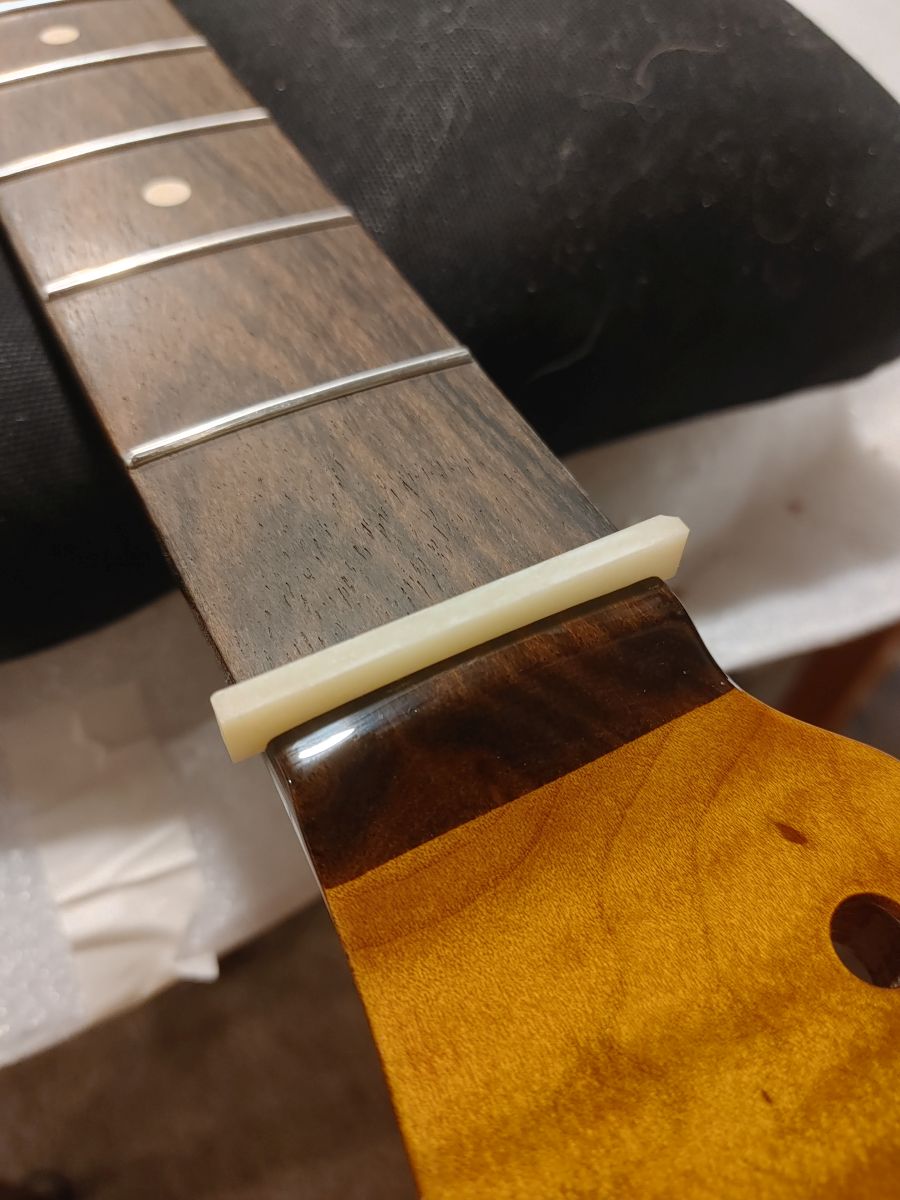
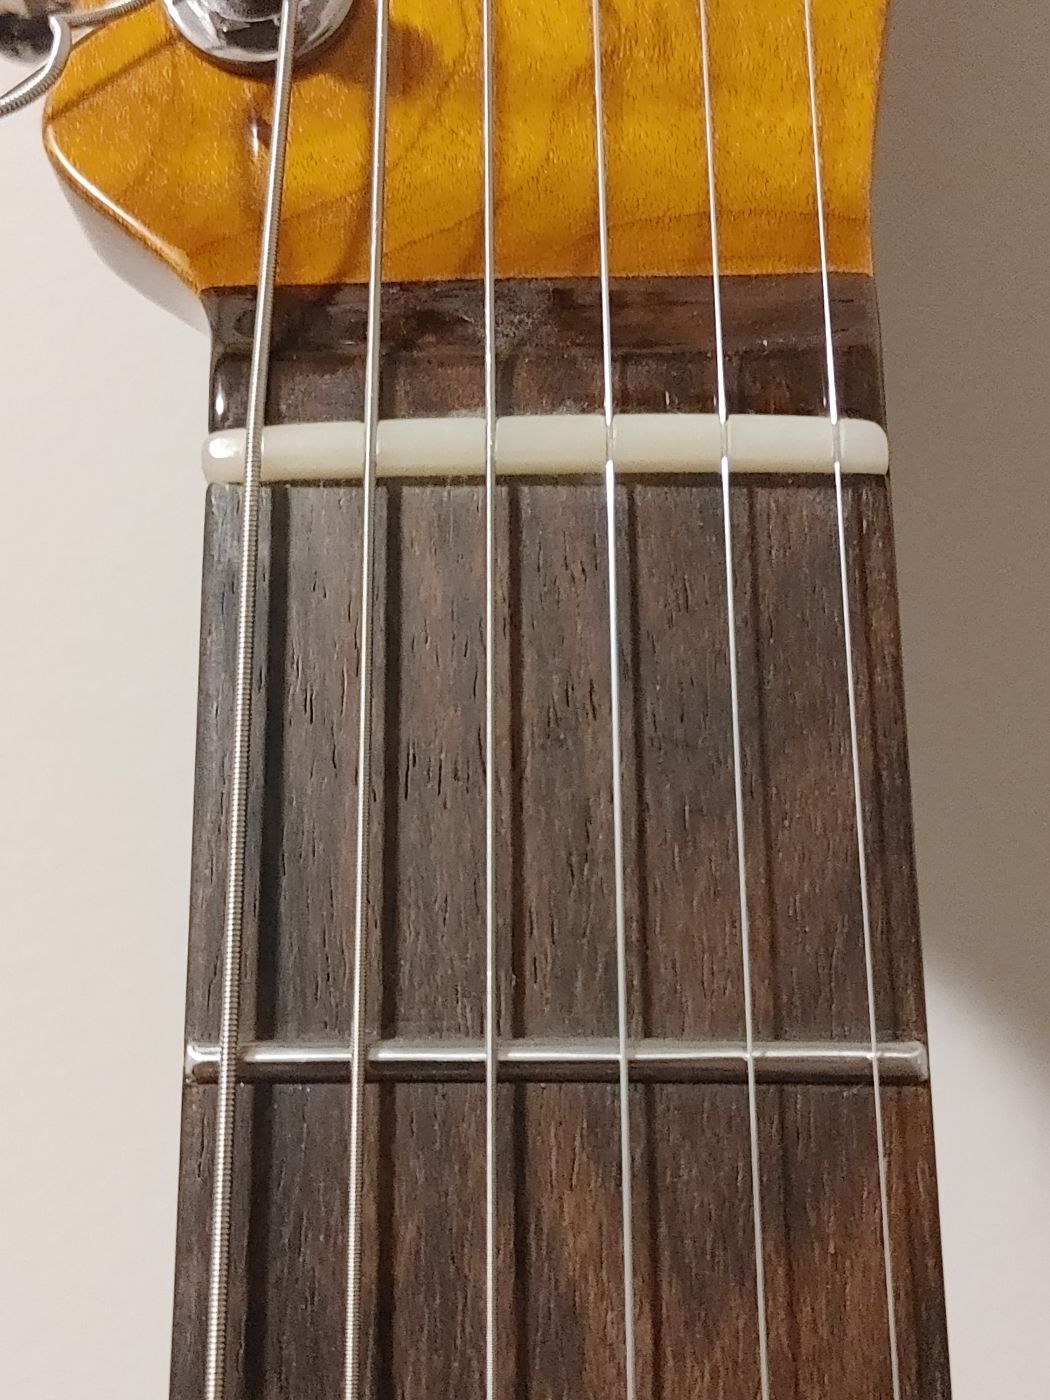
Next, on to the nut.
Grind down to the same width
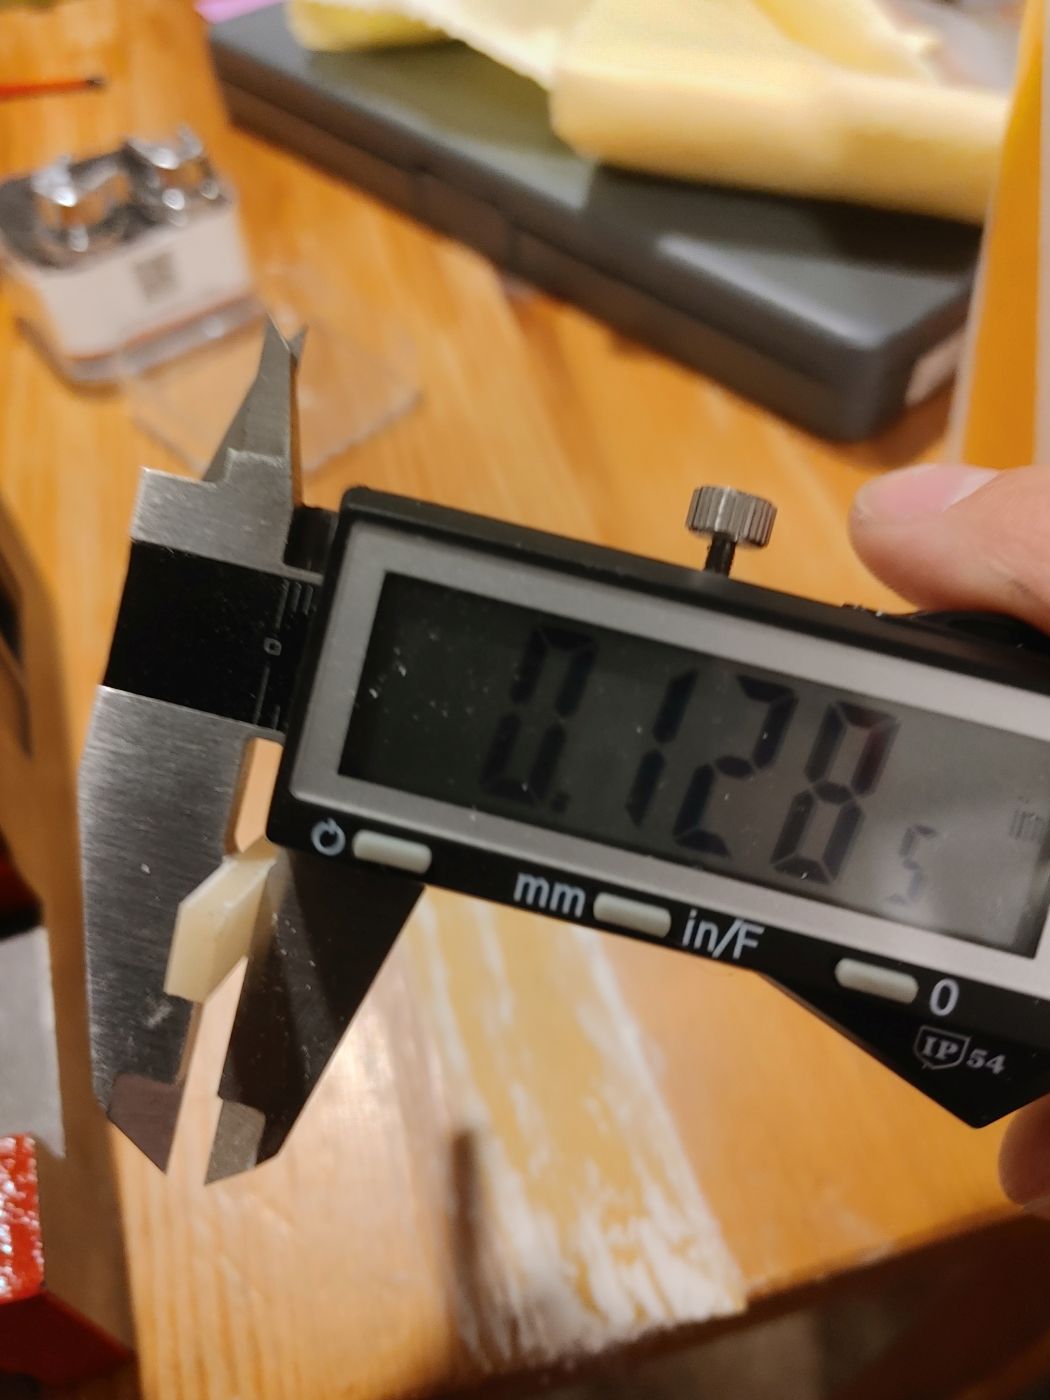
Stick back sandpaper on the table worked well
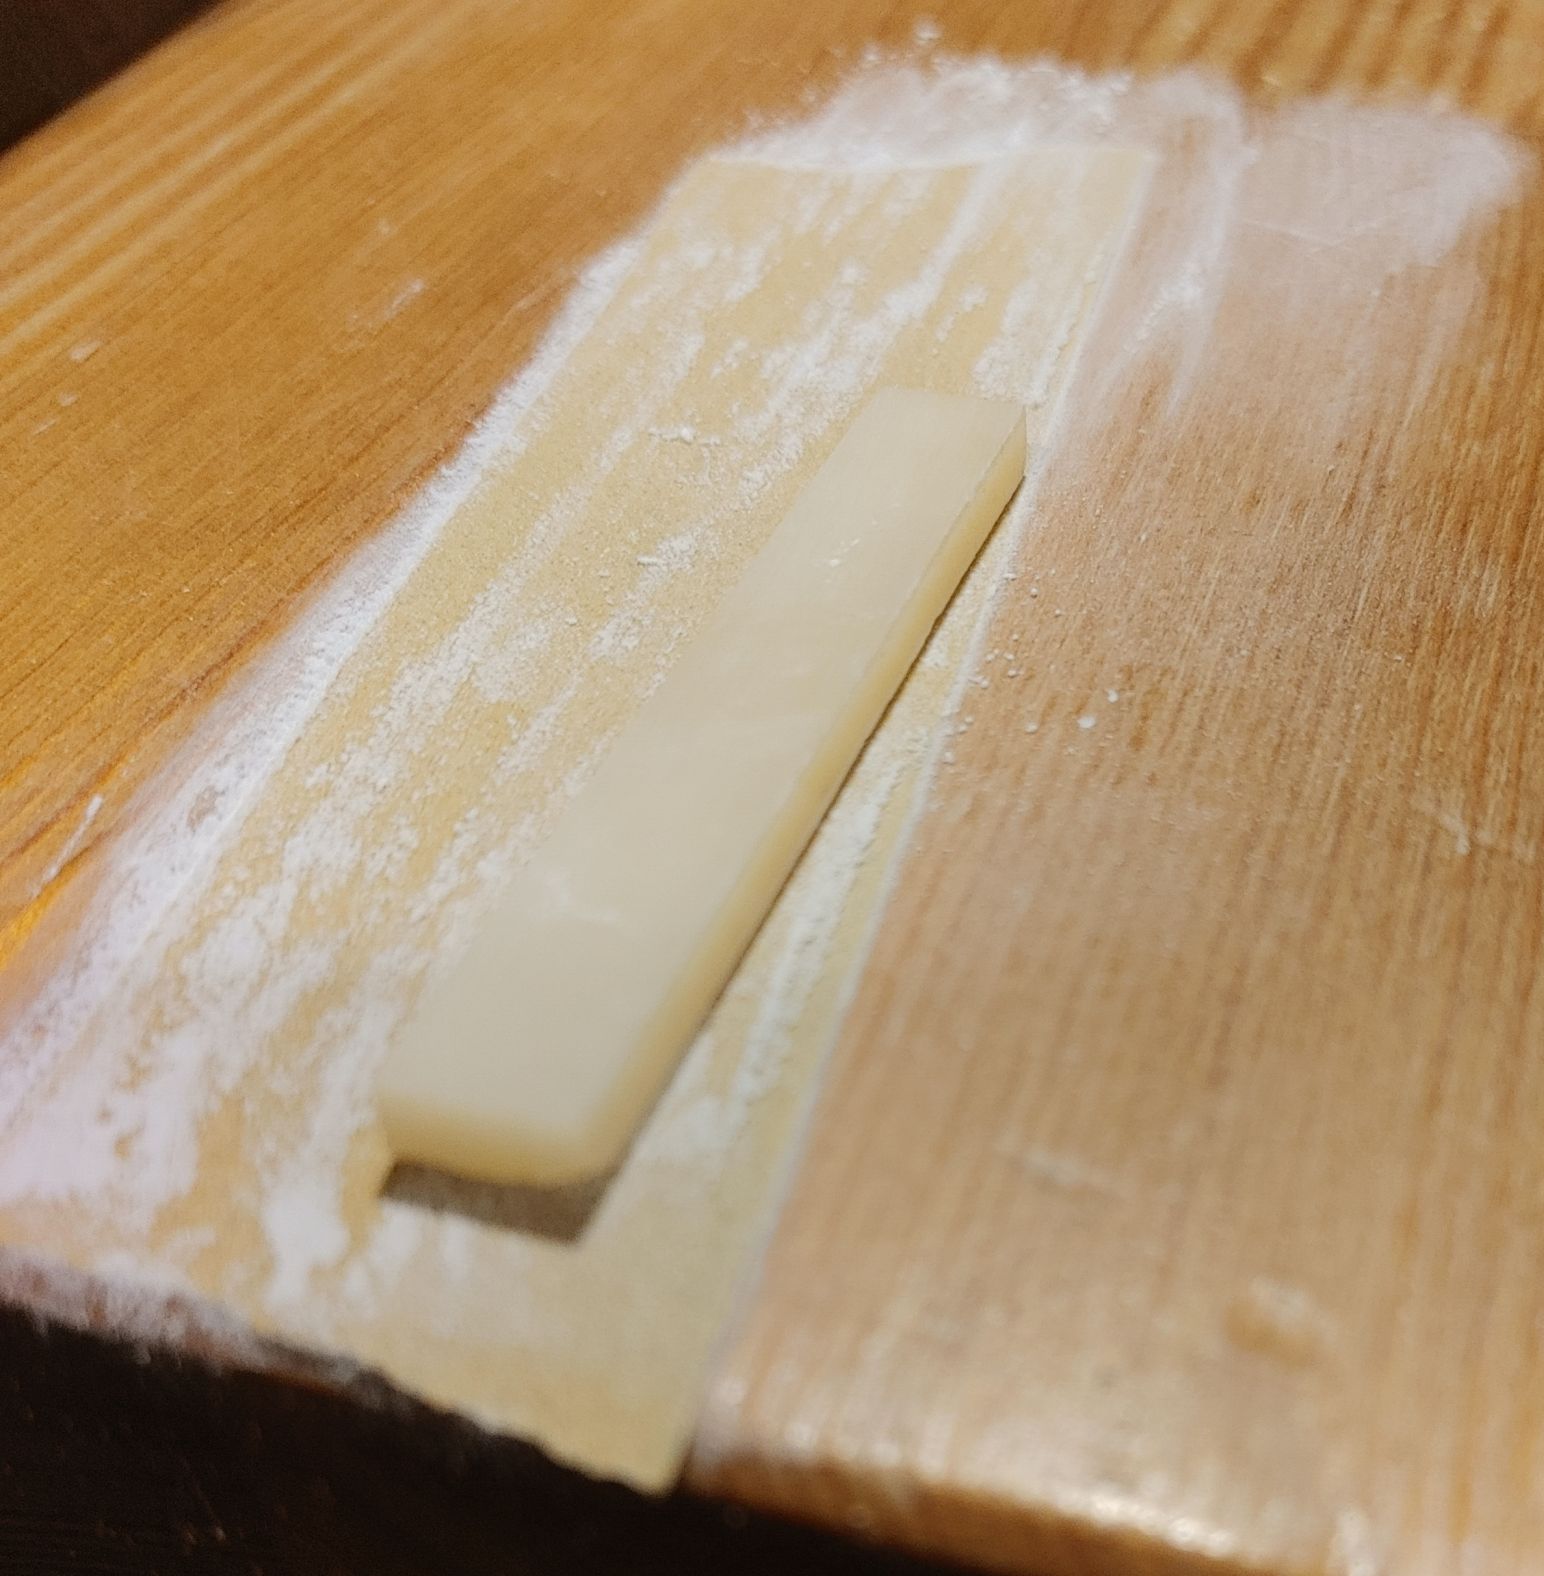
Move toward shape!
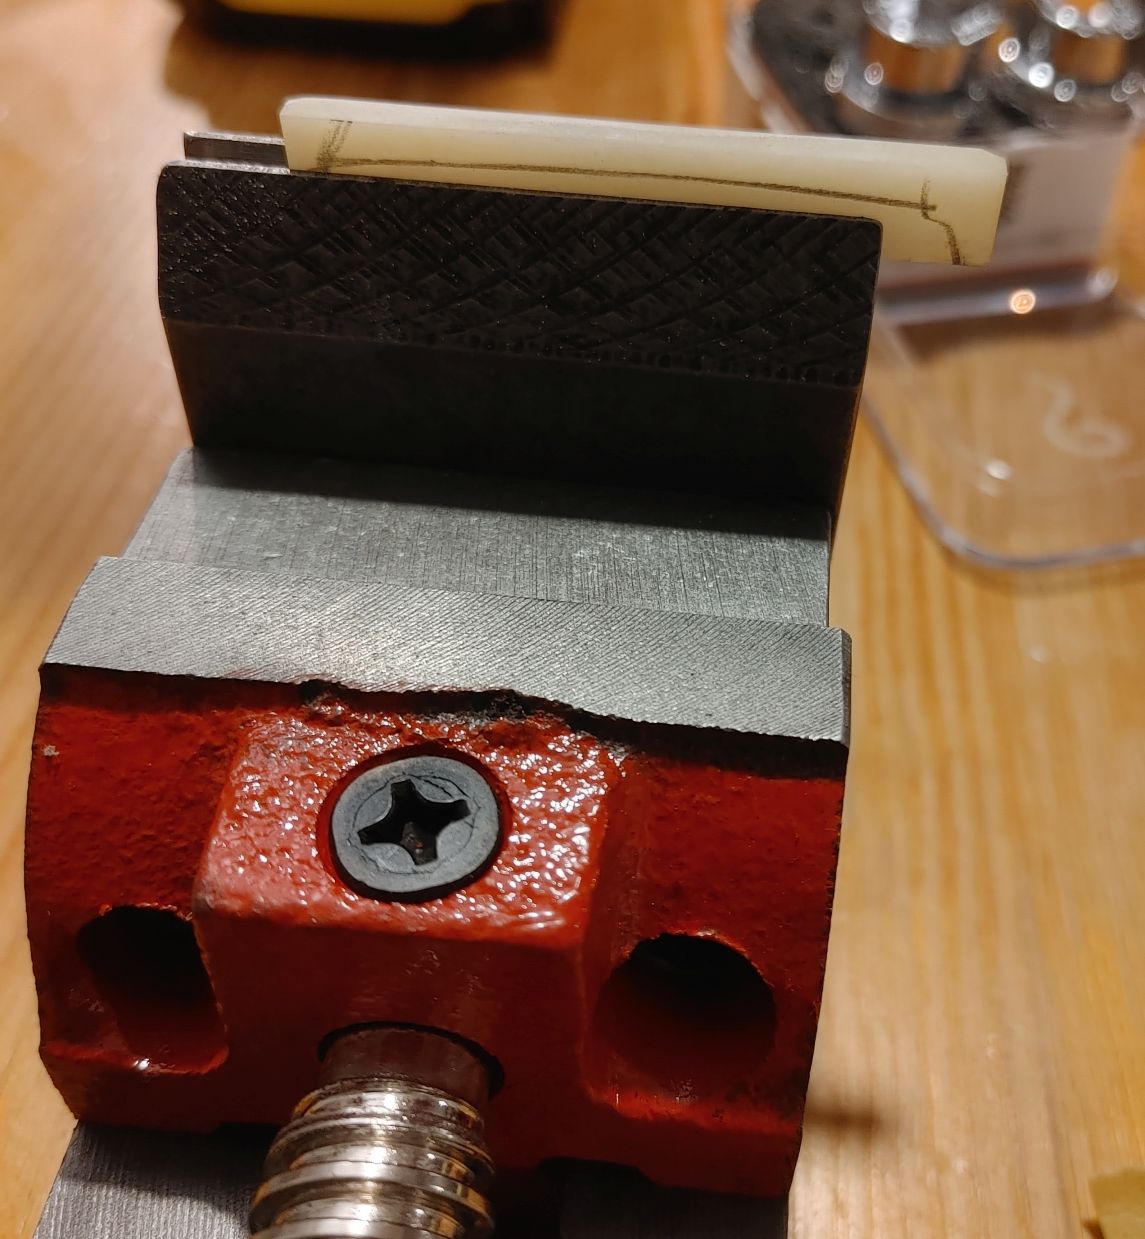
Now for the slots...
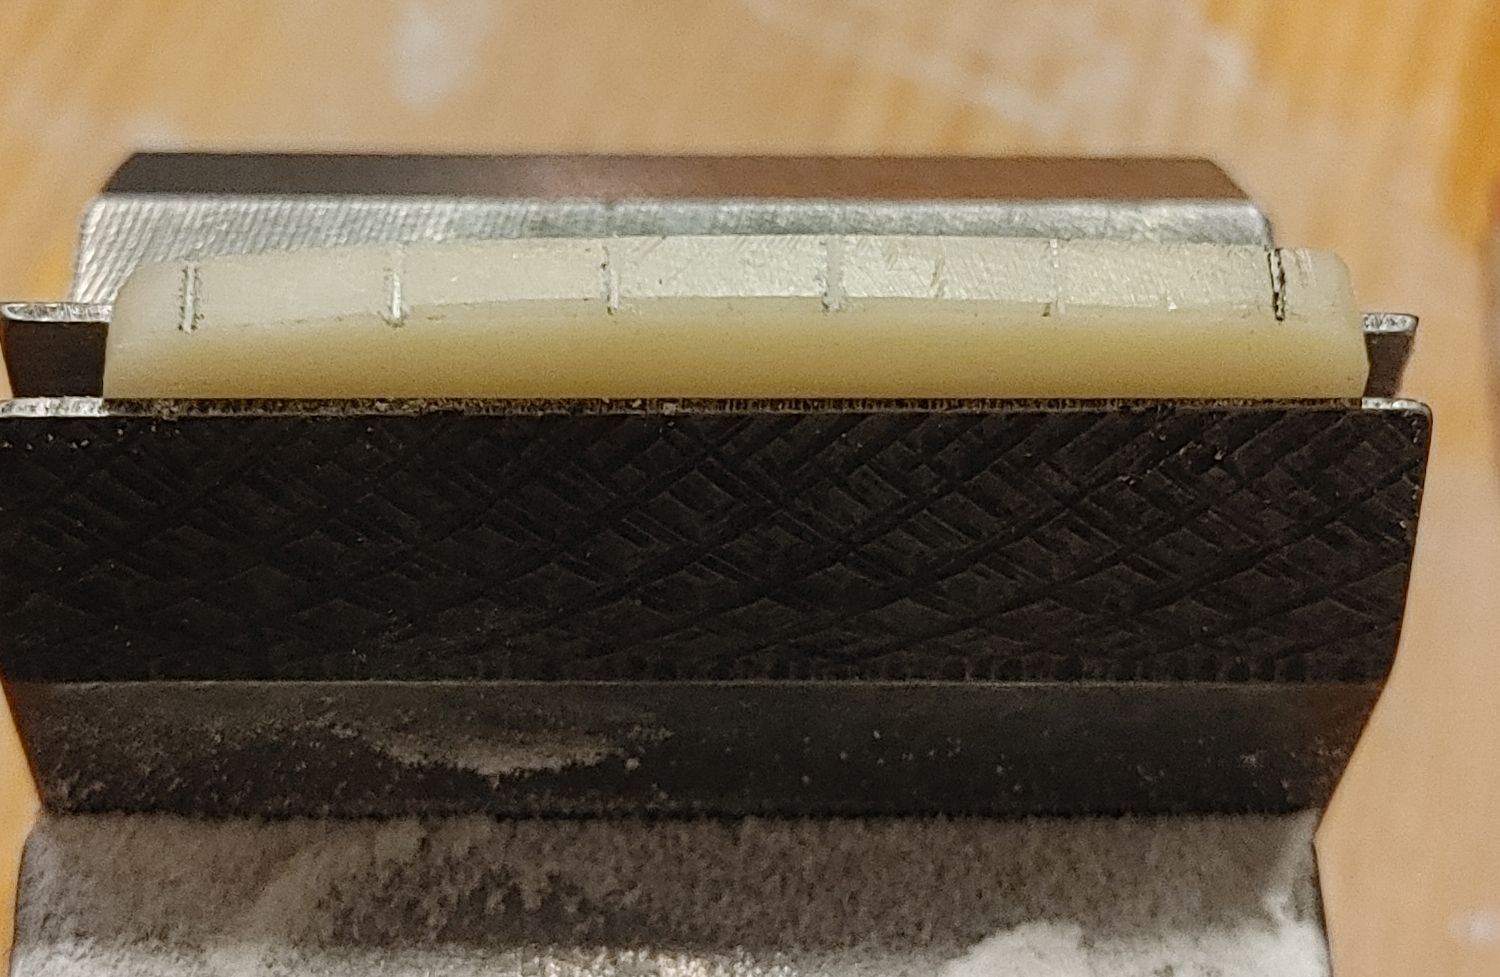
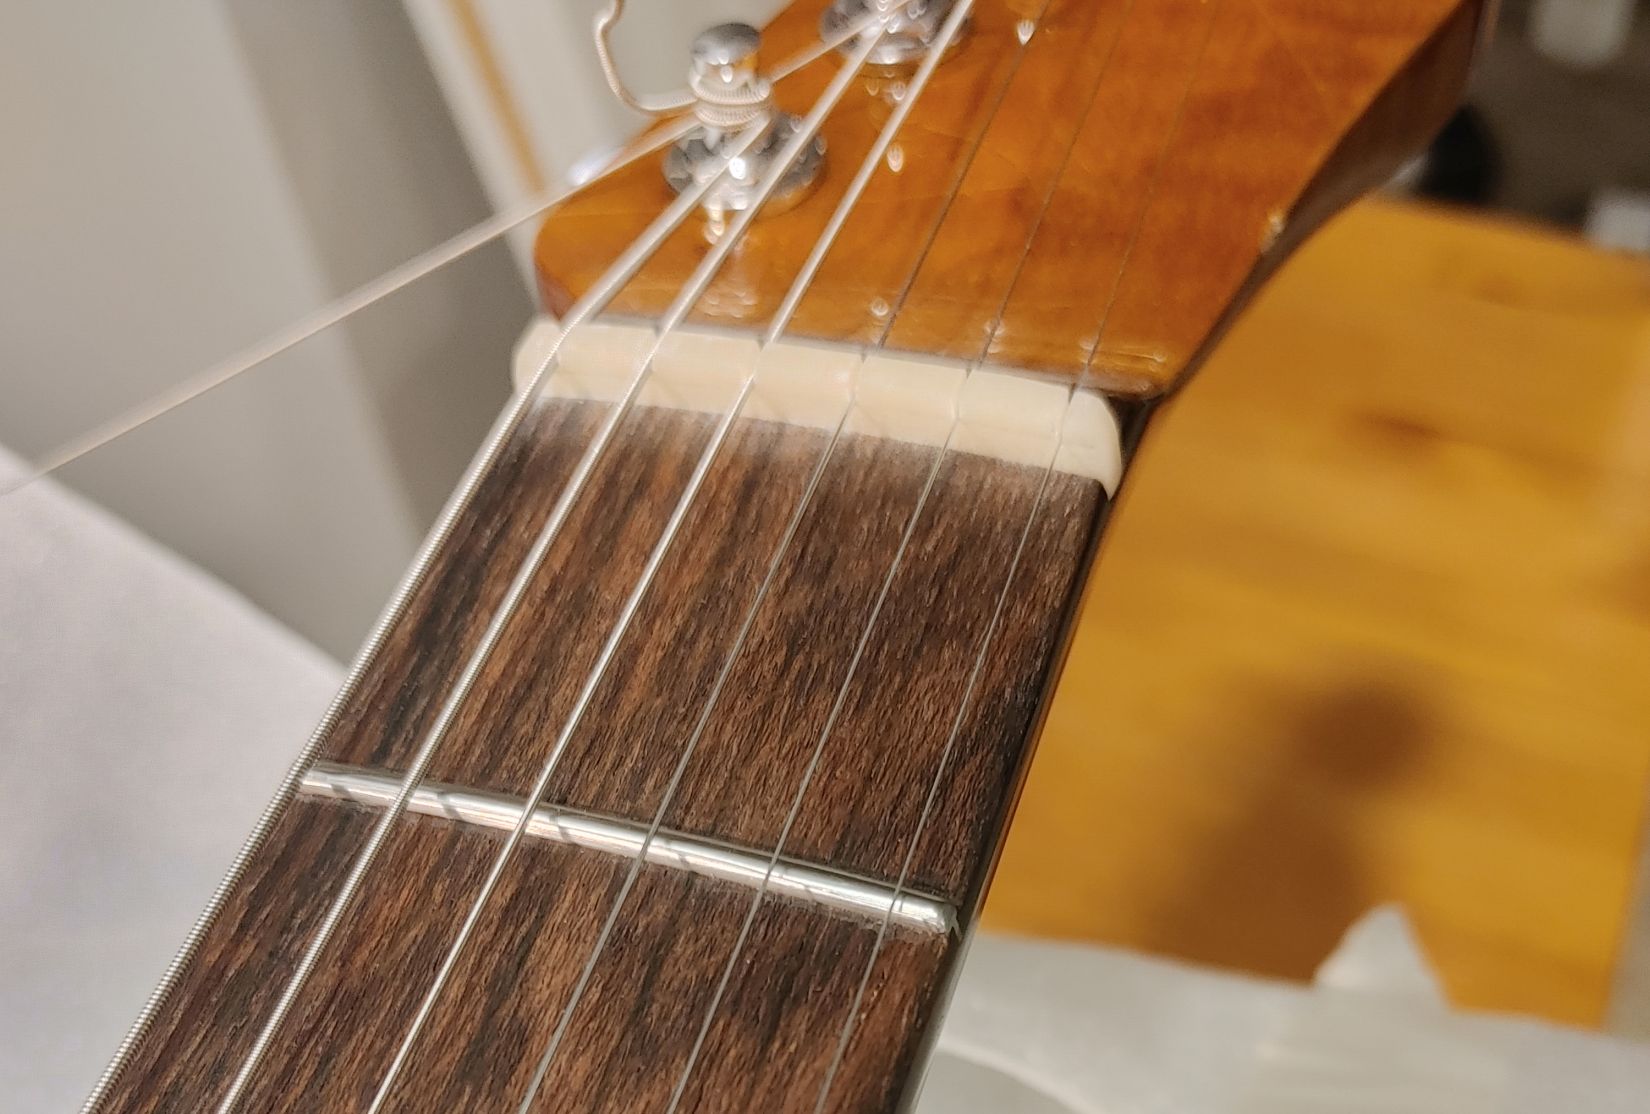
Final depth, shape, polish.
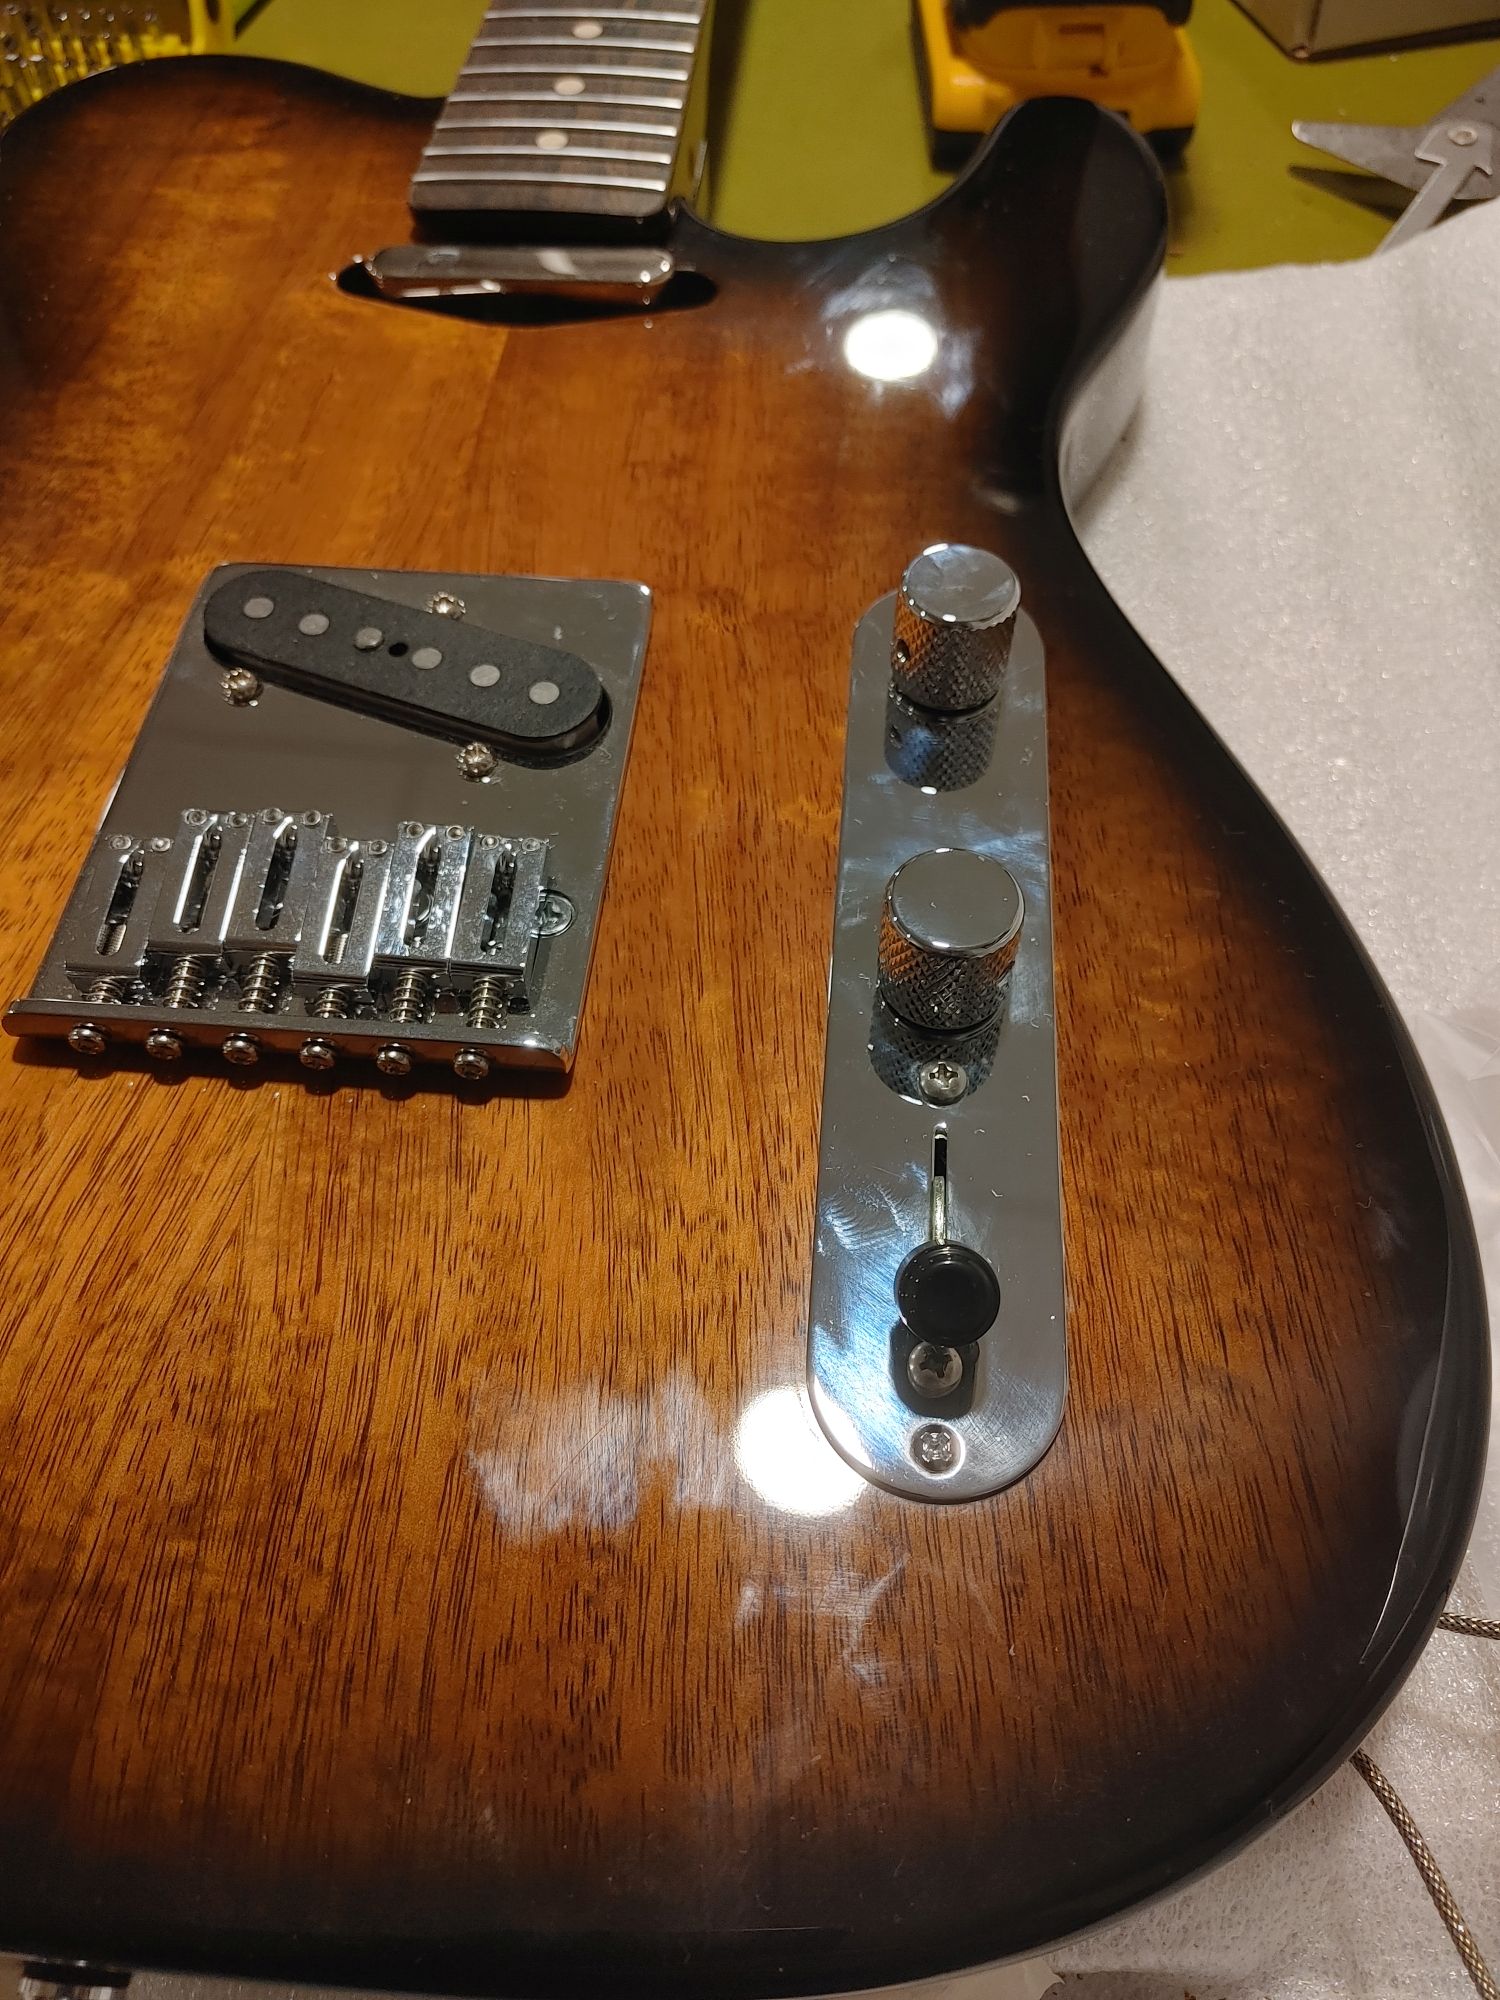
Next onto the jack. I bought this cup.
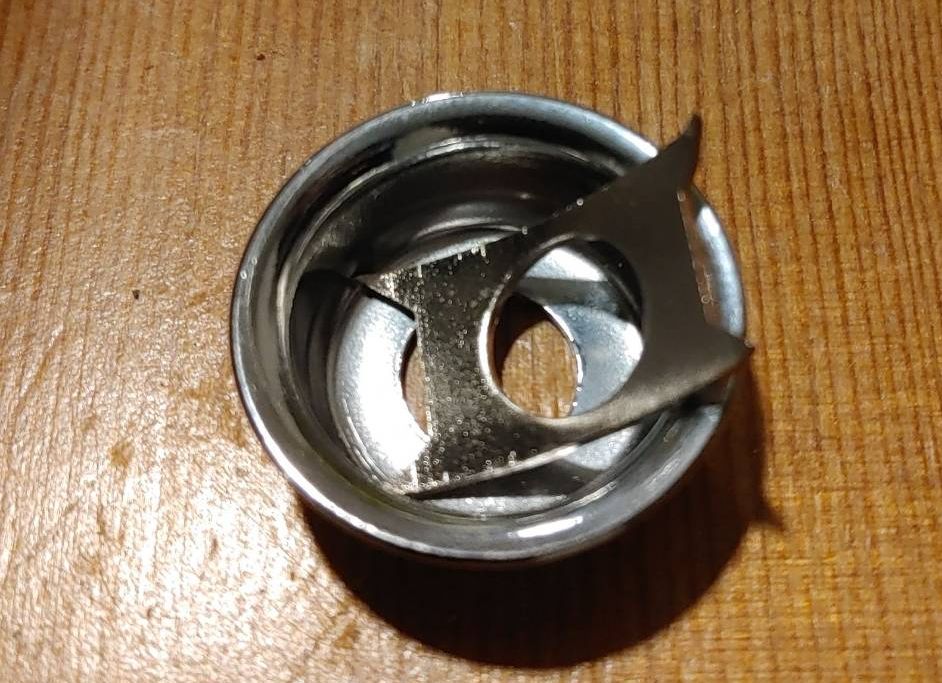
that was clearly a mistake. So I ordered this one:
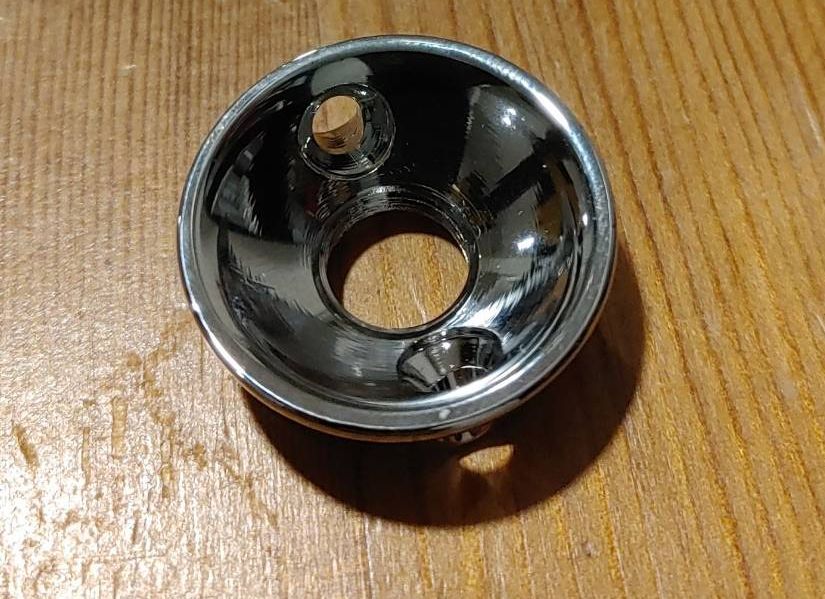
Sigh! Doesn't fit the body, it protrudes because of the curvature. Ended up with this.
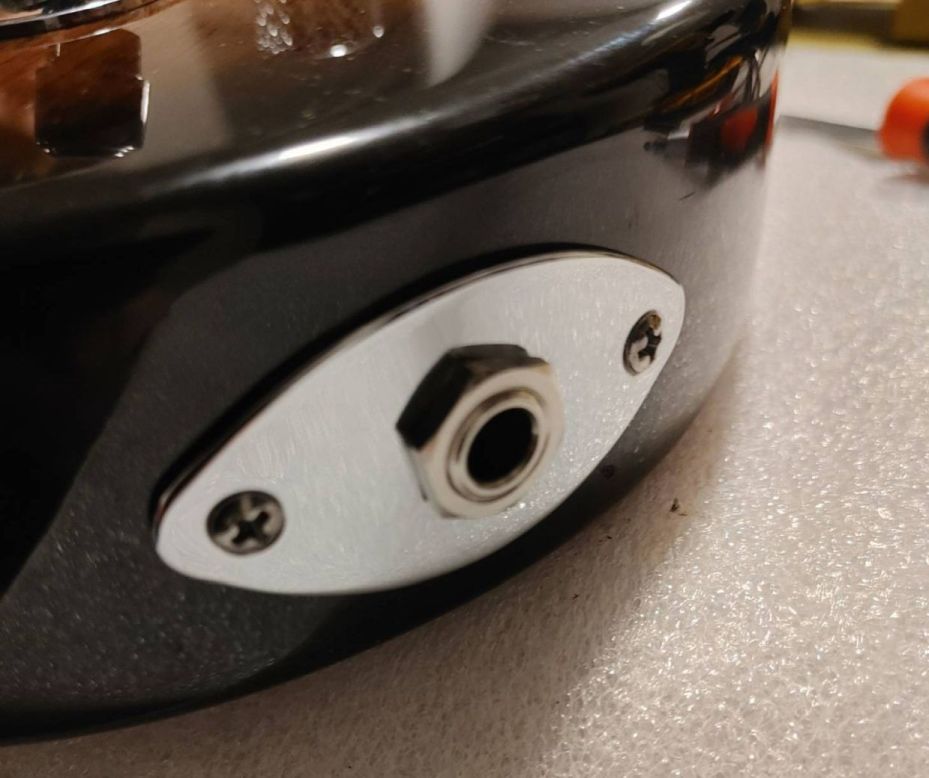
In retrospect I wish I went with the Gibson-style plate. oh well.
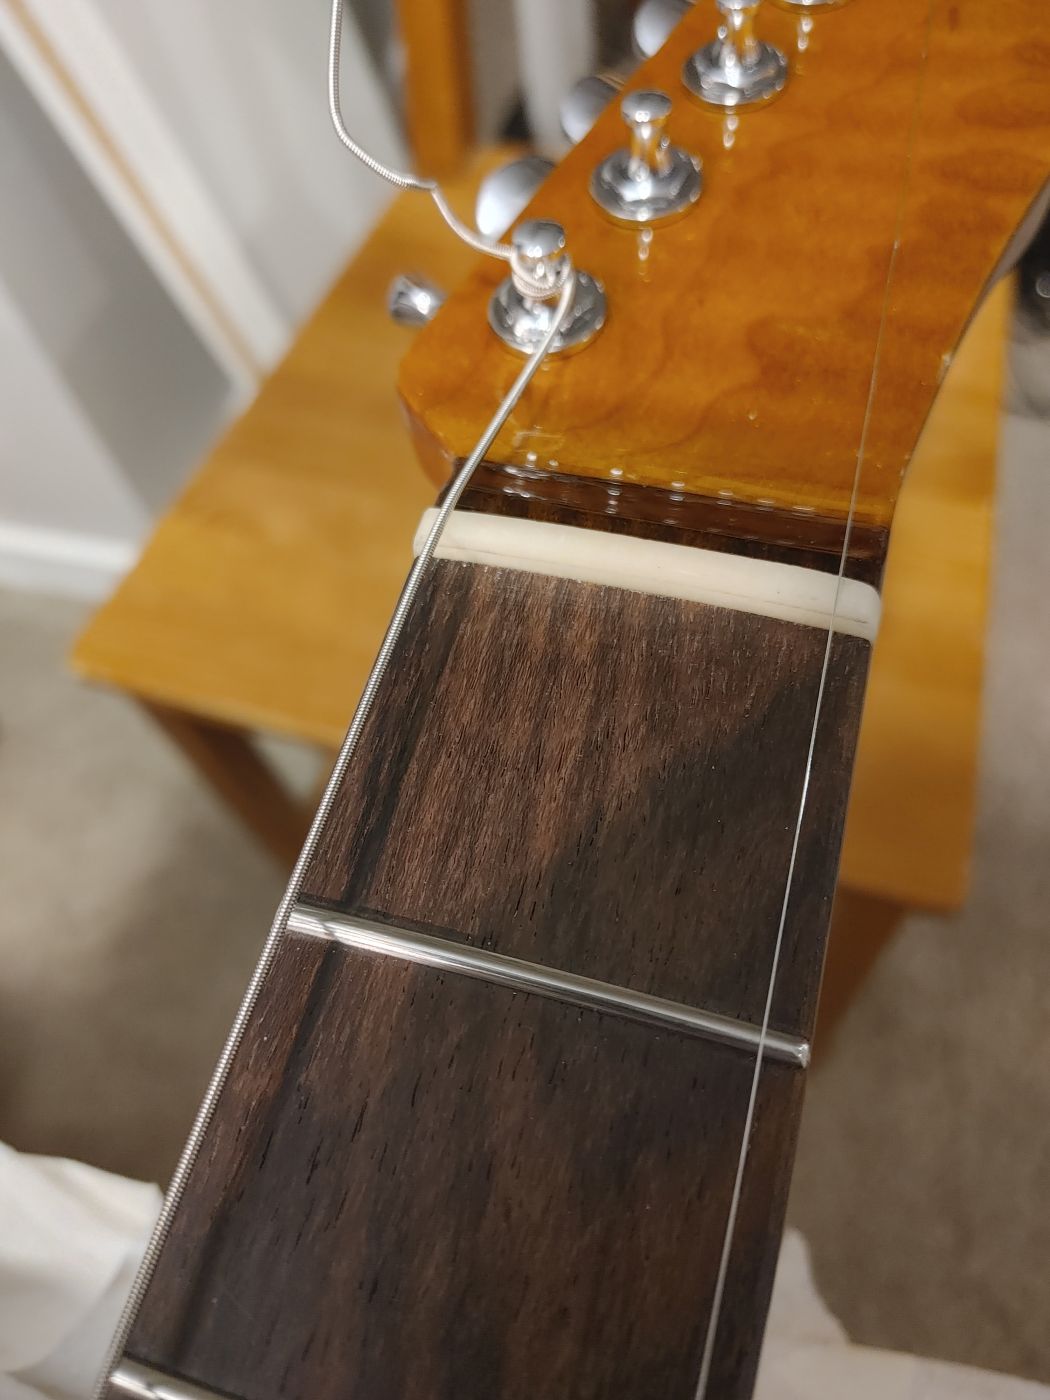
I thought a good nut didn't need a tree. This certainly needed a tree!
AALLL DONE This was a blast.
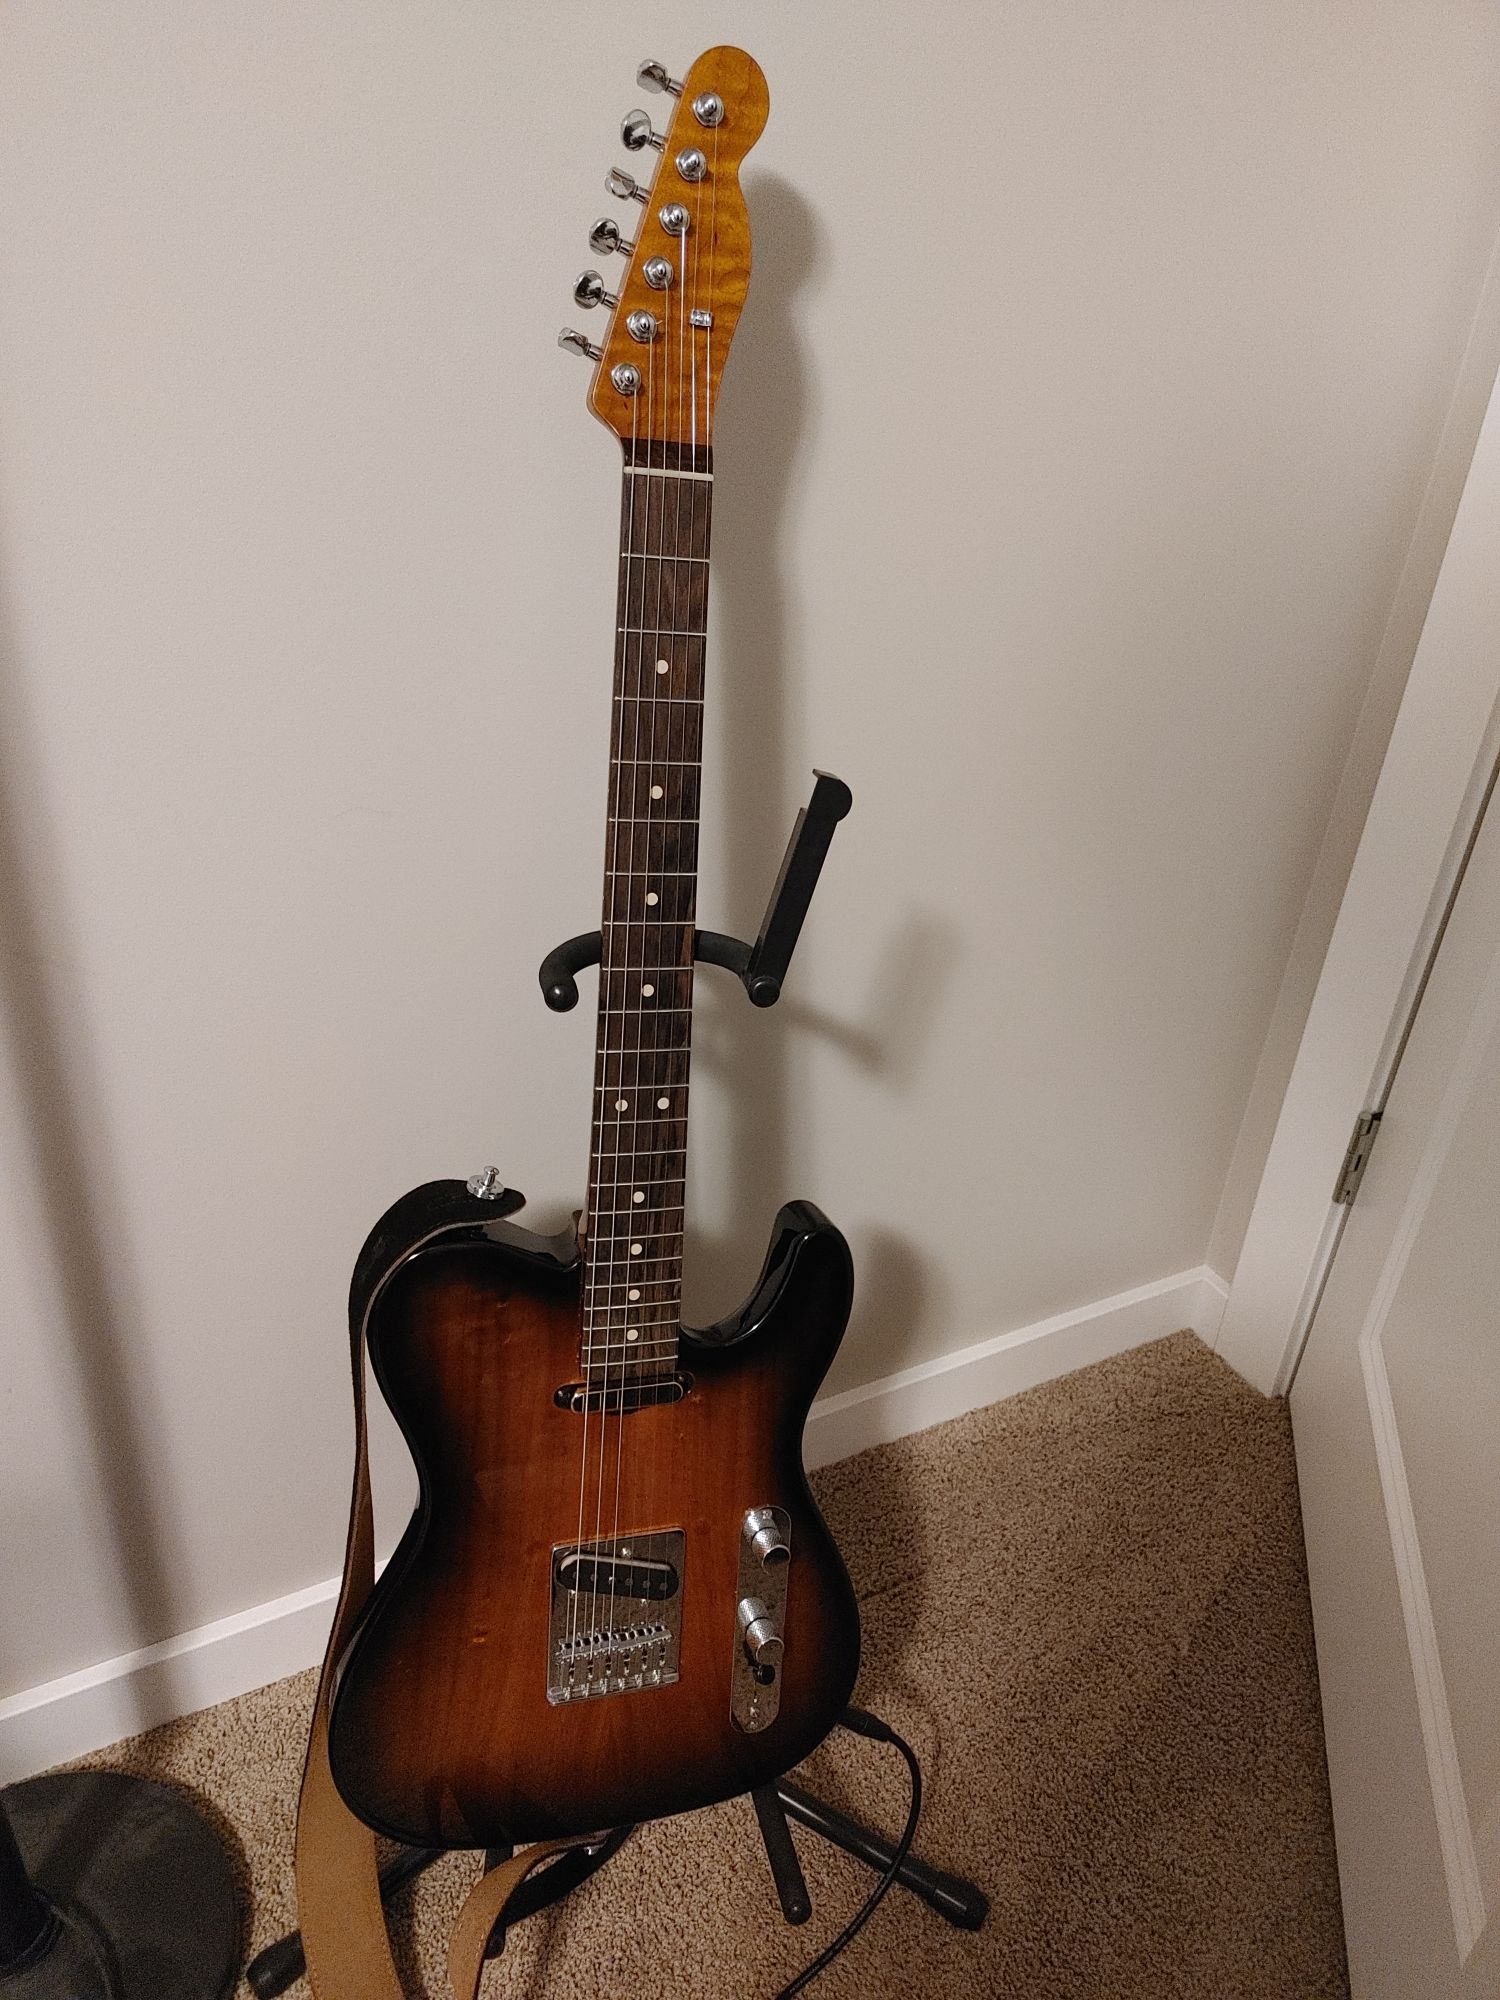
After that I just spent hours and hours playing with the setup
---
...
I couldn't do it. The wood is too beautiful. I can always add it later.
So I added longer tubing to the neck pickup, and installed it into the body.
I wired up the cavity
*** This was the second hardest part in the whole job. Getting wires from the neck cavity to the control cavity was a REAL problem. Online people suggested buying abrasive cord. Wonderful idea. I got impatient and made my own by using a razer to cut thin strips of sandpaper from a belt sander paper. I fed it through with a wire, and used the sandpaper ever so slowly to open up the cavity. This job sucked. This is the only part where I felt the warmoth quality and workmanship was below par. Seriously. fix that.
I like electronics so this bit was fun. I really like working with pushback wire.
Done! all higher end hardware, switchcraft, etc.
Next, let's put the tuners in. They were a little tight, but I used a straightedge and measured between them to ensure they were straight.
SIGH. They weren't flush when I marked the holes. Once they were in tight, they were crooked
:doh:So, let's repair and re-try.
All done! Invisible repair.
Next, on to the nut.
Grind down to the same width
Stick back sandpaper on the table worked well
Move toward shape!
Now for the slots...
Final depth, shape, polish.
Next onto the jack. I bought this cup.
that was clearly a mistake. So I ordered this one:
Sigh! Doesn't fit the body, it protrudes because of the curvature. Ended up with this.
In retrospect I wish I went with the Gibson-style plate. oh well.
I thought a good nut didn't need a tree. This certainly needed a tree!
AALLL DONE This was a blast.
After that I just spent hours and hours playing with the setup
ARCnet78
Junior Member
- Messages
- 73
Congratulations on your first build. Once you've built one, you will want more. (GAS infected, I built my first as a 60ith birthday present to myself, anxiously waiting on my third neck, sigh).
Thanks for the all photos and descriptive text, I learn something new from everyone's build. Beautiful result.
As Frank Zappa said... "shut up 'n play yer guitar"
Thanks for the all photos and descriptive text, I learn something new from everyone's build. Beautiful result.
As Frank Zappa said... "shut up 'n play yer guitar"
ragamuffin
Hero Member
- Messages
- 1,707
Great wood on the body! Unfortunate about the finish adhesion issue on the neck
jyjvstrat
Newbie
- Messages
- 13
Great wood on the body! Unfortunate about the finish adhesion issue on the neck
Yeah I was devastated with the finish flaked off. Good on Warmoth for just fixing it though. The re-finished neck has had no finish problems at all.
stratamania
Mythical Status
- Messages
- 12,417
@jyjvstrat glad you got your pics sorted out.
 unofficialwarmoth.com
Consolidated forums and general house-cleaning.
As you probably noticed, I have consolidated a lot of forums. Rest assured no posts or content was deleted. Hopefully this will make it easier for users to find the correct forum for their posts. If you see anything that seems amiss please PM me. Thanks!
Strat Avenger
Hero Member
- Messages
- 3,029
That's one of the nicest Teles I've ever seen.
Similar threads
- Replies
- 15
- Views
- 416
- Replies
- 12
- Views
- 434