Finishing a quilt tele body

Megatron

Junior Member
Messages
91
Starting my third build!

This time, I wanted a nitrocellulose gloss finish on the body, so I decided to finish the body myself.

Parts:
One piece rosewood neck from Warmoth (from my previous tele build)
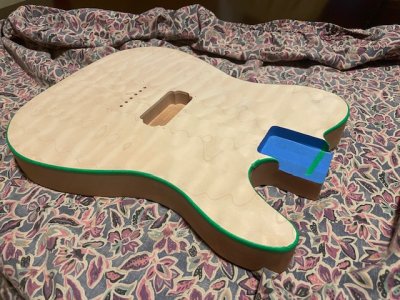
PGK Tele body with 1 piece African mahogany body and high grade bookmatched quilt maple top (shown wet).
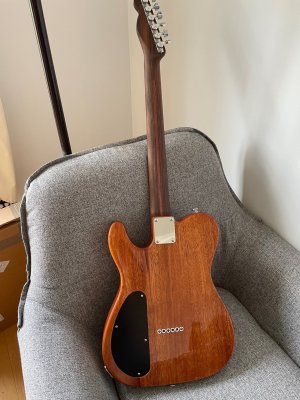
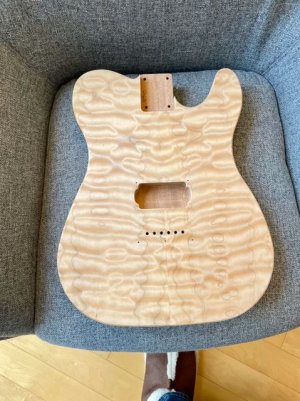
IMG_4567.jpg IMG_7897 (1).jpg

I only play guitar at night at home, so I figured I'd maximize the quilt top with a single bridge humbucker wired straight to the output jack, but I can always drill in knobs later if I find I need them (there is a small rear cavity). The rosewood neck is going to stay raw, and I'm planning to sand it down further to 2000 grit to get that nice smooth feel I achieved previously on my first strat build.

I've never finished a guitar before, but I'm going to attempt to make a pink+purple burst guitar with natural back, with this guitar as the inspiration:
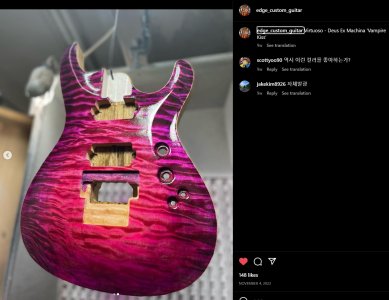
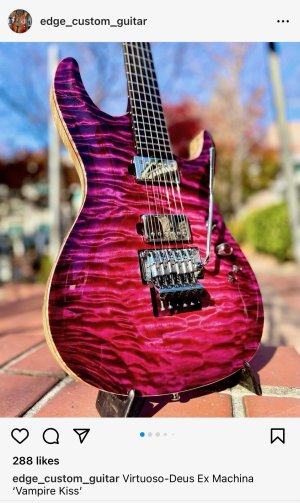
inspiration - 2.jpg inspiration - 3.jpg

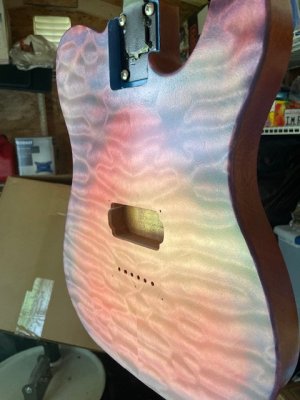
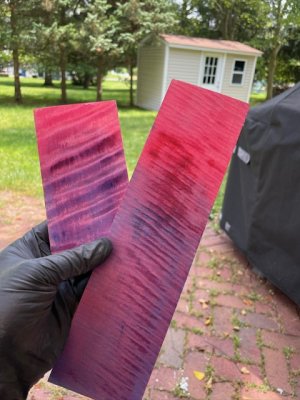
Looking for something straightforward, and taking feedback from forum members, I've started with Keda dyes (5 pack of the powder dyes you can find on Amazon). I've had decent success so far naively applying blue first and then red (which appears pink when not concentrated), but I'm still experimenting with colors and strategies.
IMG_9871 (1).JPG

The application of gloss lacquer will add some more contrast and pop to the color and flame. I doubt I can get it that close to the inspiration above, but I think it'll be pretty lovely if I can reproduce these colors on the final build.

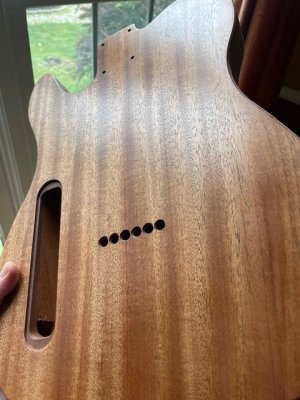
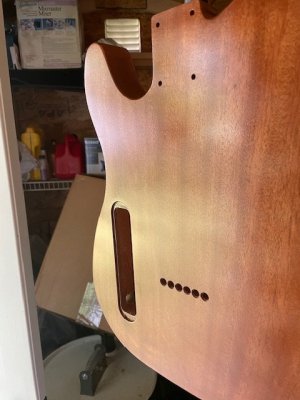
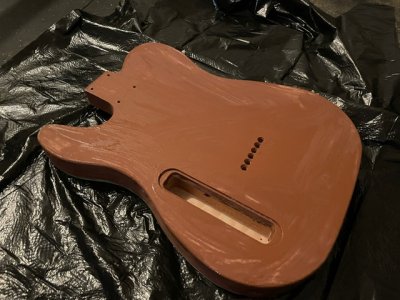
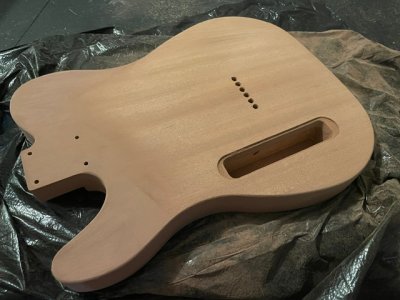
I've also sealed the back with Mahogany GoodFilla wood filler and sanded it back down to 320 grit. Show wet, and after half the body was sanded.
IMG_9887 (1).JPG
IMG_9910 (1).JPG

I've got all the protective gear and a little spray tent for the nitro lacquer. Without trying to start a debate on nitro v poly, I personally am seeking the nitro finish because, of the guitars that I've owned, I've just loved the feel and "softness" of the nitro finish. In contrast, I find my poly finished guitars to have a hard and brittle characteristic. After a fair bit of forum digging, I'm choosing Mohawk Ultra-flo Clear Lacquer (contains cellulose nitrate, just under $10/can). I've had the parts for alost a year and have been waiting for the summer days to get this spraying done outside before the cold sets in.

Looking forward to posting my finishing journey here and getting tips if you have any!
 
Updates!

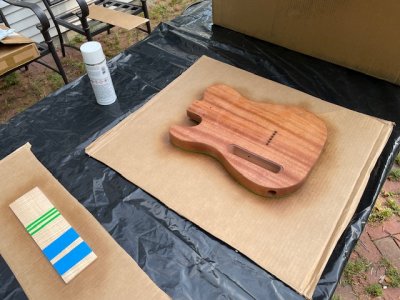
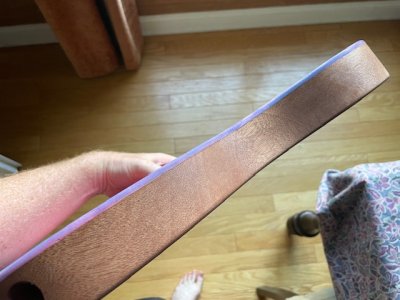
I taped off the edge and the heel, flipped it over and sprayed with nitro to seal the back and sides ahead of dyeing the top. 2 coats did the trick. Also included a test strip of maple to ensure the dye wouldn't bleed through.

IMG_9974.JPGIMG_9977.JPG

Alas, my grain filler was unsuccessful. I either sanded too vigorously or should have applied 1 or 2 more rounds of grain filler. That said, I think it looks pretty awesome. With 2 coats of nitro, it's very shiny and smooth. It has a phenomenal feel to it, and I'm tempted to leave it at this stage.

IMG_0011.JPG

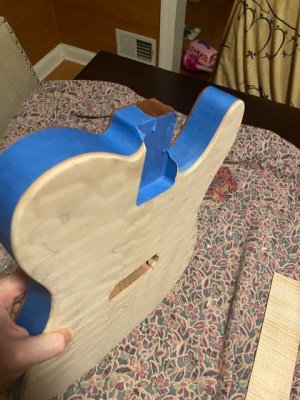
Next up, dyeing the top. I taped off the sealed sides to prevent dye from spilling over and it worked amazingly well!

IMG_0057.JPG

After dyeing the top there's a clean line.

IMG_0063.jpg

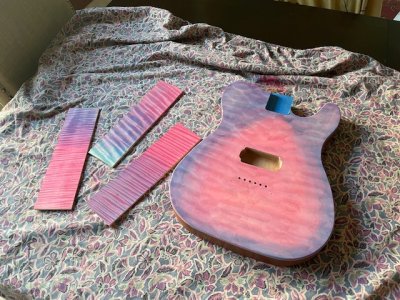
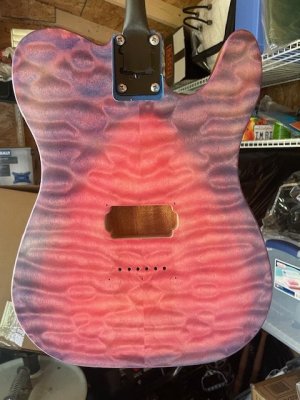
I played around with different concentrations of Keda dyes and different mixing strategies. In the end, I struggled to blend the dyes on surfaces, so I opted for a purple pink burst. The guitar top is dyed exactly the same (identical method and dye batch) as the flamed maple immediately next to it.

IMG_0062.jpg

The next day, I laid it flat and sealed the top and sides with 2 layers of nitro. It's not as smooth as the mahogany back and sides, but it's definitely starting to have a popping contrast.

Here it is immediately after the second nitro coat.

IMG_0083.JPG

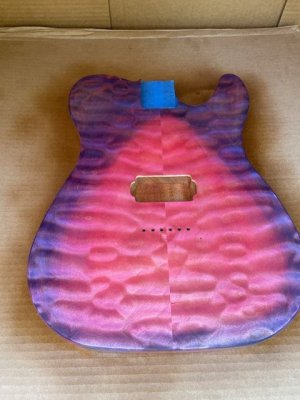
And drying overnight. The quilted figure is really popping.

IMG_0090.JPG

Now I'm getting ready for 12 more coats of nitro and level sanding. I'm going to review the best practices from Stewmac's workflow, and try to get this to a nice glossy finish.

Pickup, bridge and jack arrived yesterday. I'll start on a flamed maple backplate soon as well.
 
Good to see your progress.

If you have not filled the pores with grain filler, the lacquer, over time, will sink back more than it looks now and will look dimpled.

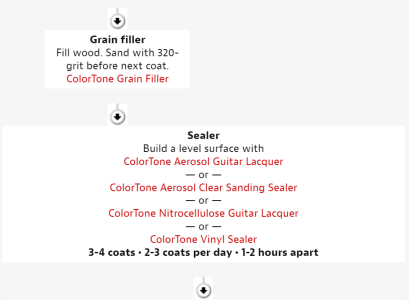
On grain filler, when applying it is better to apply it and then with a flat squeegee or blade working across the grain, you take off as much excess as possible. This also helps to work the filler into the grain. When it is dry, you should not have to do as much sanding. It would be normal to do this two to three times with an open grain wood such as mahogany. Then you would use vinyl sealer (Mohawk has this available) before moving onto the lacquer coats.

It might be a good idea to sand back the lacquer and grain fill again, then do vinyl sealer then go back to lacquer.
 
Last edited:
Thanks for the suggestion @stratamania. I'm going to sand the finish off the mahogany and attempt it again tonight. I'm going to apply with a brush (as before) but this time wipe off the excess with a rag as Dr Nitro does here. Hoping to have some positive results to share tomorrow.
 
Thanks for the suggestion @stratamania. I'm going to sand the finish off the mahogany and attempt it again tonight. I'm going to apply with a brush (as before) but this time wipe off the excess with a rag as Dr Nitro does here. Hoping to have some positive results to share tomorrow.

For that type of grain filler, that is a suitable approach, will save a lot of sanding.

I have been pore filling a mahogany strat body recently, but this time used Z-Poxy. I was just going to do some white primer sealer today, but there has been unexpected rain so it will have to wait until a better day.
 
Sanded down the back and sides yesterday (which was a pain...) and filled again with a brush but this time wiped off all excess with a rag, and no sanding after. Worked much better! Interestingly the African mahogany doesn't have that striped iridescence anymore. I'm hoping the final lacquer is level after this step. Much learning on this body! It's definitely a great experience, and despite being midway through, I'm already planning my next build for next summer :p
 
3 nitro coats today, about 1.5-2 hours apart each. It's now reflective, and the contrast has increased substantially. I am quite happy with the quilt figure- it really pops. Despite the noticeable improvements on the smoothness of the back, I'm not sure the grain filler was as successful as it could have been, but we'll see after I'm done applying all 12 coats and letting it cure for a few weeks. Weather permitting, I'm going to try to get all the coats in by the end of weekend.

IMG_0104.JPG
IMG_0108.JPG
 
How many times did you re-apply grain filler?
Did you use a vinyl sealer?

If not, you may be back to a similar situation than before, starting again.

On grain filler, when applying it is better to apply it and then with a flat squeegee or blade working across the grain, you take off as much excess as possible. This also helps to work the filler into the grain. When it is dry, you should not have to do as much sanding. It would be normal to do this two to three times with an open grain wood such as mahogany. Then you would use vinyl sealer (Mohawk has this available) before moving onto the lacquer coats.
 
Last edited:
@Megatron, here are a few types of grain filling i've done that have been successful. With the Timbermate (probably similar to Goodfilla), I don't even use a brush. I apply with a rag and wipe across the grain. My goal is to leave as little filler on the surface as possible. I can't seem to use a squeegee/scraper without scratching the surface, so the rag works best for me. Sanding it off is really easy. I can also apply 2-3 coats without having to sand off between coats.


With this rosewood neck, I used acquacoat. You can probably use it on your mahogony back now. Let the lacquer cure for a few days, then apply the acquacoat, using the same method i did above (with a rag). You'll probably get a nice smooth finish after 2 coats, then you can lightly sand, then go back with the lacquer.

 
I can't seem to use a squeegee/scraper without scratching the surface, so the rag works best for me.
Just to clarify, when I mention these, I am referring to something that will not scratch the surface with a rubber edge.
 
How many times did you re-apply grain filler?
Did you use a vinyl sealer?

If not, you may be back to a similar situation than before, starting again.
Re-applied it once, wiping off with a rag as I linked in the video above with no sanding this time. Instead of vinyl, I followed Stewmac's finishing schedule and opted to use nitro lacquer for the sealing.

This step here:
1689368492791.png

So far it's much improved. Still somewhat porous, but far less than before. I suspect a certain amount of the bumps will be leveled when I sand, so I'll keep posting updates. I'm not seeking a perfect level gloss finish, but something akin to what you'd get on a vintage nitro-finished body.

Currently at 7 coats of nitro. So far, it is WAY thinner than the clear coat I have on my Warmoth-finished bodies, so I'm hopeful this will yield my desired result. Aiming for 14 coats in total, and I am planning to sand a bit at 10 coats following Dr Nitro's protocol, and follow up with final coats, sanding and buffing.
 
@Megatron, here are a few types of grain filling i've done that have been successful. With the Timbermate (probably similar to Goodfilla), I don't even use a brush. I apply with a rag and wipe across the grain. My goal is to leave as little filler on the surface as possible. I can't seem to use a squeegee/scraper without scratching the surface, so the rag works best for me. Sanding it off is really easy. I can also apply 2-3 coats without having to sand off between coats.


With this rosewood neck, I used acquacoat. You can probably use it on your mahogony back now. Let the lacquer cure for a few days, then apply the acquacoat, using the same method i did above (with a rag). You'll probably get a nice smooth finish after 2 coats, then you can lightly sand, then go back with the lacquer.

Thanks for the tips, especially wiping *against* the grain.

Lovely neck, but I'm planning to keep mine raw this time.
 
So far it's much improved. Still somewhat porous, but far less than before. I suspect a certain amount of the bumps will be leveled when I sand, so I'll keep posting updates. I'm not seeking a perfect level gloss finish, but something akin to what you'd get on a vintage nitro-finished body.

Okay, just something for folks to be aware of. If lacquer is used instead of a sealer to "seal" and get a level surface, it will use more lacquer and take more coats than using a sealer. Also, over time, as the solvents in the nitro lacquer evaporate, what is left will sink back and your finish will no longer be smooth (which is not generally what a vintage body has).
 
Appreciate the post for posterity. I’m personally trying to minimize complexity and cost, so one type of spray can for two tasks is optimal for my first finishing job. This thread also has some more discussion on sealers.

I’ll post what the finished body looks like and will post updates over the coming months to see how it changes. This is also part of the appeal of nitro here- creating a “breathing” instrument that wears with time and use.
 
Yes, lacquer can be used to seal, but is more appropriate on a closed pore wood rather than the open pore mahogany. In terms of expense, it can end up costing more in lacquer and time than if a sealer was used.
 
Update: I'm up to 12 coats of clear gloss nitro lacquer! No pictures to post because it's hard to capture the gloss sheen without twisting the body in a video. I'm quite surprised how much thinner the finish is compared to my green warmoth tele body. 2 or 3 more layers to go, and, following Mohawk's finishing schedule, I'll let it dry for at least a week before sanding and buffing.
 
Added one more coat today but the high humidity of NJ makes this difficult because, if the humidity is high, the spray can trap moisture which shows up as a chalky white. The next spray coat contains fresh solvent which dissolves the previous finish a bit so it is resolved in subsequent coats.

Lots of learning! Next time I might opt to finish in spring or fall.
 
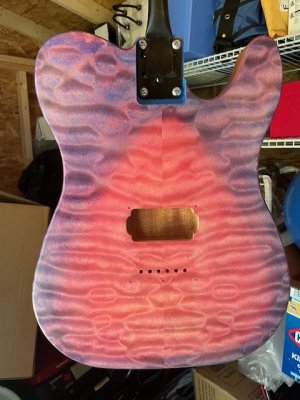
Completed the 15th coat! I tried my best to showcase the current texture of the back and front. On the back I don't see much of the grain texture coming through to the surface, so it's possible the reapplication of the grain filler was successful. The surface is glossy but not level, so I'll be sanding and buffing after a week+ of curing. Instead of an ultra-gloss mirror finish, I'm aiming to get the body to be just barely reflective as on my Heritage custom h150, which strikes a great balance between glossy and smooth.

IMG_0214.JPG
IMG_0212.JPG
IMG_0215.JPG
 
Back
Top